Do you have existing Azure AD Users using Office 365 and you need to sync them with on-premises Active Directory?
In this guide, I’ll walk through how to sync on-premises AD Users with existing Azure AD Users.
Table of contents:
- Soft Match vs Hard Match
- Sync on-premises users with Azure using Soft Match
- Sync on-premises users with Azure using Hard Match
- Bulk Modify UserPrincipalName, Email and ProxyAddresses
In this example, I have 5 existing Azure AD User accounts.
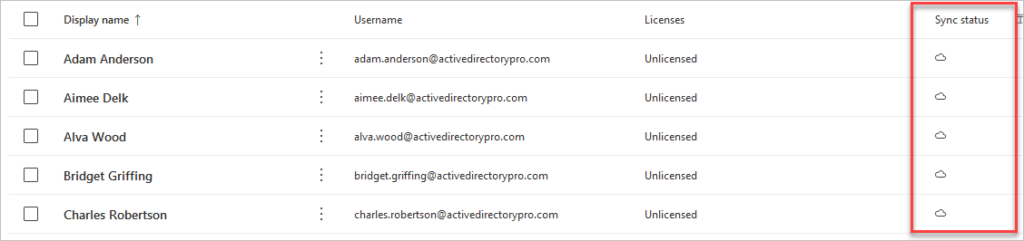
I’ve created the same users in my on-premises AD and I want to sync them with the existing Azure accounts.

Soft-match vs Hard-match
There are two options to match on-prem AD users with existing Azure AD Users.
- Soft Match = A match on userPrincipalName E-mail and proxyAddress.
- This option is easier to implement if you have a lot of users that need to sync with Azure.
- Hard match = A match on the immutable ID.
- This requires several steps and there is no easy way to implement this to multiple users.
Next, I’ll walk through both examples.
Sync on-premises users with Azure using Soft Match
You will need to modify the following three attributes for each on-prem user account.
- UserPrincipalName (logon name)
- ProxyAddresses
Tip: The AD Pro Toolkit allows you to easily bulk modify/update user attributes. See the example at the end of this article for more details.
Step 1. Set UserPrincipalName
The on-prem AD account’s UserPrinicpalName needs to match the Azure account’s Username.
For example the Azure user Adam Anderson username is adam.anderson@activedirectorypro.com.
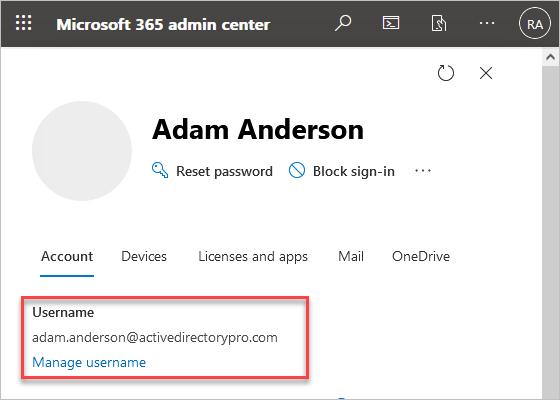
My on-prem AD account must match this.
Click the account tab and check the user logon name.
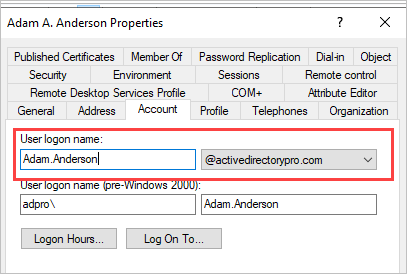
It matches.
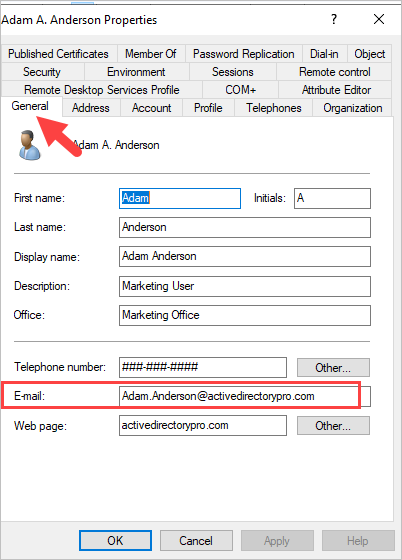
Step 2. Set E-mail
The on-prem user account email must match the Azure account. Click on the General tab and check the E-mail field.
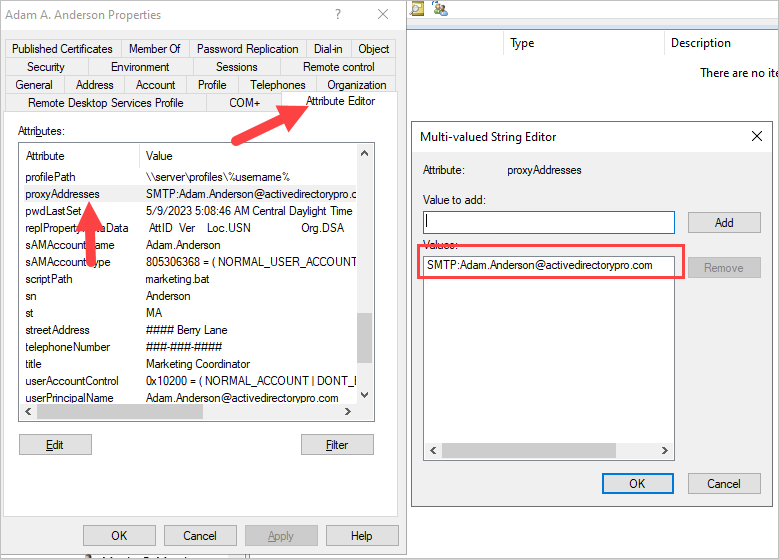
Step 3. Set ProxyAddresses
The on-prem account must have the primary proxyaddress set.
Click on the attribute editor tab then click on proxyAddresses. Add the primary SMTP address using capital SMTP.
When you have those 3 account settings configured move to step 4.
Step 4. Force Azure AD Sync
Force an Azure AD sync with the below command.
Start-ADSyncSyncCycle -PolicyType DeltaOpen the Azure Synchronization Service Manager and verify it added or modified the user.
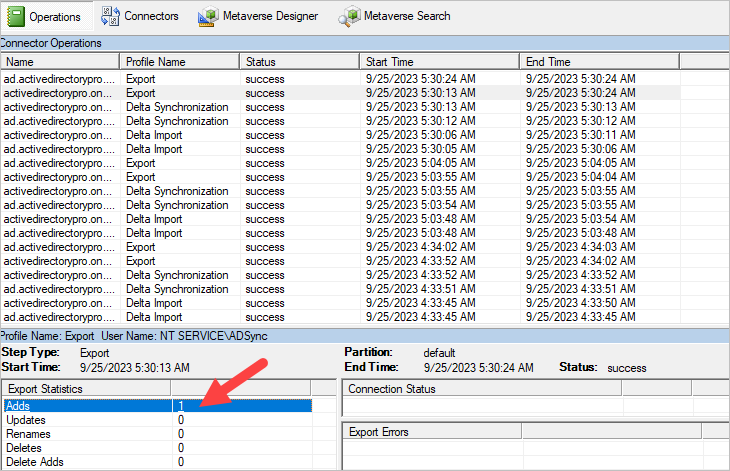
You can click on adds and then the distinguished name to view more properties.

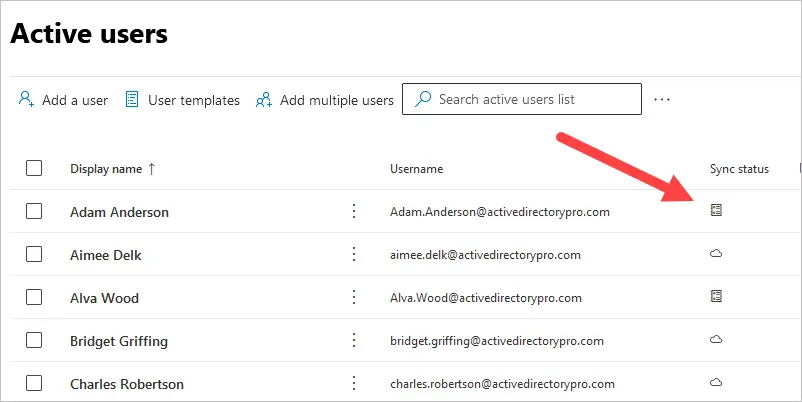
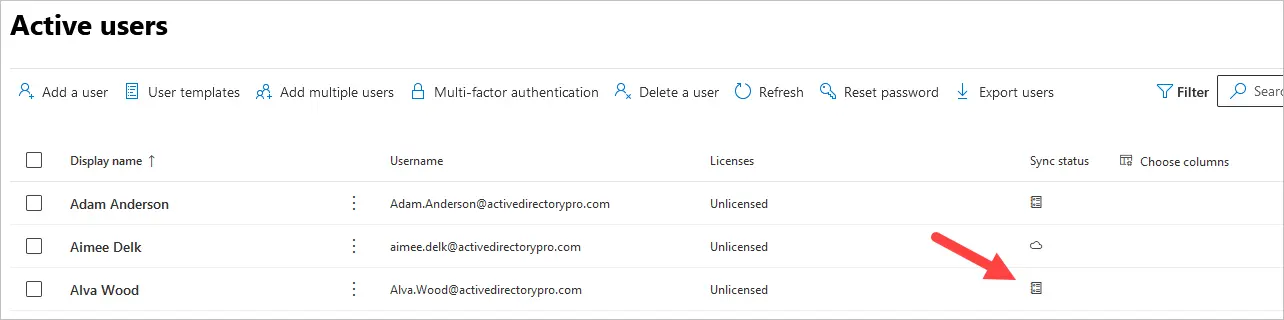
Step 5. Check Azure Object Sync Status
Hopefully, the Azure account will now say synced with on-premises.
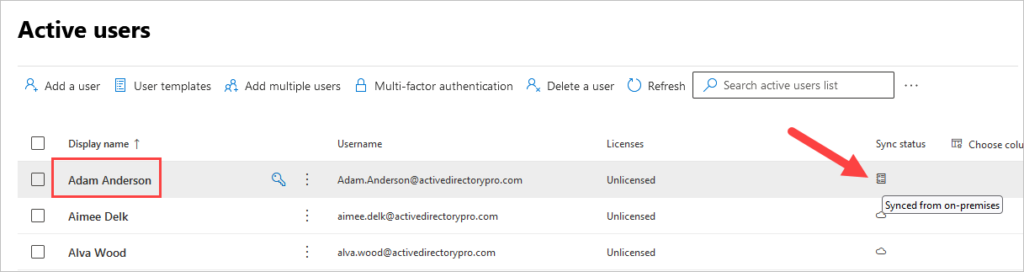
Wow, it actually worked. My Adam Anderson account is now showing synced from on-premises.
Sometimes it works and sometimes it doesn’t. I’ve followed these exact steps before with no luck. I even contacted Microsoft support and they said sometimes it does not work and the only solution is to use hard match.
Sync on-premises users with Azure using Hard Match
If a soft match does not work then you will need to use a hard match.
A hard match sets the Azure immutableID to the same value as the on-prem objectGUID.
Even though this method will hard code the immutableID you should still make sure the local AD is using the same userPrincipalName and email address as the cloud account.
Step 1: Get Local AD Account ObjectGUID
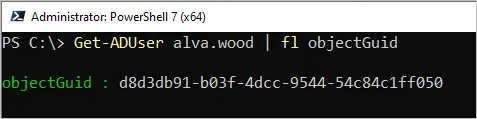
Run the following PowerShell command to get the objectGuid of the local AD account.
Get-ADUser username | fl objectGuidExample for user alva.wood.
Step 2. Convert to base 64 string
The local value is a GUID string and needs to be converted to a base64 encoded string to use in Azure. Take the objectGuid value from step 1 and use it to convert the value.
[Convert]::ToBase64String([guid]::New("d8d3db91-b03f-4dcc-9544-54c84c1ff050").ToByteArray())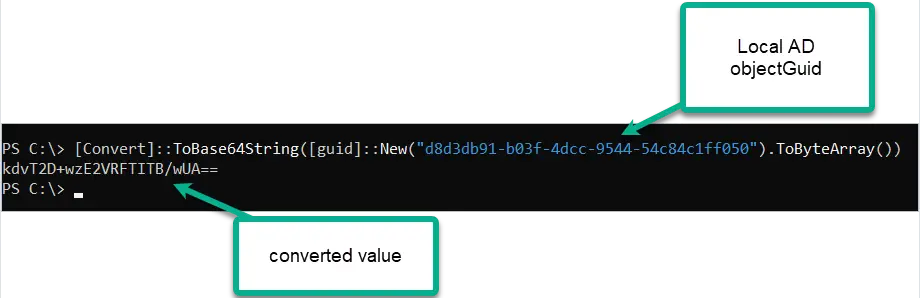
Step 3. Set Immutable ID on the Azure account
Connect to Azure AD using PowerShell.
Connect-MsolServiceCheck current ImmutableId.
Get-Msoluser -UserPrincipalName Alva.Wood@activedirectorypro.com | Select-Object ImmutableId
This user’s ImmutableID is blank. No problem, it may be blank or have a value.
Step 4. Set new immutableID for Azure account
Run this command using the base64 string value from step 2.
Set-MsolUser -UserPrincipalName alva.wood@activedirectorypro.com -ImmutableId kdvT2D+wzE2VRFTITB/wUA==
Now let’s verify the immutableID has been set on the account.
Get-Msoluser -UserPrincipalName Alva.Wood@activedirectorypro.com | Select-Object ImmutableId
Looks good.
At this point, we have linked the local AD account and Azure AD account together using the immutableID (local accounts objectGuid to Azure AD account immutableID).
The last step is to run an Azure AD Connect Sync and see if the Azure AD Account changes to synced from on on-prem.
Step 5. Run a delta sync
On your Azure AD Connect server run a delta sync.
Start-ADSyncSyncCycle -PolicyType DeltaWait about 5 minutes and then check the Azure account if it is now synced with on-prem account.
Success! The on-prem account is now synced up with the Azure account.
As you can see the hard match takes multiple manual steps, this will be a pain to do for many accounts.
Bulk Modify UserPrincipalName, Email and ProxyAddresses
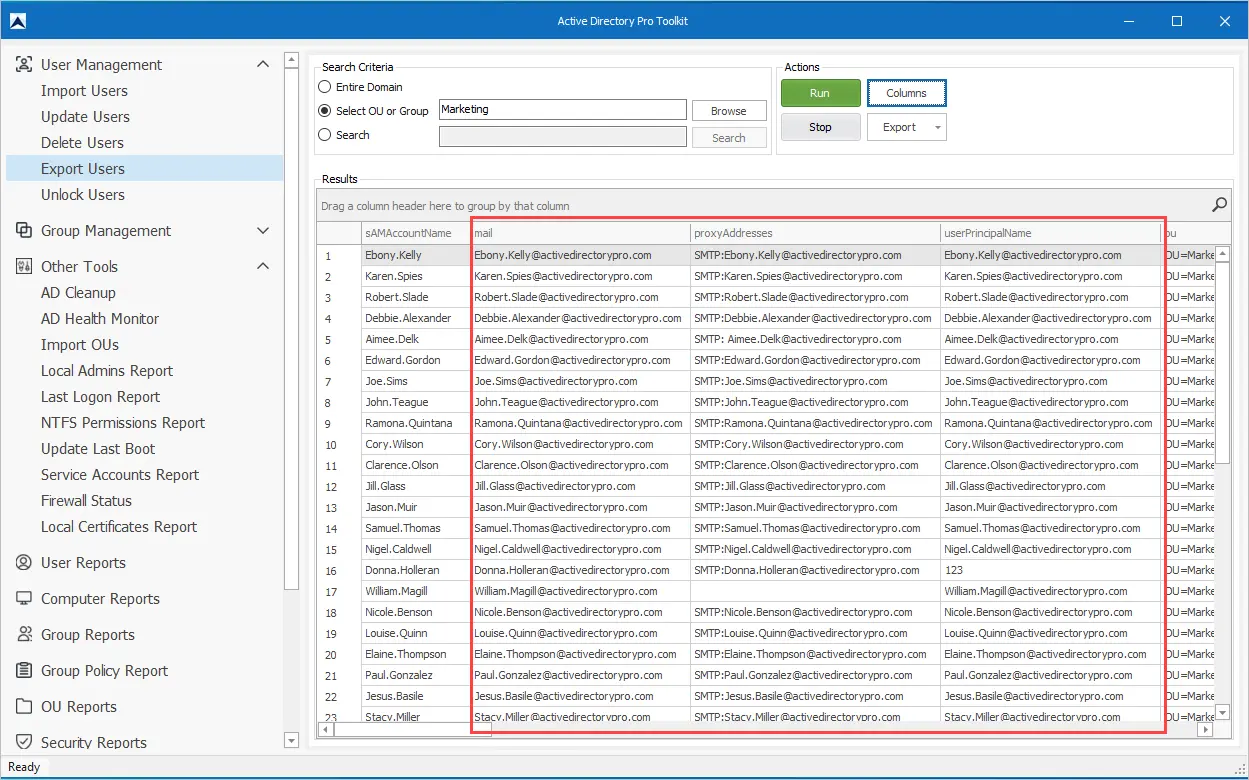
You can easily modify on-prem AD accounts using the AD Pro Toolkit.
For example, I have 47 users in my Marketing OU and they are missing the email address and the proxyAddresses need to match the Azure account.
Using the AD Pro Toolkit I can easily bulk update these attributes.
- Generate or create a CSV file
- Click on Update Users tool
- Select your csv file and click run.

Now I can use the export users tool to quickly view the userPrincipalName, email, and proxyAddresses attributes for all my users,
To learn more about updating user attributes see the resources below.
- How to Bulk Modify Active Directory User Attributes
- How to Bulk Update ProxyAddresses Attribute
- Active Directory User Updater Tool
Conclusion
In this guide, I showed you how to sync on-premises AD Users with existing Azure AD Users. I prefer to use a soft match but unfortunately, it doesn’t always work and you have to do a hard match. No matter which option you use to sync the accounts it is important that the email, proxyaddresses, and userprinciapName match between on-prem AD and Azure AD.
In soft-match step 2, I’m not sure what you mean. Does the emailaddres on prem has to match the O365 upn or the O365 primary emailaddress ?
On Prem email = 365 email. The logon name = 365 UPN.
I have a question, if I synced the account?
Is there is any chances of data loss ?
Like on Email or on Onedrive. Or they removed from the group or anything can happen ?
For the on prem account, no. I can’t think of any reason the Azure account would have data loss. Even if the account doesn’t sync the original account and data should not be affected.
What do you do when both soft and hard, fail? I’ve followed this guide to the T. I’ve made sure both o365 and on prem user accounts are just regular users as well. It still keeps creating a new onmicrosoft.com account and linking it to that. :/
If the local AD ObjectGUID and Azure Immutable ID match then I’m not sure. Might need to contact MS support. Not sure if this is an option for you but creating a brand new local AD account and making sure the UPN, Email and ProxyAddress matches the Azure account will often do the trick.
One quick question, does the password from Azure AD syncs to OnPrem or how did you set the password of each user?
Azure AD Sync will extract the password hash from your on-premises AD accounts. This is how the Azure account and on-prem accounts use the same password. Here is a detailed article on this. https://learn.microsoft.com/en-us/entra/identity/hybrid/connect/how-to-connect-password-hash-synchronization