In this guide, you will learn how to install and configure Azure AD Connect.
Azure AD Connect allows you to sync your on-premises Active Directory users to Microsoft 365. Your users will then be able to use their on-premises user id and password to log onto computers on your network as well as Microsoft 365.
NOTE: This article assumes you already have an on-premises Active Directory domain and a Microsoft 365 tenant.
Topics in this article:
- Requirements for Azure AD Connect
- Download Azure AD Connect
- Azure AD Connect Express vs Custom Install (install type)
- Install and Configure Azure AD Connect
- Verify Azure AD Connect Sync Status
- Exclude Users from Azure AD Connect
- Troubleshooting
Requirements for Azure AD Connect
There are several requirements for using Azure AD Connect, and I have summarized them below.
- You need to have an Azure AD tenant and a verified domain.
- Your on-premises AD domain needs to have a routable domain or the user accounts need a registered UPN suffix that matches the verified domain in Azure. For example, if your on-premises domain is .local then you have a problem. This is not a routable domain and will be different from your registered Azure domain name.
- The Active Directory schema version and forest functional level must be Windows Server 2003 or higher.
- The domain controller used by the Azure AD connect must be writable.
- Azure AD Connect must be installed on a domain-joined server running Windows Server 2016 or later. Windows Server Core is not supported.
- Disable Soft Matching on your tenant. This option allows you to match existing cloud users in Azure with on-premises users. If you do not require this it should be disabled. I’ll show you how to check this in the install steps below.
- You will need your Azure AD Global Administrator account during the installation.
Refer to the Microsoft Prerequisites document for more details.
Download Azure AD Connect
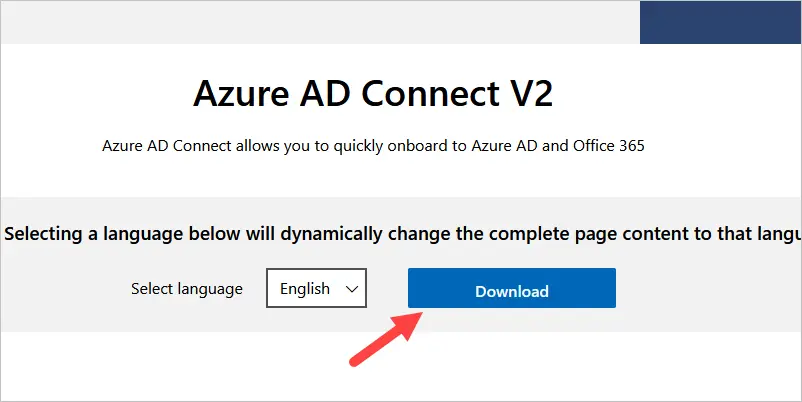
To download the Azure AD Connect client go to the link below.
https://www.microsoft.com/en-US/download/details.aspx?id=47594
Select your language and click the download button.
Azure AD Connect Express vs Custom Install
During the installation you can choose between express and custom install, it defaults to using express and is the most common. Review the lists below to help you choose the install type.
Express
- You have a single Active Directory forest.
- You have less than 100,000 objects in your on-prem Active Directory.
- Express will enable password hash synchronization from on-premises to Azure for single sign.
Custom
- You have more than one Active Directory forest.
- You plan to use federation or pass through authentication.
- You have more than 100,000 objects.
- You want to use group-based filtering.
Refer to the Select your installation type document for more details.
Install and Configure Azure AD Connect
In this example, I’m going to install Azure AD Connect on a Windows 2022 Server and use the express install type.
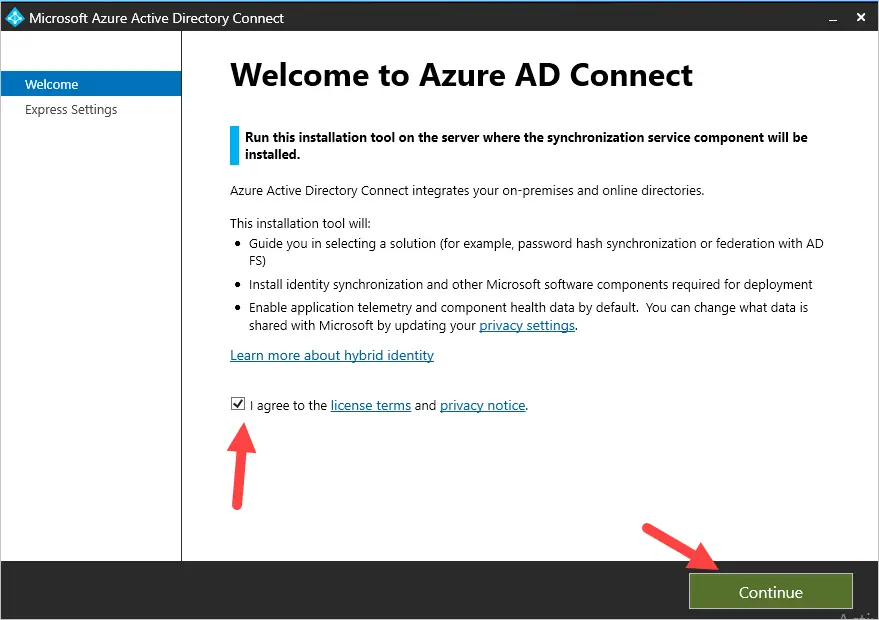
Step 1. Start the Azure AD Connect install
Open the azure msi file you downloaded.
Agree to the terms and click continue.
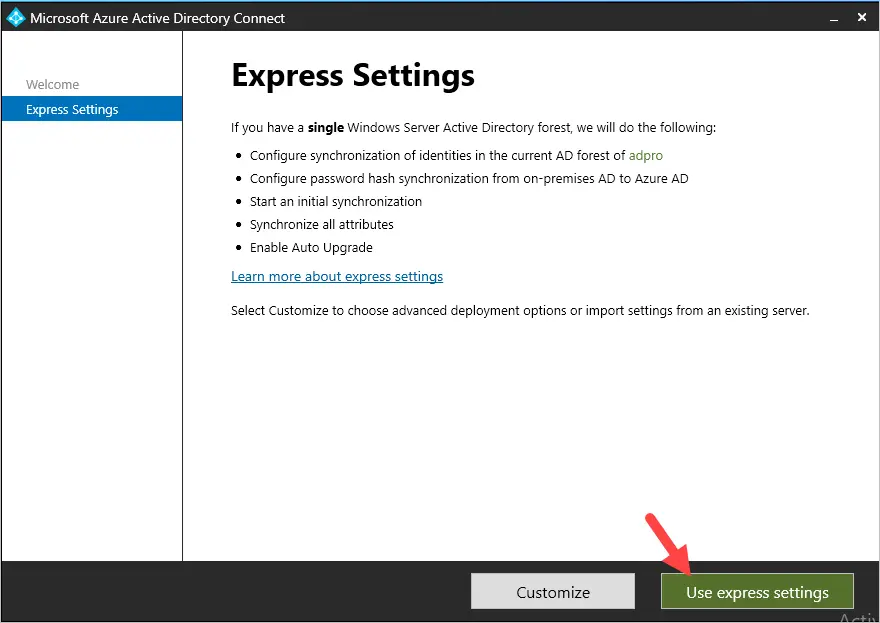
Step 2. Choose Installation Type
It will default to express, if you need to use the custom install click the customize button. In this example, I’ll be using the express install.
Step 3. Connect to Azure AD
Enter the username and password of the Azure AD global administrator.
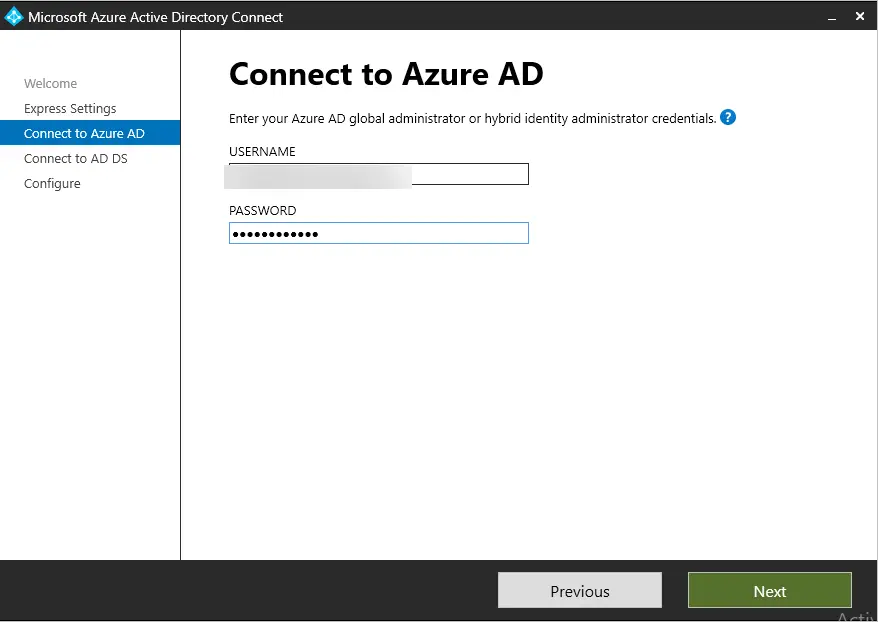
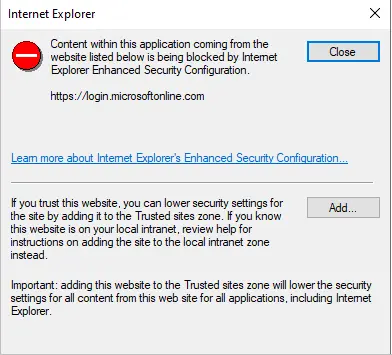
You might get multiple errors like below. You will need to add the URLs to the trusted site zone by clicking the add button. I got this popup 3 times for 3 different URLs, once added I got the Microsoft logon box.
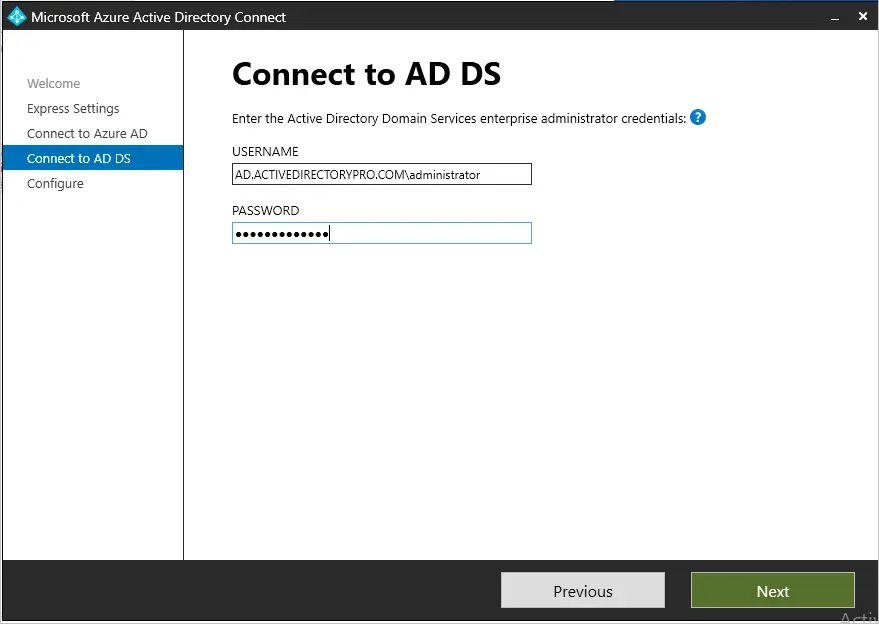
Step 4. Connect to AD DS (on-premises Active Directory)
Now you will enter the credentials of an enterprise administrator account for your on-premises Active Directory. These credentials are used to create the local Active Directory account that is used for synchronization.
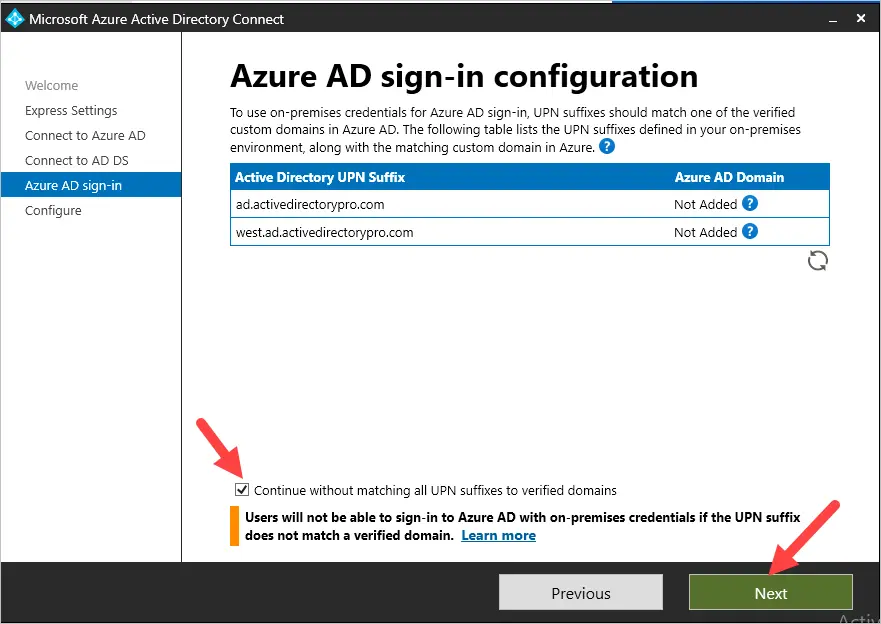
Step 5. Azure AD sign-in configuration
The screen is showing you the UPN suffixes it detected in your local Active Directory. It is common to have multiple UPN suffixes. If you want to use single sign on you need to have a UPN suffix that matches your verified domain in Microsoft 365. For example, my domain is activedirectorypro.com, this domain is verified in the 365 tenant.
But the install does not detect a matching UPN suffix. I’ll select “Continue without matching all UPN suffixes to verified domains” and fix this later.
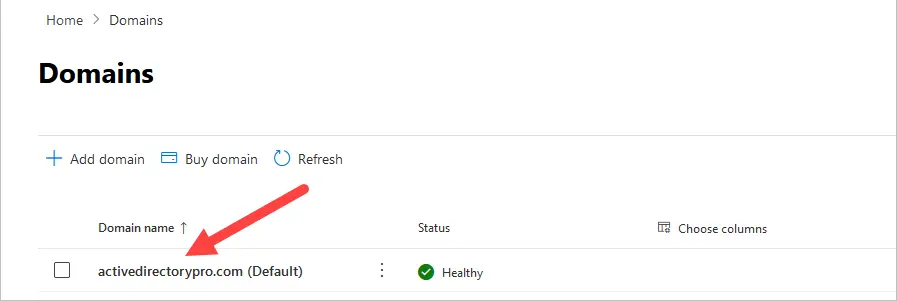
The screenshot below shows my verified domain in the 365 admin center.
Step 6. Ready to configure
This last step will actually install the Azure AD Connect tool and configure it using the provided settings.
Tip: If you don’t want to sync all OUs, then uncheck “Start the synchronization process when configuration completes”. If you keep this option checked it will sync all objects from your on-premises Active Directory. You can change this later but it will take additional steps to remove the synced objects from Azure. I cover this later in this guide.
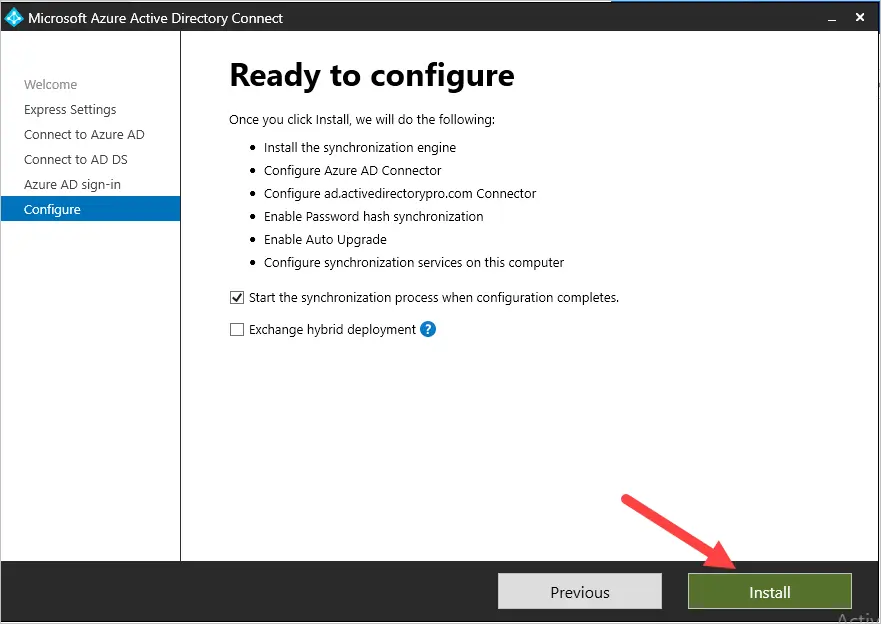
The installation can take several minutes to complete.
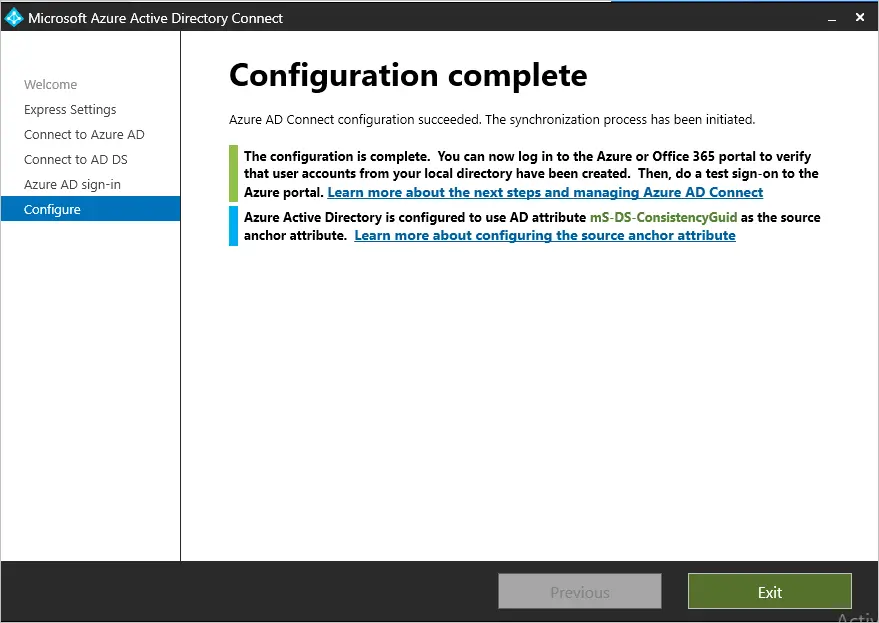
If you get a message that says “The Active Directory Recycle Bin is not enabled for your forest” then I highly recommend you enable it. See my article enable ad recycle bin for step by step instructions.
How to Check Azure AD Connect Sync Status
You can view the sync status by logging into the Microsoft 365 Admin Center and viewing the Azure AD Connect dashboard.
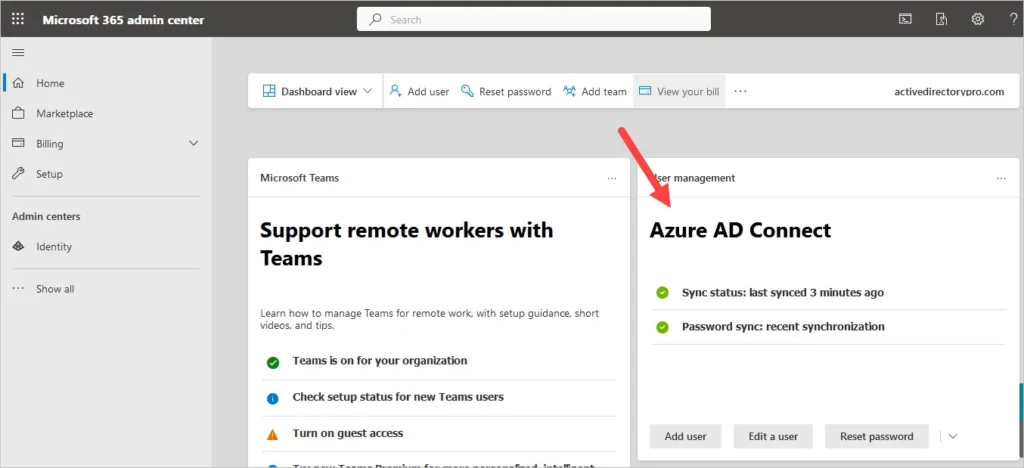
You can click on sync status to get more details.
Check Azure ad connect sync status using Powershell
To check the sync status with Powershell you can use the following command. This requires the MSOnline module to be installed.
Get-MsolCompanyInformation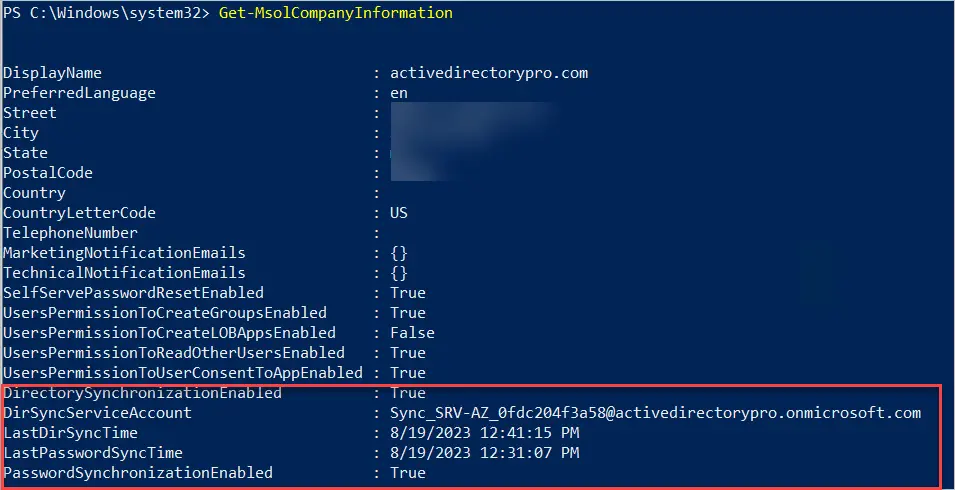
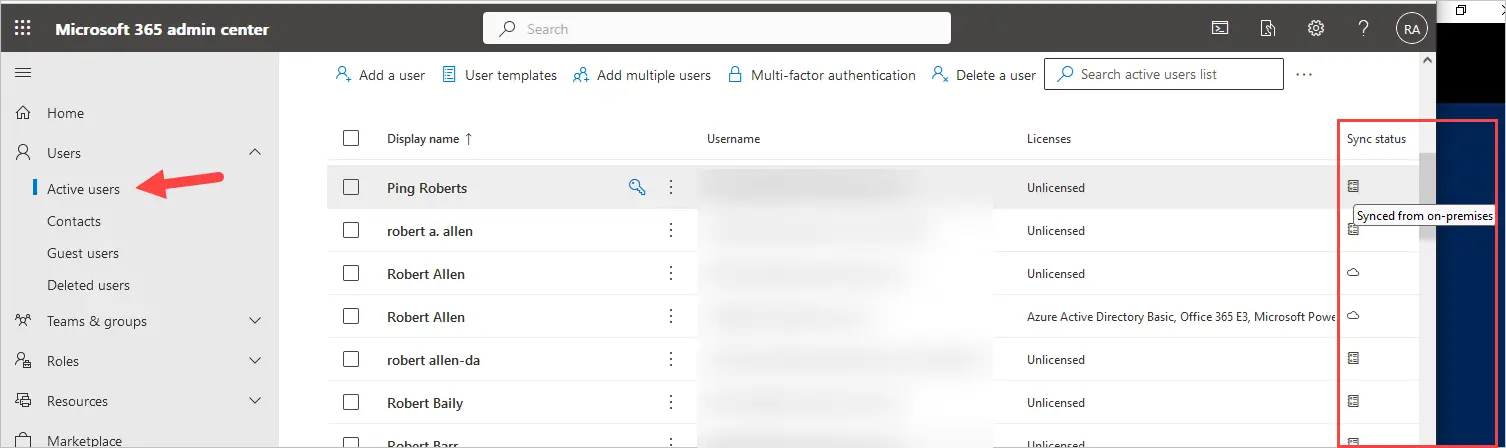
Check Synced Users in the 365 Admin Center
You can also verify users are being synced in Azure by clicking on Users -> Active Users. Add the Sync status column and it will show you if the user is synced from on-premises or is a cloud only user.
Exclude Users from Azure AD Connect Sync
What if you have users or groups that you don’t want to sync to the Azure cloud?
The easiest option is to use the Azure AD connect domain and OU filtering. If you need more advanced options such as excluding users based on an attribute you can use the synchronization rules editor.
The following steps will walk through excluding an OU from syncing.
1. Open Azure AD Connect.
2. Click Configure
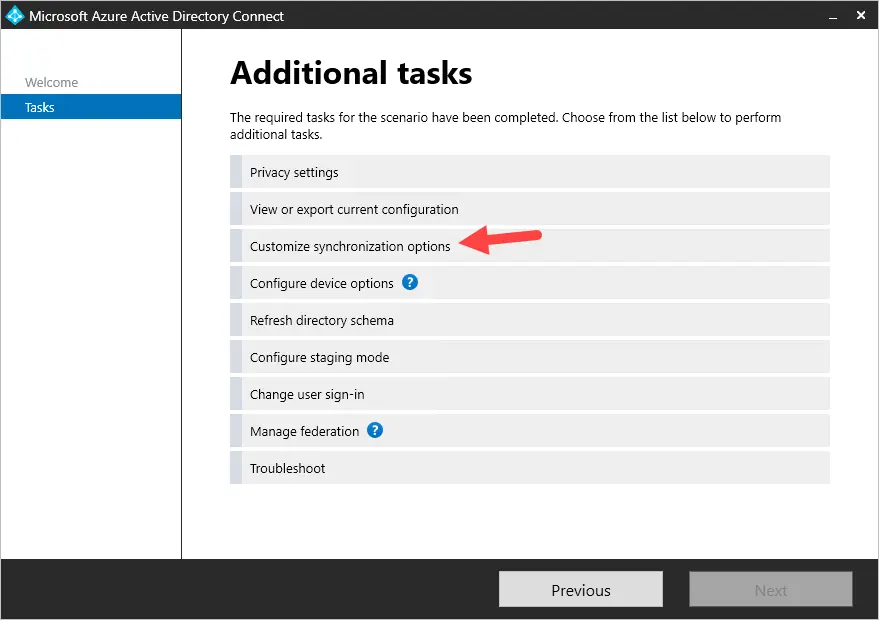
3. Click Customize synchronization options and click next
4. Enter your Azure AD global administrator credentials.
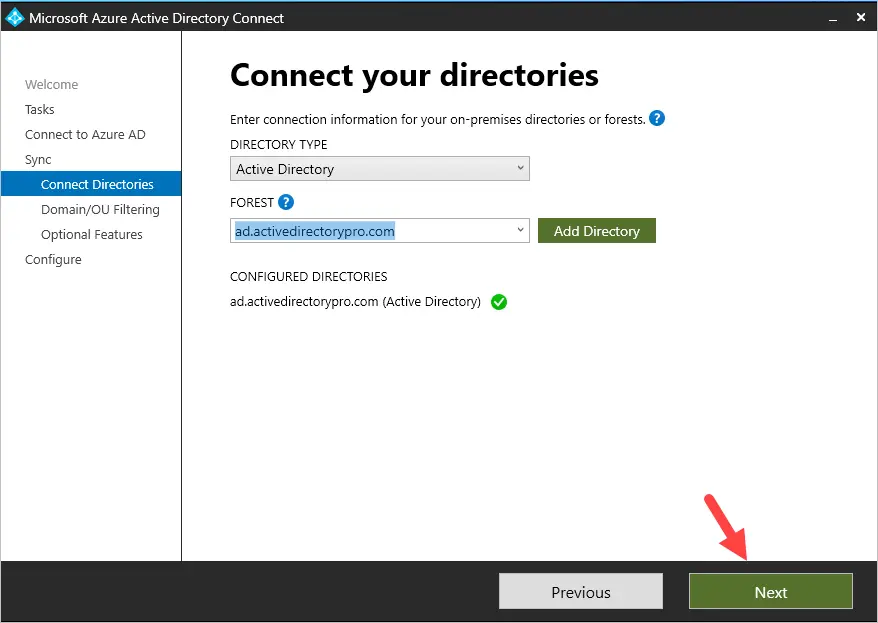
5. Select your forest, it should already be selected, and click next.
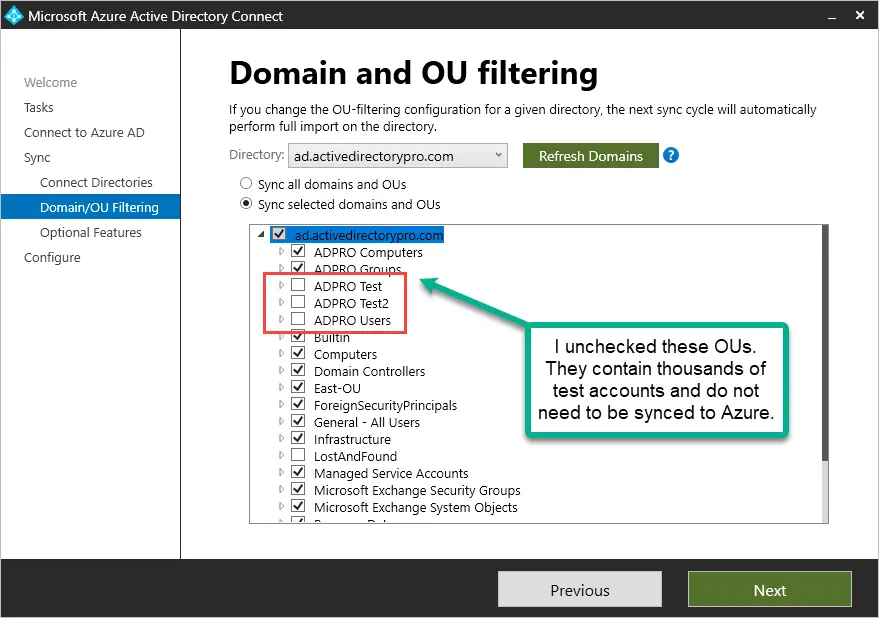
6. Select “Sync selected domains and OUs”.
Next, uncheck any domains or OUs you want to exclude from syncing to Azure.
In this example, I’m going to uncheck my west.ad.activedirectorypro.com domain. This domain was for testing only and does not need to be synced. Under my ad.activedirectorypro.com domain I’m going to uncheck my test OUs. These OUs are test accounts that do not need to be synced.

When you are done click the next button.
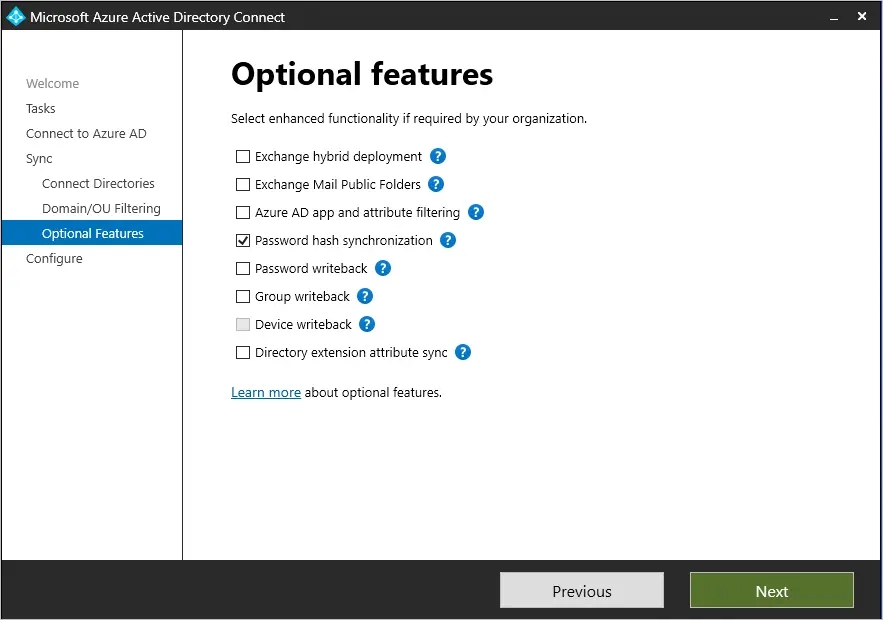
7. On the option features page leave the default options selected and click next.
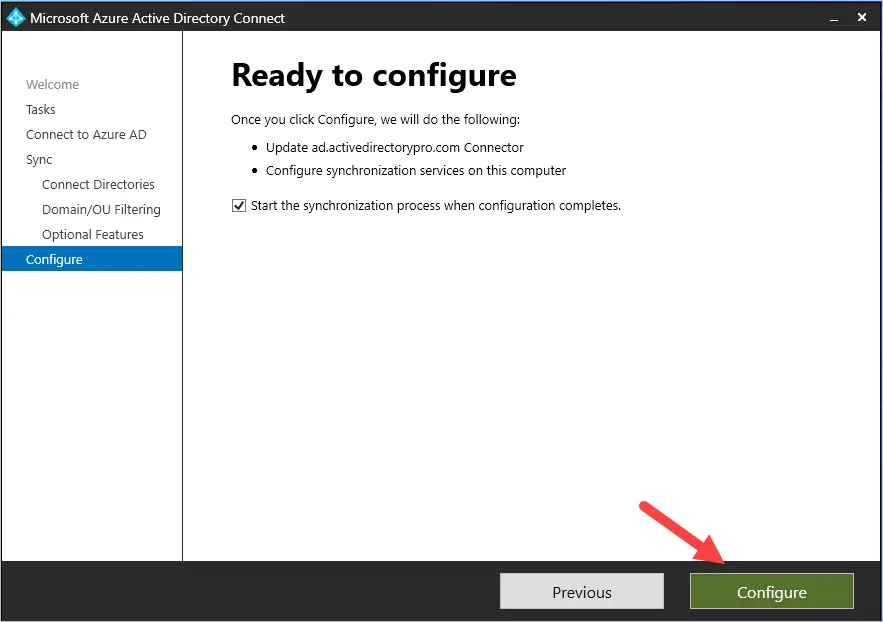
On the ready to configure screen click configure.
What happens to accounts in Azure if they are already synced?
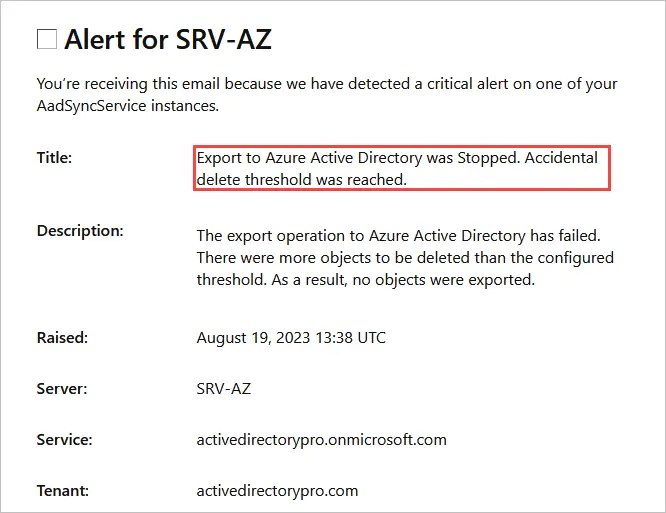
If accounts have been synced to Azure and you then exclude them they will be deleted from Azure. In this guide, I initially synced my entire domain (over 8,000 accounts) to Azure. I then excluded several OUs that had around 5,000 accounts. When I exclude these OUs and user accounts they will be deleted from Azure. By default, there is a threshold of 500 accidental deletes. See the steps below for more details.
After I excluded over 5,000 users from Azure AD Connect, I got the following email alert.
If you want to continue with removing the accounts follow these steps.
1. Disable the Azure AD Connect sync deletion threshold with the following command.
Disable-ADSyncExportDeletionThreshold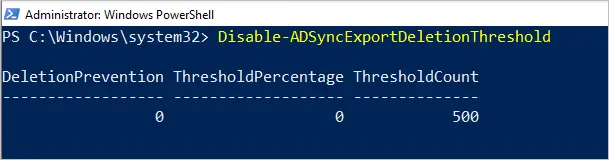
2. Force start Azure AD Connect Sync
Use the following command to start the sync process.
Start-ADSyncSyncCycle -PolicyType Initial3. Check the synchronization service status
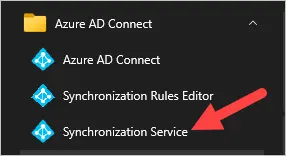
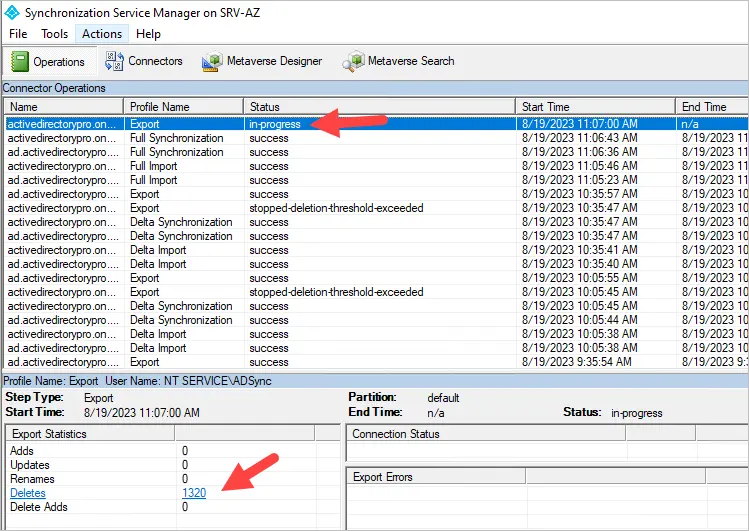
Open the Synchronization service tool.
Look for export in the profile name. Click on it and view the export statistics and status. Mine is showing in-progress with 1320 deletes.
The deletion process can take a while if you have a lot of accounts. You may also get an email notification that deletes threshold has been resolved.

4. When done deleting the accounts set the threshold back to 500 objects.
Enable-ADSyncExportDeletionThreshold -DeletionThreshold 50For more details refer to the article Azure AD Connect Sync: Prevent accidental deletes.
Troubleshooting
When it comes to syncing your on-premises users to Azure there can be all kinds of different issues. Below are some options to help you troubleshoot and get more details on issues you may have.
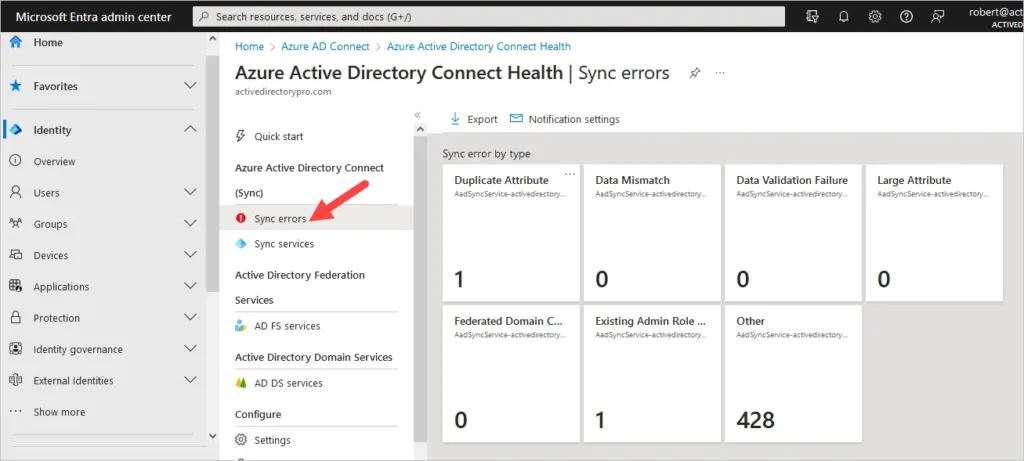
1. Azure Active Directory Connect Health
In Azure, you can check for sync errors using the Azure Health Connect tool.
2. Azure AD Connect Troubleshoot
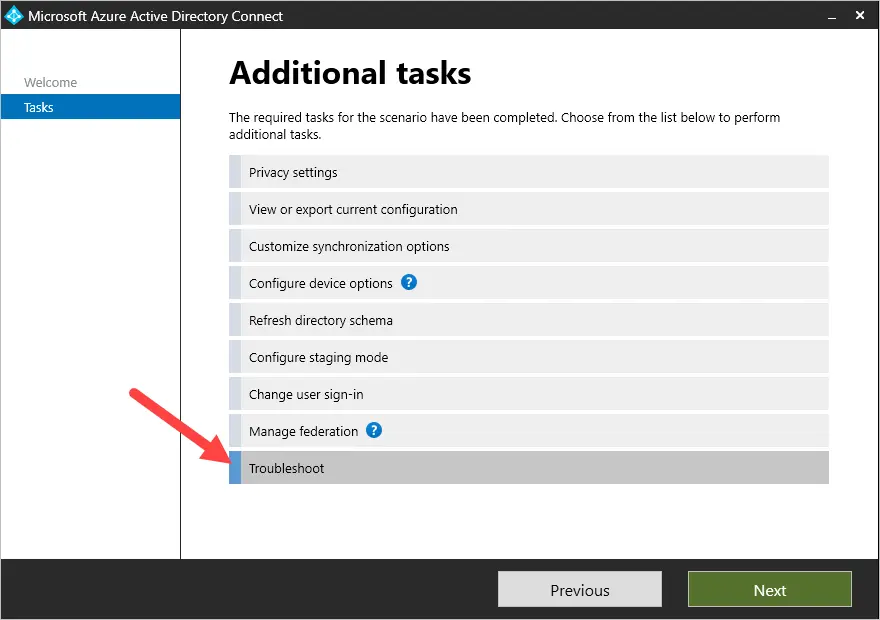
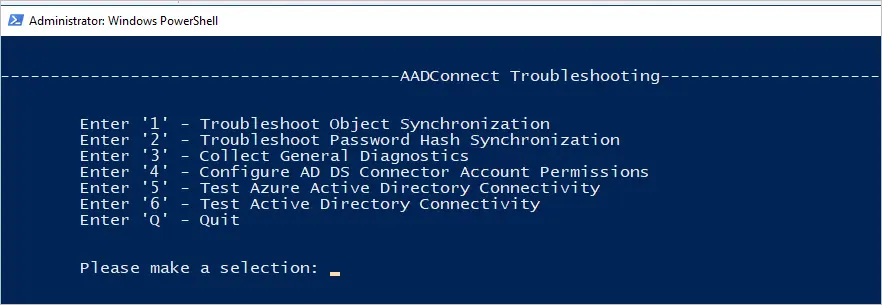
The troubleshooting wizard can help with the following:
https://learn.microsoft.com/en-us/azure/active-directory/hybrid/connect/tshoot-connect-objectsync#troubleshooting-task
- Detect user principal name (UPN) mismatch if the object is synced to Azure AD.
- Check whether object is filtered due to domain filtering.
- Check whether object is filtered due to organizational unit (OU) filtering.
- Check whether object sync is blocked due to a linked mailbox.
- Check whether the object is in a dynamic distribution group that isn’t intended to be synced.
You will be prompted with what troubleshooting steps you would like to perform.
See the Microsoft article Troubleshoot object synchronization with Azure AD Connect sync for more details.
3. Azure AD Connect Connectivity issues
Many sync issues can be related to a network connection issue. The following are the two most common connection issues.
- Connection to On-Premises Active Directory (Domain Controllers): The server running Azure AD Connect, needs full connectivity to your domain controllers. Make sure the following Active Directory Firewall ports are open between the servers.
- 53 (TCP/UDP)
- 88 (TCP/UDP)
- 135 (TCP/UDP)
- 389 (TCP)
- 445 (TCP)
- 49152 – 65535 TCP/UDP
- Connection to Azure AD: The server that is running Azure AD Connect needs internet access to various Azure and Microsoft URLs. Refer to the document Office 365 URLs and IP Address ranges for a complete list.
Conclusion
If you have some experience with on-premises Active Directory and Azure then working with the Azure AD Connect is pretty straightforward. If you are new to these technologies then it can be challenging. Hopefully, this guide helped you with the installation and configuration of Azure AD Connect and sync your on-premises accounts to Azure.
If you liked this article, you may also like:
Thank you for the great step by step. Have a AD domain ending in .local, single forest, single domain. have read that this poses an issue, I would be so grateful if you could advise on this and perhaps provide steps to mitigate issues relating to Azure AD Connect working with my internal .local domain.
There are some many different articles and opinions, hard to know what to trust.
It will still work with a .local domain. You will just need to register a UPN suffix in AD that matches the verified domain in 365.
Microsoft addresses this in the article below.
https://learn.microsoft.com/en-us/microsoft-365/enterprise/prepare-a-non-routable-domain-for-directory-synchronization?view=o365-worldwide
Hello, Thanks for sharing the configurations step by step! I have one windows server 2012 R2 server as a domain controller and one AD connect server with Windows Sever 2019 and its syncing my 2012 DC with Azure tenant working fine.
Now, I created another domain controller with windows server 2019 Standard, and now i want to sync this new domain controller with my Azure tenant. Could you please share any document or guide which i could refer and make the necessary changes? I am planning to demote the 2012R2 server as Domain controller. thanks in advance!
Is this an additional domain controller or a new one in a new domain? If it’s an additional DC in your existing domain, you don’t need to do anything.