If you are using Azure AD Connect to sync your on-prem Active Directory to Azure you can force a sync with the following steps.
Step 1. Check ADSync Module
When you install Azure AD Connect it will include the ADSync PowerShell module.
To verify the module is loaded run the command below.
get-module
If it is not loaded use the below command (this assumes that Azure AD Connect was installed to the default path). If you run this on the machine that has Azure AD Connect installed then you most likely do not need to import the module.
Import-Module -Name "C:\Program Files\Microsoft Azure AD Sync\Bin\ADSync" -Verbose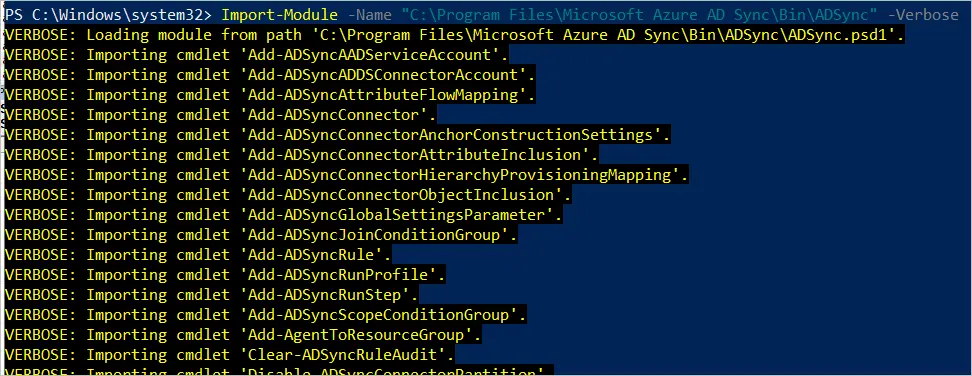
Step 2. Run Start-ADSyncSyncCycle command
You can choose to run a delta or a full sync.
- Delta sync – This will sync all the changes made since the last sync. This is the most common type of sync to force.
- Full sync – This will check all AD objects and sync them again. You typically do not need to run a full unless you make major changes.
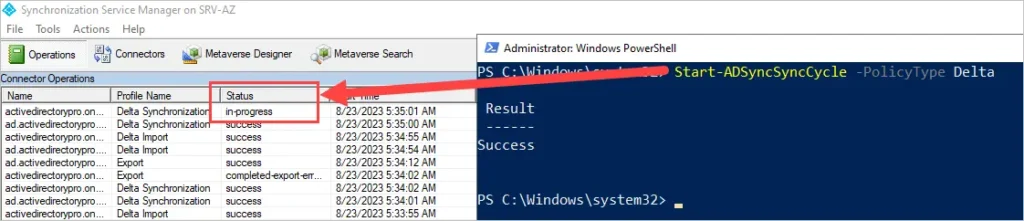
To run a delta sync use this command.
Start-ADSyncSyncCycle -PolicyType Delta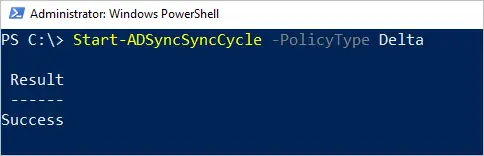
To run a full sync use this command.
Start-ADSyncSyncCycle -PolicyType InitialStep 3. Check Azure AD Connect Sync Status
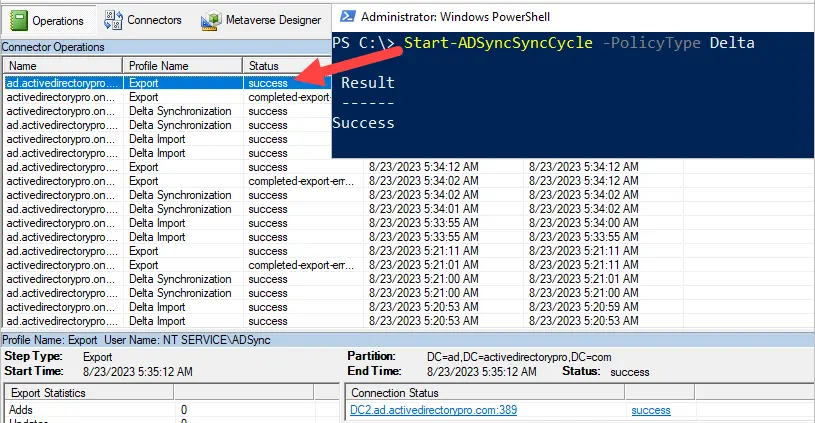
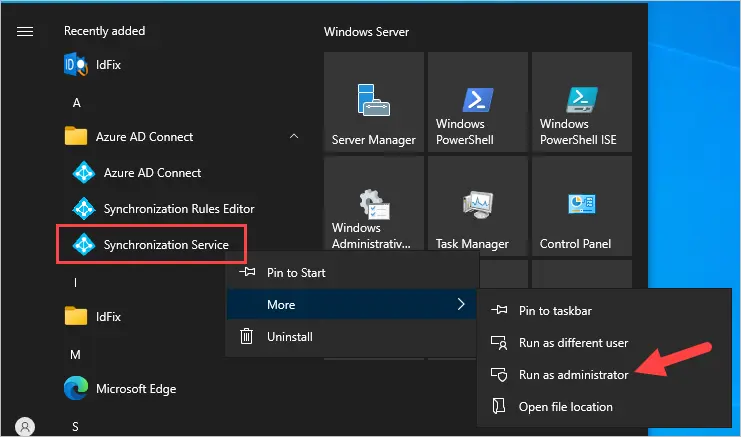
You can check the details of the sync by opening the Synchronization Service Manager.
Make sure to Run as administrator or it will give an error.
When you start the delta or full sync you can see the sync status in real time.
When it completes you can click on an entry and get more details such as adds, updates, and deletes.
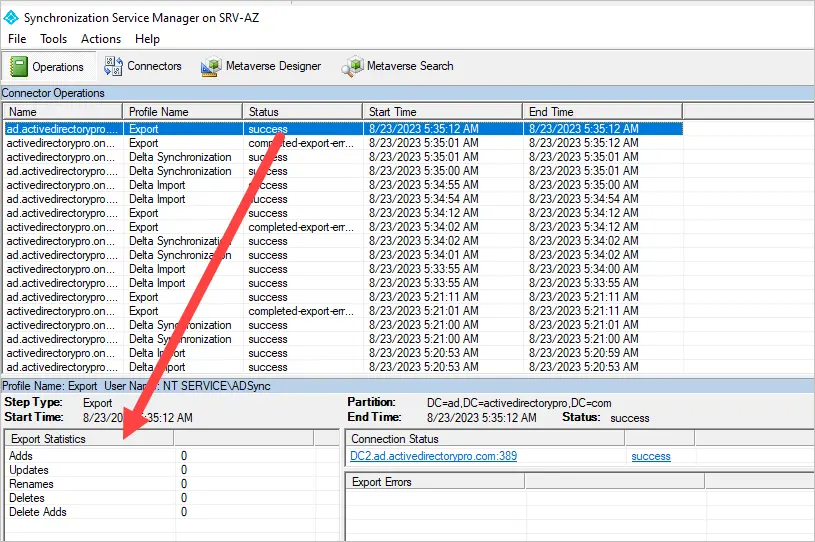
You can see in the above screenshot, no changes were made.
Additional Azure AD Connect PowerShell Commands
Here are some more useful Azure Ad Connect PowerShell commands.
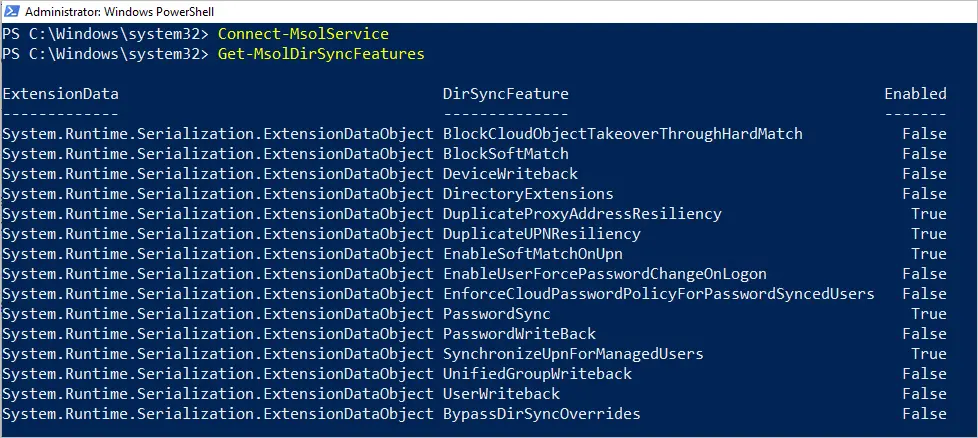
1. Get Azure Sync Features for a tenant
This command will show you what features are enabled or disabled.
Get-MsolDirSyncFeaturesYou will need to first run Connect-MsolService to connect to Azure Active Directory.
2. Get Azure AD Connect Sync Schedule
Get-ADSyncScheduler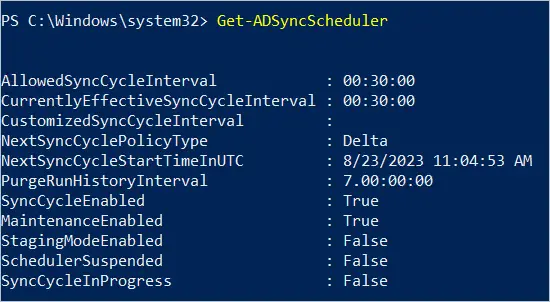
3. Disable Azure AD Connect Scheduler
Set-ADSyncScheduler -SyncCycleEnabled $falseThis command will disable the sync schedule. This can be useful if you need to make many on-prem changes and need to temporarily disable syncing to Azure.
4. Enable Azure AD Connect Scheduler
Set-ADSyncScheduler -SyncCycleEnabled $true5. Change Azure AD Connect Sync Schedule
By default, the sync occurs every 30 minutes. To change the sync schedule use the following command.
Set-ADSyncScheduler -CustomizedSyncCycleInterval d.HH:mm:ssd – days, HH – hours, mm – minutes, ss – seconds.
For example, to change the sync from 30 minutes to run every 1 hour.
Set-ADSyncScheduler -CustomizedSyncCycleInterval 01:00:00If you know of any other useful Azure Sync commands please post them in the comments below.