On-premises AD accounts are synced to Azure using the Azure AD Connect software. There are times when you need to disable the synchronization such as removing accounts, fully moving to the cloud, or troubleshooting.
In this post, I’ll show you the steps to disable the Azure AD sync.
Important: When you disable AD synchronization you must wait a while before you can turn it back on. I cannot find any documentation from Microsoft on how long you must wait. In my testing, I had to wait about an hour.
How to Disable Azure AD Synchronization
Step 1. Install the Azure AD module
Open an elevated Windows PowerShell command and run the following command.
Install-Module MSOnlineStep 2. Connect to Azure AD
Connect-MsolServiceStep 3. Check Current Sync Status (true or false)
(Get-MSOLCompanyInformation).DirectorySynchronizationEnabledStep 4. Disable Azure AD Sync
Set-MsolDirSyncEnabled -EnableDirSync $falseIf you want to turn synchronization back on run this command.
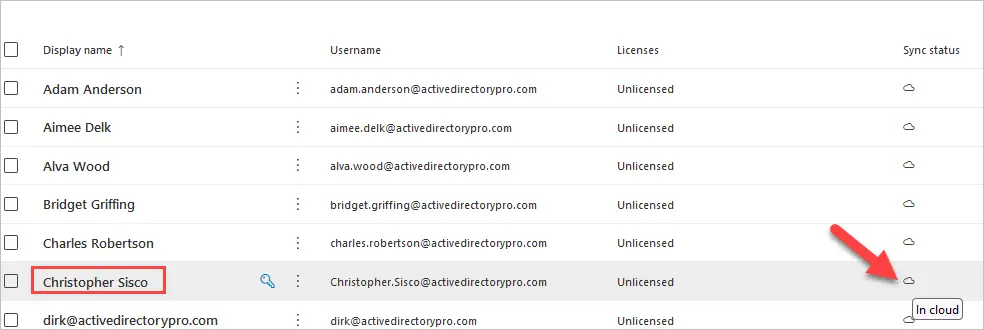
Set-MsolDirSyncEnabled -EnableDirSync $trueNote: When you disable the synchronization, any on-premises synced accounts will be changed to cloud only.
For example, the account Christopher Sisco is showing “Synced from on-premises”

After I disabled the synchronization the account changed to cloud only in Azure.
If you get the error ” Set-MsolDirSyncEnabled : You cannot turn off Active Directory synchronization.” This means you have recently changed the status and the Azure services are preventing you from changing it back. You will have to wait a while before you can turn it back on. I had to wait about an hour before I could turn the sync back on.

If you enjoyed this article you may also like how to permanently remove deleted users from Office 365. Post your questions or comments below.
After I run the command, what should I do with my Azure AD Connect server? Any specific deprovisioning steps I need to take?
Perfect well explained
What about the security groups and distribution lists that were synced?