AD Pro Toolkit User Guide
- Getting Started
- User Management
- Group Management
- Security Tools
- AD Reports
- Other Tools
- Troubleshooting
- Firewall Settings
- Audit Log Settings
Create Active Directory Users
This guide shows you how to bulk create users with the AD Pro Toolkit.
Requirements:
- You need permission to create user accounts in Active Directory.
- The following headers are required in the CSV template. All other headers are optional.
- SamAccountName = This will be the users logon name.
- password = users password. Make sure it meets your password requirements.
- givenName = First name
- sn = Last name
Read First:
- Run a small test first – It is recommended to first run a small import to ensure the accounts are being created as expected.
- User attributes – The CSV template includes 33 user attributes. This covers the most common attributes for creating new accounts. Additional attributes can be added to the template.
- Name column – You DO NOT need to add the name attribute to the CSV. This gets automatically created based on the first and last name.
- CSV Template – Refer to the provided CSV template for an example of how to setup the CSV file.
- CSV Template CheatSheet – If you are not familiar with Active Directory attributes then refer to the CSV Template Cheatsheet.
Video Tutorial
If you don’t like videos scroll down for written instructions.

How to Use the AD User Creation Tool
- Click on User management > Import Users
- Click “Download CSV Template”
- Fill out the csv with the user details
- The CSV requires the following headers, all other headers are optional.
- SamAccountName = This will be the users logon name.
- password = users password. Make sure it meets your password requirements.
- givenName = First name
- sn = Last name
- Click Import options button if you need to change the following
- Enable or disable the account (Enabled by default)
- Force password change at next logon
- Change name format to lastName, FirstName
- Select your CSV file and click Run.

CSV Example below
Click here to download my example template.

Verify the Import (Optional)
A quick way to verify the accounts imported correctly is to use the export users tool.
You are not actually going to export anything but you can quickly preview accounts and their settings.
Click on Export Users and click Run (if you want to check users in a specific OU select the OU).

Now you can scroll through the list and verify all of the user fields are set correctly.
Supported Attributes List
Below is a list of attributes included in the template. The CSV headers are case sensitive and can be in any order. You can delete any columns from the template that you do not need.
| Attribute Name (column headers) | Example Value | Description |
|---|---|---|
| sAMAccountName | test.user1 | This is the users logon name |
| password | Fullb@@ller02# | The users password. |
| ou | OU=ADPRO Users2,DC=ad,DC=activedirectorypro,DC=com | The OU where you want to import accounts to. |
| memberof | it_wrk_admins,it_srv_admins | Adds users to groups. Separate multiple groups with a comma. |
| userPrincipalName | test.user1@activedirectorypro.com | The users user principal name. |
| givenName | Robert | The users first name |
| initials | RA | The users initials |
| sn | Allen | The users last name |
| displayname | Robert Allen | The users display name |
| description | IT staff | The description field in AD. |
| physicalDeliveryOfficeName | 1st floor | This is the office field in Active Directory (General tab). |
| telephoneNumber | 1-888-214-3802 | This is the Telephone number field (General tab). |
| robert@activedirectorypro.com | This is the E-mail field (General tab). | |
| wwwHomepage | activedirectorypro.com | P.O Box field (Address tab). |
| streetAddress | 123 W. EagleCrest LN | Street field (Address tab). |
| postOfficeBox | PO Box 1 | P.O Box field (Address tab). |
| l | Springfield | This is the City field (Address tab). |
| st | MO | State/province field (Address tab). |
| postalCode | 65802 | Zip/Postal Code field (Address tab). |
| c | US | 2-digit string value |
| profilePath | \file1\profiles\%username% | Profile path field (Profile tab). |
| scriptPath | it.bat | Logon script field (Profile tab). |
| homeDirectory | \file2\users\IT\%username | This is the home folder path (Profile tab) |
| homeDrive | z: | Connect to (profile tab) |
| homePhone | 1-888-214-3802 | Home phone (Telephones tab) |
| mobile | 1-888-214-3802 | Mobile number (Telephones tab) |
| ipPhone | 1-888-214-3802 | Ip phone (Telephones tab) |
| title | Network Manager | Job title field (Organization tab) |
| department | IT | Department field (Organization tab) |
| company | Active Directory Pro | Company field (Organization tab) |
| employeeid | 12345 | This is the employeeID attribute |
| employeenumber | 1 | This is the employeenumber attribute |
| manager | robert.allen | This will assign a manager to the user account. Use the managers logon name. |
| proxyAddresses | SMTP:test.user1@activedirectorypro.com, smtp:test.user2@activedirectorypro.com | This column will add additional proxyAddress to the user. |
Add Additional Attributes
You can add additional user attributes to the CSV file, you just need to know the LDAP name. You can find the LDAP name by opening the attribute editor in Active Directory Users and Computers. You could also use PowerShell to list all user account properties.
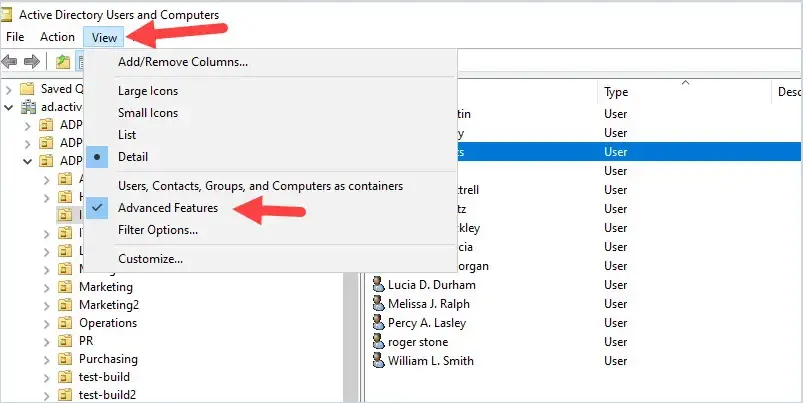
To see the attribute editor you first need to enable the advanced features in Active Directory Users and Computer
Click view from the top menu then select advanced features.
Now when you open an account you will see the attribute editor tab.
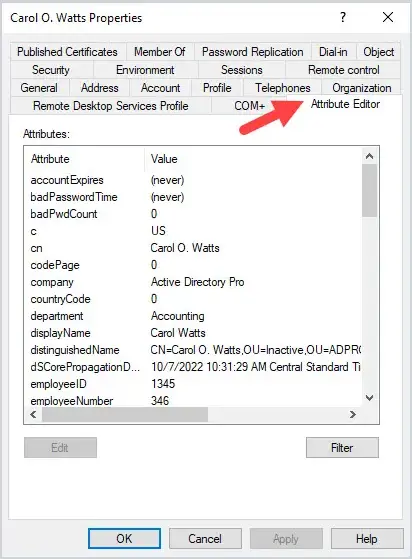
The attribute editor screen will show you all the user LDAP properties.
Now just find the attribute name and add it to the CSV. For example, I want to add information to the other Home telephone section for users.
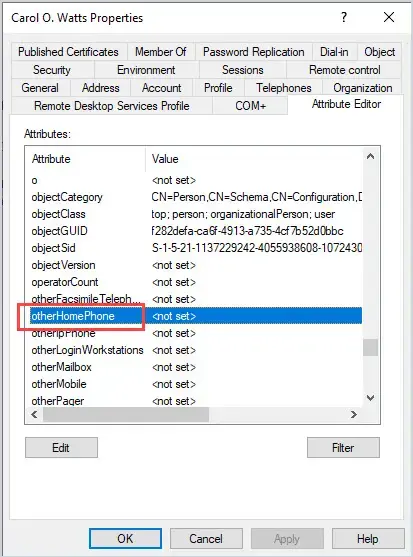
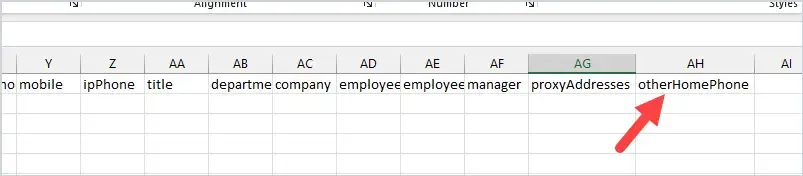
In the attribute editor, I see the name is “otherHomePhone”. I will add this to the CSV.
All done. That is how you add additional attributes to the CSV file to import with new accounts.
Schedule User Creation
You can use the built-in task scheduler to automate importing new user accounts.
- Click on Scheduler.
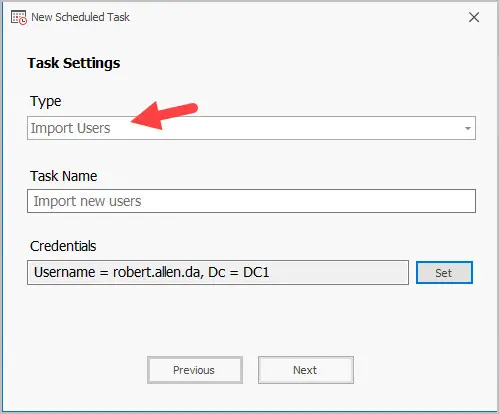
- Click on the Add button.
- For the type select “Import new users”
- Give the task a name.
- Set the credentials.

- Click Next
- Set the schedule frequency. You can choose from Daily, Weekly or Monthly.
- Click Next
- Select your CSV template. Click the options button to change import options if needed.
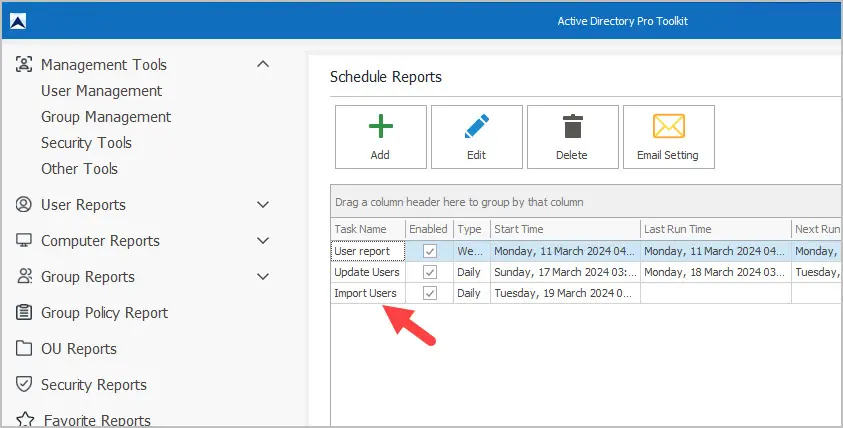
- Your task will now appear in the list.