AD Pro Toolkit User Guide
- Getting Started
- User Management
- Group Management
- Security Tools
- AD Reports
- Other Tools
- Troubleshooting
- Firewall Settings
- Audit Log Settings
Update ProxyAddresses
In this guide, I’ll show you how to add, change, and remove ProxyAddresses using the AD Pro Toolkit. This will update the proxyAddresses attribute for on-premise Active Directory user accounts.
Tip #1 It is recommended to test updating a few accounts first to make sure the proxyAddresses update as needed. After verifying the accounts update correctly, then proceed with making bulk proxyAddress updates.
Tip #2 Before making bulk changes to user accounts, create a backup of the user attributes. Run the All Users report and add the attributes that you want to change such as ProxyAddresses. Then export the report to a CSV file. This will give you a backup of the user attributes so you can refer to it if needed.
Table of Contents:
Add New ProxyAddresses
Use this option when you want to add new proxyaddresses to a user account.
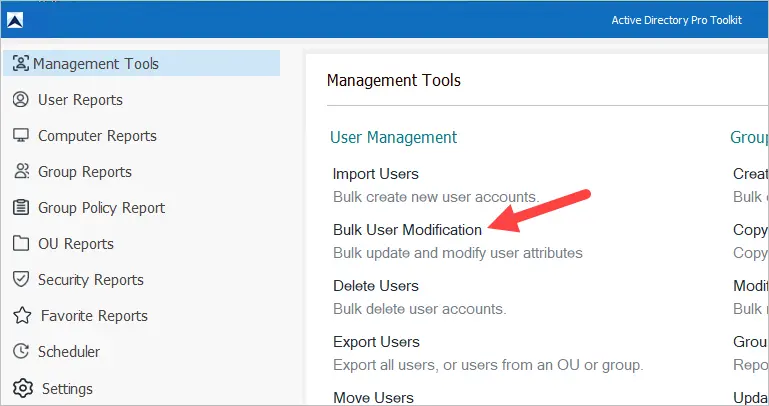
1. Click on the Bulk User Modification Tool
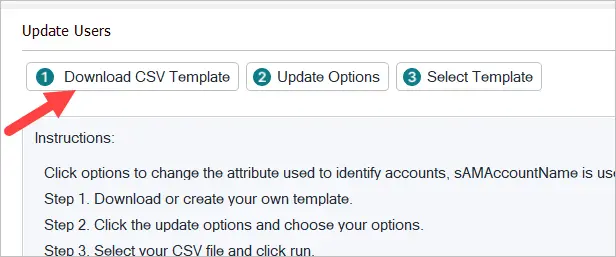
2. Download the CSV Template
3. Fill out the CSV and include the account you want to update in the ID column and the new address in the proxyAddresses column.
Example CSV.
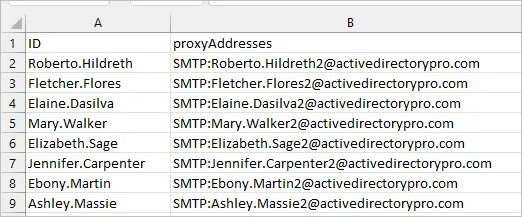
Note: You do not have to remove the other columns in the template, you can leave them blank or delete them.
4. Select Options
Click the update options button and make sure “Add New” is selected.
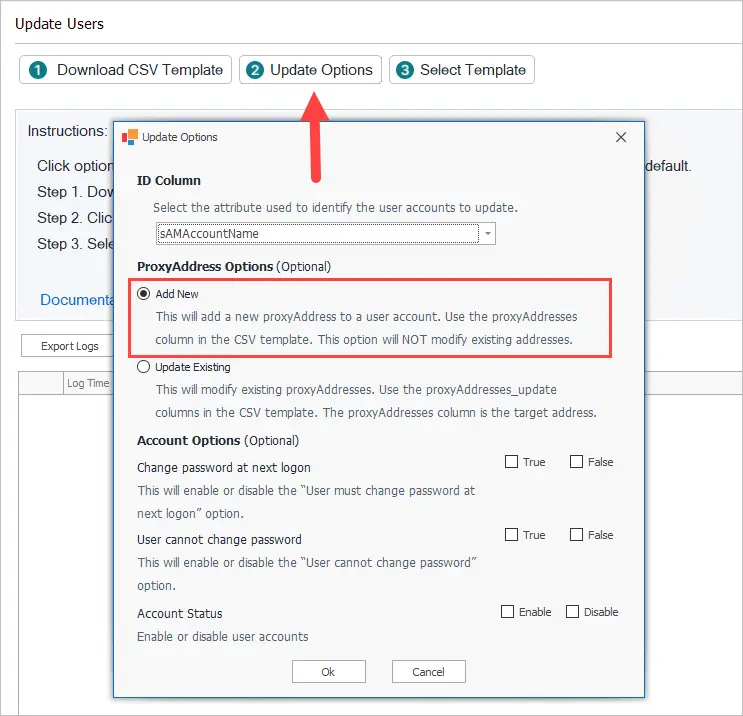
5. Select your CSV file and click run.
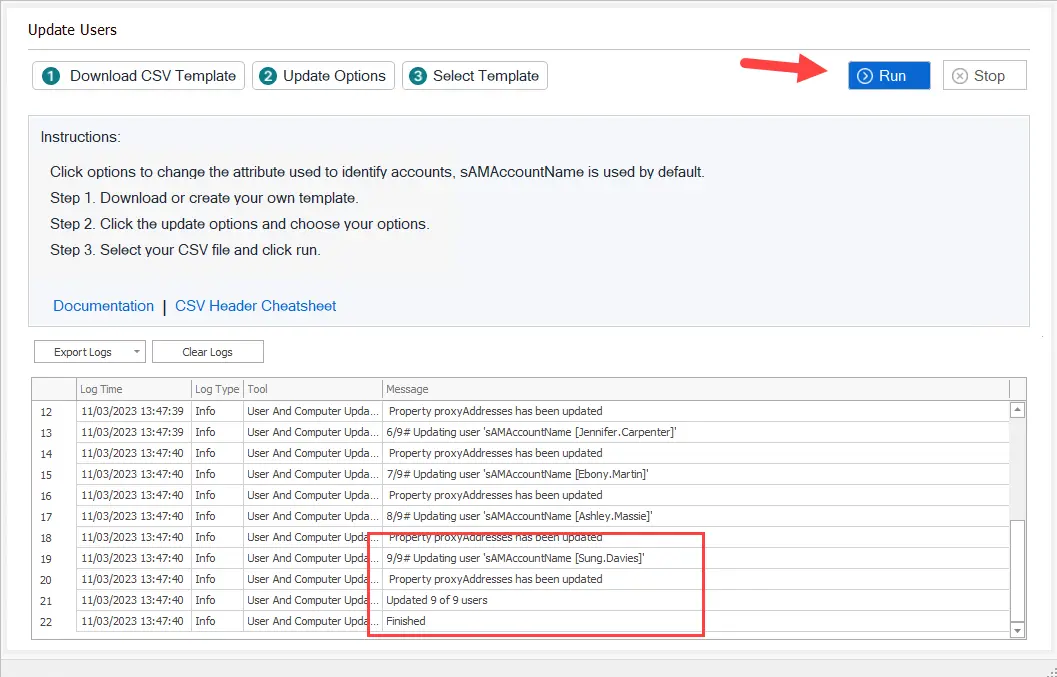
Check the logs for any errors.
Update Existing ProxyAddresses
In this example, I’ll walk through updating an existing ProxyAddress.
1. Download and fill out the CSV template.
To update existing proxyaddresses the CSV must have these three columns.
- ID = The Active Directory User Account.
- proxyAddresses = This column will be the address you want to update.
- proxyAddresses_update = This column will be the new address.
For example, in the CSV below the user “Roberto.Hildreth” currently has the address Roberto.Hildreth2@activedirectorypro.com and I’m going to change it to Roberto.Hildreth3@activedirectorypro.com.

2. Select Options and choose Update Existing.
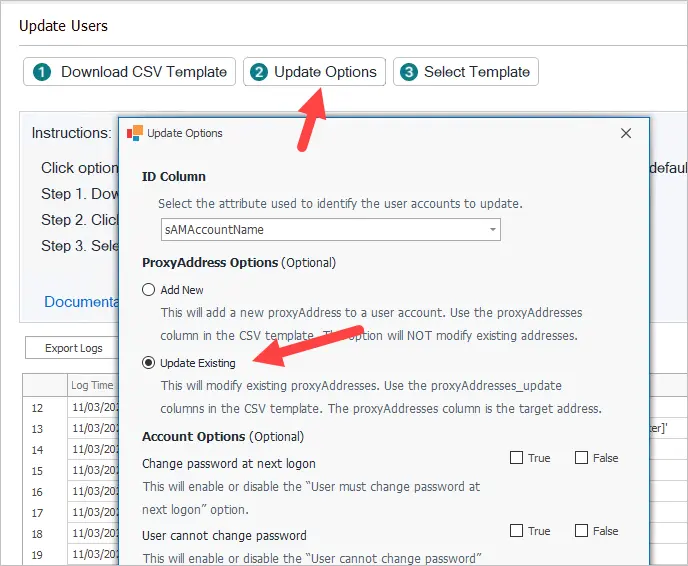
3. Select your CSV and click run.
Remove ProxyAddresses
To remove proxyAddresses for a user, put remove in the column.
CSV Example.
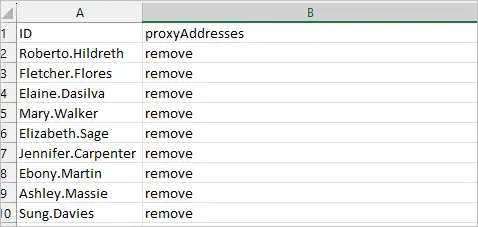
Warning: This will remove all user’s proxyAddresses. I recommend running the All Users report first and exporting the proxyAddresses to a CSV file. This will give you a backup of the user settings in case you need to revert.
In the options “Add New” should be selected. Although you are not adding new proxyAddresses this option must be set to remove the addresses.
Select your CSV file and click run.