In this guide, I’ll show you how to bulk create users in Active Directory using PowerShell and the AD Pro Toolkit. I’ll cover how to set up the CSV, run the import, and verify the accounts were created successfully.
Bulk Create AD Users with AD Pro Toolkit (GUI Tool)
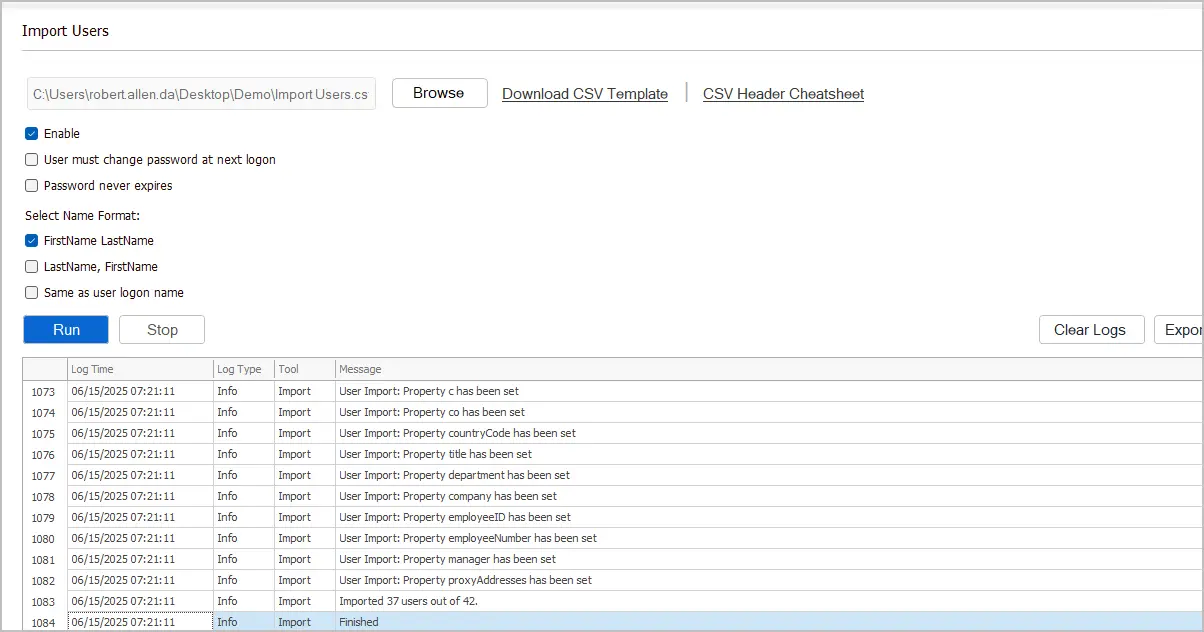
In this first example, I’ll use the AD User Creation Tool that is included with the AD Pro Toolkit. This tool makes it very easy to import users and is a great alternative if you don’t want to deal with PowerShell scripts. Also, there are certain user fields that PowerShell does not support, and a 3rd party import tool is needed.
You can download a free trial of the toolkit and try it for yourself.
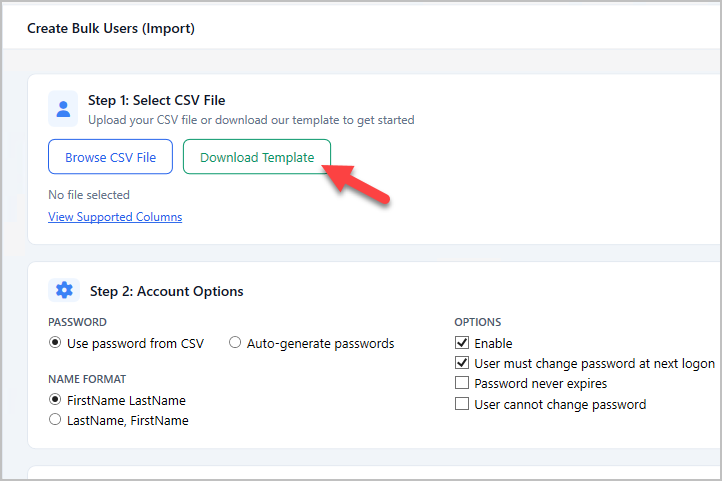
Step 1. Click on Download Template
Browse to AD Users > Create Bulk Users (Import) and click the download template button.
Step 2. Fill out the CSV with account details
I recommend the follow CSV headers and settings when creating new user accounts. You can remove any column in the CSV that you do not need.
- SamAccountName (required) = This will be the users logon name.
- password (required) = users password. Make sure it meets your password requirements.
- givenName (required) = First name
- sn (required) = Last name
- OU = The organizational unit to add the user accounts into. This is the distinguished name of the OU. If you leave it blank it will import into the default users container.
- DisplayName = This is the users display name.
- Groups = Groups to add the users to. Separate each group with a comma.
- Force Password Change at Next Logon = Click the import options button to enable this for each user.
Download the included CSV template as a reference or starter template.
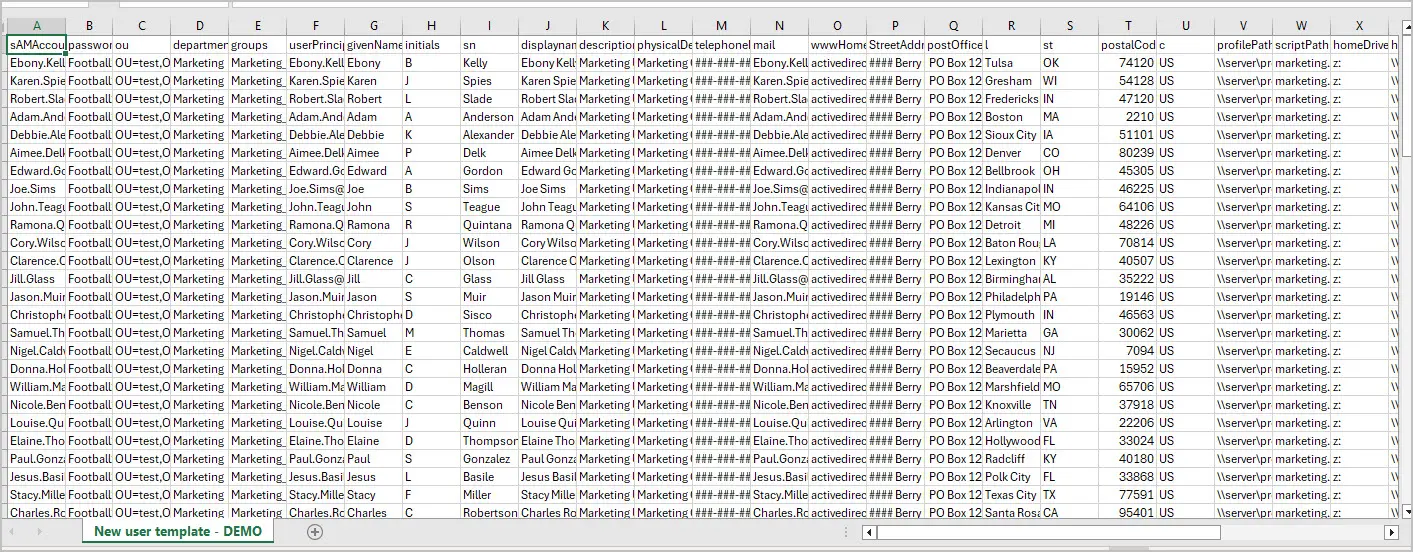
Save your template and click “Browse csv file” to select your template.
Step 3. Select account options
In the account options box, select the account options that your need.
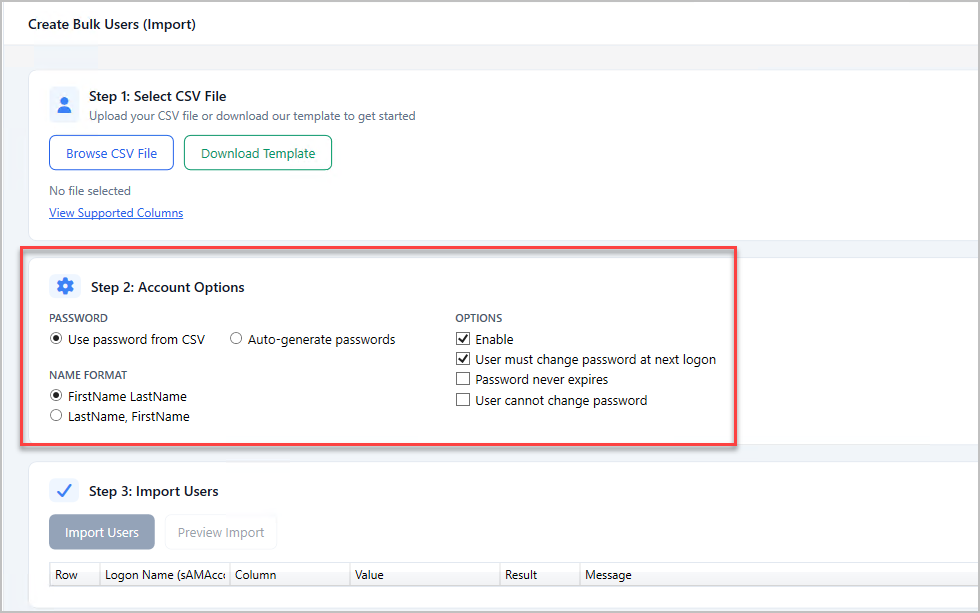
Description of each option.
| Option | Default | Description |
|---|---|---|
| Password | ||
| Use password from CSV | Uses the Password column value from the CSV per user |
|
| Auto-generate | Generates a random password; length is configurable (default 12). Generated passwords are offered as a downloadable CSV after import | |
| Name Format | ||
| FirstName LastName | Display name is built as John Smith |
|
| LastName, FirstName | Display name is built as Smith, John (overridden if CSV has a Display Name column) |
|
| Account Options | ||
| Enable | On | Account is enabled immediately on creation |
| User must change password at next logon | On | Forces a password change on first login |
| Password never expires | Off | Sets the UAC DONT_EXPIRE_PASSWD flag |
| User cannot change password | Off | Sets the UAC PASSWD_CANT_CHANGE flag |
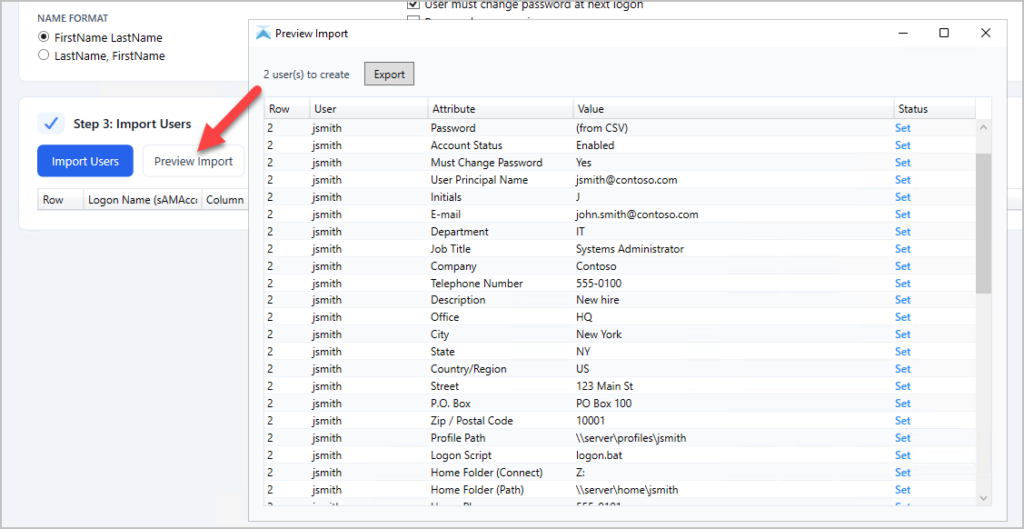
Step 4. Click Preview (Optional)
If you want to preview the import, click the preview import button.
Step 5. Import Users
Click “Import Users” to start the import.
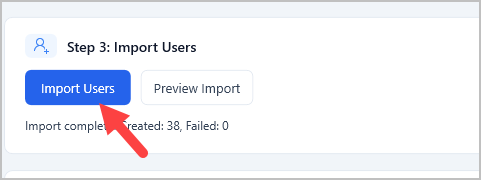
If you selected to auto generate password you will get prompted to save a csv that includes the users logon name and password.
Review the logs for any errors.
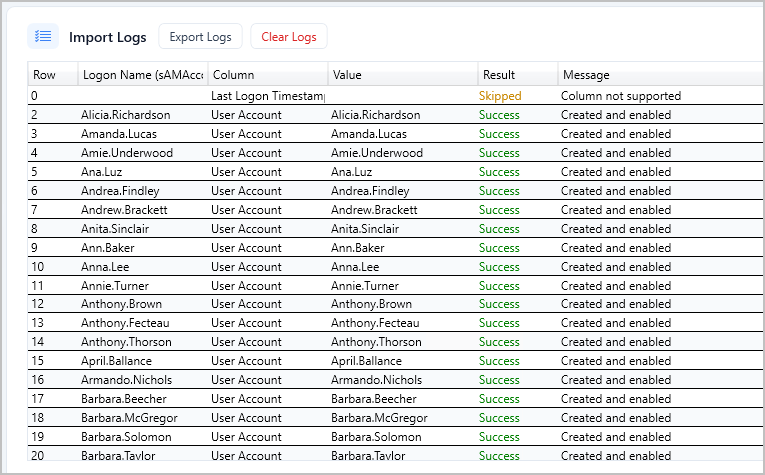
The GUI tool is a huge time saver and makes importing user accounts into Active Directory super easy. Plus, you don’t have to modify any scripts or need PowerShell experience.
The AD Pro Toolkit also includes a User Update Tool to modify multiple user accounts at once. This is a huge time saver for when you need to mass update user information such as department, telephone number, email addresses, and so on.
Try the AD Pro Toolkit for FREE, download your copy here.
Bulk Create AD Users from CSV with PowerShell
What you will need:
- PowerShell Active Directory Module loaded - The script I provide will load the module you just need to run it from a computer that has RSAT tools installed or the AD role.
- Rights to create user accounts in Active Directory
- CSV File (See below)
- PowerShell Script (See below)
Step 1: Setup the CSV file
A basic CSV file should have the following headers. Technically you can import new accounts with just the SamAccountName, Name, and the password column but that is not recommended.
- SamAccountName = this will be the users logon name
- password = users password. Make sure it meets your password requirements.
- path = OU where you want to import users to. This is the distinguished name of the OU. If you leave it blank it will import into the default users container.
- GivenName = First name
- Surname = Last name
- Name = Name
- DisplayName = Display Name
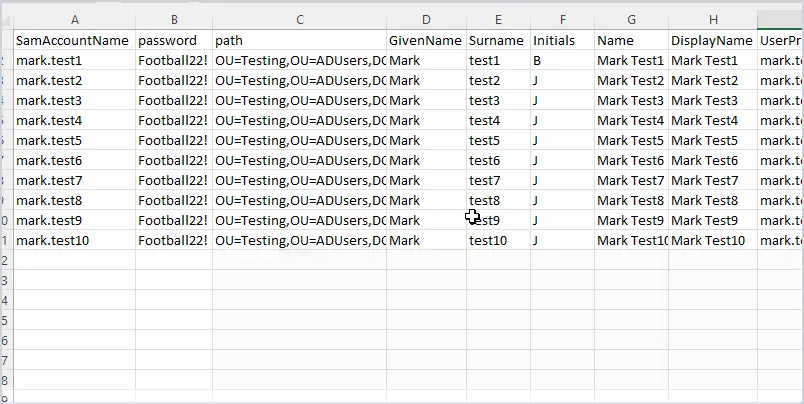
Above is an example of my CSV file.
How do you find the OU path?
The OU path is the distinguishedName attribute, to find this open up Active Directory Users and Computers and browse to the OU you want to import to, then right click and select properties then select attribute editor.
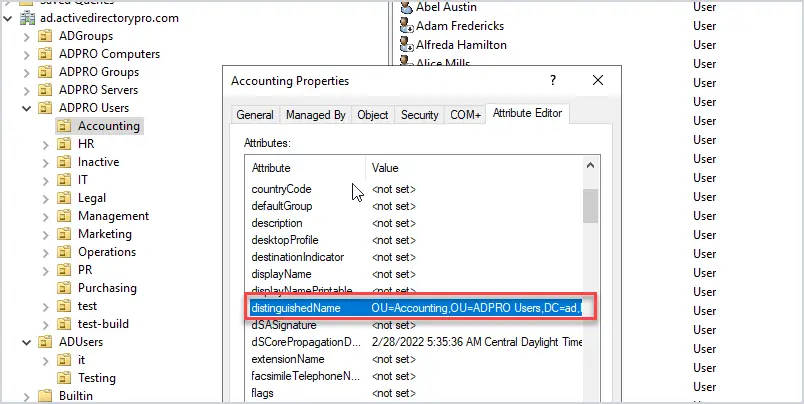
Copy the path into the path column in the CSV file.
At this point the CSV file has the required fields, you can jump to step 2 (setting up the PowerShell script) or keep reading to configure optional fields for user accounts.
Add additional user fields to the CSV file.
You may want to include some additional user fields in the CSV. Just know that whatever columns you add to the CSV you will also need to include them in the PowerShell script.
I’ve included several common user fields in the CSV template and PowerShell script.
- UserPrincipalName
- Department
- Description
- Office
- OfficePhone
- EmailAddress
- StreetAddress
- POBox
- City
- State
- PostalCode
- Title
- Company
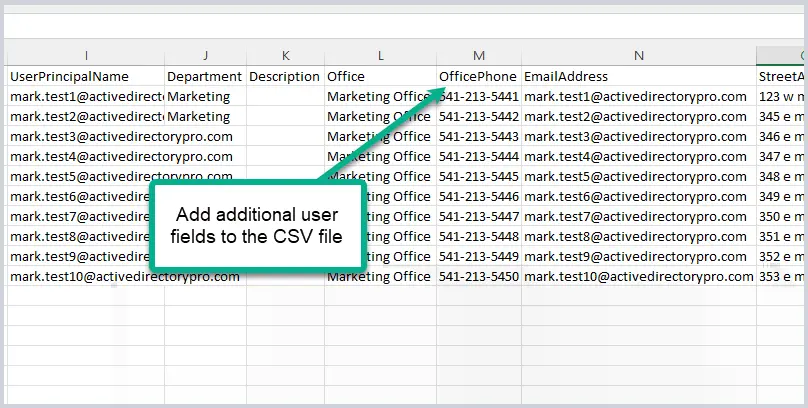
To add more I recommend looking at the PowerShell new-aduser cmdlet to see which parameters are supported.
I like to keep the name of the headers the same as the new-aduser parameters, it makes it easier to troubleshoot.
At this point, you should have a CSV file configured, and save the file to your local computer.
Step 2: Configure the PowerShell Script
Copy the script below and modify it as needed.
#Import active directory module for running AD cmdlets
#Author: Robert Allen
#Website: activedirectrypro.com

Import-Module activedirectory

#Store the data from ADUsers.csv in the $ADUsers variable
$Users = Import-csv c:\it\users.csv

#Loop through each row containing user details in the CSV file
foreach ($User in $Users) {
    # Read user data from each field in each row
    # the username is used more often, so to prevent typing, save that in a variable
   $Username       = $User.SamAccountName

    # Check to see if the user already exists in AD
    if (Get-ADUser -F {SamAccountName -eq $Username}) {
         #If user does exist, give a warning
         Write-Warning "A user account with username $Username already exist in Active Directory."
    }
    else {
        # User does not exist then proceed to create the new user account

        # create a hashtable for splatting the parameters
        $userProps = @{
            SamAccountName             = $User.SamAccountName
            Path                       = $User.Path
            GivenName                  = $User.GivenName
            Surname                    = $User.Surname
            Initials                   = $User.Initials
            Name                       = $User.Name
            DisplayName                = $User.DisplayName
            UserPrincipalName          = $user.UserPrincipalName
            Department                 = $User.Department
            Description                = $User.Description
            Office                     = $User.Office
            OfficePhone                = $User.OfficePhone
            StreetAddress              = $User.StreetAddress
            POBox                      = $User.POBox
            City                       = $User.City
            State                      = $User.State
            PostalCode                 = $User.PostalCode
            Title                      = $User.Title
            Company                    = $User.Company
            Country                    = $User.Country
            EmailAddress               = $User.Email
            AccountPassword            = (ConvertTo-SecureString $User.Password -AsPlainText -Force)
            Enabled                    = $true
            ChangePasswordAtLogon      = $true
        }   #end userprops

         New-ADUser @userProps
       #  Write-Host "The user account $User is created." -ForegroundColor Cyan


    } #end else

}
You will need to modify the path to the CSV file you saved from step 1 (unless it matches what I have in the script).
$ADUsers = Import-csv C:\it\bulk_import.csv
By default, the script sets the accounts to enable. You can change this by setting Enabled to false
Enabled = $false
By default, the script sets the accounts to change password at the next logon. To change this set “ChangePasswordAtlogon to false.
ChangePasswordAtLogon = $false
That should do it for configuring the script. It’s pretty much ready to go as is.
Step 3: Run the Import
At this point, the CSV file should be setup with the user’s information and the Powershell script should be modified (if needed)
Now it’s time to execute the script.
In PowerShell ISE just click the green button to run the script. If you saved the script to a ps1 file just run the script instead of running directly from ISE.
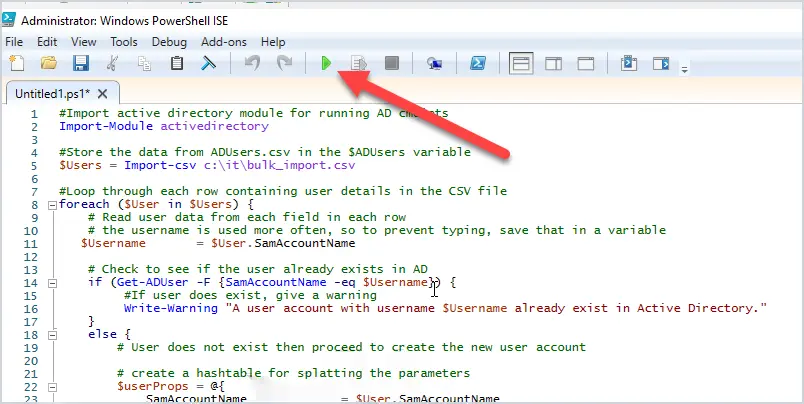
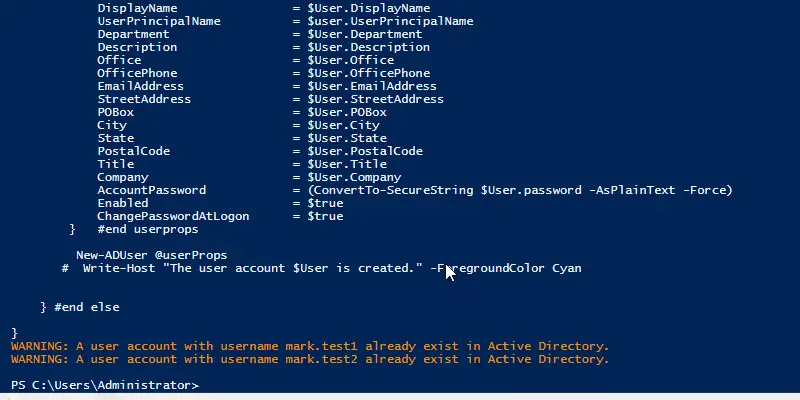
It will return the prompt when completed. Any errors will be displayed in the console.
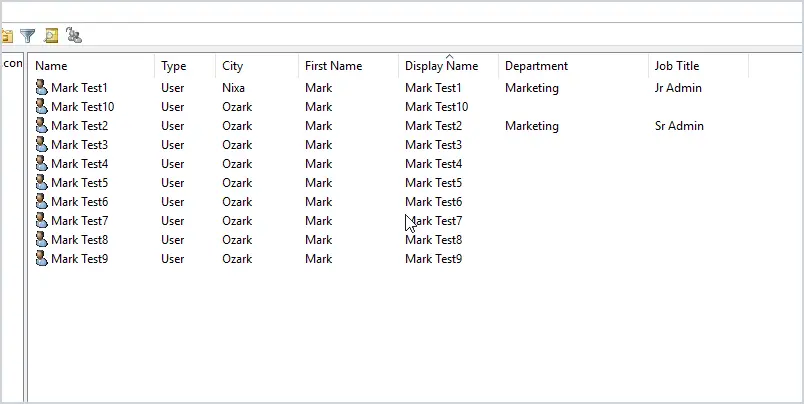
Now check Active Directory to verify the accounts imported.
Verify AD User Import
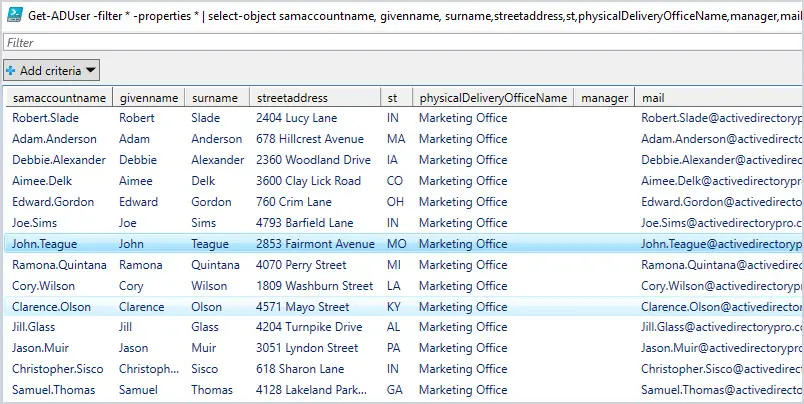
This step is optional but I like to list all accounts from the domain or OU I imported to as a way to verify the import. It’s also useful for getting a list of user accounts and exporting it to csv.
Below is the PowerShell command to get all domain users. The results are sent to a gridview to make it easier to read.
You can add or remove whatever user attributes you need.
Get-ADUser -filter * -properties * | select-object samaccountname, givenname, surname,streetaddress,st,physicalDeliveryOfficeName,manager,mail,title,company,whenCreated
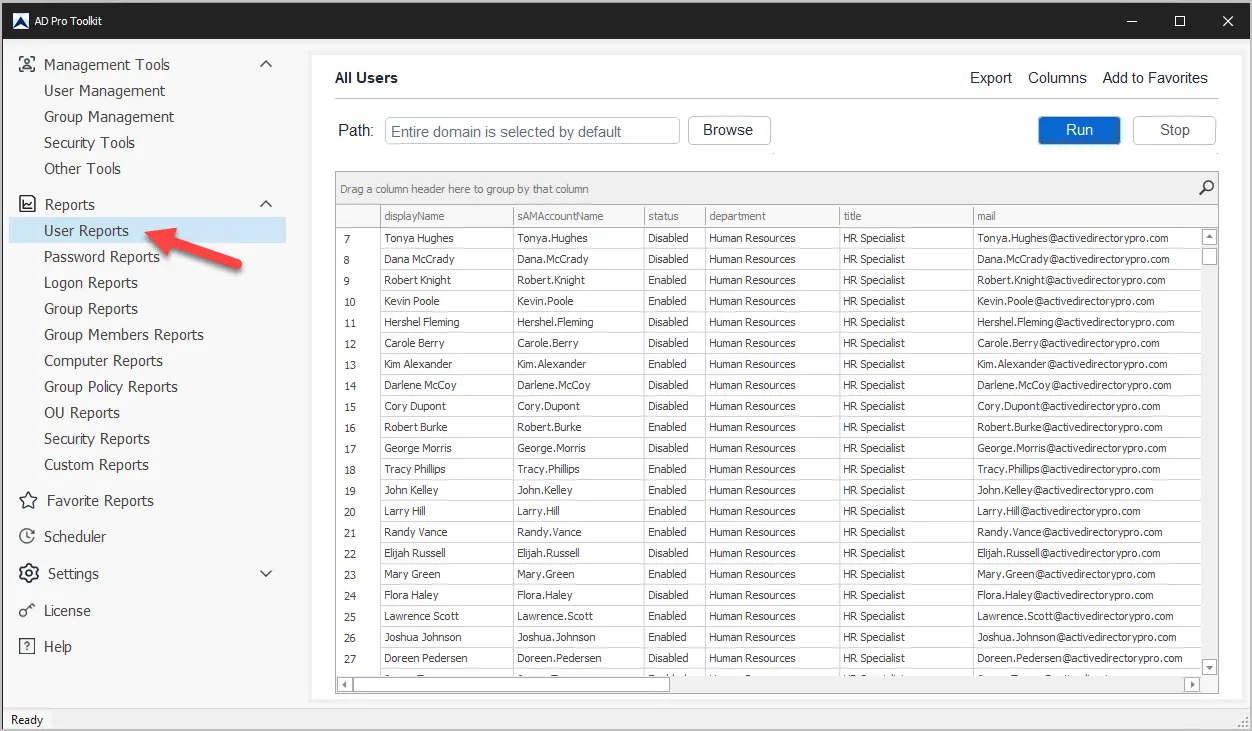
Another option is to use the user export tool that is included in the AD Pro Toolkit. You can select to list all domain users, users from an OU or from a group. You can also easily add or remove columns to the report.
Additional Resources
- LDAP Mapping - Shows a mapping of the user fields in the Active Directory User and Computer console to their LDAP attribute names.
- Active Directory Pro Documentation - Guides and examples on how to use the AD Pro Toolkit.