In this guide, you will learn how to block dangerous file attachments in Exchange online such as .bat, .com, .html, cab and other files types.
Microsoft 365 has threat policies that are enabled by default. However, some of these policies are very basic and do not cover all threats. One of the most important ways you can improve office 365 security is to block files that can be dangerous. It only takes one user clicking on a bad file to bring down your entire infrastructure. In this article, I’m going to walk you step-by-step through blocking file types.
Block File Attachments Using Anti-Malware Filter
In this first example, I’ll show you how to block common file attachments using the exchange online anti-malware filter. In this example, I’ll add the .htm attachments to the filter.
1. Log into Microsoft 365 Security.
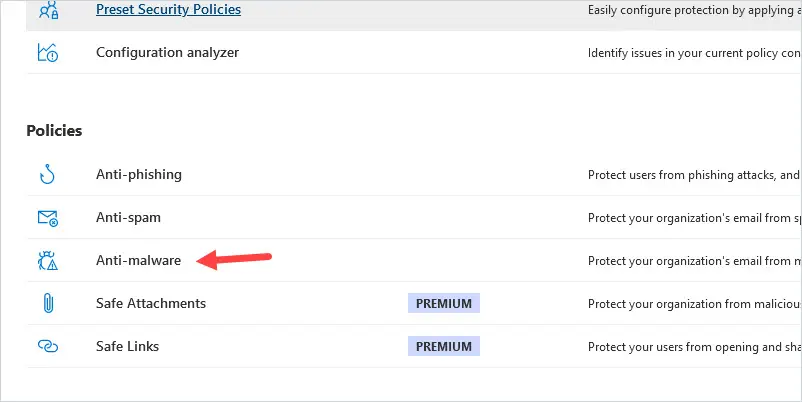
Click on Policies & rules -> Threat Policies -> Anti-malware
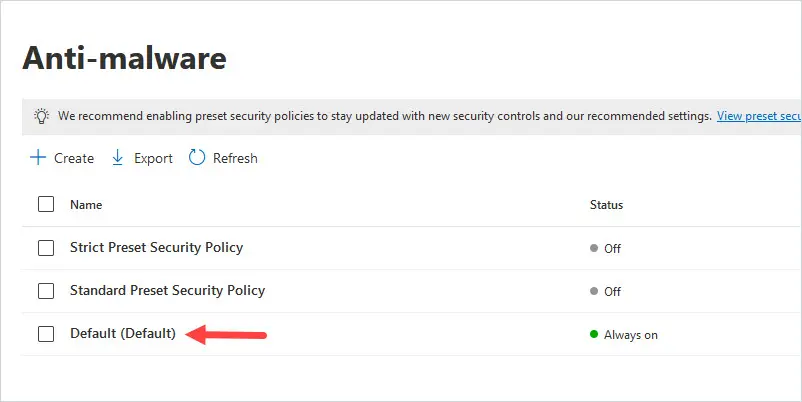
Click on the Default (Default) policy.
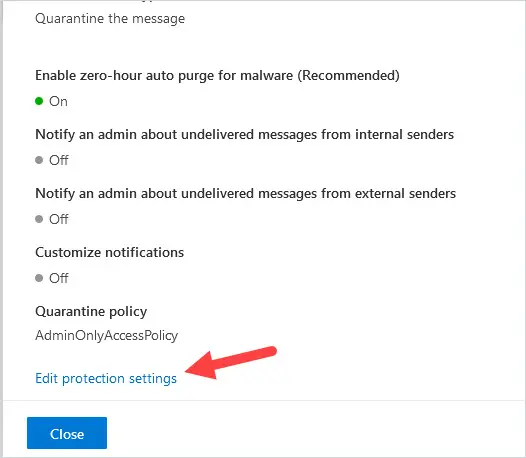
2. Click on Edit protection settings.
3. Under Protection settings, if Enable Common attachments filter is not selected, then click the box to the left of it.
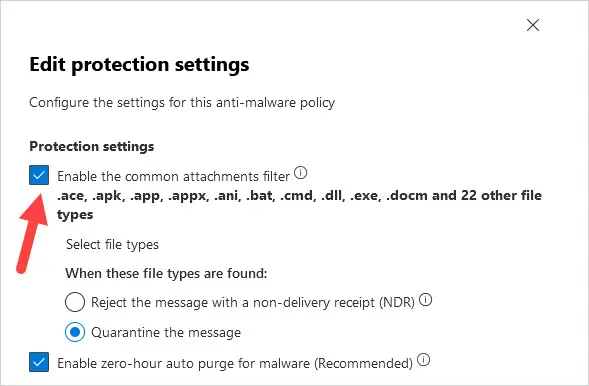
4. Click on select file types.
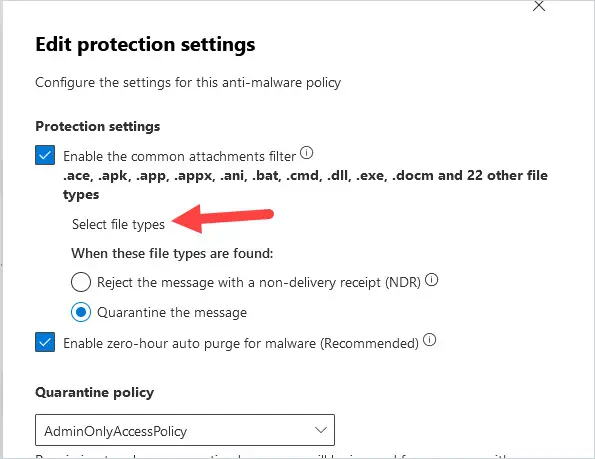
The list of files that Microsoft 365 blocks will be displayed.
To add to the list, type in the file extension, without the . in front of it, you want to block. For example, I’m adding htm. As you can see, all file extensions with htm are returned.
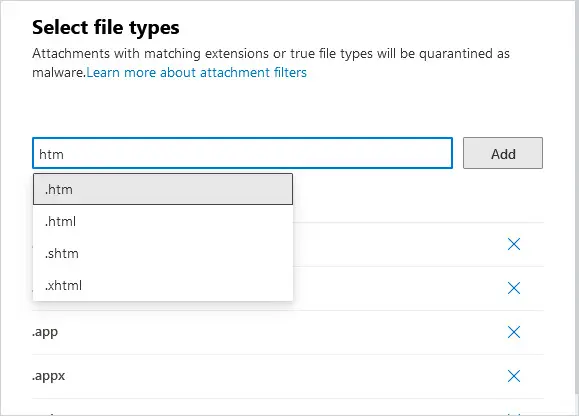
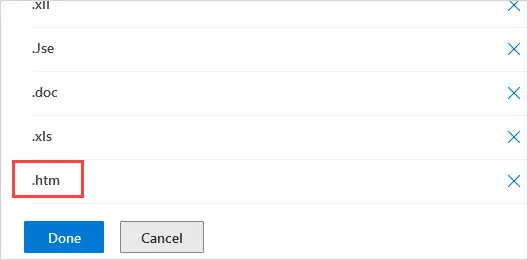
5. Select the file type from the list and click Add. I selected .htm and clicked Add. I also recommend blocking .html file attachments. The file type will go to the bottom of the screen. Click on Done.
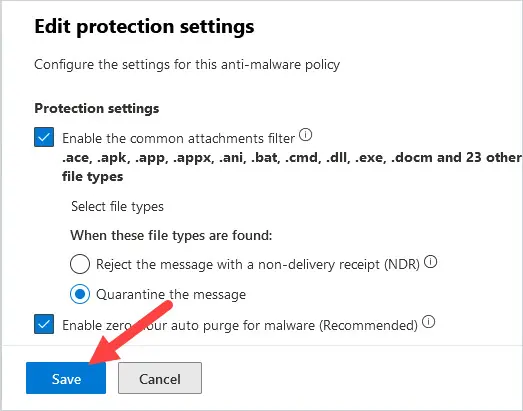
6. Be sure to click Save back on the Protection Settings screen. It could take a few hours before the changes take effect.
Block File Attachments using a Transport Rule
You can use a Transport Rule to block files by file extension. I like this option because it allows you to send a message to the sender on why the file was blocked and give further directions. This comes in handy when blocking .doc and .xls files because even though they are older file formats, they are still widely used.
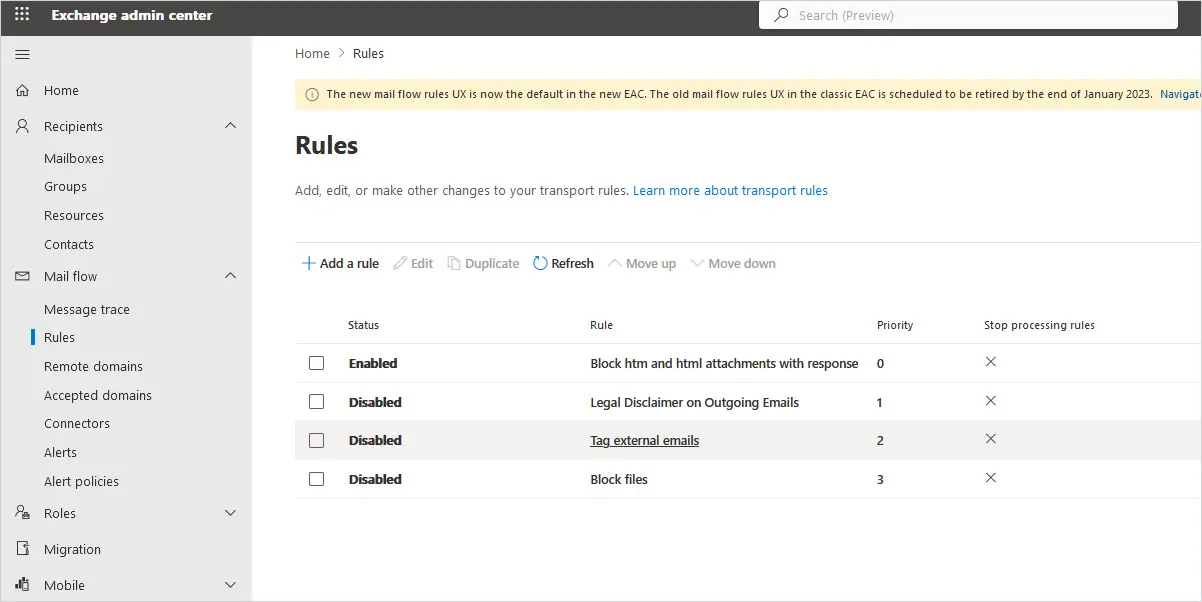
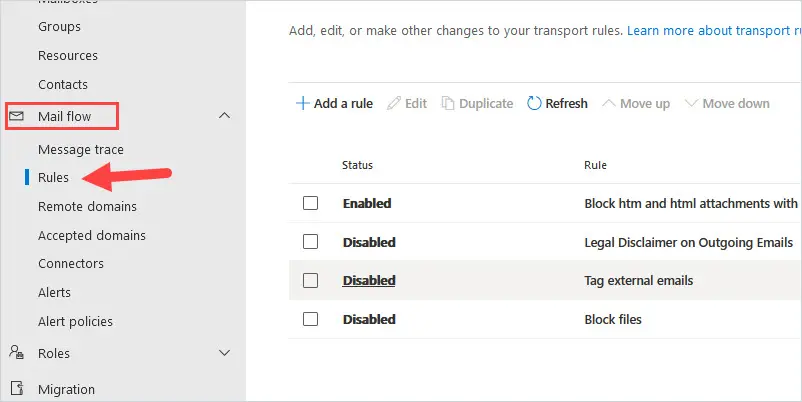
1. Log into Exchange Admin Center
Under Mail flow click on rules.
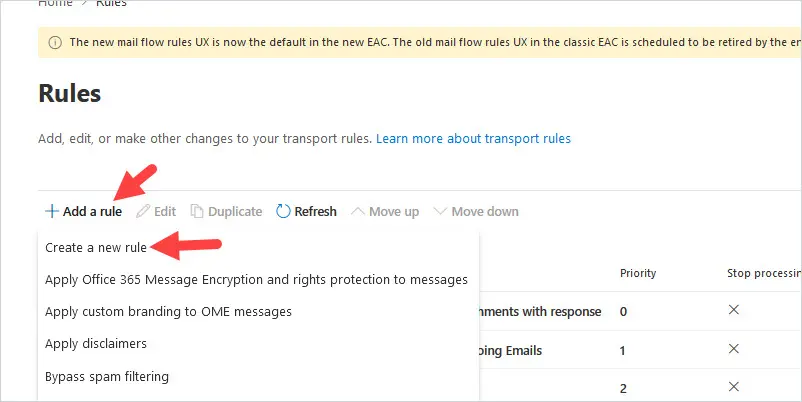
2. Click on Add a rule then click Create a new rule
The rule conditions will be displayed.
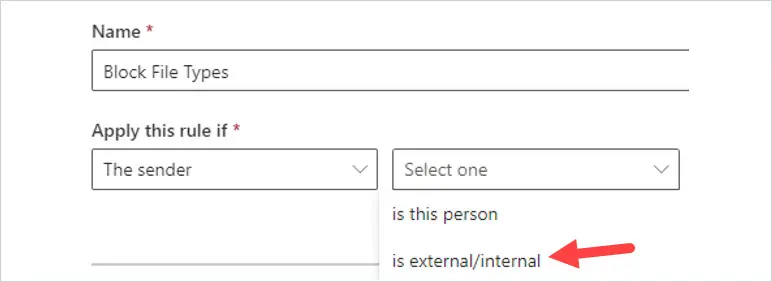
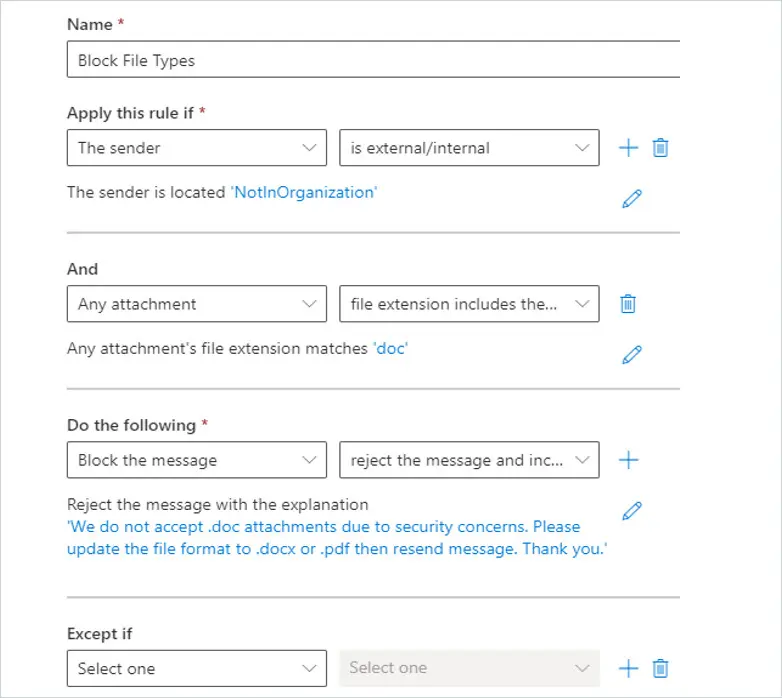
For the name, select a very intuitive name. In this case, I’m going to enter Block File Types.
Where it says Apply this rule if, select “The Sender” and then select is “external/internal”
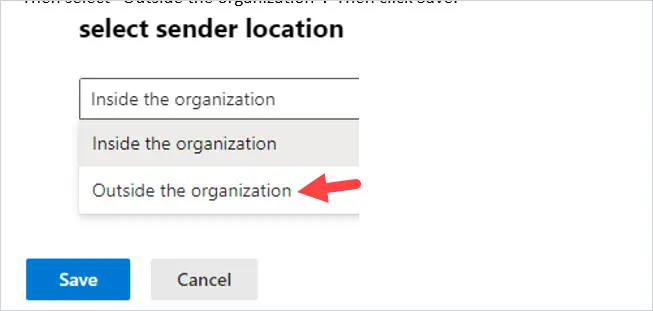
Then select “Outside the organization”. Then click Save.
To the right of Apply this rule if, click the + sign.

Another condition will be added below under And.
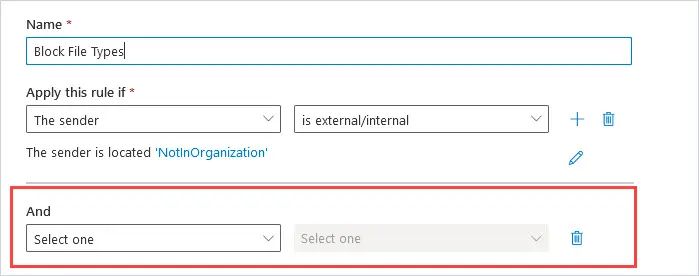
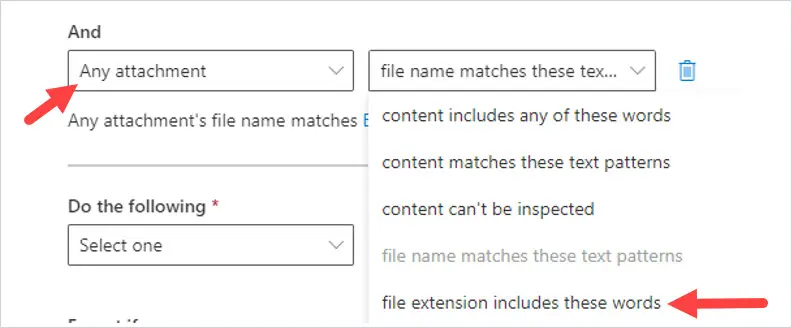
Under the And, Select “Any attachment” and then select “file extension includes these words”
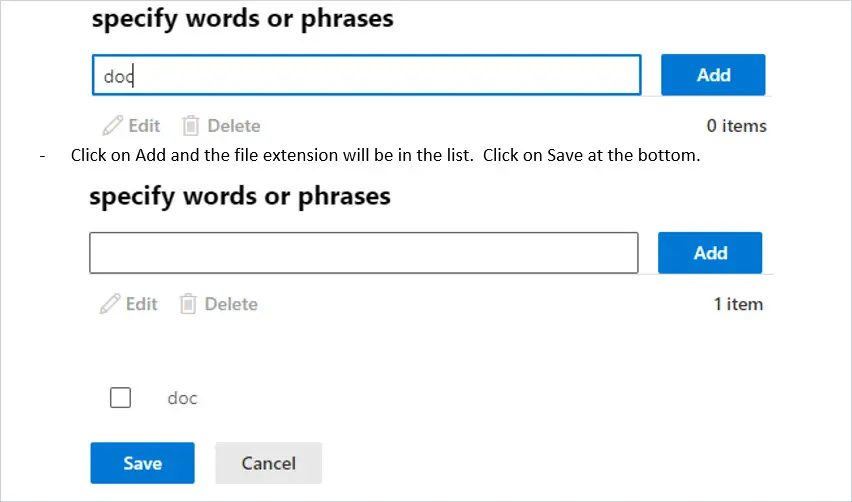
On the specify words or phrases, enter in the file types you want to block. In this case, I’m going to block .doc file extensions. So I enter in doc to block old Word documents.
Next, you want to choose what happens when you receive a file with the extension. Under Do the following, select Block the message. I want to enter a reason for the rejection so I’m going to choose to reject the message and include an explanation.

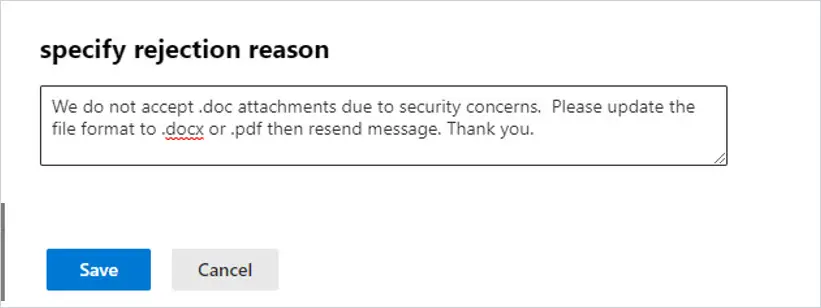
After selecting reject the message and include an explanation, the specify rejection reason will open. You can enter a short message that the sender will receive, example message below, and click Save.
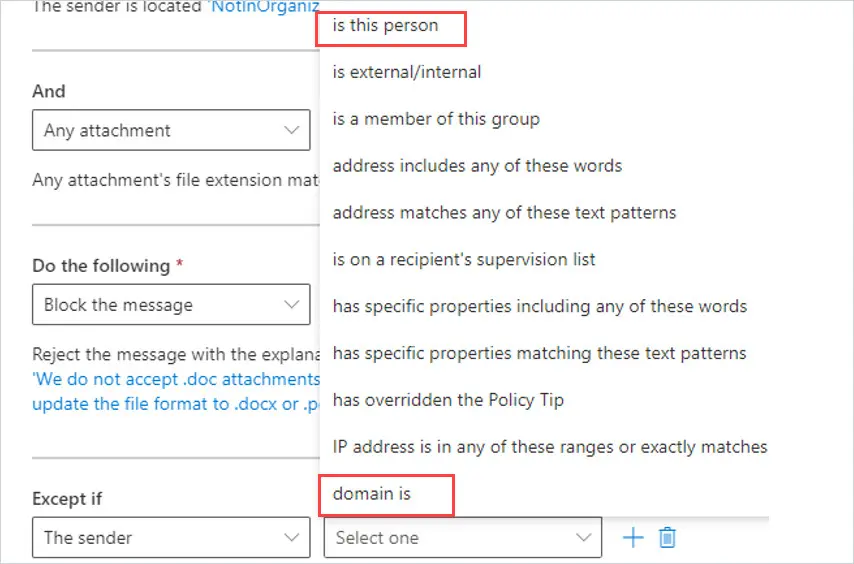
You can add an exception if you want to allow external trusted senders. Modify the Except if section.

You can select The Sender and choose domain is or is this person.
The final settings in the rule will look like below:
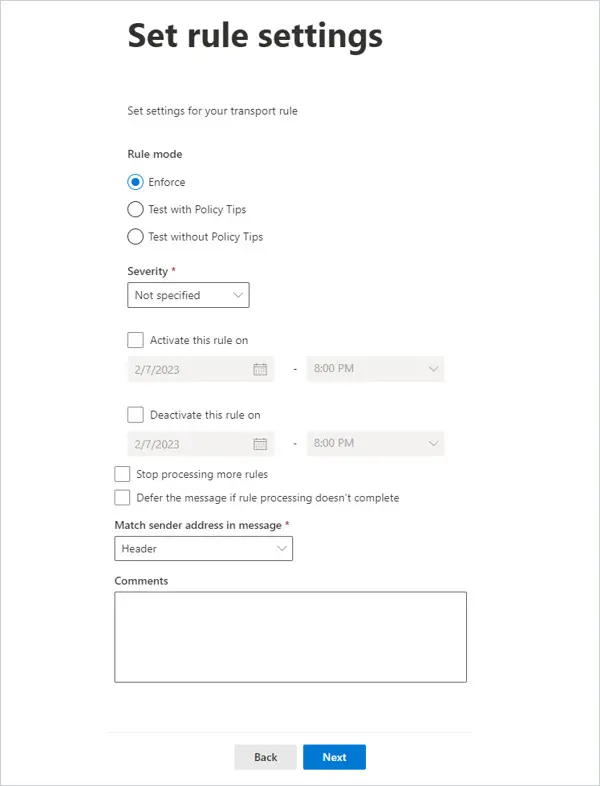
Click Next. The set rule settings page will be displayed. You can leave all settings as default. Click Next.
The review and finish page is displayed. Click on Finish at the bottom.
Now you need to enable the rule.
Go back to the Mail flow -> Rules page and click on the rule you just created.
Toggle Disabled to Enabled.
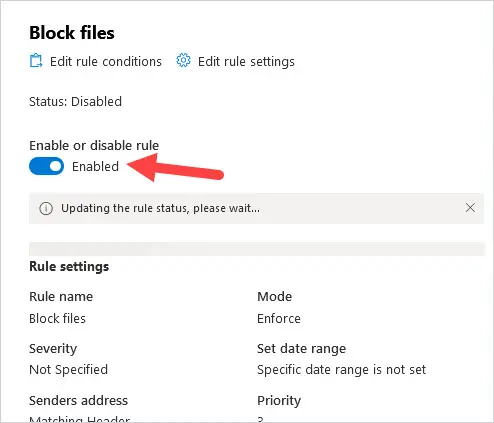
It could take a few hours before the rule completely blocks the file types.
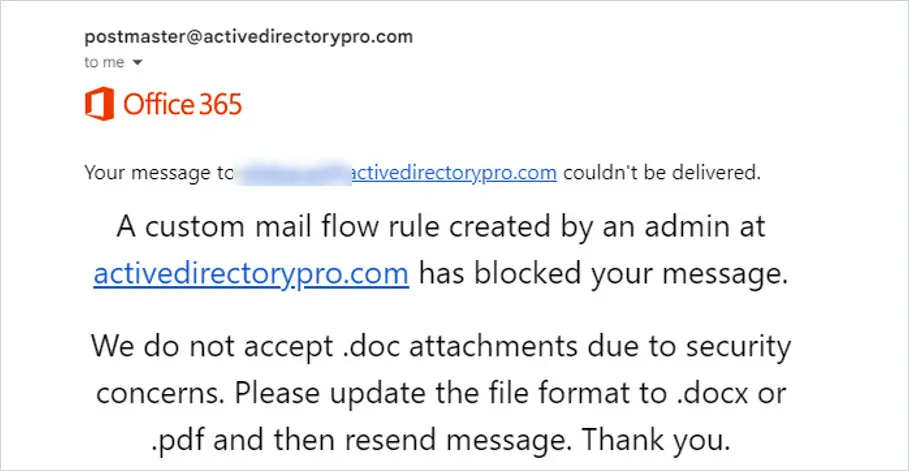
The external sender will get a message that looks like the below when sending a message that includes a blocked attachment.
Add Files to Malware Filter using PowerShell
1. Connect to Exchange Online
2. Use the cmdlet Get-MalwareFilterPolicy to see what policies you have and display the settings.
Get-MalwareFilterPolicy
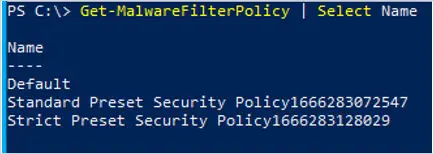
In this example, use cmdlet Get-MalwareFilterPolicy to see only names of Malware Policies
Get-MalwareFilterPolicy | Select Name
3. Use the cmdlet Set-MalwareFilterPolicy to modify a Malware Policy
In this example, common attachment blocking is enabled in the Default Malware policy.
Set-MalwareFilterPolicy -Identity Default -EnableFileFilter $true
In this example, we add a file type “doc” to the Malware Policy Default using the variable $AddFileTypes
$AddFileTypes = Get-MalwareFilterPolicy -Identity Default | select -Expand FileTypes
$AddFileTypes += "doc"
Set-MalwareFilterPolicy -Identity Default -FileTypes $AddFileTypes

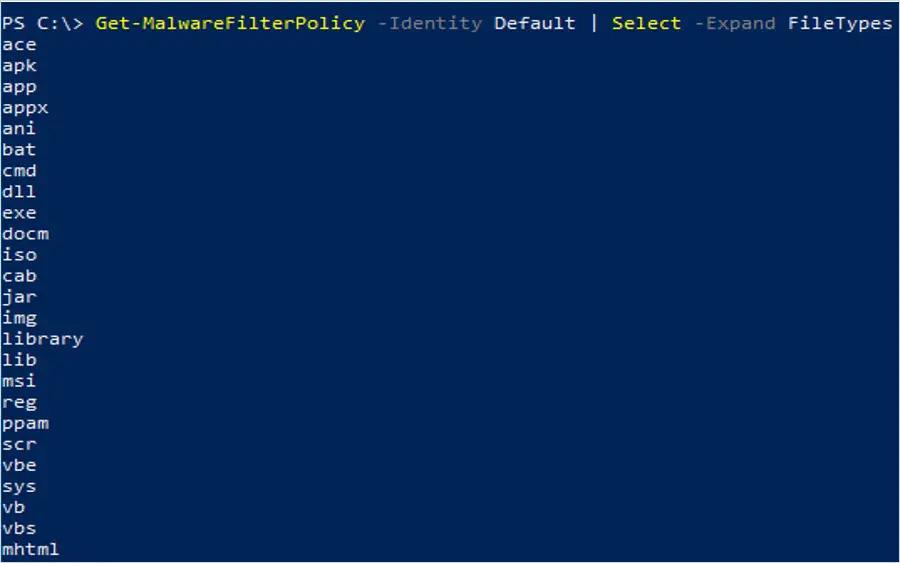
In this example, we view the file types blocked in Malware Policy Default
Get-MalwareFilterPolicy -Identity Default | Select -Expand FileTypes
Add Transport Rule using PowerShell
1. Connect to Exchange Online
2. Use cmdlet New-TransportRule to create a Transport rule
In this example, a new transport rule called “Block xls files” is created. File extension xls is blocked with a return explanation to the sender. The rule only applies to senders outside the organization. Rule is enabled.
New-TransportRule "Block xls files" -SentToScope NotInOrganization -AttachmentExtensionMatchesWords "xls" -RejectMessageReasonText "We do not accept xls files due to security concerns." -Enabled $true

In this example, we create a rule called “Block doc files” from senders outside the organization and delete the message.
New-TransportRule "Block doc files" -SentToScope NotInOrganization -AttachmentExtensionMatchesWords "doc" -DeleteMessage $true

3. Use the cmdlet Set-TransportRule to modify an existing Transport Rule.
In this example, files doc and docm are blocked.
Set-TransportRule -Identity "Block doc files" -AttachmentExtensionMatchesWords "doc","docm"
4. Use the cmdlet Remove-TransportRule to delete a Transport Rule.
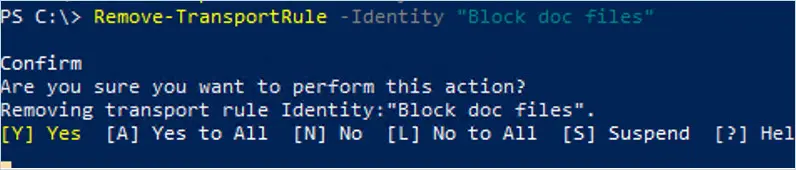
In this example, Transport Rule “Block doc files” is deleted
Remove-TransportRule -Identity "Block doc files"
Recommended File Types to Block
While Microsoft blocks a lot of dangerous files, the malware and phishing threats are dynamic. Adapting to this is always a challenge. Just a few years ago, .doc files were still considered safe. Not anymore with them being the number one choice for being infected with ransomware.
ace, ani, apk, app, appx, arj, bat, cab, cmd, com, deb, dex, dll, docm, elf, exe, hta, htm, html, img, iso, jar, jnlp, kext, lha, lib, library, link, lzh, macho, msc, msi, msix, msp, mst, pif, ppa, ppam, reg, rev, scf, scr, sct, sys, uif, vb, vbe, vbs, vxd, wsc, wsf, wsh, xll, xz, z
Many antivirus and security agencies recommend blocking files xls and doc because they can execute code. These are still actively used all over the world. A lot of users don’t think about converting these to .xlsx and .docx files. Train your users to convert their old files to new versions of Word and Excel.
Consider blocking .htm and .html files as well. These are very dangerous but are still widely used.
Consider blocking compressed files such as .zip, .jar, and .tar because they can contain executables.
Ultimately, consider the risk factors carefully when making your decision to block files. If you can’t block specific files in your organization, consider only allowing dangerous files from trusted senders.