This is a guide to managing send on behalf and send as permissions with PowerShell in Office 365.
In this guide you’ll learn:
- Give Send on Behalf Permissions With PowerShell
- Get Send on Behalf Permissions with PowerShell
- Give Send As Permissions with PowerShell
- Get Send As Permissions with PowerShell
Tip #1 – A user delegated Send As permission is not allowed to open a mailbox to read the emails. It only allows the delegate given Send As permission to send emails as if they were the owner of that mailbox. The recipient of the email will not see a difference between the owner of the mailbox and the user that has been delegated to Send As the owner of the mailbox.
Tip #2 – A user delegated Send on Behalf permission is not allowed to open a mailbox to read the emails. It only allows the delegate given Send on Behalf permission to send emails on behalf of the owner of the mailbox. The recipient of the email will see a message Sent on Behalf of in the sender address. Refer to the article grant full office 365 mailbox permissions if you want the delegate to open the mailbox with full permissions.
Prerequisites: Minimum Office 365 Admin Role(s) needed to accomplish this task: Exchange Recipient Administrator
Give Send on Behalf Permissions With PowerShell
Step 1: Connect to Exchange Online
Refer to the article Connect to exchange online with Powershell if you need steps on how to connect.
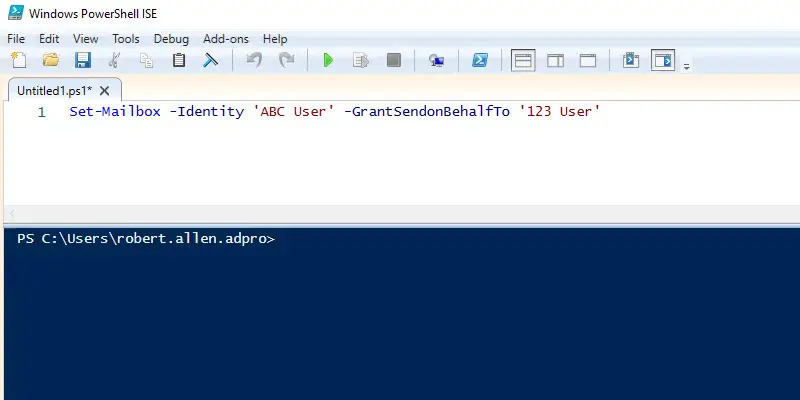
Step 2: Use the Set-Mailbox cmdlet
We will use the Set-Mailbox cmdlet to give Send on Behalf permissions. In the example below, we give the user ‘123 User’ Send on Behalf permissions to the mailbox ‘ABC User’.
Set-Mailbox -Identity 'ABC User' -GrantSendonBehalfTo '123 User'
Get Send on Behalf Permissions with PowerShell
To verify send on half permissions, you can use the Get-Mailbox cmdlet to view permissions. In the example below, we check the Send on Behalf permissions on the mailbox ‘ABC User’.
Get-Mailbox -Identity 'ABC User' | Format-List GrantSendonBehalfTo
Give Send As Permissions with PowerShell
Step 1: Connect to Exchange Online
Refer to the article Connect to exchange online with Powershell if you need steps on how to connect.
Step 2: Use Add-RecipientPermission
We will use the Add-RecipientPermission cmdlet to give Send As permissions. In the example below, we give the user ‘123 User’ Send As permissions to the mailbox ‘ABC User’.
Add-RecipientPermission "ABC User" -AccessRights SendAs -Trustee "123 User"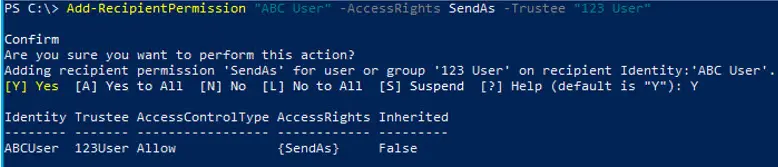
Get Send As Permissions with PowerShell
To verify the permissions, you can run the Get-RecipientPermission cmdlet to view permissions on the mailbox. In the example below, we check permissions on the mailbox ‘ABC User’.
Get-RecipientPermission "ABC User"
In my opinion, managing users mailbox permissions is much easier and faster with PowerShell. With the admin portal, it takes several clicks to accomplish what I covered in this guide.
Post your questions or comments below.
How can we identify that, who have Sendonbehalfof permission on a distribution group (via powershell)?
Get-DistributionGroup -Identity “DL@domain.com” | Select DisplayName, GrantSendOnBehalfTo
Thanks Sumeet, this command is exactly what I’ve been looking for.