In this guide, I will walk you through step by step how to convert a regular user mailbox to a shared mailbox.
I’ll show you how to convert a mailbox using the Exchange Admin portal and using PowerShell.
A Shared Mailbox is different from a regular user mailbox. It doesn’t need a user id and password to sign into the account. You give access to the shared mailbox via mailbox delegation. Also, shared mailboxes do not need an Exchange license unless the shared mailbox is going to be over 50 GB.
Reasons for converting a user to a shared mailbox:
- An employee left the company, but the email address is still needed, and you need to disable the account associated with it for security reasons.
- Several users need to manage the mailbox
Prerequisites:
- Minimum Office 365 Admin Role(s) needed to accomplish this task: Exchange Administrator
- The user mailbox must have a license assigned to it before you can convert it to a shared mailbox. After you convert it, you can remove the license.
How to Convert a User Mailbox to a Shared Mailbox via Exchange Admin Portal
1. Log into the Exchange admin portal https://admin.exchange.microsoft.com
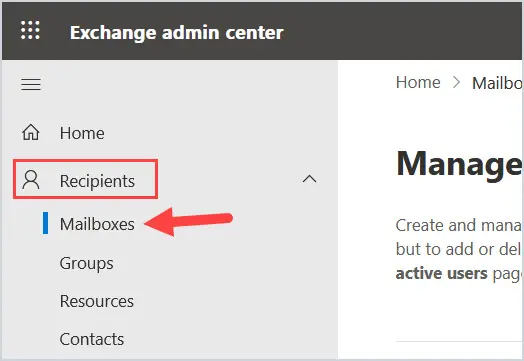
2. Click on Recipients and then Mailboxes.
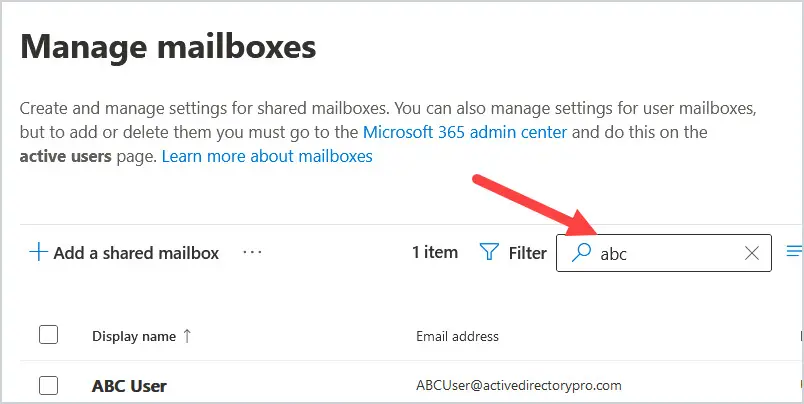
3. Search for the mailbox you want to convert to a shared mailbox in the search field and press enter. In this example, we are going to use the mailbox called ABC User.
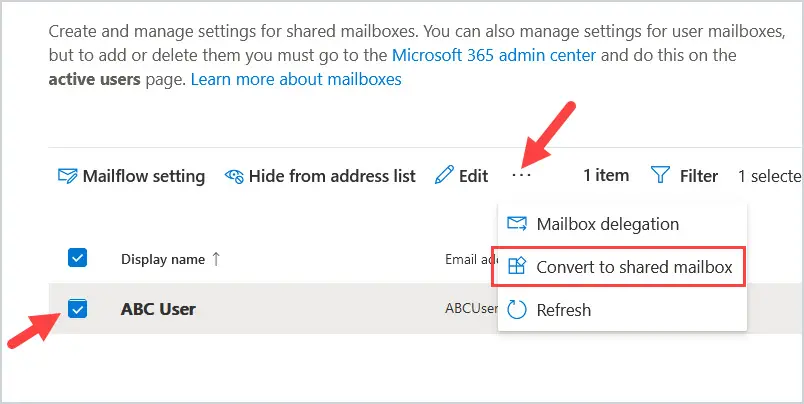
Click in the box to the left of the mailbox (ABC User in my case).
Above that, click on Convert to shared mailbox. You might need to click on … to view all the options.
4. It will prompt you to convert the mailbox from regular to shared. Click Confirm at the bottom.
5. It will give a status message that mailbox is being converted to shared mailbox. When it’s done, it will display Mailbox converted successfully.
6. Now if you look up ABC User again, it will show the Recipient Type as SharedMailbox.

Tip: If you have an associated account for the mailbox in Active Directory or Azure AD, you can now safely disable the account. Do NOT delete the account. Also, it would be wise to reset the password on the account if it is for an employee that is no longer with the company as the user id and password will still work to log into the account even after conversion.
How to Convert a User Mailbox to a Shared Mailbox using PowerShell
1. Connect to exchange online
Refer to the article Connect to exchange online with Powershell if you need steps on how to connect.
2. We are going to use the Set-Mailbox cmdlet to convert a user mailbox to a Shared Mailbox. The example below converts the mailbox 123 User to a shared mailbox
Set-Mailbox -Identity “123 User” -Type Shared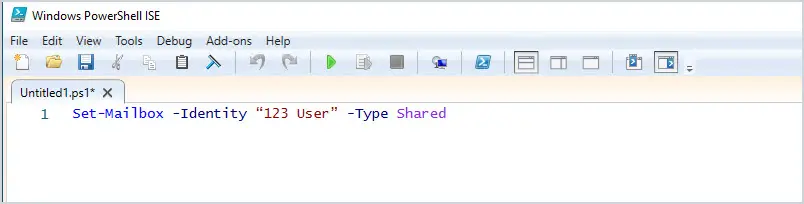
3. To verify this worked, you can pull the information on the mailbox using the Get-EXORecipient cmdlet. The RecipientTypeDetails field will show you what type of mailbox it is. The following example displays detailed information about the mailbox “123 User”
Get-EXORecipient -Identity “123 User” 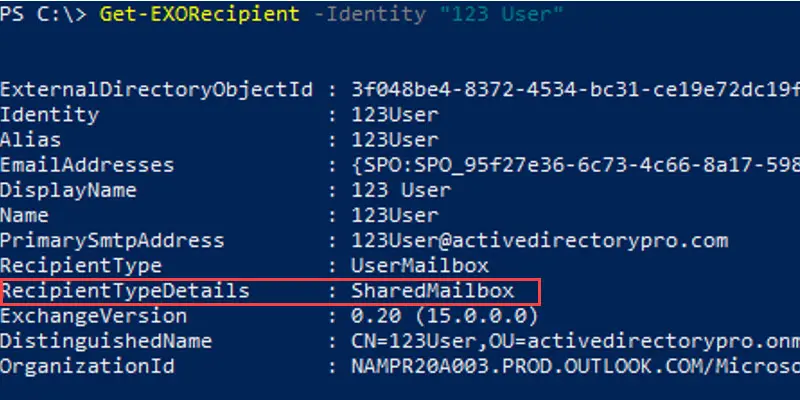
To narrow this down to just see the Recipient Type Details, which will show you the type of mailbox it is, use the Get-EXORecipient cmdlet. The example below pulls the Recipient Type Details field for the 123 User.
Get-EXORecipient -Identity "123 User" | Format-List RecipientTypeDetails