In this guide, you will learn how to disable the control panel access for specific users. I’ll also show you how to only show specific control panel items.
The control panel provides access to many different system settings. In a business network, you probably don’t want your users to have the ability to modify these settings. The good news is you can use group policy to restrict access to the items in the control panel.
Check it out!
How to Disable Control Panel for specific Users
In this example, I’m going to disable the control panel for all users in the Accounting OU.
Step 1. Create and Link a New GPO
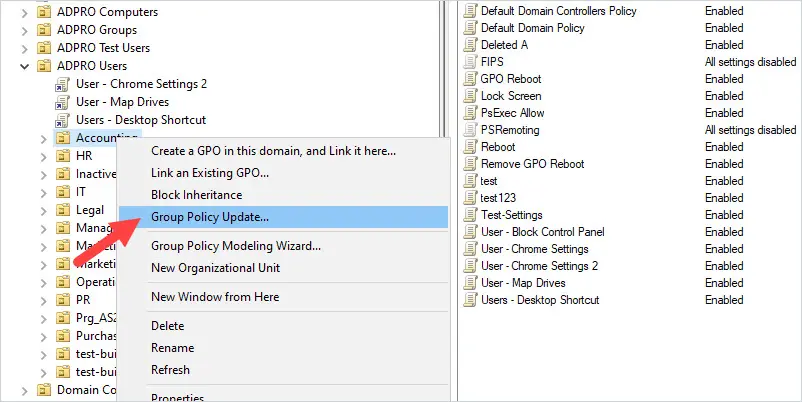
Open the group policy management console.
Browse to the OU, right click and select “Create a GPO in this domain, and Link it here”
Give the GPO a name. I will name mine Users – Disable Control Panel
Step 2. Edit the GPO settings
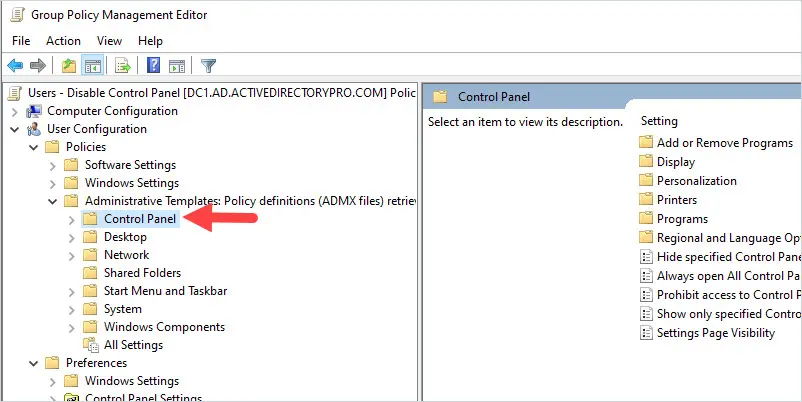
Now, right click on the newly created GPO and select edit.
Browse to User Configuration -> Policies -> Administrative Templates -> Control Panel
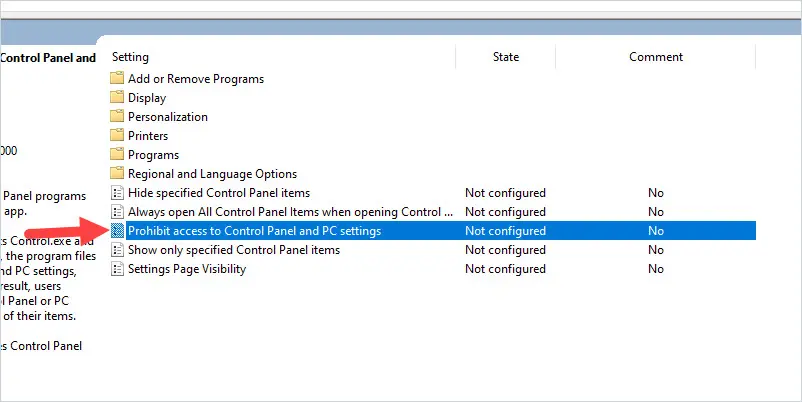
Click on “Enabled” to enable this policy. Then click on OK.
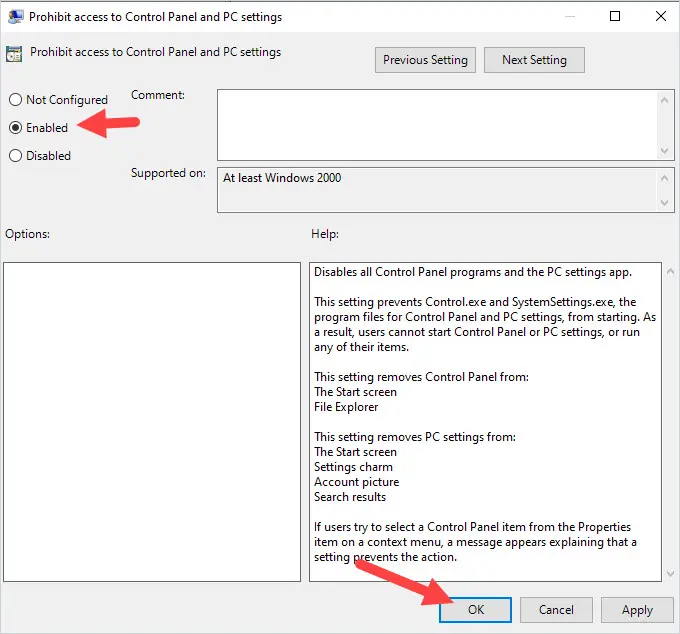
All done!
Now, I’ll log into a computer and verify that access to the control panel is blocked.
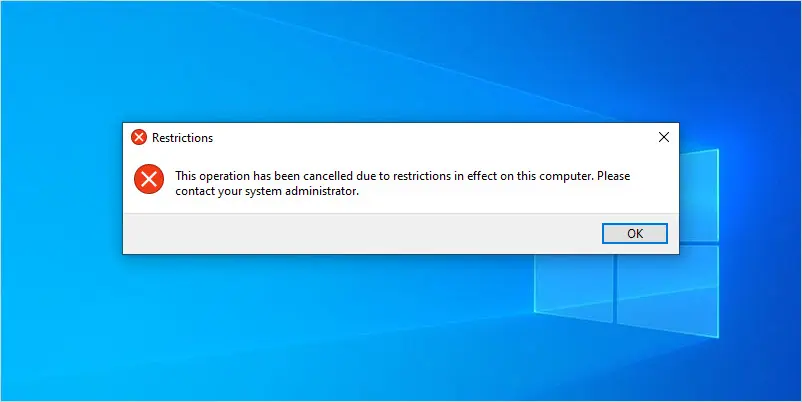
I’m logged into the computer as user “Alice Mills”, a user in the Accounting OU. When trying to access the control panel the user gets the below message.
If someone logs into the computer that is in a different OU such as the HR OU they would still have access to the control panel.
If you want to apply this policy to specific users that are in different OUs then you would need to use group policy filtering. To learn how to use GPO filtering see my group policy management guide and click on Lesson 5 – Group Policy Filtering.
Show Only Specified Control Panel Items
If you want users to have access to only specific control panel items follow these steps.
Step 1. Create and link a New GPO
Open the group policy management console.
Browse to the OU, right click and select “Create a GPO in this domain, and Link it here”
Give the GPO a name. I’ve called mine “User – Limit Control Panel Items”.
Create and link a new GPO and enable the Show only specified Control Panel items policy.
Step 2. Edit the GPO Settings.
Now, right click on the newly created GPO and select edit.
Browse to User Configuration -> Policies -> Administrative Templates -> Control Panel
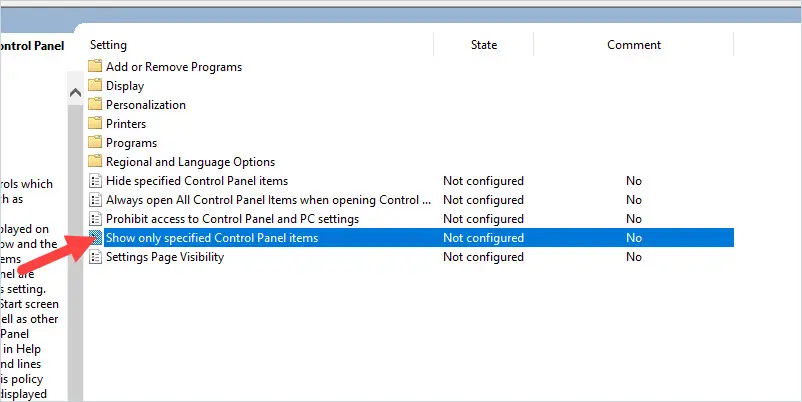
Next, open the policy “Show only specified Control Panel items”.
Click on Enabled.
Then click on the show button.
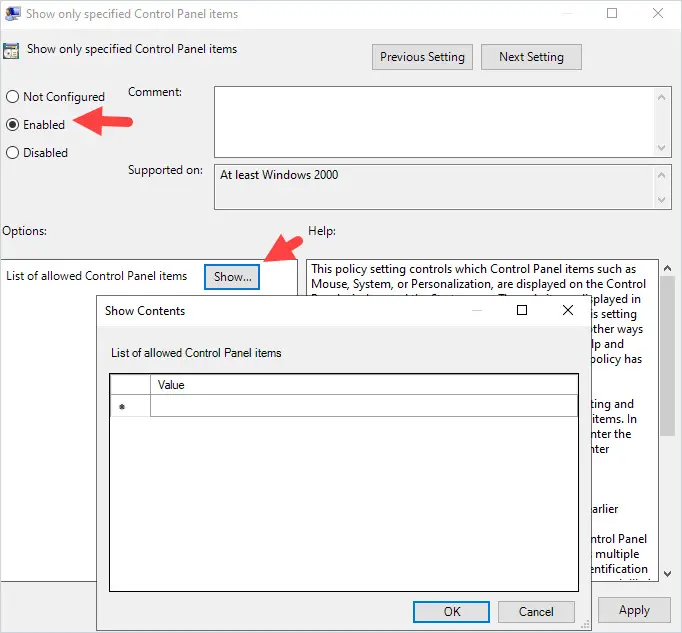
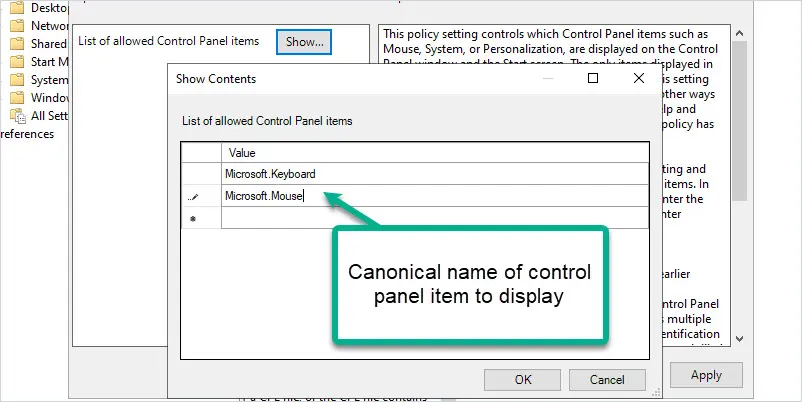
To display a control panel item you need to enter the control panel item’s canonical name.
For example, I want to only disable the keyboard and Mouse.
Refer to the Microsoft article Canonical Names of Control Panel Items to see a full list of canonical names.
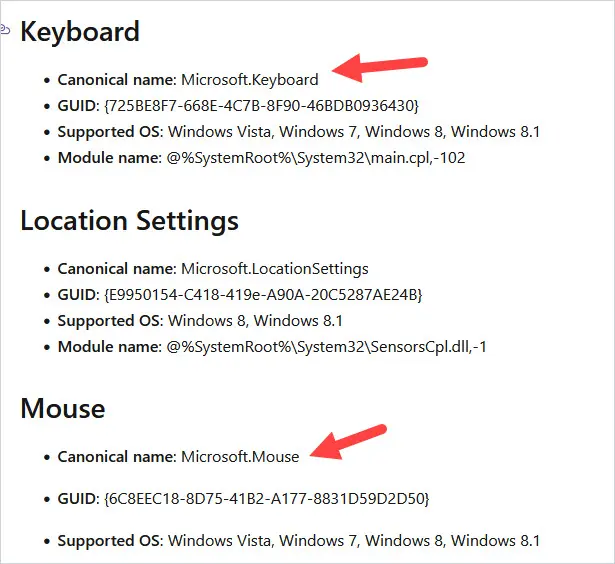
I’ll then enter the canonical names into the GPO settings.
Click ok and OK again when done.
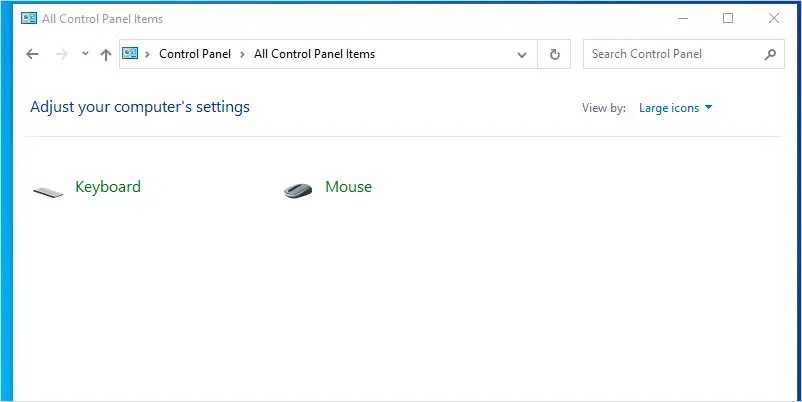
Now when the user opens the control panel they will only have access to the items listed in the GPO.
In the below example, the user Alice Mills from accounting only has access to the keyboard and mouse control panel items.
I hope you enjoyed this article. If you have questions or comments, post them below.