In this guide, you will learn how to install and configure Microsoft LAPS.
Microsoft Local Administrator Password Solution (LAPS) is a free tool that randomizes the local administrator password on domain-joined computers. It is the best way to ensure the local admin account has a unique password and is changed on a regular basis.
Having the same local admin password on all computers is a huge security risk. This means if the local admin password is stolen on one computer then all computers may be compromised. The best defense against this security issue is to have a unique local administrator password on each computer.
Topics in this article:
- Install Microsoft LAPS on Management Computers
- Install Microsoft LAPS on Client Computers
- Extend Active Directory Schema
- Set Computer Object Permissions
- Set User Rights (Allow Read Permissions of Stored Password)
- Group Policy Settings
- How to View the computers Password
Step 1: Install Microsoft LAPS Software on Management Computers
The LAPS software needs to be installed on both management computers and client computers. The management features will be used to configure and manage LAPS.
You can install the LAPS management features on the domain controller or another domain-joined computer (such as windows 10 or 11).
1. Download the LAPS software from the link below.
https://www.microsoft.com/en-us/download/details.aspx?id=46899
Choose the download you want. I’m going to download the 64-bit version.
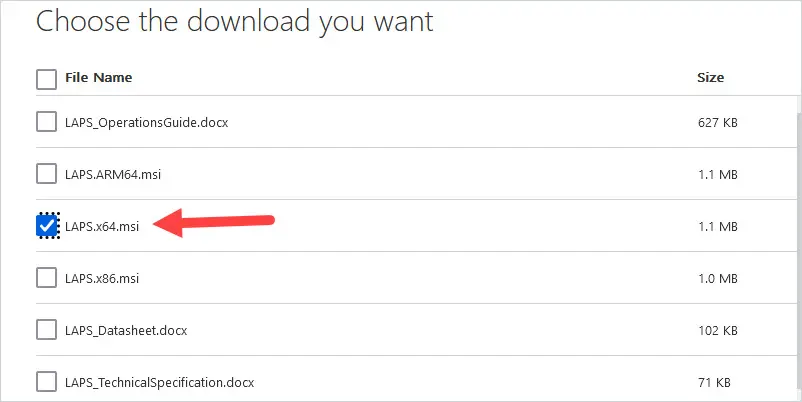
2. Double-click the file LAPS.x64.msi to start the installation.
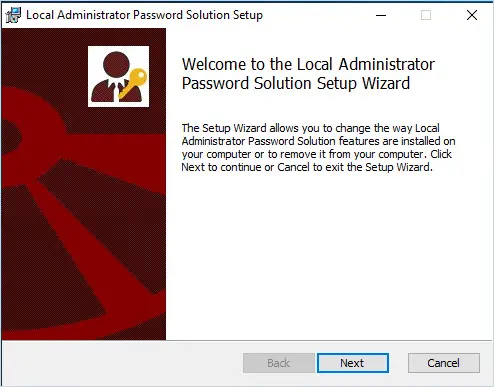
3. Click “Next” on the setup wizard screen.
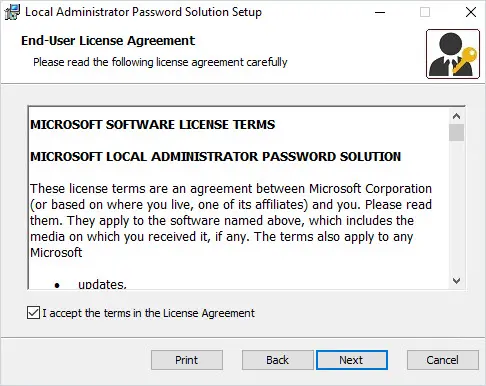
4. Accept the license agreement and click “Next”.
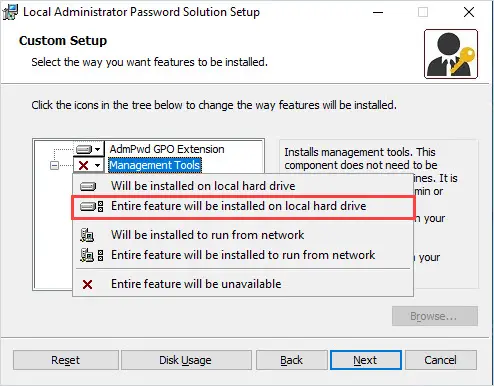
5. Install all features.
Click on Management Tools and select “Entire feature will be installed on local hard drive” and click “Next.
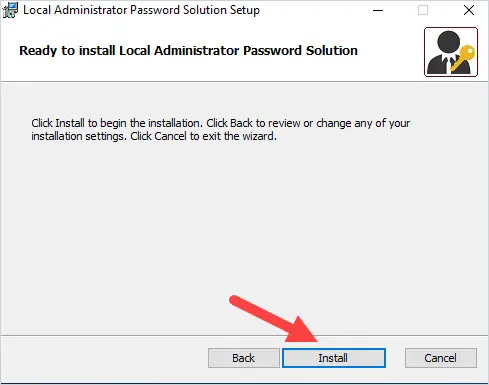
6. Click Install.
When the installation is complete click “Finish”.
That completes the LAPS software installation for the management computer. In step 3 we will come back to the management computer to complete the LAPS setup.
Step 2. Install Microsoft LAPS on Client Computers
The LAPS group policy client-side extension (CSE) will need to be installed on each computer. This is done by using the same installer file used in step 1 (LAPS.x64.msi).
There are many different ways to install the LAPS client software. If you want to deploy the software using GPO, refer to the article Deploy Software via GPO.
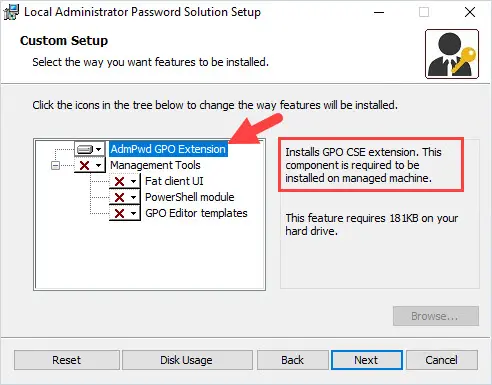
To manually install the client software, run the LAPS.x64.msi file and keep the defaults. The only feature that should be selected is the AdmPwd GPO Extension.
You can also deploy using a script, SCCM, PDQ, or any other software deployment program.
Here are the commands for deploying with a script.
msiexec /q /i \\server\share\LAPS.x64.msHere is an example of hosting the file on a file server.
msiexec /i \server\share\LAPS.x64.msi /quietStep 3. Extend Active Directory Schema
Microsoft LAPS uses two new attributes for the computer objects in Active Directory.
- ms-Mcs-AdmPwd – This attribute saves the computer’s administrator password.
- ms-Mcs-AdmPwdExpirationTime – This attribute saves the password expiration timestamp.
To enable these new attributes, the Active Directory schema needs to be extended.
Follow the steps below.
1. You will need to be logged on with an account that is a member of the Scheme admins group in Active Directory.
2. Run the two commands below:
Import-module AdmPwd.PS
Update-AdmPwdADSchema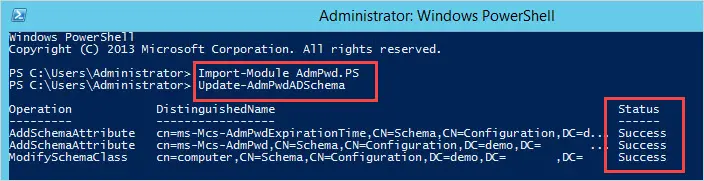
You should get a status of success like the screenshot above.
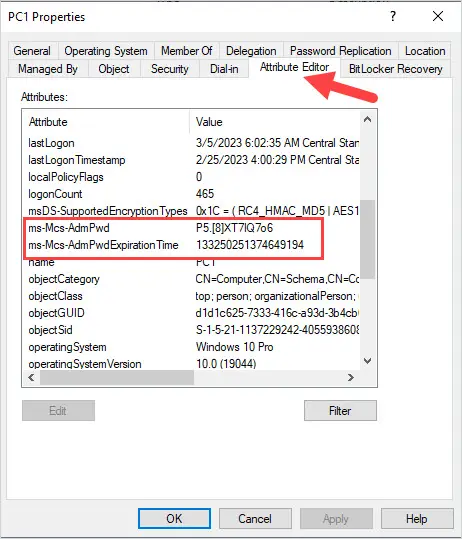
You should now see the two new attributes on a computer object. You can verify this by opening the attribute editor on a computer in Active Directory.
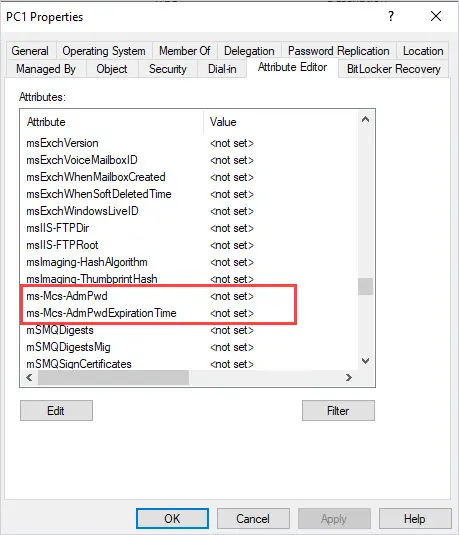
Currently, these attributes have no value but will be updated when the LAPS setup is completed.
Step 4. Set Computer Permissions
The write permissions on the ms-Mcs-AdmPwd and ms-Mcs-AdmPwdExpirationTime attributes need to be modified for the SELF built-in account. This is required so the computers can update the password and expiration timestamp of the local administrator password. This is done by using PowerShell.
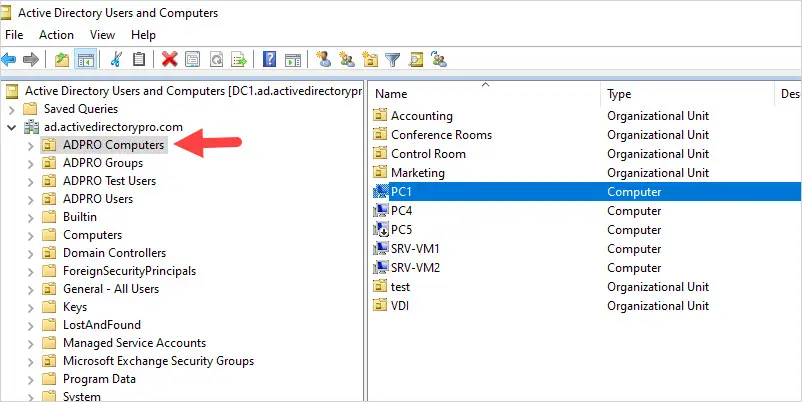
1. First, identify the OU that contains your computer objects.
For example, all of my computers are in the OU “ADPRO Computers”
2. Use the Set-AdmPwdComputerSelfPermission command to set the permissions.
Note: You may need to first run import-module ADMPwd.ps.
Set-AdmPwdComputerSelfPermission -OrgUnit "ADPRO Computers"In this example, I’m setting the permissions on the OU “ADPRO Computers”

You do not need to run this on sub-OUs.
Step 5. Set User Rights (Allow Read Permissions of Stored Password)
By default, only members of the Domain Admins group can read the stored password of the computer accounts. You can add additional users or groups with PowerShell.
In this example, I’ll add the group it_wrk_admins to have permission to view the local administrator’s password.
Open PowerShell and run the below command.
Set-AdmPwdReadPasswordPermission -Identity "ADPro Computers" -AllowedPrincipals "it_wrk_admins"To view which users or groups have permission, run the below command.
Find-AdmPwdExtendedRights -Identity "ADPro Computers"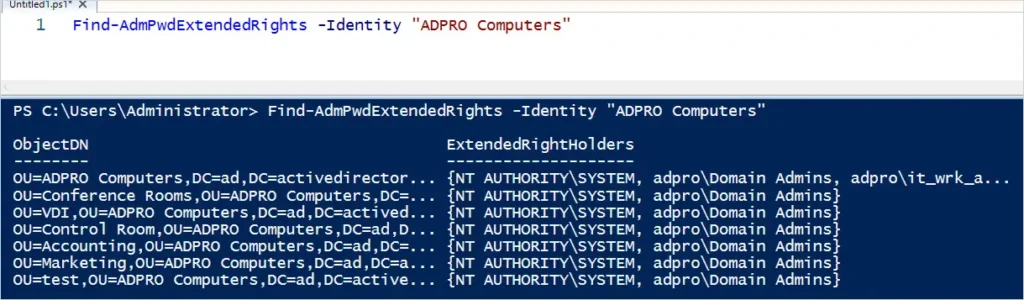
Above you can see the domain admins and the it_wrk_admins group has the extended rights permissions.
You only want to allow approved IT Admins to have permission to read the password. Regular users should not be allowed this access. Use the Find-AdmPwdExtendedRights command to see which users have the right to view the password.
Step 6. Group Policy Settings
The last configuration step is to create a group policy for the LAPS settings.
Tip: If you have a group policy central store configured you will first need to copy the AdmPwd.admx and AdmPwd.adml files from c:\Windows\PolicyDefinitions into your central store.
1. Open the group policy management console.
2. Create a new GPO on the OU that contains your computers.
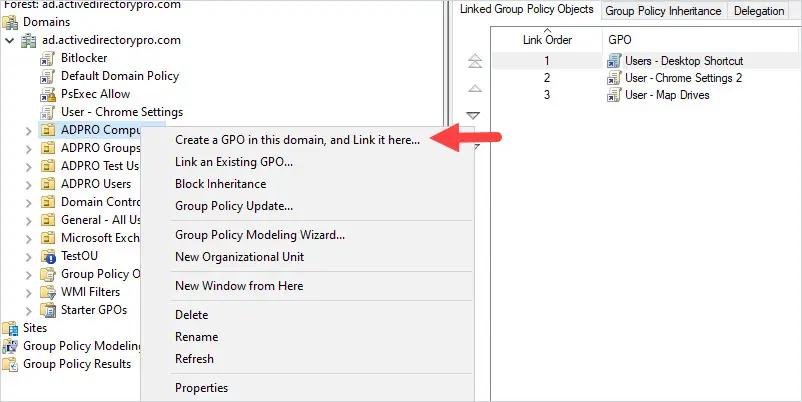
Give the GPO a name. I’ve called mine Computer – LAPS.
3. Edit the GPO
Browse to the following policy settings Computer Configuration -> Policies -> Administrative Templates -> LAPS.
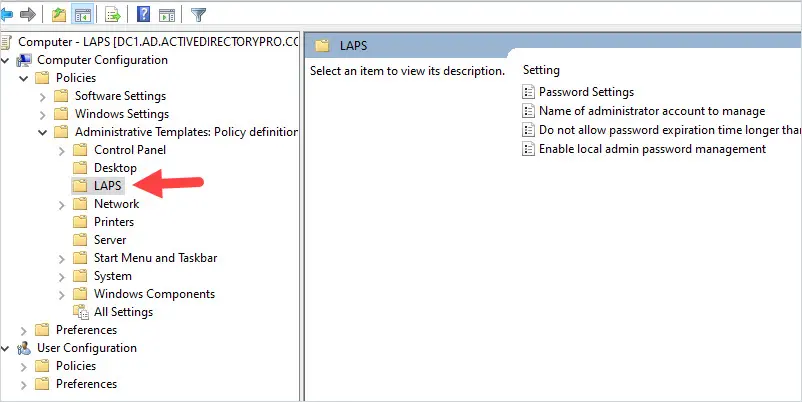
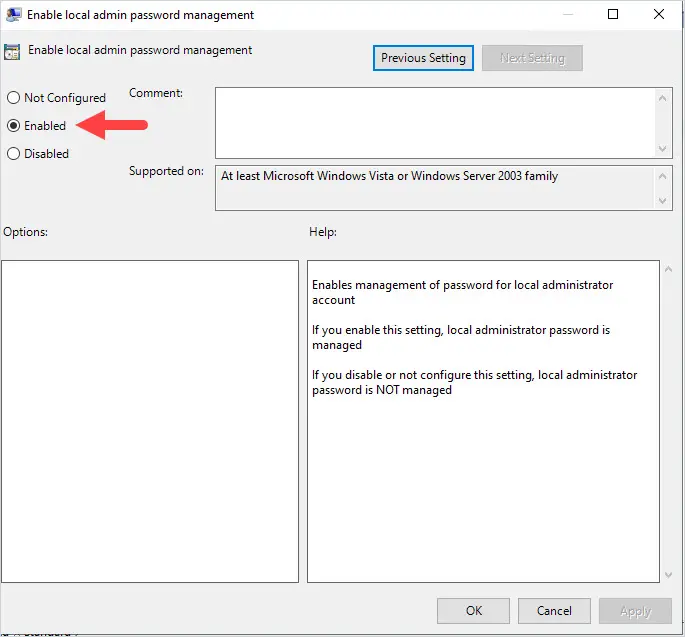
Click on the policy Enable local admin password management.
Click on Enable and then OK.
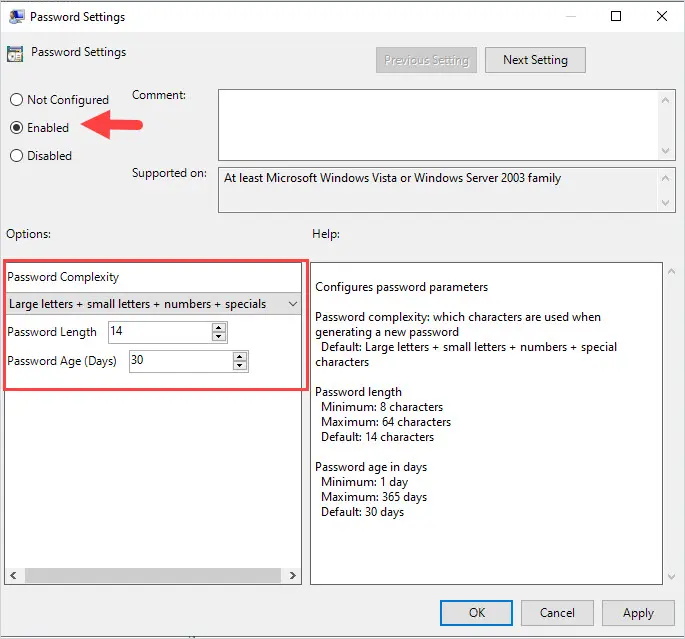
Click on the policy Password Settings.
Click on Enable. Then configure the password complexity setting and click OK.
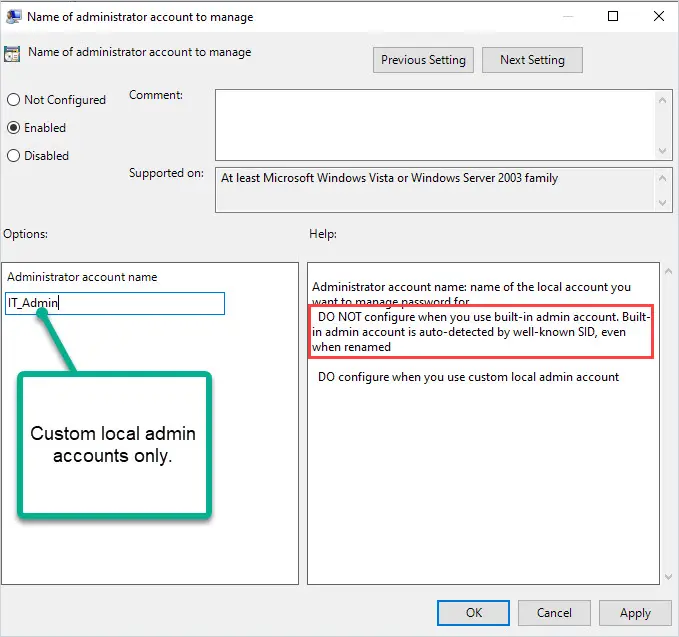
If you have a custom local administrator accounts you want LAPS to manage, you can enable the Name of administrator account to manage.
Tip. You do not need to configure this policy for the built-in admin account, even if you renamed it. This policy is only for custom local admin accounts.
For example, if I had a custom local admin account called IT_Admin I could use this policy to have LAPS manage it.
That completes the configuration steps of Microsoft Laps.
How to View the Local Administrator Password
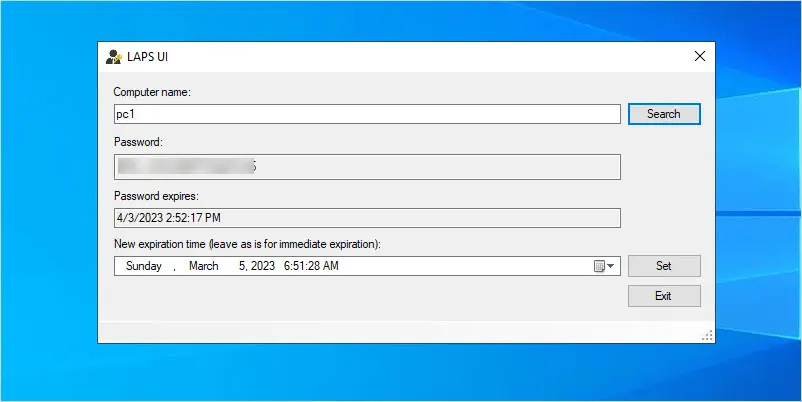
On your management computer open the LAPS UI program.
Enter a computer name and click search.
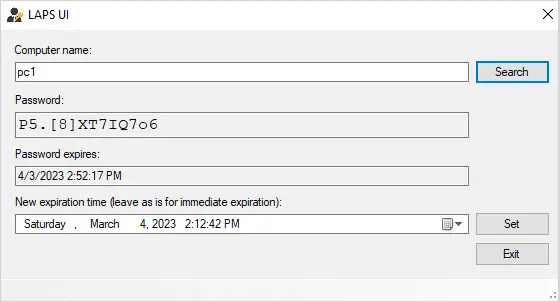
Above you can see the local administrator password for PC1 and when the password expires.
Using PowerShell.
Get-AdmPwdPassword PC1
You can also view the password in Active Directory by opening the computer and clicking on the Attribute Editor. The only issue with this is the password expiration is not in a readable format.
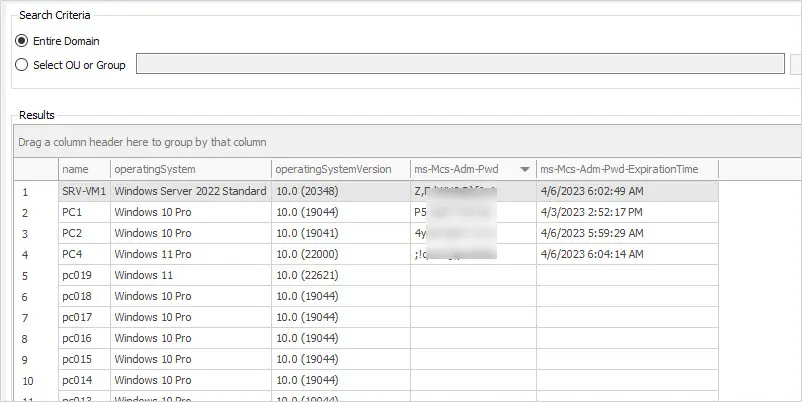
Another option is to use the AD Pro Toolkit. It includes a LAPS password report that will get the LAPS password on all computers. To run this report click on Reports -> Security -> LAPS passwords.
I hope you found this article helpful. If you have a comment please post it below.
Thanks. Very useful!
Greate Guide, Thanks!!
Hello Robert,
Great post and explanation.
Thanks for all !
Regards.
Alexandre
Great!, thanks for sharing your skills and knowledge