In this guide, I’ll walk you through how to deploy software using Group Policy. I’ll cover two methods, deploying MSI packages and EXE files. MSI deployments use the built-in software installation feature in Group Policy, while EXE deployments require a startup script. I’ll include step-by-step instructions for both methods.
Video Tutorial
If you don’t like video tutorials or want more details, then continue reading the instructions below.
Create a Network Share for the MSI Install File
The first step is to ensure you have a secure shared folder for the MSI file so users and computers can access it. The MSI files do not get copied to computers; they will run from a network share.
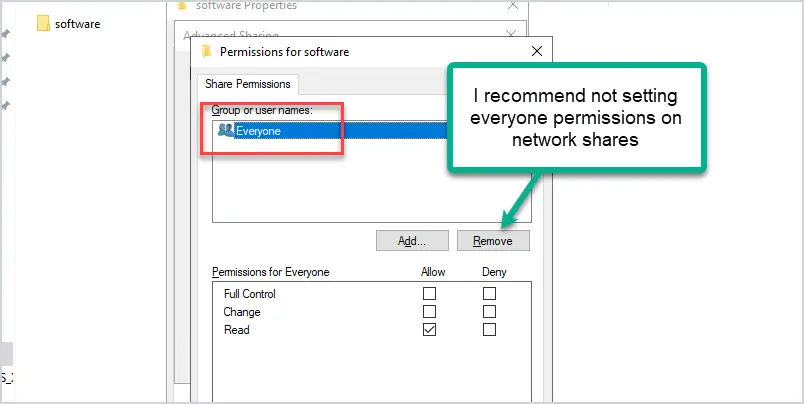
Tip: It is critical that you don’t set “everyone” permissions on your network shares. There is no need for this and it is just bad practice. This gives everyone on your network access to the shared folder including unauthenticated users. Also, this is how ransomware and viruses spread, as they are often programmed to look for UNC shares and attack the files and folders. Even if you set “READ ONLY” access, you are still giving everyone access to read the files in this directory. Again, this is just bad practice and can easily be avoided.
/end rant
Steps to create a secure network share:
Pick a server that everyone can access to configure the shared folder.
Right-click a folder, then click the sharing tab and advanced sharing.
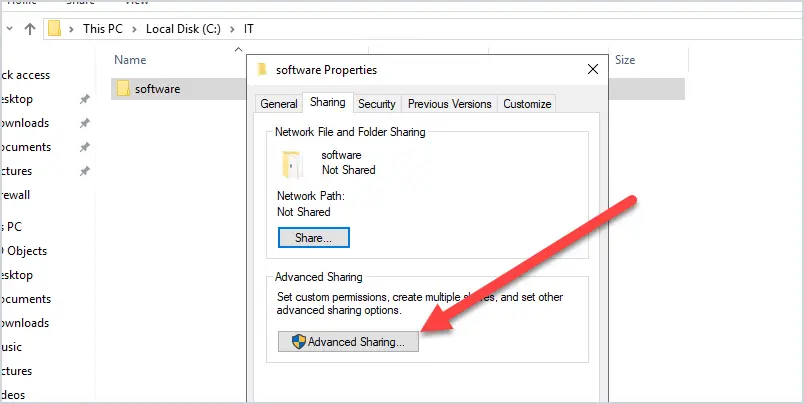
I’m using a 2019 Windows server. I created a folder called software to store the install files. You can name your folders anything you want.
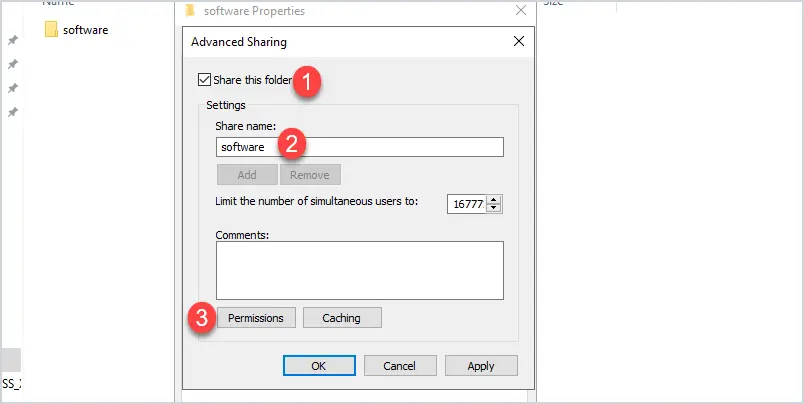
On the advanced sharing screen, click the box to share this folder. The share name can be anything you want, I’ve called mine “software”.
Now click the permissions button.
On the share permissions screen, remove everyone.
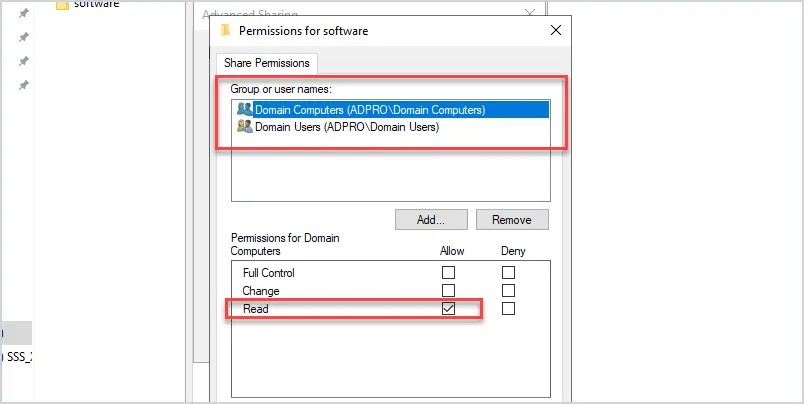
Now add domain computers and domain users and set the permissions to read. You can lock the permissions down to specific users and computers if needed by creating new security groups.
Click ok to get back to the properties page and click on the security tab.
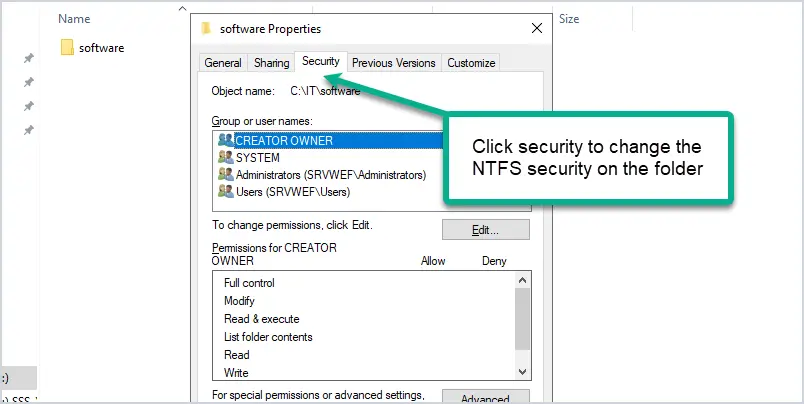
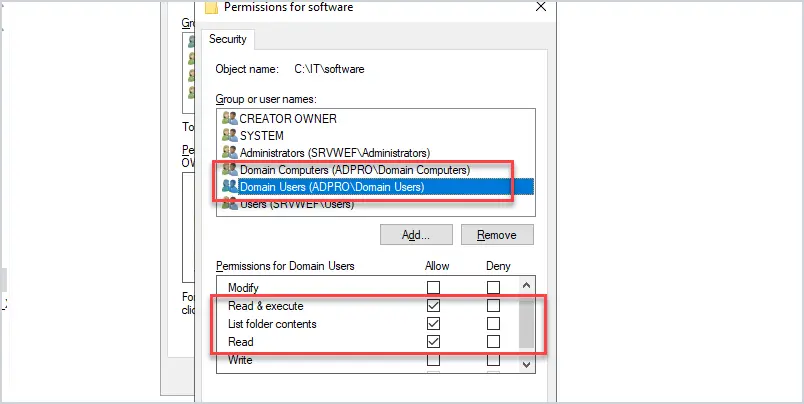
Make sure everyone is not listed, if so remove it.
Add domain users and domain computers and give them read & execute, list, and read permissions.
Ok, good job. The shared folder configuration is complete. Now copy the MSI install files to the folder you just created.
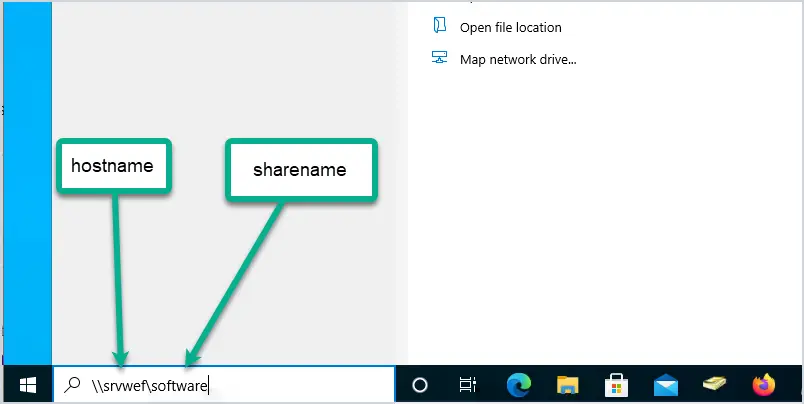
Test access to the network share on a remote computer. On the remote computer in the search box type the \\hostname\sharename. My server name is “srvwef” and the share name is “software”.
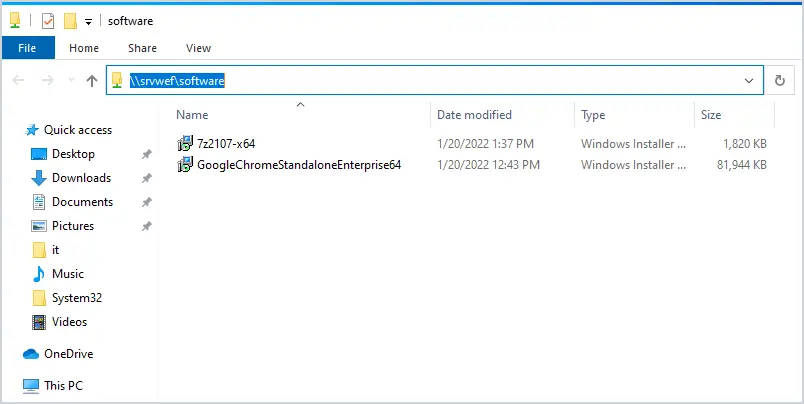
If you can access the share you should see a list of files.
That completes the network share configuration. The next section will configure the GPO for software deployment to computers.
Create GPO to Deploy Software to Computers
Group policy has settings for targeting computers and settings to target users. In this section, we will target computers for deploying software. This means the software install will be installed for anyone that logs into the computer.
I recommend creating a new GPO for the software install, do not add these settings to the Default Domain Policy.
In the group policy management console browse to the OU, right click and select “Create a GPO in this domain, and link it here”
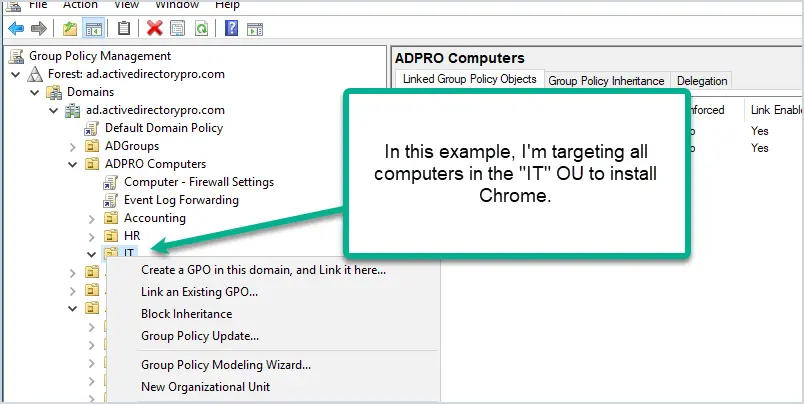
In this example, I’m going to install Chrome on all the computers in the IT OU, so I will create and link the GPO to the IT OU.
Give the GPO a name. I’ve named mine “Computer - Chrome Install”
Edit the new GPO:
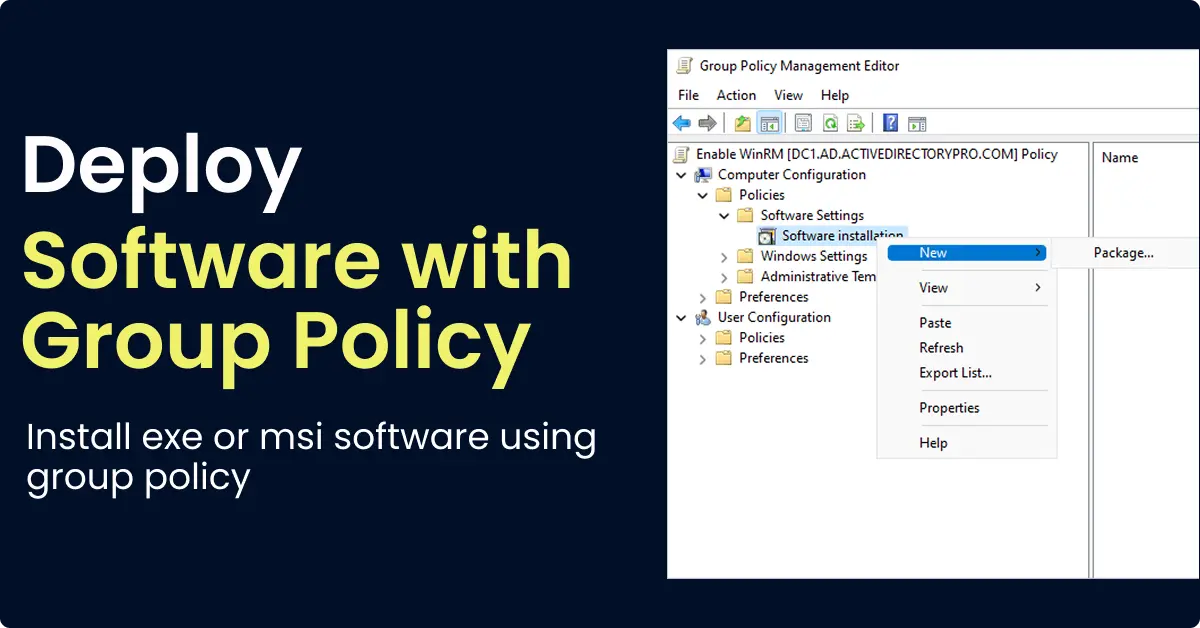
Computer Configuration > Policies > Software Setting > Software installation
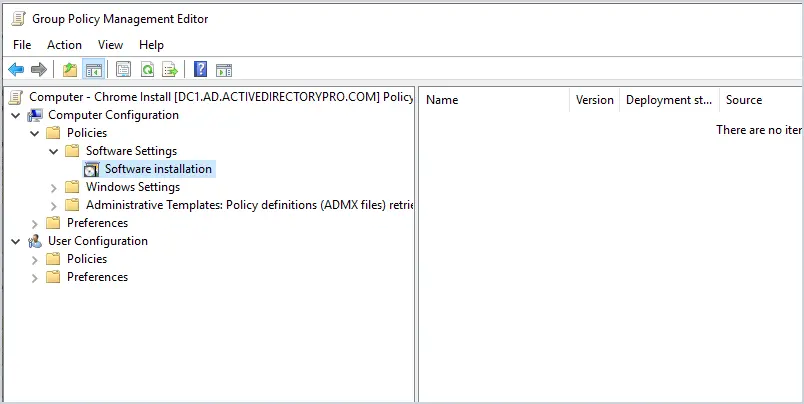
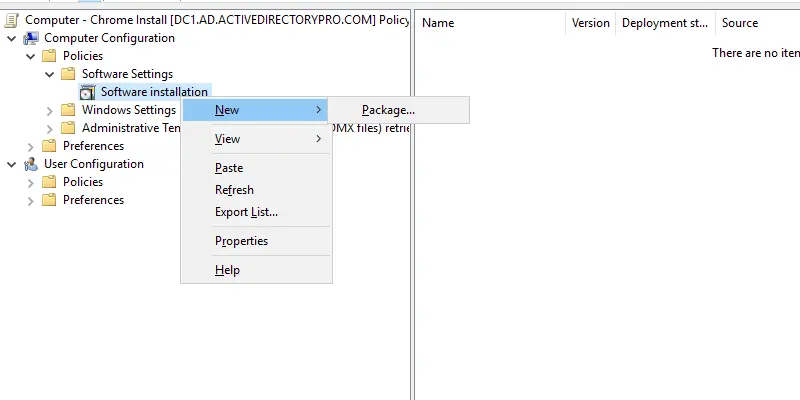
Right click Software installation and select New > Package
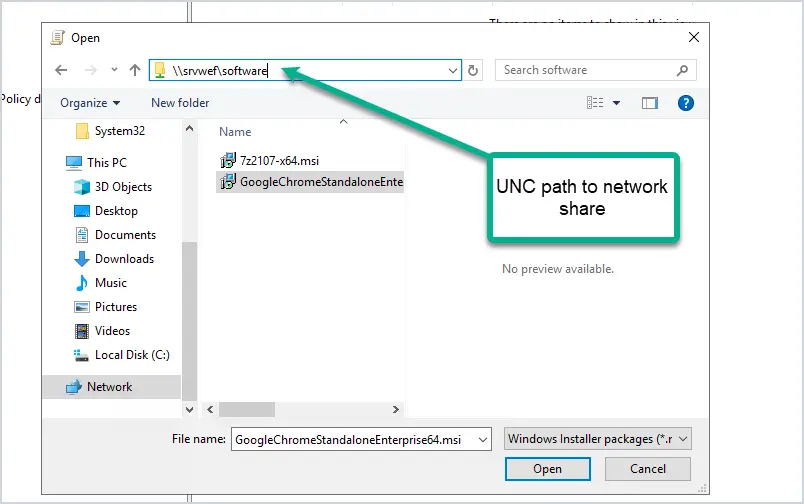
On the open screen browse to the network share using the UNC path, select the MSI you want to install, and click open. DO NOT browse using the local drives or the install will fail.
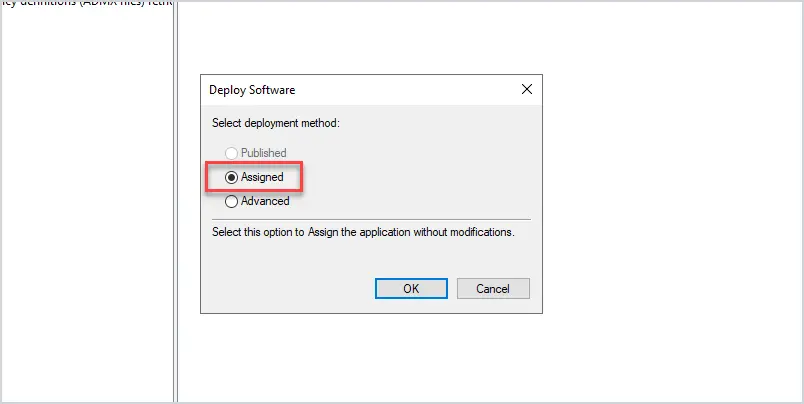
On the deploy software screen, click Assigned and then click Ok. Published will be grayed out as that option can only be used when deploying software to users.
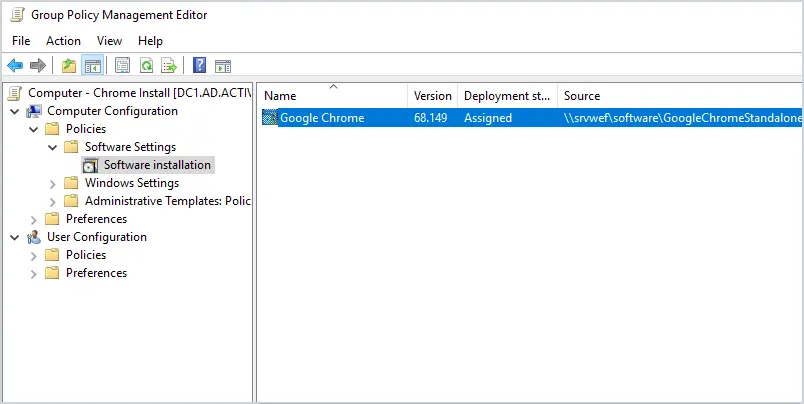
That completes the GPO configuration. The GPO settings should look like this.
The software will only install during a reboot and the computer must have its GPO settings updated. GPO settings will refresh automatically every 90 minutes.
To force the GPO settings you can use the gpupdate /force command.
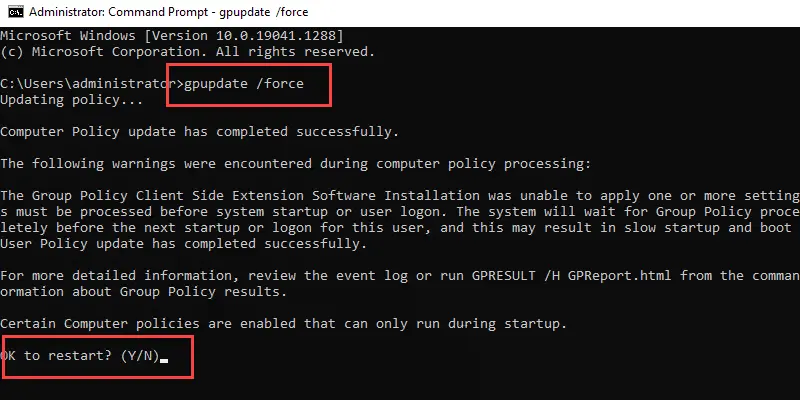
When you run the gpupdate command you will get a message saying one or more settings must be processed before the system start or user logon. This is referring to the software installed by GPO and is expected. Type Y to restart the computer.
The software will be installed on reboot.
When I log in I can see the Google Chrome icon on the desktop and that confirms the software installed.

That completes the steps on how to deploy software using group policy.
GPO Settings to Install Software to Users Only
If you want to install software to specific users just use the user configuration GPO settings instead of the computer.
This works differently than deploying to a computer.
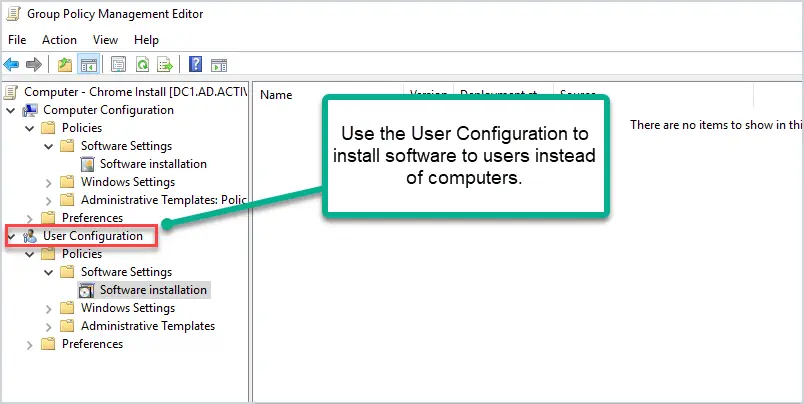
In my testing, the user configuration does not install the software automatically for the user. This is why I prefer to use the computer configuration for deploying software but everyone has different requirements.
Published vs Assigned Deployment Method:
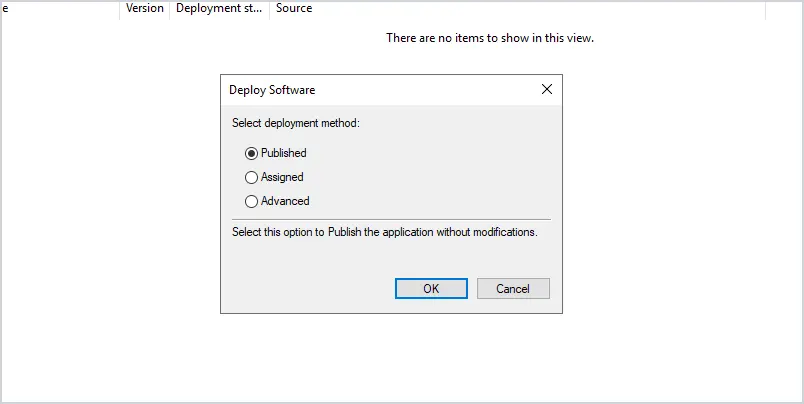
There is little to no documentation on this from Microsoft. From my testing, they seem to do the same thing. The only thing I see this does is add the software to the list of programs that can be installed from the network.
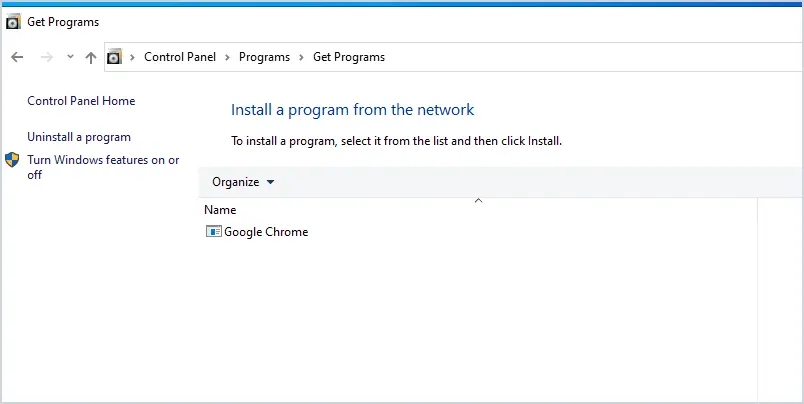
The user will need to click on Google Chrome from here and then the software will install. Some articles I found said the assigned option should put an icon on the desktop, then it will install when the user clicks the icon. This was not my experience.
Install exe software using Group Policy
Group policy software deployment does not support exe files. You will need to use a script and group policy to deploy software with an exe. I’ll show you these steps below.
I do not recommend this method as it will require the users to have administrator rights and the ability to run scripts. I strongly recommend against users having either of those rights. If you must deploy an exe with group policy then try to grant temporary rights, when the deployment is done remove the rights and ability to run scripts. The preferred method would be to use a 3rd party program that can securely install software on your remote computers. Those programs can be expensive, so I understand the desire to use free options. I’ve been there before and at times you have no choice due to a lack of funding or management constraints.
Step 1: Configure a PowerShell Script
First, you need to configure a script. The script needs to check if the program is already installed if not then install it, if already installed then do nothing. I’m using PowerShell but you could also use a batch file.
Here is the script I’m using:
#Script to install exe via GPO

$folder = 'C:\Program Files\7-Zip'

if (-not (Test-Path -Path $Folder)) {

    start-process -FilePath "\\srvwef\software\7z2107-x64.exe" -ArgumentList '/S'

    }

else  { }
Let me explain what each line does.
$folder = 'C:\Program Files\7-Zip'
The above line sets $Folder to the directory to check if it already exists. This will be used in the next line to determine if the program is already installed. Change the path to whatever program you want to check for.
if (-not (Test-Path -Path $Folder))
This line is testing if the path of $Folder does not exist. If it doesn’t exist then it will start the install process. If it does exist it will move to the else line and do nothing.
start-process -FilePath "\\srvwef\software\7z2107-x64.exe" -ArgumentList '/S'
This line starts the installation if the $Folder does not exist. I’m using a UNC path and the /S argument so it is a silent install. Users will need access to the location of the installer.
else {}
If the path of $Folder exists the script will move to this line and do nothing.
It’s a very basic script. You can modify it and add logging or other options. That is the nice thing about PowerShell you can customize it to your needs.
Save the script as this will be used in the next step. I saved my script as install.ps1
Step 2: Configure UNC Share
You need to have a secured distribution point for your EXE install file. It needs to be accessible for remote computers and users. I walked through on how to create a secure network share in the pervious tutorial for deploying an MSI file. Check it out if you need step by step instructions.
Step 3: Configure GPO Settings
Now let’s configure the group policy.
Create and link a new GPO to the OU containing your users. I’m going to add a new GPO to my Accounting OU.
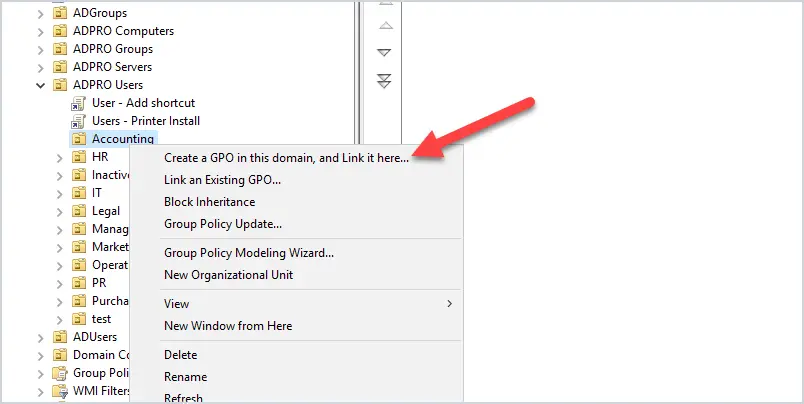
Give the GPO a name. Then edit the GPO
Navigate to User Configuration > Windows Settings > Scripts (Logon/Logoff)
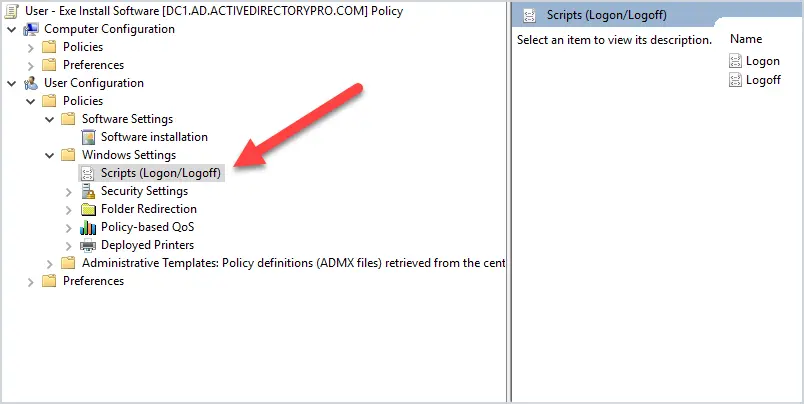
On the right side click on “Logon”.
Then click on PowerShell Scripts or Scripts if using a batch file.
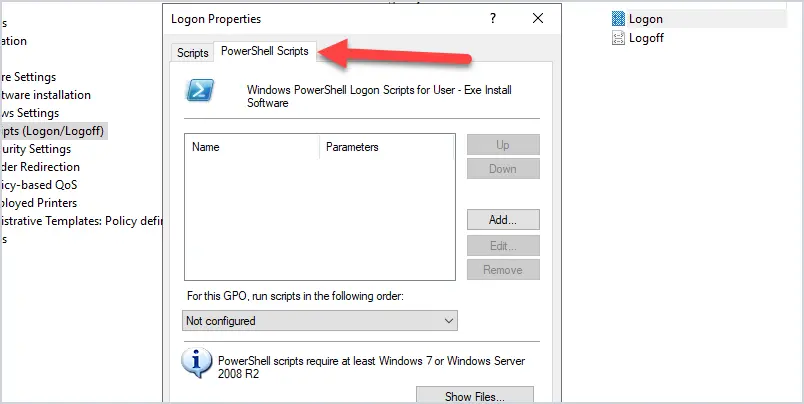
Click on the Add button, then click browse.
With the browser window open you want to copy and past the .ps1 file into this window. Do not modify the path, this is the path of the GPO, and the script needs to be copied into this path. Your path will look different than mine.
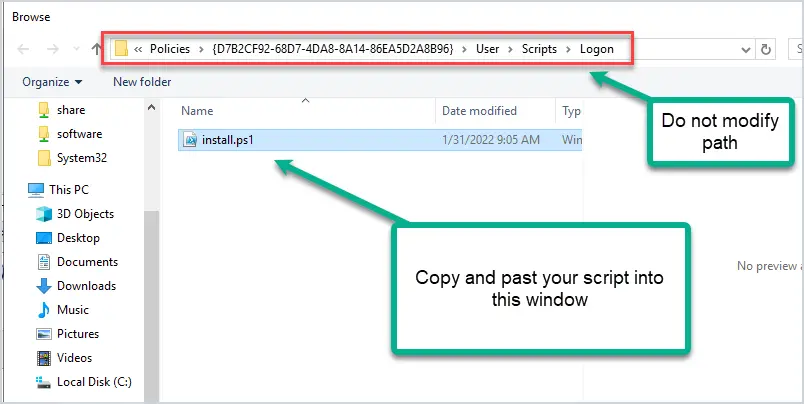
Click ok and ok again. You should be back at the main screen. This completes the GPO configuration.
Step 4: Reboot Computer
Now reboot, login and the software should install.
If the software is a silent install the user will not see anything when they login, it will install in the background with no user interaction. Unless you add some logging into the script you will not know if it installs are not. That is one drawback to using group policy to install the software. If this is a method you will use long term then I would add some logging to the script to help track for failed and successful installs.
Tips and Troubleshooting
Here are some tips to troubleshoot GPO software installation issues.
Tip #1 Check the event logs
On the computer that fails to install, check the system event logs for errors. This will provide details as to why the installation failed.
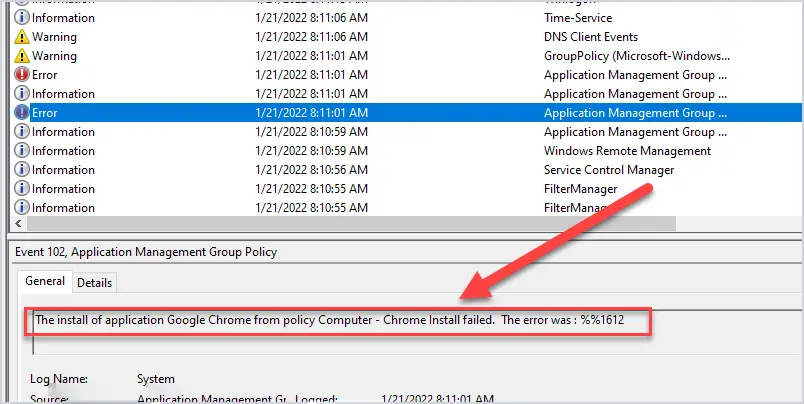
Tip #2 Display detailed messages at startup
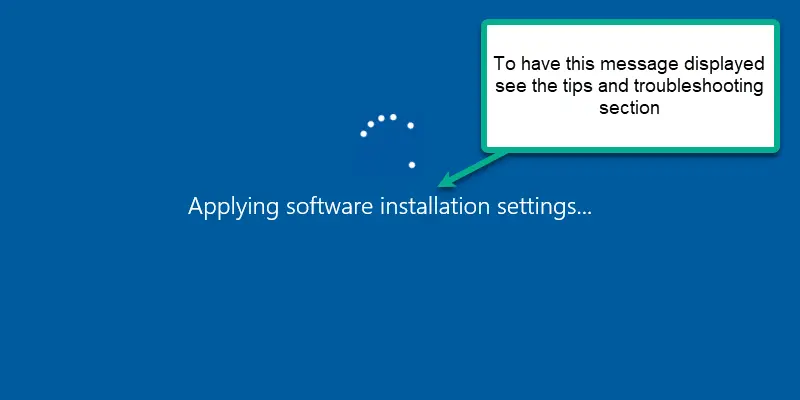
This will display the “Applying software installation settings” during startup.
You will need to enable this GPO setting.
Computer Configuration > Policies > Administrative Templates > System and enable “Display highly detailed status messages.
Tip #3 Enable Wait for the network at computer startup and logon
If you are having issues with the software installation you may need to enable this GPO setting.
Computer Configuration > Policies > Administrative Templates > System > Logon and enable “Always wait for the network at computer startup and logon”
Tip #4 Test with a small MSI file
The problem might be the MSI install file. Test with a small program like 7zip or notepad ++, these are really small install files that are known to work.
Tip #5 Use gpresult to verify the GPO is enabled.
Use the built-in gpresult command to verify the GPO settings are getting applied to the computer.
Sources
- Use Group Policy to remotely install software
- 15+ years of experience doing this in production environments
- Tested this solution in my Active Directory lab