In this guide, you will learn how to use group policy to create a lock screen policy. In addition, I’ll show you how to disable (exclude) the lock screen policy from specific users and computers.
In this example, I’ll create a policy that locks the screen after 15 minutes of activity. You can change the timeout settings to whatever meets your needs. This guide will work on Windows 10, Windows 11, Server 2012, and later operating systems.
How to Enable Lock Screen GPO
Step 1. Determine GPO Location
The lock screen policy is a computer policy, this means anyone who logs into the computer will get the lock screen policy applied. Later I will show you how to exclude specific computers from the policy.
It’s best to apply this policy to all computers but there will always be exceptions. I’ve had requests to exclude conference room computers, computers that are used for 24/7 monitoring, then of course there are always a few users that complain and want it disabled. These requests should all be approved by upper management.
Depending on your OU structure you could apply the GPO to the root and let the sub OUs inherit the policy or you could apply the policy to specific OUs.
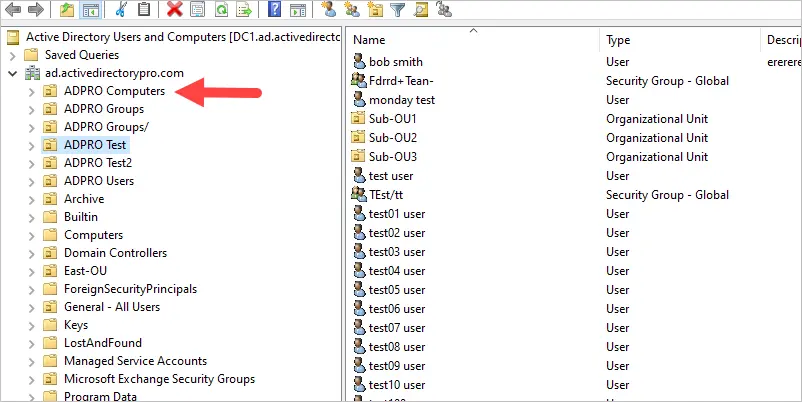
In this example, I want the policy to apply to all computers so I’m going to link the GPO to my ADPRO Computers OU. All the sub-OUs will inherit the policy. In step 4, I’ll show you how I exclude specific computers from the policy.
Step 2: Create a New GPO
Do not add these settings to the default domain policy. It is group policy best practice to not modify the default domain policy and instead create a new one.
1. Open the group policy management console
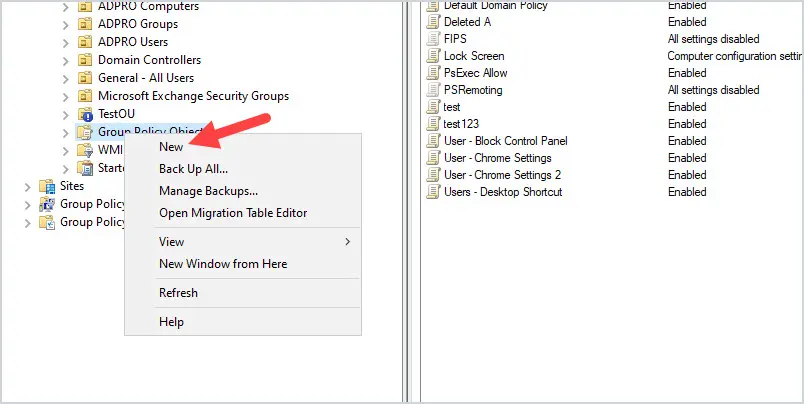
2. Right Click “Group Policy Objects” and click new
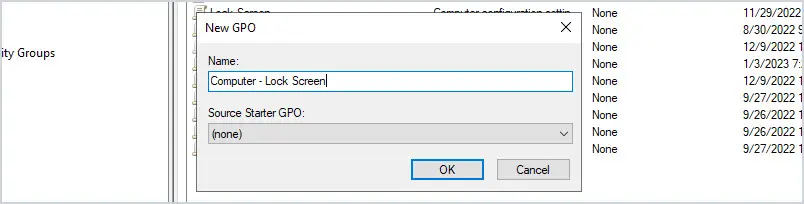
Give the new GPO a name. For example, I named my GPO “Computer - Lock Screen”.
The GPO is created but now we need to set the idle timeout settings.
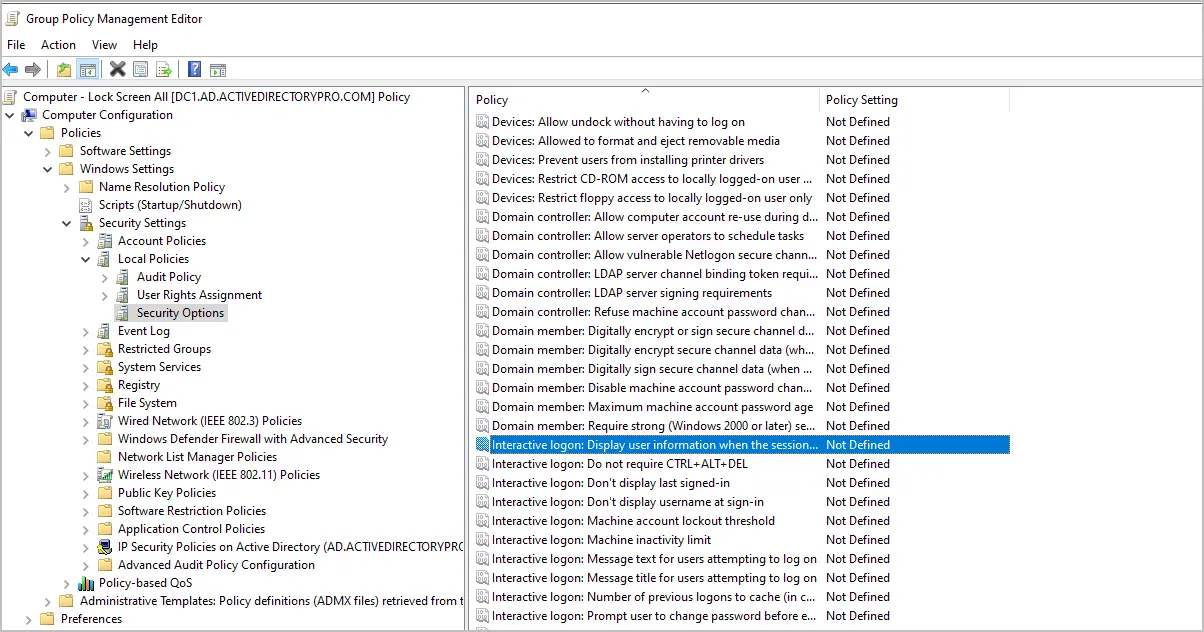
There is only one group policy setting that needs to be set. It is the “Interactive Logon: Machine inactivity limit”
Browse to -> Computer Configuration -> Windows Settings -> Security Settings -> Local Policies -> Security Options
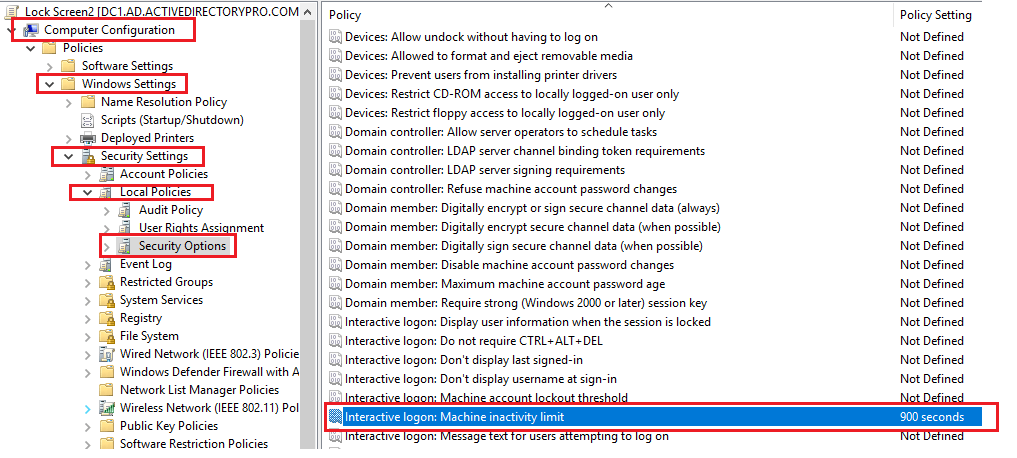
Change the value to whatever you want. I set mine to 900 seconds which is 15 minutes.
Step 3: Apply the Lock Screen GPO
The GPO is created and the policy settings have been enabled. Now you just need to link the GPO to the correct OU.
Since this is a computer policy you must apply the GPO to an OU that contains computer accounts. If you apply the GPO to an OU with users only the lock screen will not work.
1. In the group policy management console right-click an OU and select “Link an Existing GPO:
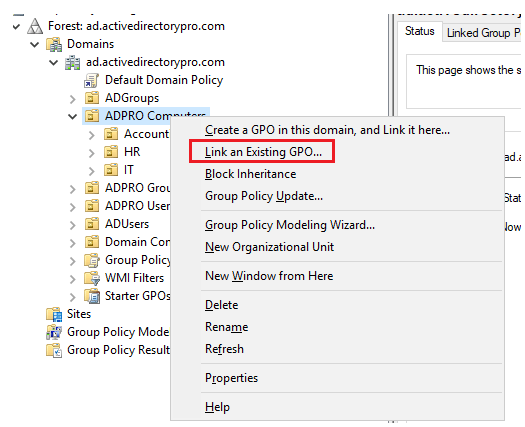
2. Select the GPO you created in step 2 and click OK.
The GPO is now linked.
The GPO refresh interval is 90 minutes on a computer. So keep in mind it could take up to 90 minutes before this policy gets applied to all computers. You can instantly refresh this by rebooting the computer or running the gpupdate /force command.
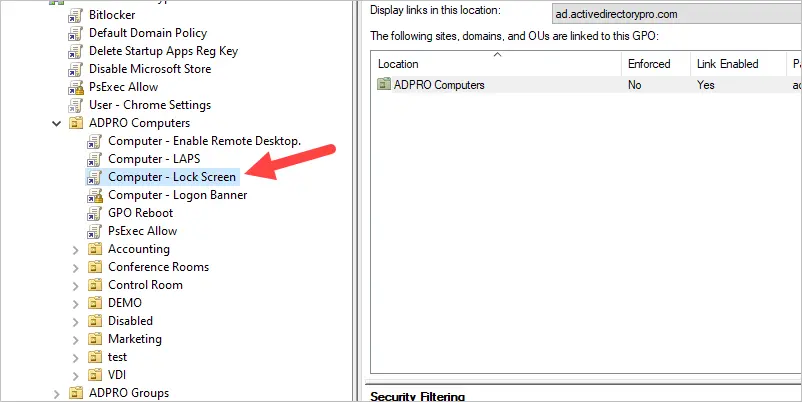
Above is a screenshot showing the GPO linked to my ADPRO Computers OU. All of the sub-OUs will inherit this policy. So computers in the Accounting, HR, and IT OU will get the lock screen GPO applied.
How to Verify the Lock Screen GPO is applied
To verify the GPO is applied to a computer you can use the gpresult /r command. You will need to open the Windows command prompt as administrator or it can fail to pull the computer policies.
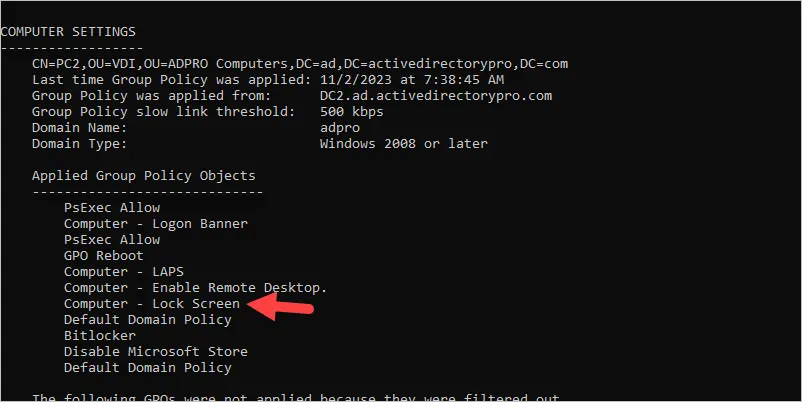
You can see above the “Computer - Lock Screen” GPO is applied to this computer.
How to Disable the Lock Screen for Specific Computers
Let’s say you have the lock screen GPO applied to all computers but now you need to disable it on specific computers.
There are two options:
- Option 1: Move the computers into a new OU and not link the GPO to this OU. This works and I’ve used this method for several clients.
- Option 2: Create a security group, add the computers, and deny the policy from applying to this group. This is my preferred method as I think it prevents moving computers around between OUs.
I’m going to show you option 2.
1. Create a security group and add the computers that you want the lock screen policy disabled on. It’s very important to name the group with a descriptive name and use the description box.
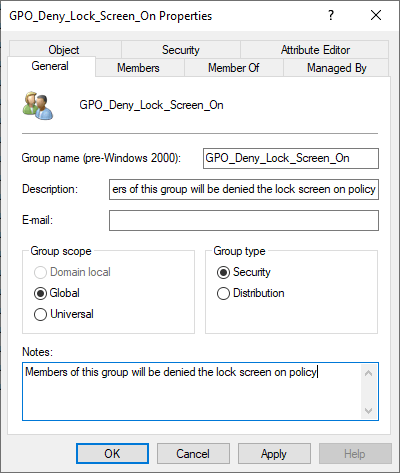
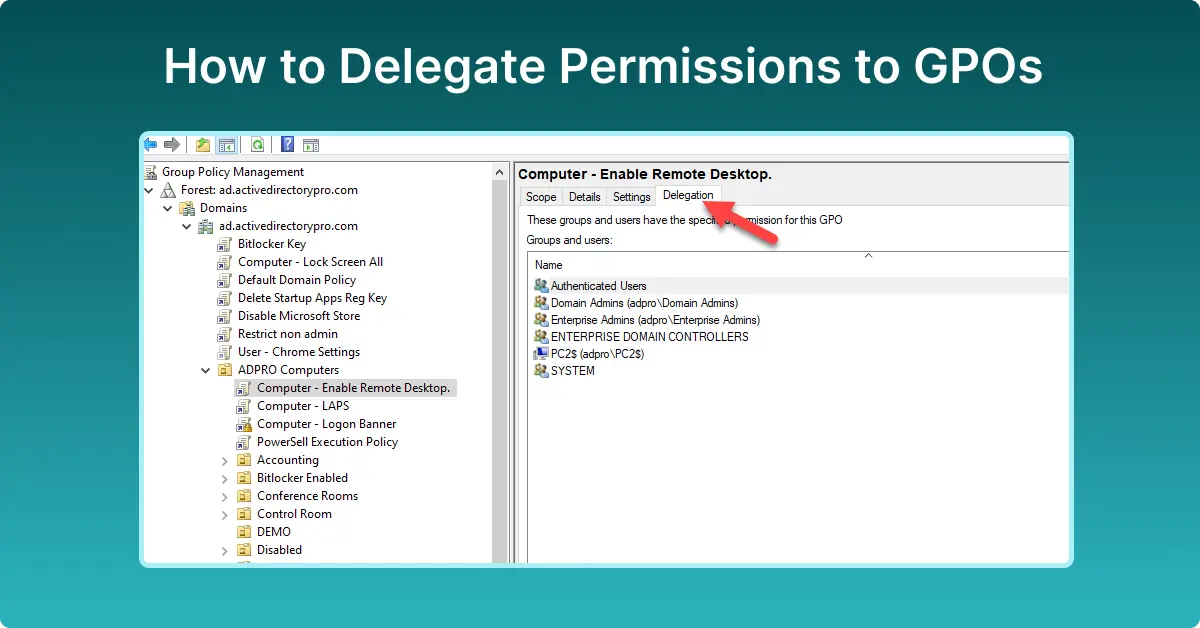
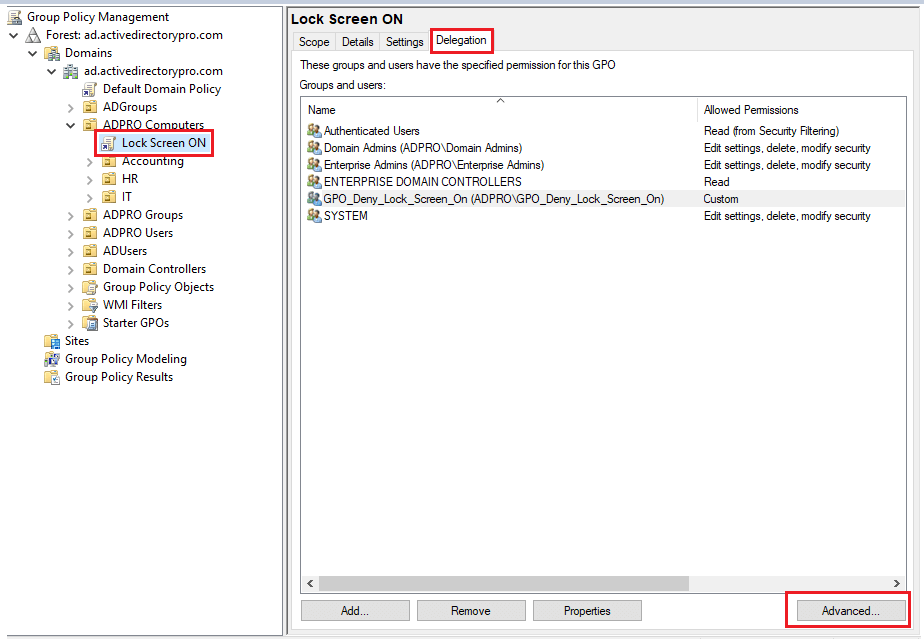
2. Go into the group policy management console, select the GPO click the delegation tab then click Advanced.
3. With the security settings windows open click on Add
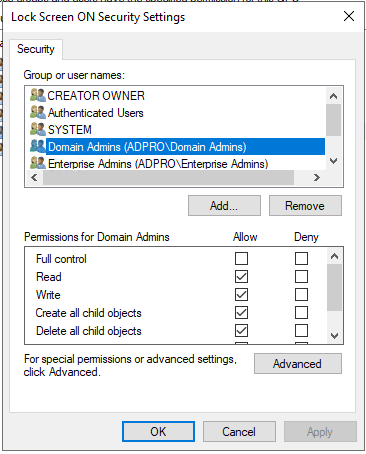
4. Add the security group and click ok
5. Make sure Read is set to “Allow” and Apply group policy is to “Deny”.
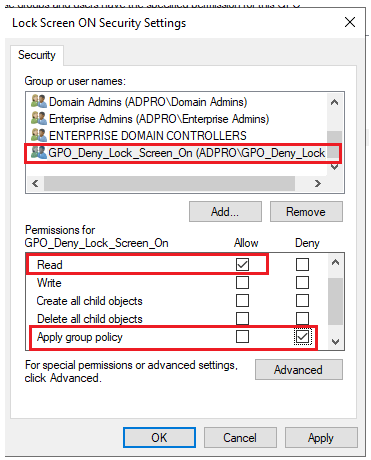
That should do it. The computers in your deny group will need to be rebooted.
When you check a computer with the gpresult /r command the policy will show as denied
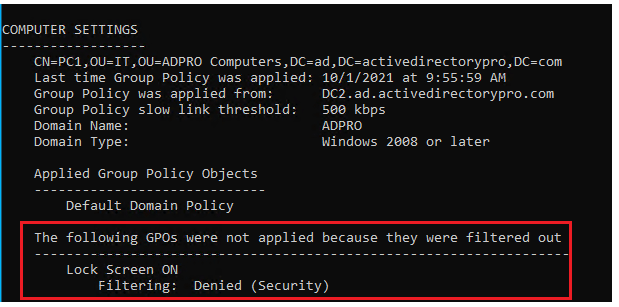
To deny any additional computers all you have to do is add them to the security group. I find this method more convenient than moving computers around to different OUs.
Download a free trial and create your own GPO reports.
Enforcing the lock screen on company computers is a very common requirement. Any company that gets audited will always get asked if this policy is in place, regardless it’s a good policy to have in place. Have fun with those exclusions.