In this guide, I will demonstrate how to deploy a domain controller in Azure.
Deploying a Domain Controller in Azure can be used to add additional Domain Controllers to your on-premises environment. It’s also an easy way to create an Active Directory test lab.
Note: The VM I create in this demo is for testing, the settings are not optimal for a production domain controller. If you want to deploy a Domain Controller in Azure for production you will need to determine the right settings for your organization, such as VM size (CPU, Mem), redundancy options, disks, and network settings, all of which will increase the cost.
Tip #1: For a production DC, DO NOT give it a public IP or allow public inbound ports.
Tip #2: To add an azure domain controller to your on-premises environment you will need a VPN tunnel from your network to Azure. I will go over this in a separate guide.
Tip #3: For production, the Azure virtual network must not overlap your on-premises network. For testing, it doesn’t matter (assuming you will not be connecting to your on-premises network).
Let’s get started.
Part 1: Create a Virtual Machine
If you don’t have an Azure account you can create one for free. Microsoft gives you a $200 Azure credit for 30 days. This is plenty of credits to create several VMs and use other Azure resources.
Step 1. Sign in to your azure portal, https://portal.azure.com
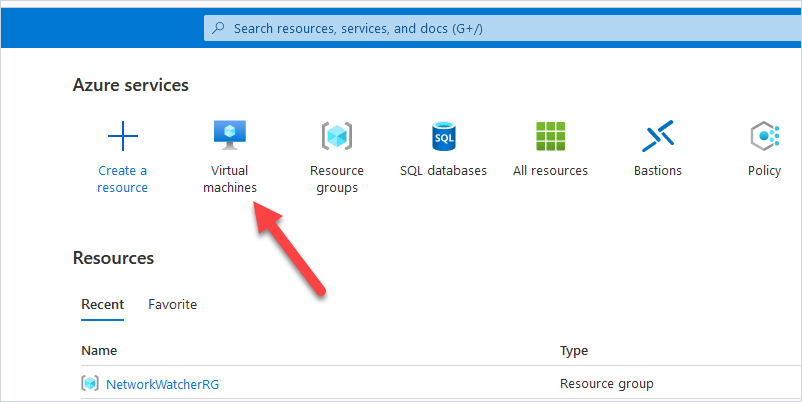
Step 2. Click on “Virtual machines”
Step 3. Click on Create and select “Azure virtual machine”
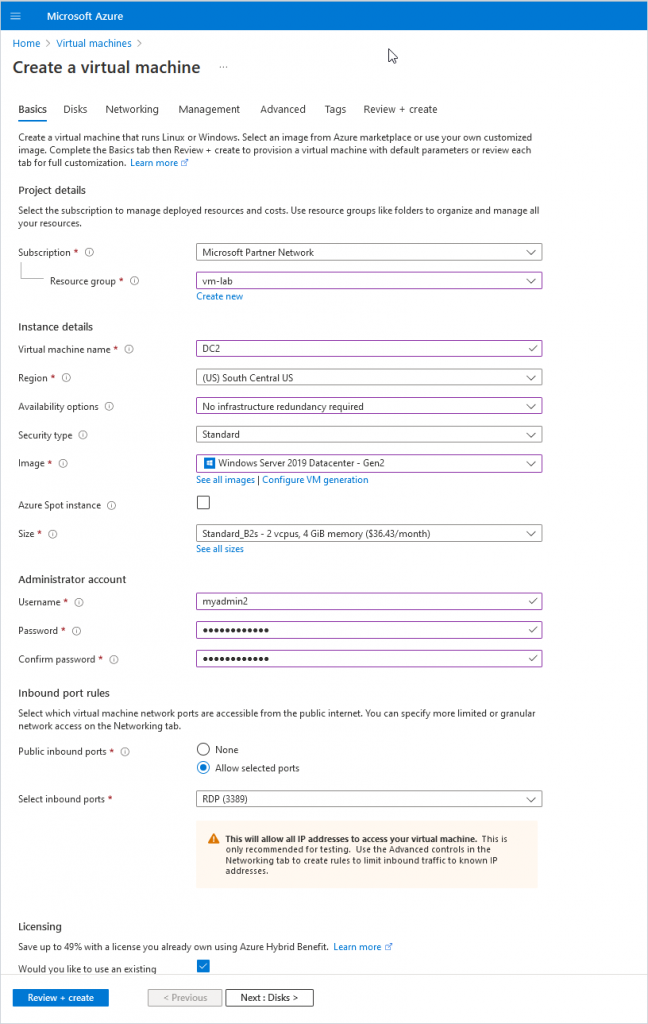
Step 4. Enter basic information for the new VM
- Subscription: Select the subscription you want to use for the VM.
- Resource group: Select an existing or create a new resource group.
- Virtual machine name: Give your VM a name.
- Region: Choose your region, you typically want a region that is close to you.
- Availability options: This is for redundancy and will ensure your VMs are still running if one Azure data center has a failure. You want this for production VMs. I’m just creating a test VM so I’ll choose “No infrastructure redundancy required.”
- Security Type: I’ll choose Standard.
- Image: Pick the OS you want to use, I’ll pick “Windows Server 2019 Datacenter”.
- Size: You will need to determine the size of VM you need. For testing reasons, I’ll choose a small VM to keep costs low.
- Username and password: This will be the administrator account for the VM.
- Public inbound ports: For production, you want this set to “none”. For testing, I’ll leave RDP open.
- Licensing: If you have an existing license you can use select the box, this can save money on each VM.
Here is a screenshot of the Basics settings for my VM.
Now click Next to go to the Disks page.
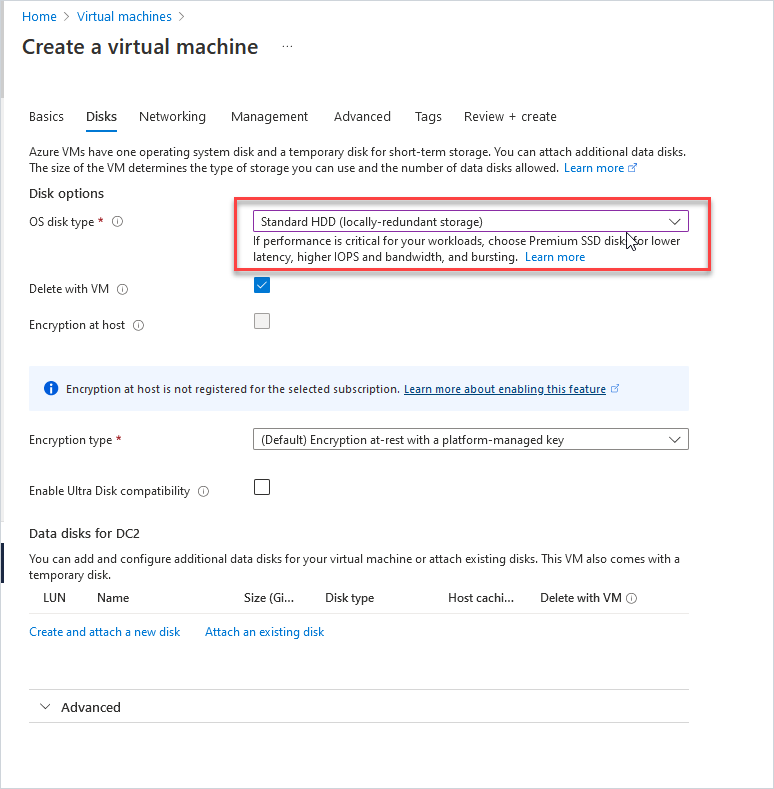
Step 5. Enter disk details for the VM.
Determine the disk type to use, for testing I use the standard HDD.
Click next to go to networking.
Step 6. Network settings
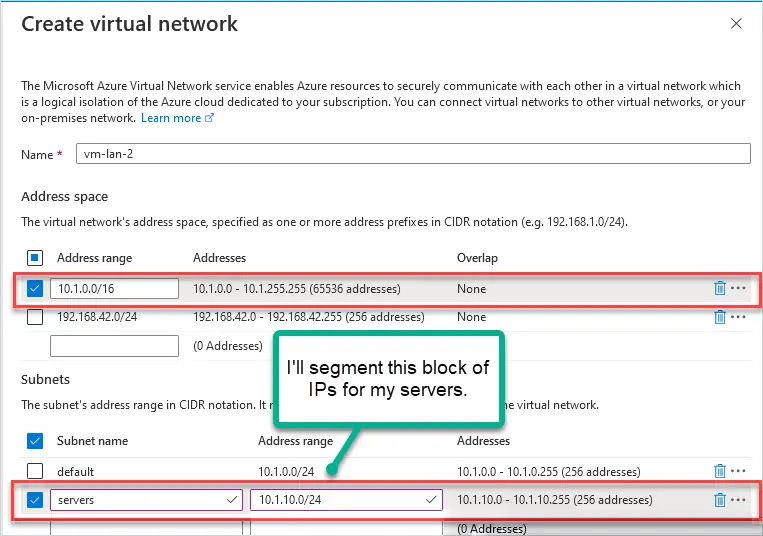
- Virtual network: Select an existing or create a new virtual network.
- Subnet: Select or create a subnet.
You create a virtual network and then use subnetting to segment the address space. For example, I’m using the 10.1.0.0/16 address space then I segment 10.1.10.0/24 (256 addresses) with subnetting. I’ll use the 10.1.10.0/24 subnet block for my servers.
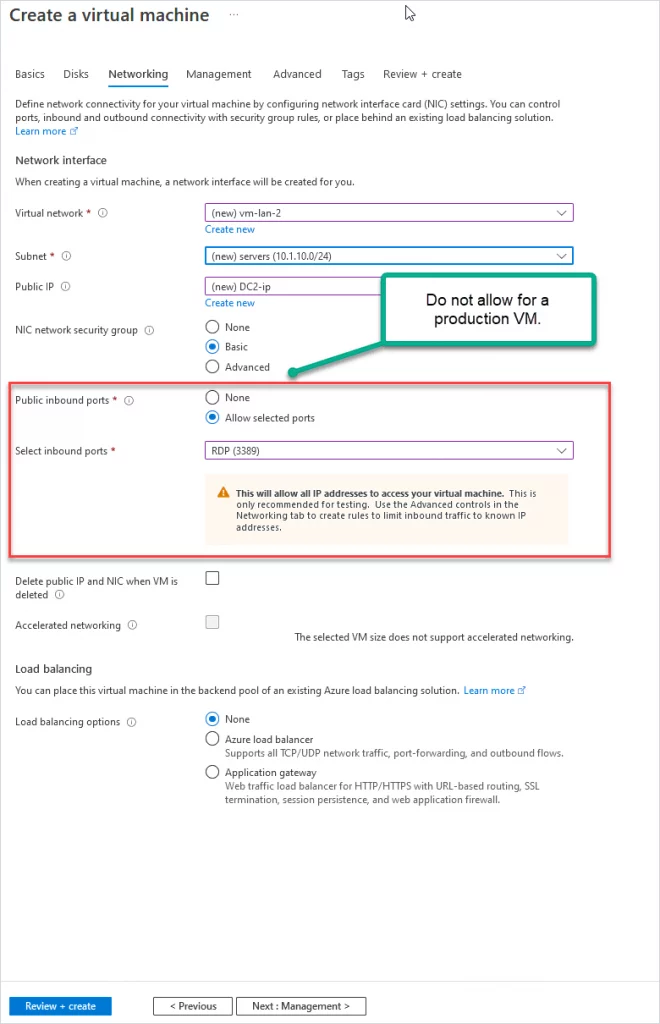
- Public IP: A public IP will be added automatically. For testing, this is OK, for production set this to none.
- NIC network security group: This is s stateful firewall for your virtual network. I’ll choose standard.
- Public inbound ports: For production, you want to select none. For testing, you can use RDP to access the VM.
Click next to “Management”
Step 7: Management Settings
The only thing I want to point out on this page is the “Auto-shutdown” option. For testing with Azure, this is a great feature to help save costs. You get charged for the VM running even if you are not using it. I’m not going to be using this test domain controller 24/7 so I’ll have it auto shut down at 7:00 PM each night. Do not do this for a production domain controller.

Step 8: Click Review + create
Microsoft will validate your settings and show any warnings or settings that were missed. You will also get a cost estimate but keep in mind it is just an estimate.
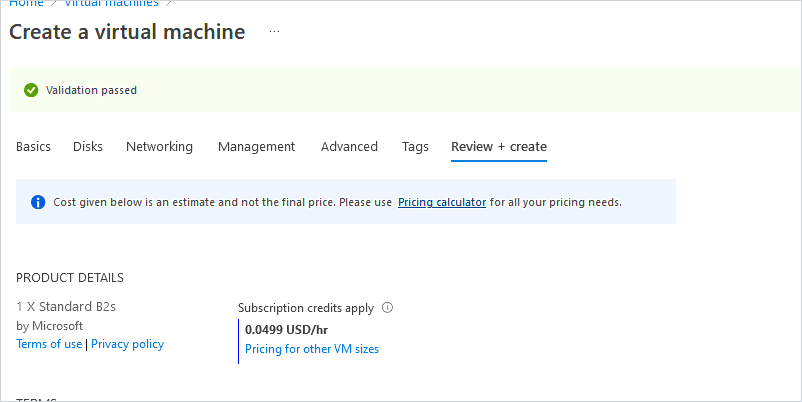
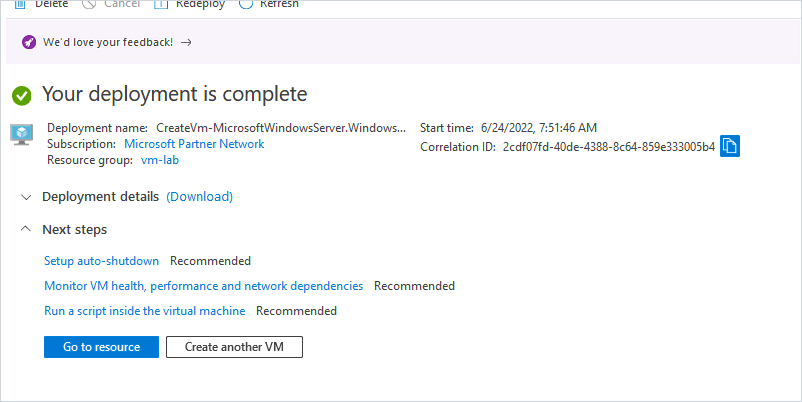
When ready click the “Create” button to create the VM.
You will get a progress page so you can watch the status of the deployment. It took about 5 minutes for my VM to be created.
Part 2: Configure VM with Static IP Addresses
Domain controllers need a static IP address and the DNS pointing to itself. For on-premises DCs you would just go into the NIC settings and manually configure the IP settings. With Azure VMs it’s recommended to set this at the Virtual Network Interface.
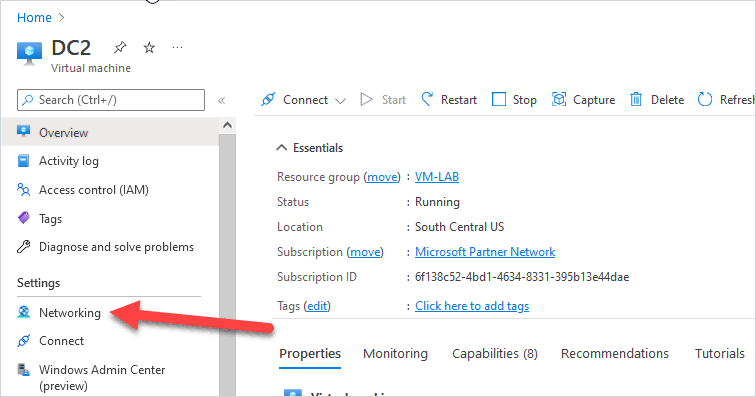
Go to VM Networking settings.
In the right-hand menu for your VM under settings click on “Networking”.
Now click on the Network Interface for the VM (You will have a different name).
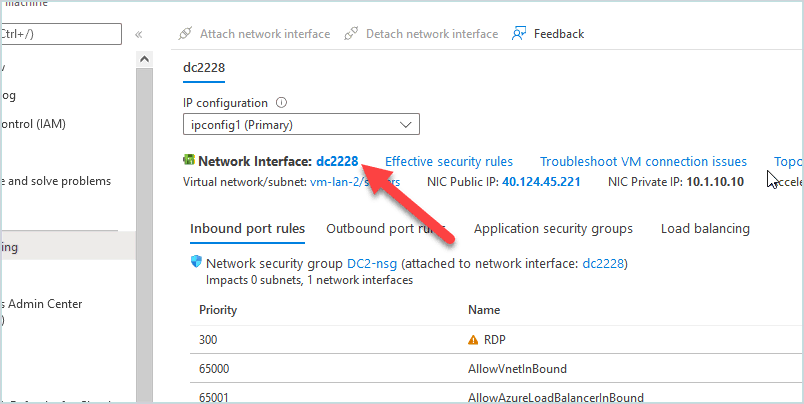
Next click on “IP Configurations” in the left menu under settings.
Next click on “ipconfig1” under IP configurations.

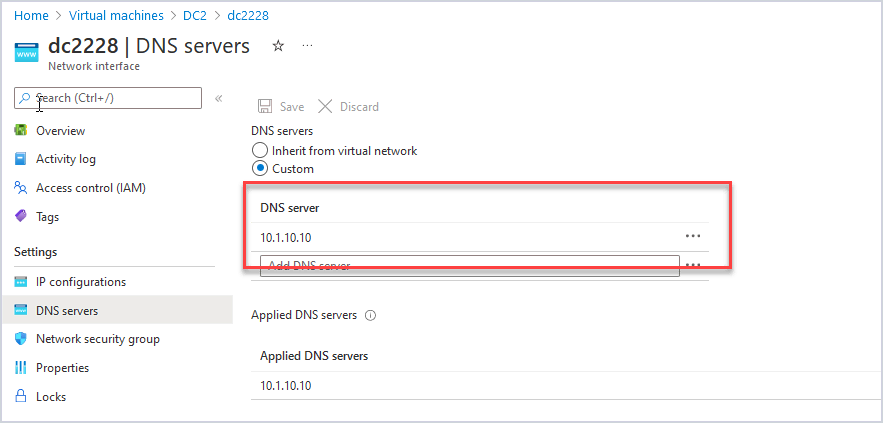
Change the IP from “Dynamic” to “Static” and enter the IP address you want the domain controller to have, it must be an IP from the subnet you assigned to your virtual network. I’ll give my DC the IP address 10.1.10.10.
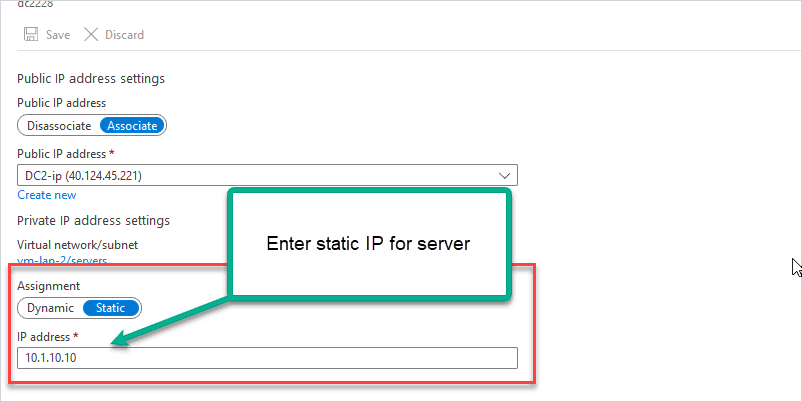
Click “Save”. The network interface will be restarted to set the IP address.
Go back to the Network Interface and click on “DNS servers”.
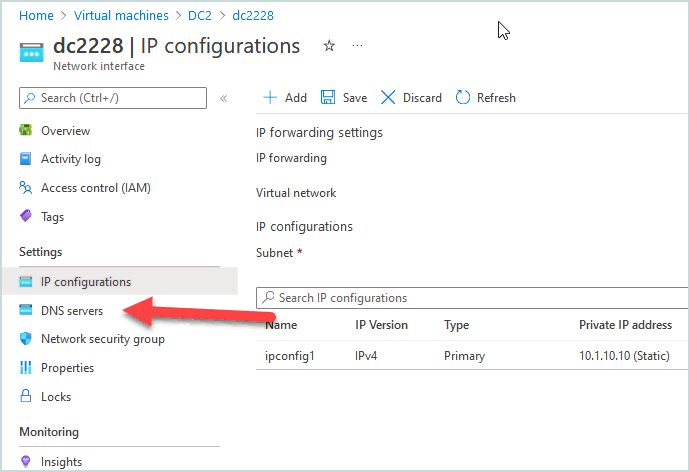
Set the DNS server to the IP address of the domain controller.
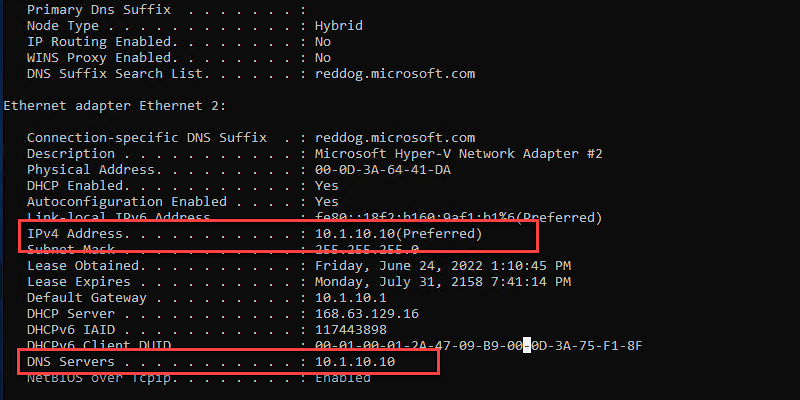
Now on the VM, your server should be configured with the settings from above. Below I run ipconfig /all to verify my IP settings.
Part 3: Install Active Directory Domain Services
With a VM created and the IP settings configured we can move forward with installing Active Directory on the server. If you have installed ADDS before this is not new, it’s the same as installing it on an on-premises server.
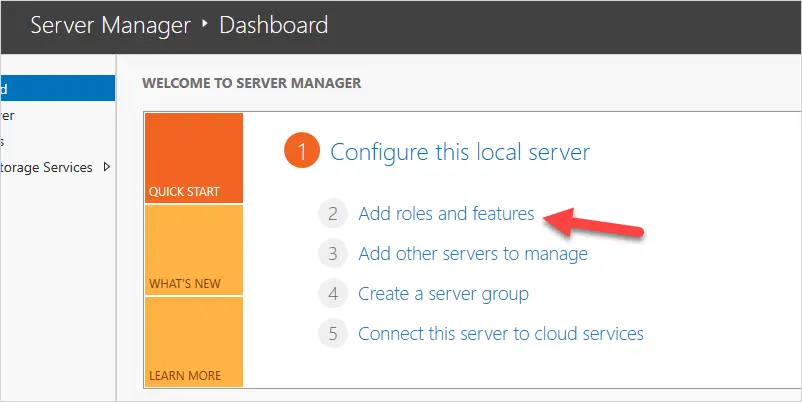
Go to the server manager and click on “Add roles and features”
Before you begin – click “Next”.
Installation type – select “role based” and click “Next”.
Server Selection – select the hostname of your server and click “Next”.
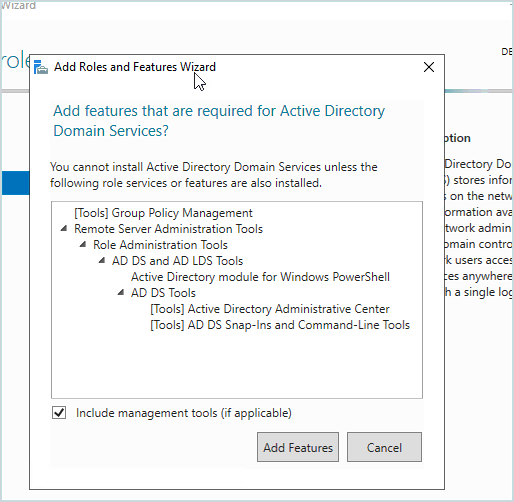
Server Roles – select “Active Directory Domain Services”.
You will get a pop-up to add additional features. Click “Add Features”.
Click “Next”.
Features – no features need to be added so click “Next”.
AD DS – Click “Next”.
Confirmation – Click “Install”.
The installation will start.
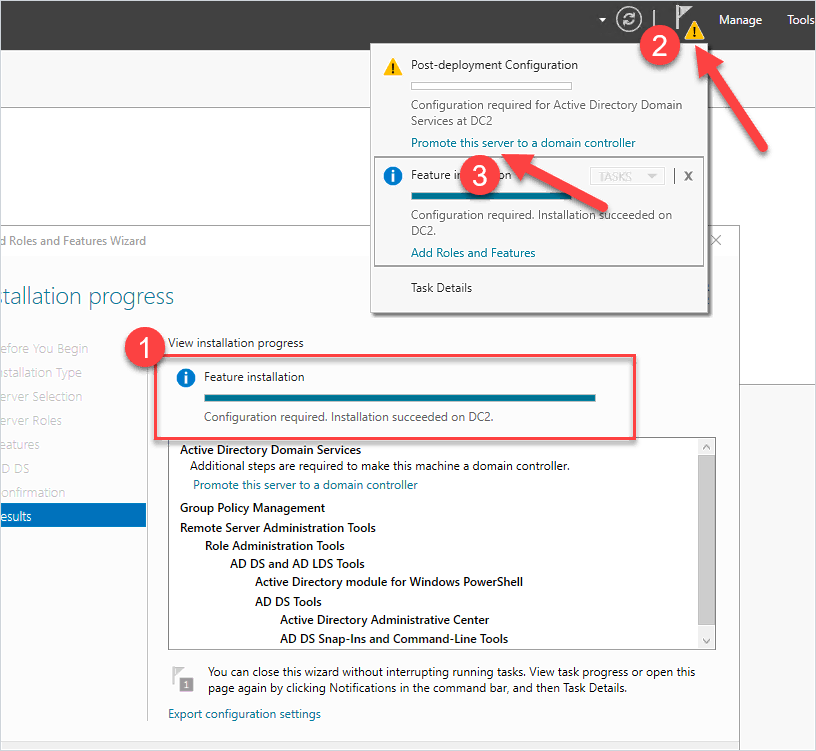
When finished click the yellow icon in the upper right corner and click on “Promote this server to a domain controller”.
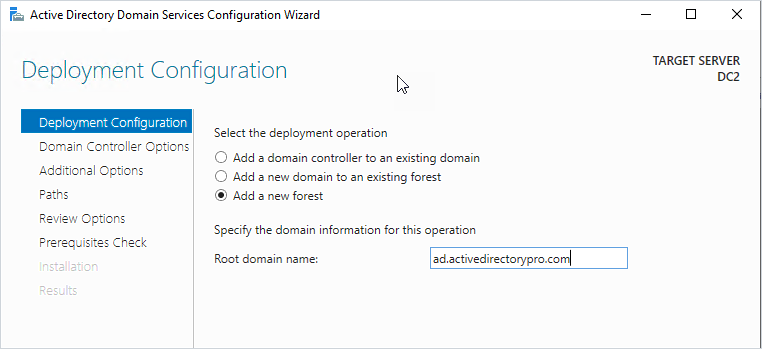
Deployment Configuration
I’m creating a new domain so I’m going to pick “Add a new forest”. If you’re adding another DC to your existing domain you would pick the first option “Add a domain controller to an existing domain”.
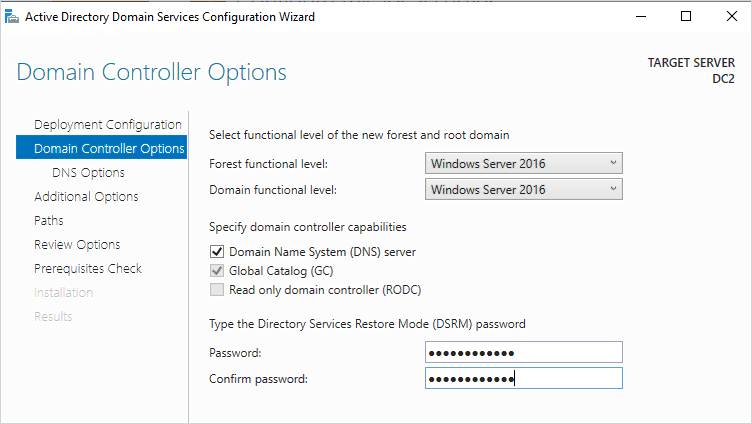
Domain Controller Options
For a new test domain, the default settings are good. Add a DSRM password and click next.
DNS Options
Click next on this screen.
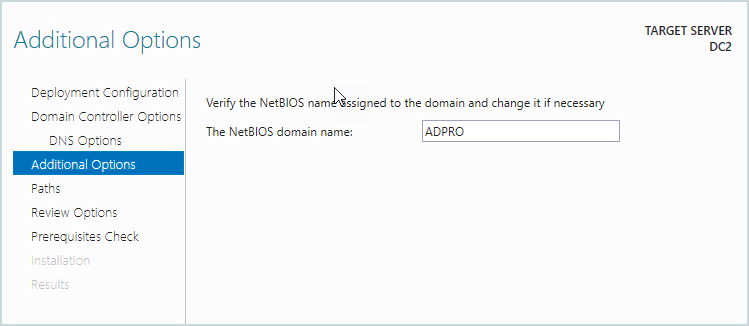
Additional Options
Enter a NetBIOS name and click “Next”
Paths
I always leave these as default settings
Review Options
Review your settings and click “Next”
Prerequisites Check
If the Prerequisites pass click on “Install”

When done installing the server will reboot and will now be a domain controller.

Nice work. If you followed along you should now have a domain controller running in the Azure cloud.
You can now deploy additional Azure VMs and connect them to this domain controller. You can also use this domain controller to add additional DCs to your on-premises environment.
Part 4: Additional Settings and Tips
Here are a few additional settings and tips I recommend.
- You will need to create a new site in Active Directory Sites & Services with the new subnet.
- You should adjust the domain controller DNS settings for redundancy.
- A VPN tunnel is required from your on-premises network to Azure.
- If you are testing and use a public IP with open ports (RDP 3389), then I recommend using fake/dummy data in Active Directory. Their server might get comprised due to the internet exposure so don’t use real data such as real usernames and passwords.
- You can use the Azure firewall to limit access to the VM from your IP address.
- Use Bastion for secure remote connectivity.
- Explore the many options that Azure has to offer, it’s very impressive everything it has to offer.
Do you plan to use domain controllers running in Azure? Let me know in the comments below.
Resources
- Deploy AD DS in an Azure virtual network – Microsoft document with some good details on extended on-premises to Azure.
- How to Add a Secondary Domain Controller
It is recommended that you create a data disk and keep the SYSVOL separate from the OS disk as host caching needs to be turned off.
Create a separate virtual data disk for storing the database, logs, and sysvol folder for Active Directory. Don’t store these items on the same disk as the operating system. By default, data disks are attached to a VM using write-through caching. However, this form of caching can conflict with the requirements of AD DS. For this reason, set the Host Cache Preference setting on the data disk to None.
Thanks Dexter.
I found this in the Microsoft documentation (link below for reference). “Create a separate virtual data disk for storing the database, logs, and sysvol folder for Active Directory. Don’t store these items on the same disk as the operating system”
https://learn.microsoft.com/en-us/azure/architecture/example-scenario/identity/adds-extend-domain
Hi Robert, this is great. I am refreshing my knowledge and training in AD and this is exactly what I wanted to do. My question is, you suggest “You will need to create a new site in Active Directory Sites & Services with the new subnet.” Not sure I understand why. Isn’t Default First Site Name the first site? I thought we would only add a second physical location here. Thanks!
If it is your only site then you do not need to create an additional one, the default will do.
Hi Robert, nice article, a quick question, we have deployed 2 additional DCs in Azure (in Hub network) in addition to our other on-prem DCs. When we promote them as DCs, we get all sort of weird DNS issues and cant get to Internet etc. We had to demote them and currently doing some testing to troubleshoot before we can promote them as DCs again. We have noticed, on of this new Azure server (to be the DC), NSlookup is working fine but its not working on the other one. Both have same DNS and other network settings. Any idea what could go wrong here? Many thanks
Are you trying to join the DCs in Azure to the same domain as the on-prem DCs? Seems like a connection issue between azure and on-prem. Can you ping the on-prem DCs from the azure servers?
easy to understand ,nice
Very useful, well explained and clear guide, thanks a lot for sharing!!! helped me a lot
I made a Domain controller in Azure. now the issue is that onpremise DC is replicating to Azure DC(if I create any computer or user object onpremise DC , it is reflecting in azure DC but it is not happening vice versa. If we create or delete any objects in Azure dc ,it is not reflecting in On premise dc). I checked the replication in both azure and onpremise but there is no errors. nothing found in event logs too.
Can someone tell what could be the reason for this ?
Did you update Sites & Services with the on premise subnet?
Sounds like a replication issue. Did ensure the required ports are allowed between your on prem DC and the Azure DC?
Hi, nice tutorial, one question though: If you have two domain controllers, and I would like each DC to first point to itself and then to other in a way:
DC1 primary dns DC1/IP, secondary DC2/IP
DC2 primary dns DC2/IP, secondary DC1/IP but this does not seems to be possible, I mean you can configure it in Azure but if go ipconfig/all on DCs settings seems to be same for both.
For all other VMs i have DNS set on VNET and get inherited primary DC1 secondary DC2, and for DCs I would like to have it different, is it possible?
Nice and clear. 👌
Such nice guide, very well line up all stuff, thanks for sharing.
Hi Ritesh. Thanks for the feedback.
Excellent
Very nice guide, thank you for sharing!