Having one Domain Controller is not recommended because it creates a single point of failure. If the only Domain Controller goes down in the organization, big outages will occur resulting in a loss of operations. To avoid this single point of failure you need to have a secondary Domain Controller. A second DC will load balance the services and minimize the risk of critical services going down. In this article, I will walk through the steps to add a second Domain Controller to an existing domain.
Steps to Add a Secondary Domain Controller
If you are using Windows Server 2012, 2016, or 2019 the steps to add a secondary domain controller is the same.
Step 1. Configure Basic Server Settings
Before promoting the server to a secondary domain controller you need to make sure you have these settings configured.
- Computer name - You want to set the computer name before promoting it to a domain controller.
- IP settings - Set a static IP address on the server and make sure the DNS is pointing to an existing domain controller or DNS server. You will not be able to join the server to the domain if this is not set.
- Date and Time - Make sure the time zone is correct. Your domain can have weird issues if the date and time are off.
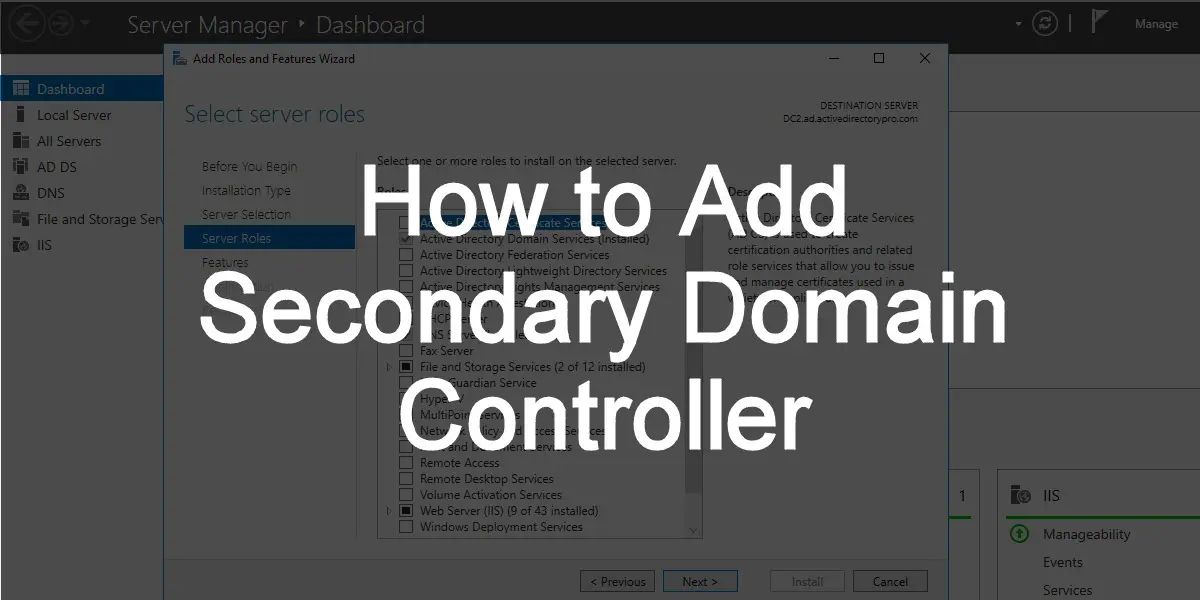
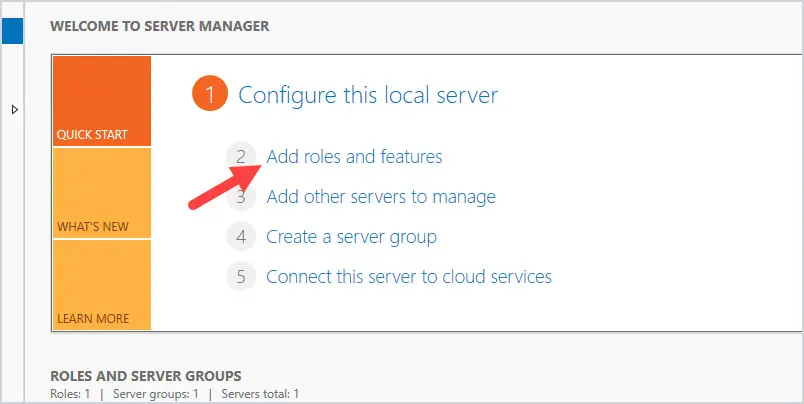
Step 2. Open Server Manager & Install AD DS Role
1. Click on Add roles and features
2. Click “Next” on the Before you begin page.
3. Select “Role-based or featured-based installation and click next.
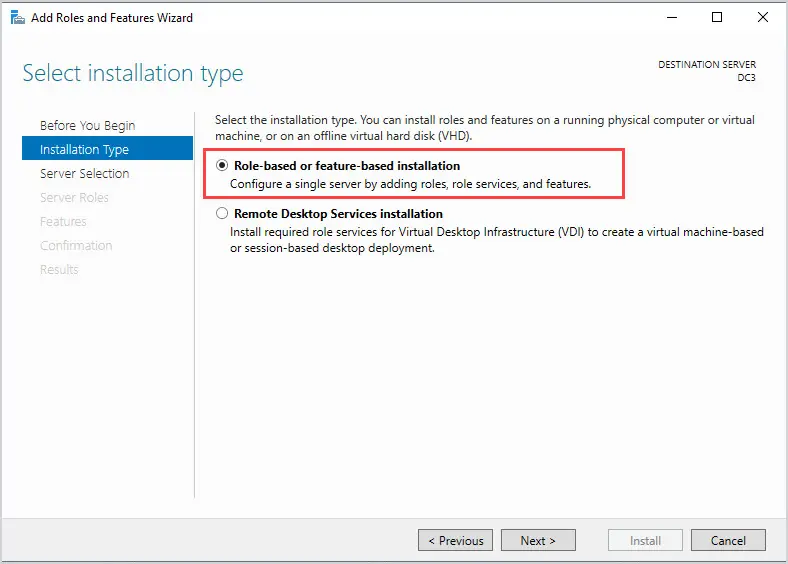
4. Select a server from the server pool. Select your server and click next.
5. Select Active Directory Domain Services, you will get a popup to add features that are required for Active Directory Domain Services, click Add features. Click Next.
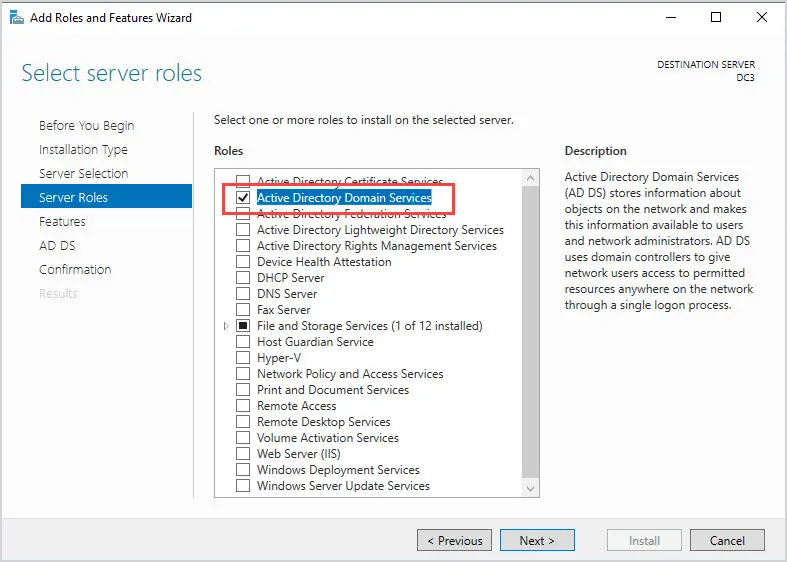
6. Click next on the features page. Nothing additional needs to be selected on this page.
7. Click next on the AD DS page. This page is just informational.
8. Click Install on the confirmation page.
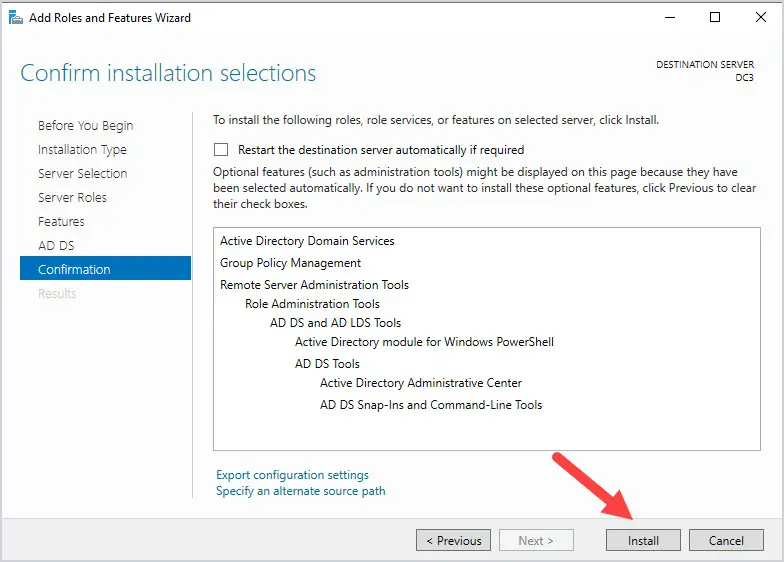
When the installation is complete it will say “Configuration required. Installation succeeded on”. When you see this move to step 3.
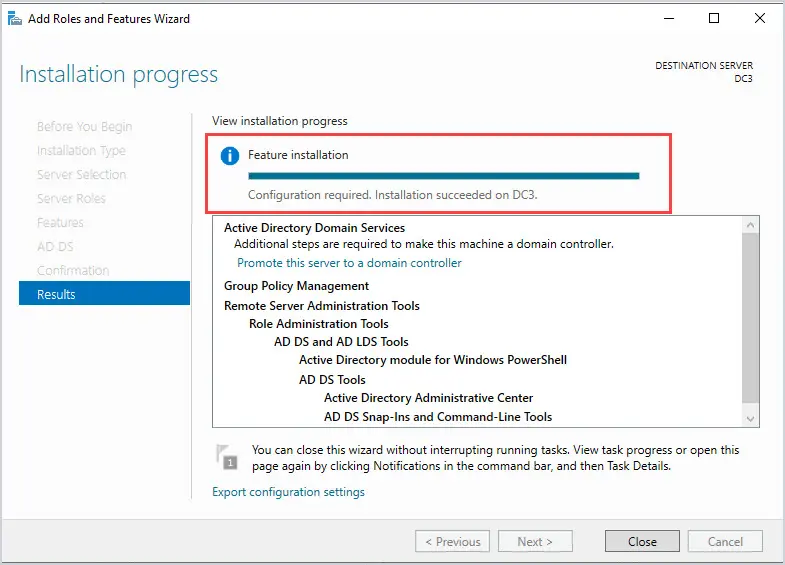
Step 3. Promote this server to a domain controller
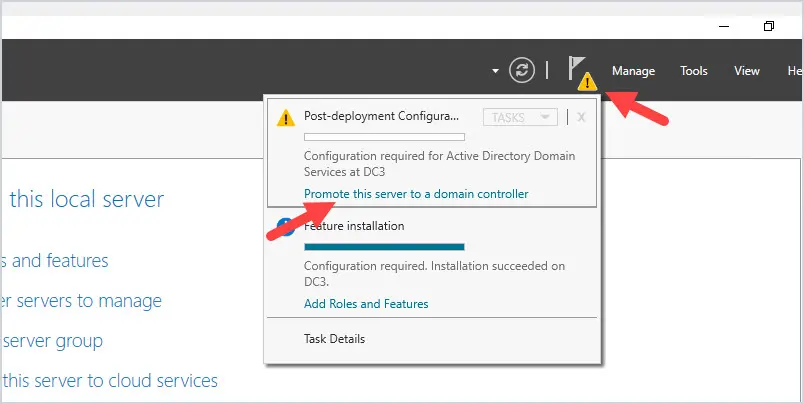
1. In the server manager click the yellow icon at the top and click “Promote this server to a domain controller”.
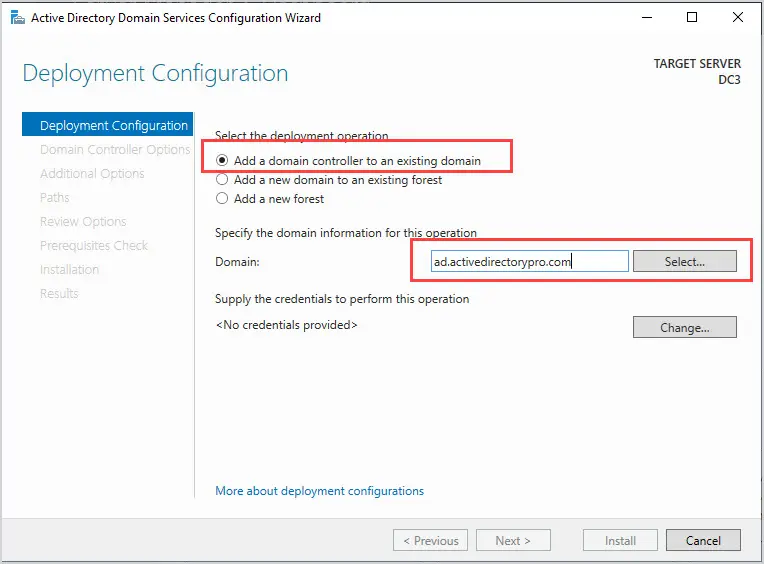
2. Select “Add a domain controller to an existing domain”. Next, enter or select the existing domain you want to add the secondary domain controller to. You will need to click the change button to enter in administrator credentials. Click Next.
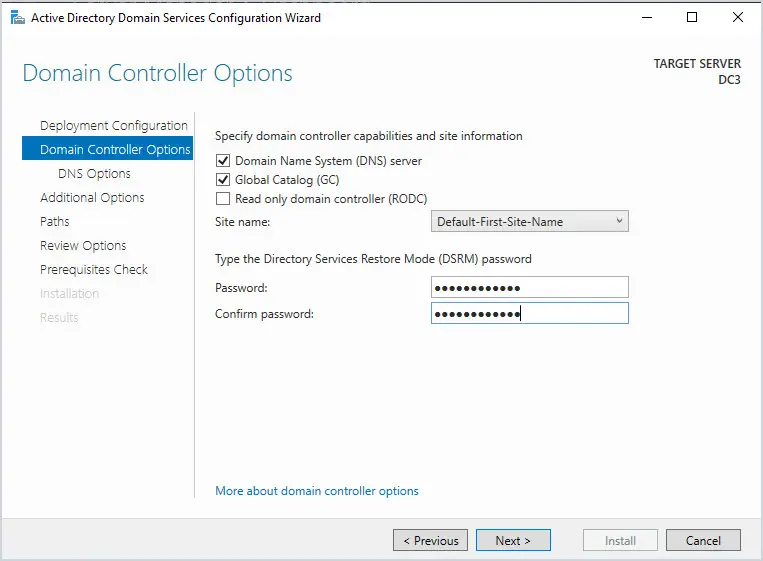
3. On the Domain Controller Options page, Domain Name System (DNS) server and Global Catalog (GC) should be checked. The Default First Site name should be selected for the site name unless you have created a new one. I would recommend leaving it as the default. Enter a password for the Directory Services Restore mode and click “Next”.
NOTE: Directory Services Restore MODE (DSRM) allows an administrator to repair or recover an Active Directory Database.
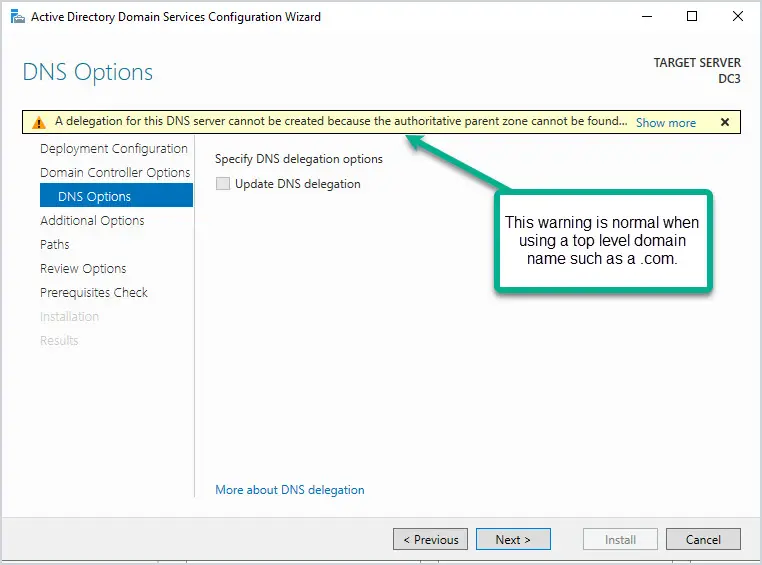
4. DNS Options
You will most likely receive the error below that says “A delegation for this DNS server cannot be created….” This is common. The wizard is trying to contact the nameservers for the domain I entered winadpro.com and is unable to create a delegation for the sub-domain ad.winadpro.com. This message can be ignored if you don’t need computers from outside of the network to be able to resolve names within your domain. More info on this error https://technet.microsoft.com/en-us/library/cc754463(WS.10).aspx
5. On the Additional Options page, select where you want this server to replicate from. In my environment, I want it to be able to replicate from any domain controller. The replication depends on how you installed the first DC and where it is located. If the DC’s are all in the same site, then replicate from any will work. If you have multiple sites, then you would have a different replication strategy. For my organization, we have 4 domain controllers all in the same site, so I have set them up to replicate from any.
6. For the paths I always leave them the defaults.
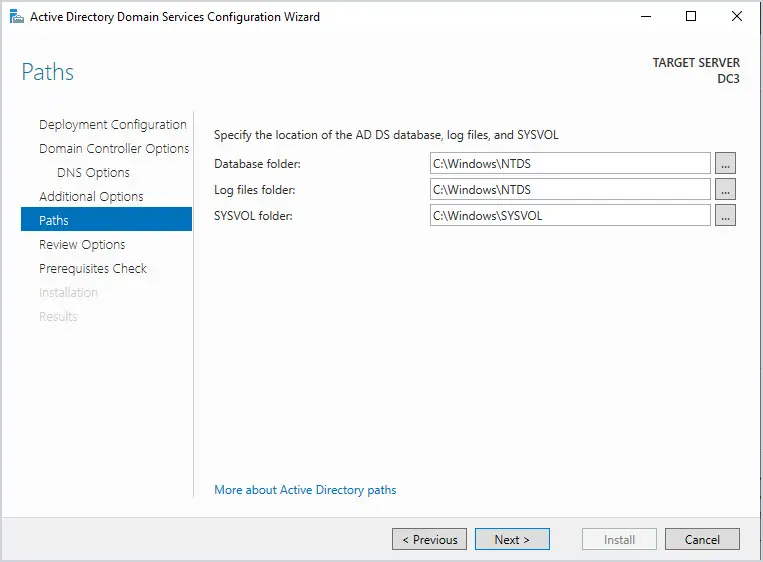
7. Click next on the Review options page.
8. On the Prerequisites Check page you may see two warnings (cryptography algorithm and the delegation for DNS) this is typical. If the prerequisite passed click install.
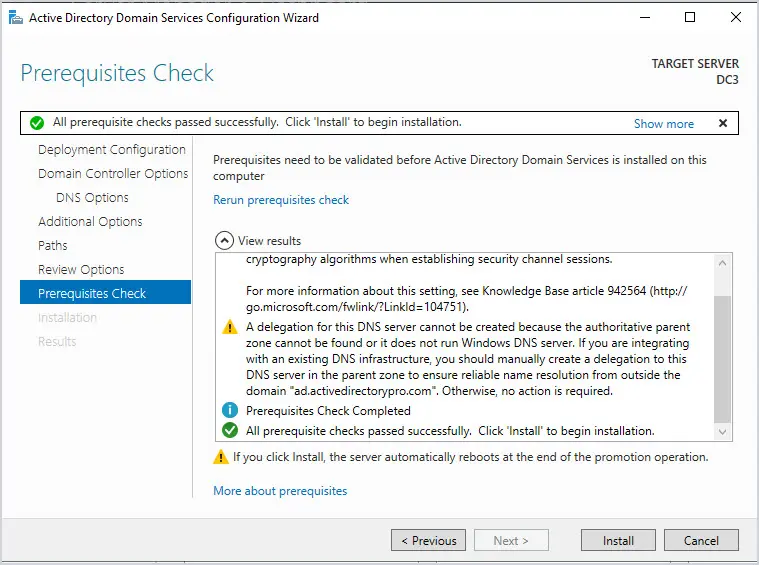
The server will automatically reboot when it is finished.
Step 4. Verify Secondary Domain Controller
At this point, you have completed the steps for adding a secondary domain controller to an existing domain. Now log into the DC and let’s verify a few things.
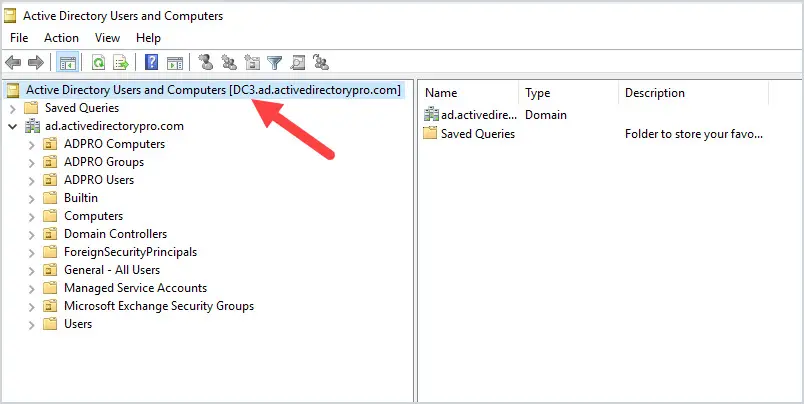
1, Open Active Directory Users and Computers (ADUC) and spot check some user and computer accounts. Make sure ADUC is connected to your new DC. During the installation everything should have replicated to your secondary DC.
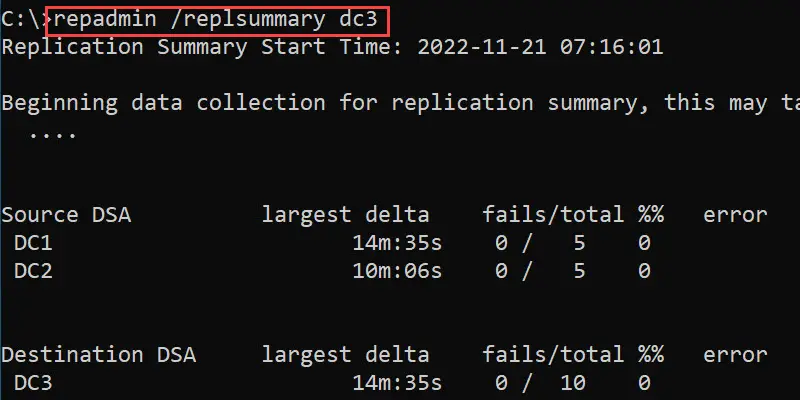
2. It’s also a good idea to check ad replication to make sure there are no replication errors. From another domain controller open the command prompt and enter repadmin /replsummary computername. In this example, I’m using DC3. You can see there are no fails or errors.
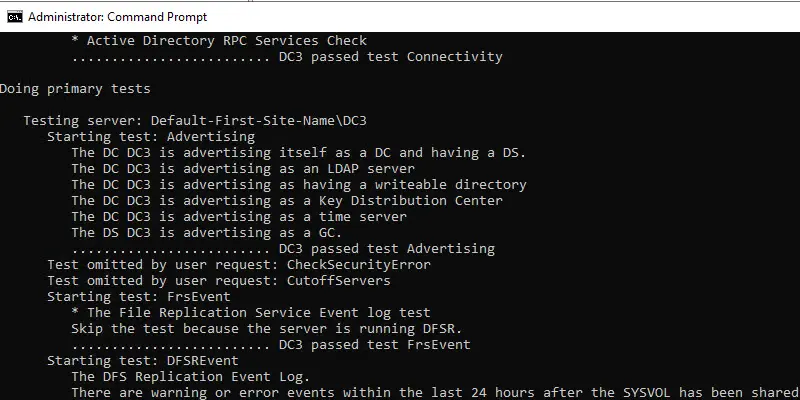
3. You can also run an Active Directory health check on your domain controller using the dcdiag command. From the command prompt run the command dcdiag /v. This will display a lot of details but is one of the best ways to check the health of a domain controller.
Summary
In this article, we walked through how to add an additional domain controller to an existing domain. It is highly recommended to have multiple DCs in your organization. The benefit to this is it will load balance the services and minimize the risk of a complete network outage. Feel free to leave your comments or questions in the comment section.