
In this article, you will learn the difference between NTFS and Shared folder permissions.
I will also share my best practices for using shared and NTFS permissions on a Windows domain server.
What are Share Permissions?
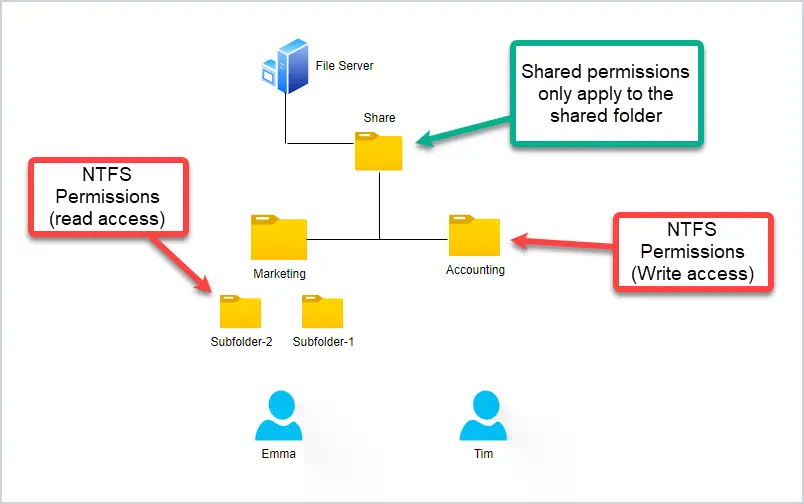
Share permissions control who can access a folder over the network, and are applied to a shared folder but do not apply to subfolders.
What are NTFS Permissions?
NTFS permissions are a way to control access to data that is stored on the NTFS file system. With NTFS permissions you can control access to local users as well as network users (Active Directory). For example, if you want users in the accounting department to have modified rights to a folder, but all other users should be read-only, you would use NTFS permissions to set the access.
What is the Difference Between NTFS and Shared Permissions?
- Shared permissions are used on the shared folder only (does not apply to subfolders).
- NTFS permissions are used to control access to root and subfolders.
- Share and NTFS permissions are used together to provide access to folders over the network.
- NTFS permissions allow you to apply different permissions to each folder.
- NTFS permissions can apply to both local and network users.
In the diagram below, I have a shared folder called “Share” on a Windows file server. The share permissions I set on the “share” folder only apply to this folder. To change access to the subfolders I would need to use NTFS permissions. With NTFS permissions I can apply different permissions to each folder.
How to View Shared Permissions
Here are the steps to view shared permissions.
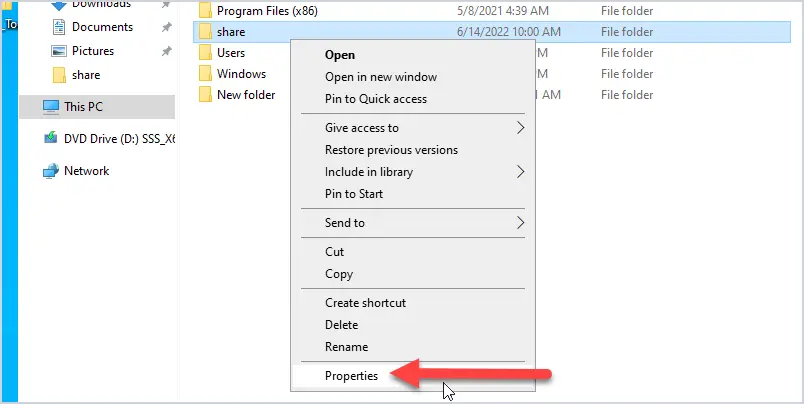
Step 1: Right-click the shared folder and select properties
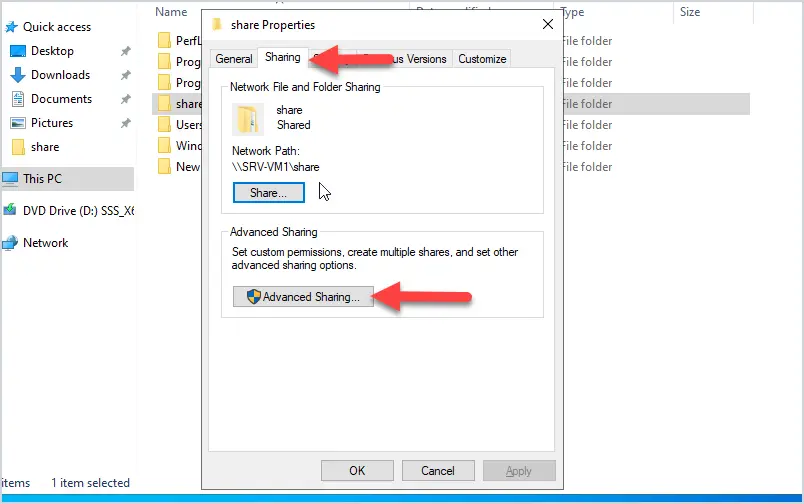
Step 2: Click the “Sharing” tab and then click “Advanced Sharing”
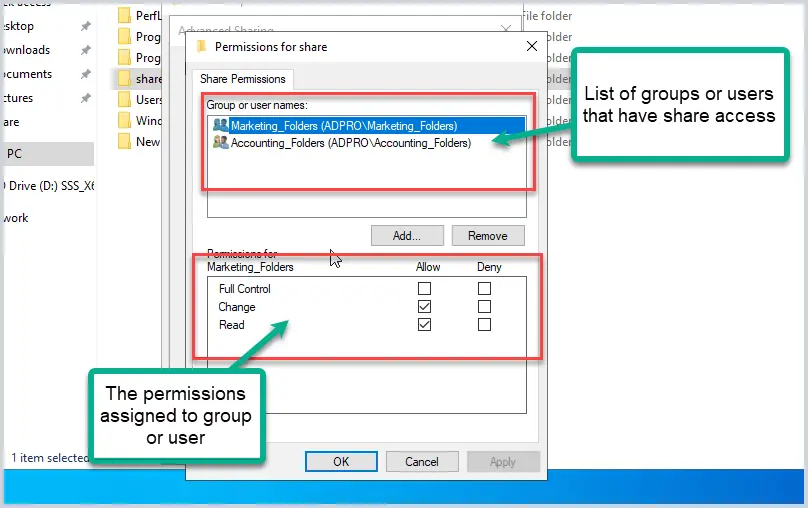
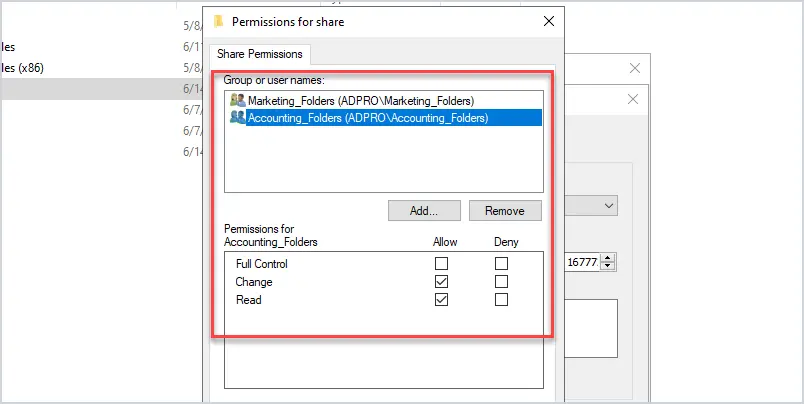
Step 3: Click the “Permissions” button
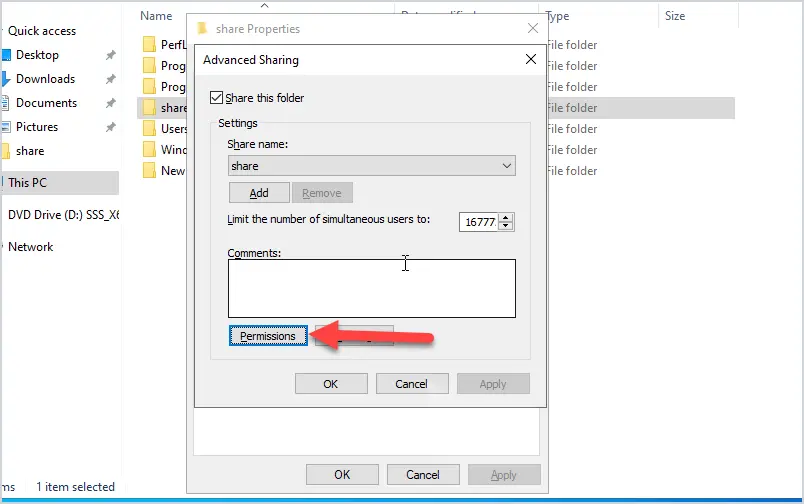
You should now see a list of users and groups and their permission to the folder.
How to View NTFS Permissions
Viewing NTFS permissions is very similar to shared permissions. Browse to the folder, right-click, and select properties. Now click on the “Security” tab to see the NTFS permissions.
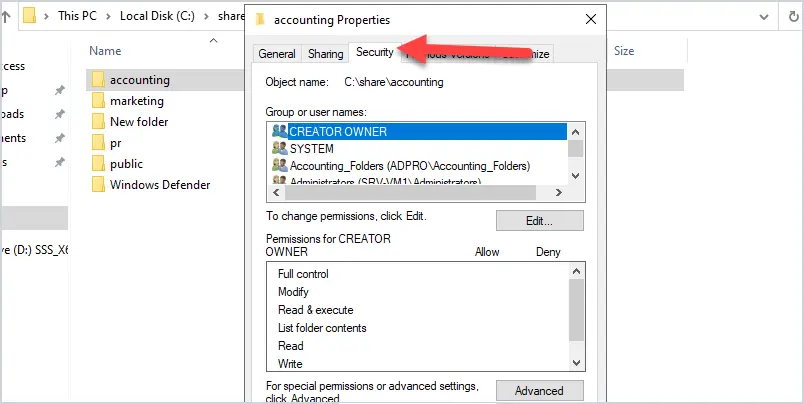
The NTFS permissions will probably have more groups and users listed as it includes local users.
The above method works for checking permissions on a single folder. The problem is that you will often need to check or create a report on all folders. To view permissions on all folders you will need to use a 3rd party tool or create a PowerShell script.
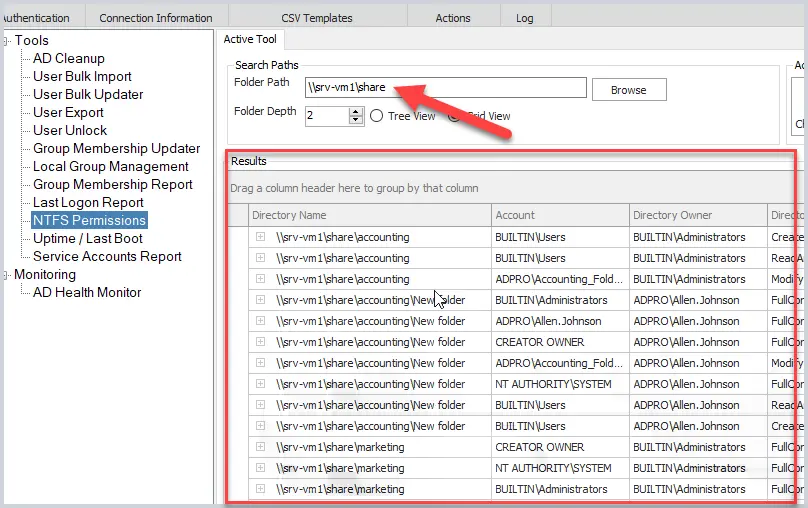
In the example below, I’m using a GUI NTFS Permissions Tool that quickly gets NTFS permissions on all folders.
With this tool, enter or select the shared folder and click run. You will get a report of the NTFS permissions on the root and all subfolders. This tool is very easy to use and saves a lot of time, it also lets you export the report to a CSV file.
NTFS vs Shared Permissions Best Practices
Here are some tips for using NTFS and shared permissions.
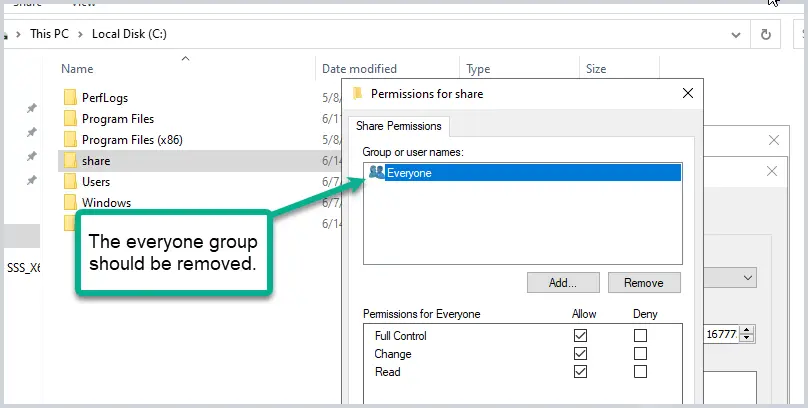
Tip #1: Change the default shared permissions.
The default “share permissions” applies to the “everyone” group, which is insecure and should be removed. You should only give share permissions to groups of users that require access.
Tip #2 Don’t assign permissions to individual users.
When assigning permissions, use groups instead of users. This will simplify administration and make it easier to report on who has access to what.
Tip #3 Don’t give users Full Control.
You don’t need to give users full control of a folder. The most rights they will need is Modify. Full control allows users to take ownership of a folder which would allow them to change permissions on the folder.
Tip #4 Use Least Privilege Access.
Give a minimal amount of permissions to users that enable them to do their job. If a user or group needs to just view documents, then don’t give them write or modify access. Giving more access than is needed can lead to weakness in your systems. Take advantage of the granular control that NTFS permissions provide and give only the access that is needed.
Tip #5 Review NTFS and Shared Permissions.
You should review folder permissions at least once a year, sometimes this is required by an audit. The only efficient way to do this is by using PowerShell or an NTFS Permissions Tool as I demonstrated in this guide.
Tip #6 Don’t use the Everyone Group.
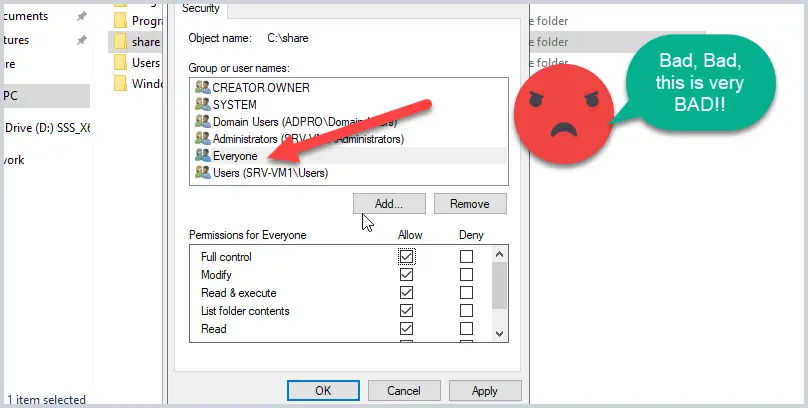
Just like share permissions don’t use the Everyone group on NTFS permissions. You might even have some vendor or tech support say to just add the everyone group that will fix it but don’t do it. This is how viruses spread such as ransomware and replicate to other systems on your network.