In this guide, you will learn how to connect to office 365 with PowerShell. In addition, I’ll show you how to list the available commands for each module and verify they are installed.
When completed you will be able to manage Office 365 and Azure with PowerShell.
Step 1: Install Required PowerShell Modules
Before you can connect to Office 365 you first need to install the required modules. Unfortunately, Microsoft is now recommending you install two modules to manage Office 365. Here are the two modules we will be installing.
- Microsoft Azure Active Directory Module for Windows PowerShell
- The old module for Azure AD
- Also known as MSOnline
- Azure Active Directory PowerShell for Graph
- The new module for Azure AD
To make things even more confusing if you upgrade PowerShell to the new core version (PowerShell 7) it does not support the old module (Microsoft Azure Active Directory Module). If you are using PowerShell core you will need to use the new module (Azure Active Directory PowerShell for Graph).
Let’s move on to installing the modules.
Installing Module 1 (Microsoft Azure Active Directory Module for Windows PowerShell)
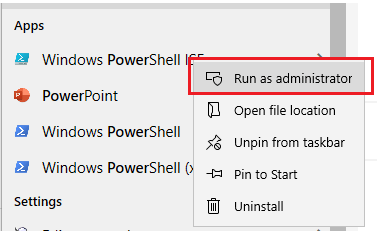
- Open PowerShell as administrator. To do this right-click on PowerShell and choose “run as administrator”
- Type the following command and press enter
Install-module -name MSOnline
If you get a message about NuGet version 2.8.5.201 or newer click yes or type Y.
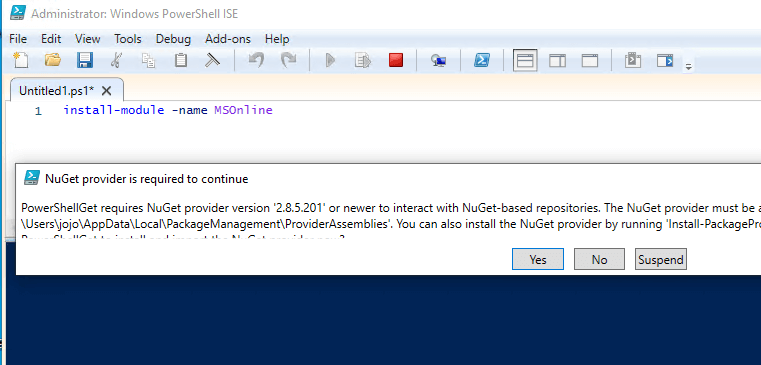
If you get a message about installing the module from an untrusted repository click yes or type Y.

When it is completed we will very it’s installed in step 3.
- Type the command below to list the installed modules
Get-Module -ListAvailable
Look for the MSOnline module name
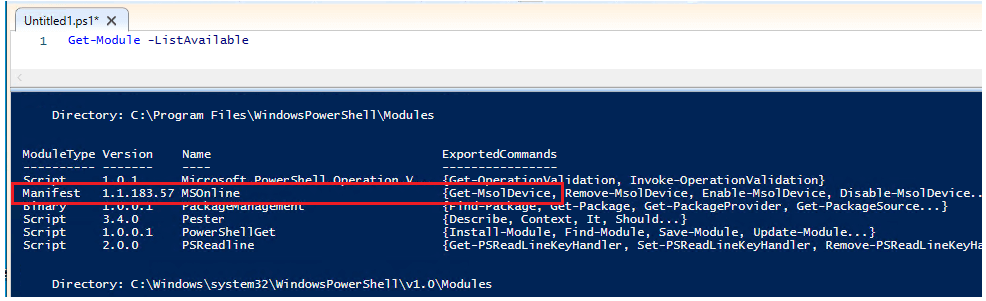
The first module is installed. Now, let’s installed the 2nd module.
Installing Module 2 (Azure Active Directory PowerShell for Graph)
-
Open PowerShell as Administrator
-
Type the following command and press enter
Install-Module -Name AzureAD
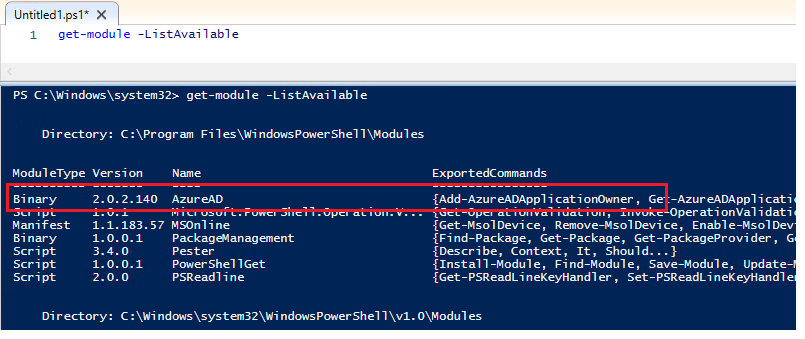
- Verify the module is installed
get-module -ListAvailable
Step 2: Connect to Office 365 with PowerShell
Each module has different commands for connecting to office 365. You don’t have to use both, you can pick which module you want to use.
Connect with Module 1 (Microsoft Azure Active Directory Module for Windows PowerShell… AKA MSOnline)
- Type the following command and press enter
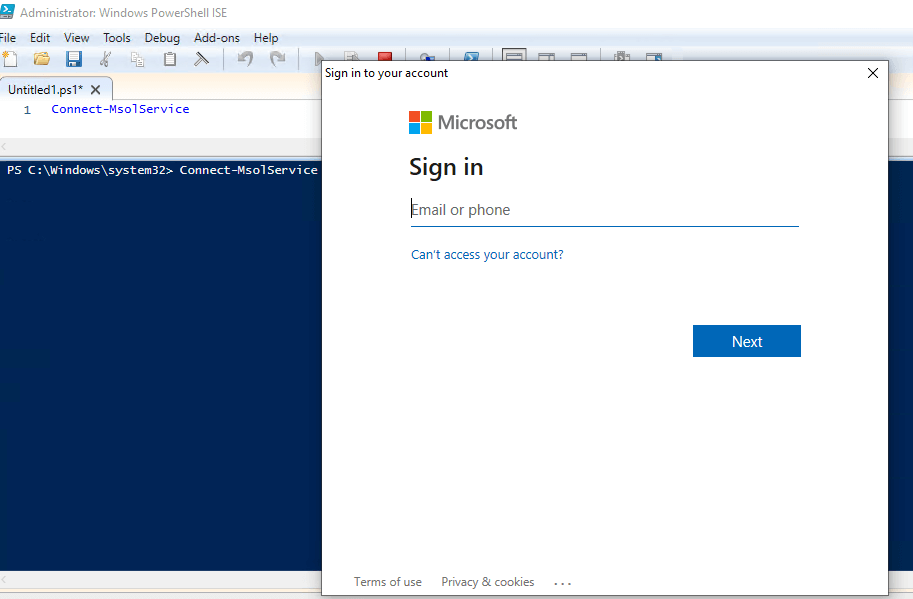
Connect-MsolService
You will get prompted to sign in.
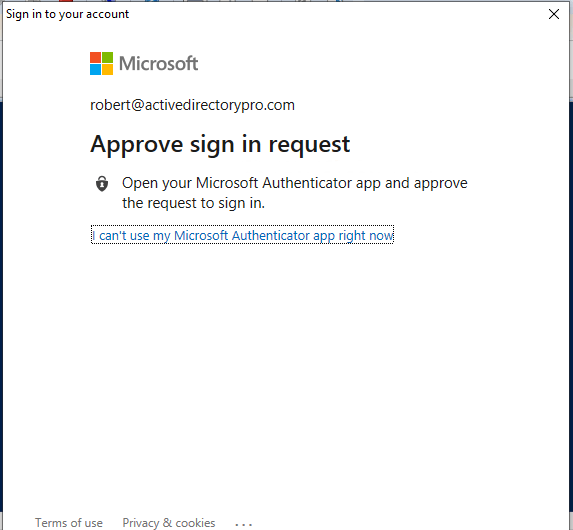
If your account is configured for MFA you will get prompted to approve the request.
- Verify connection
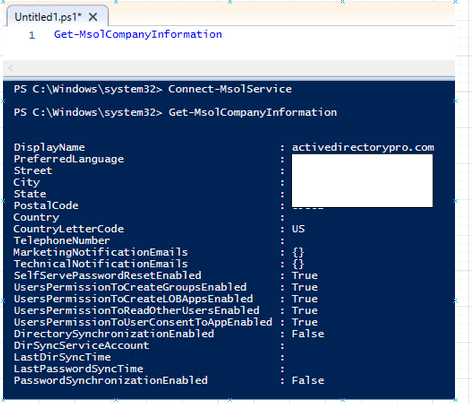
I like to use the command below to verify I’m connected to Office 365.
Get-MsolCompanyInformation
If you are connected PowerShell will display the company info that you have listed in Office 365.
Connect with Module 2 (Azure Active Directory PowerShell for Graph)
- Type the following command and press enter
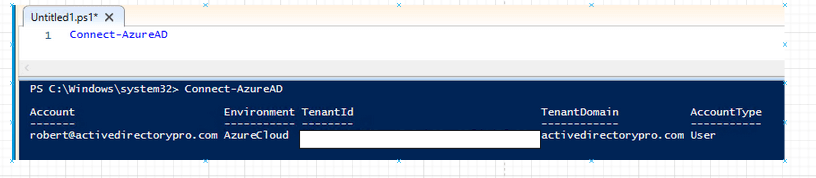
Connect-AzureAD
The AzureAD module will automatically display some company information when it connects.
So far you have learned the required modules, how to install them, and the commands to run to connect PowerShell to office 365.
Now let’s look at how to list the available commands for each module.
List Office 365 Module Commands
To view a list of commands you first need to know the module name, to list the module names use this command.
Get-Module -ListAvailable
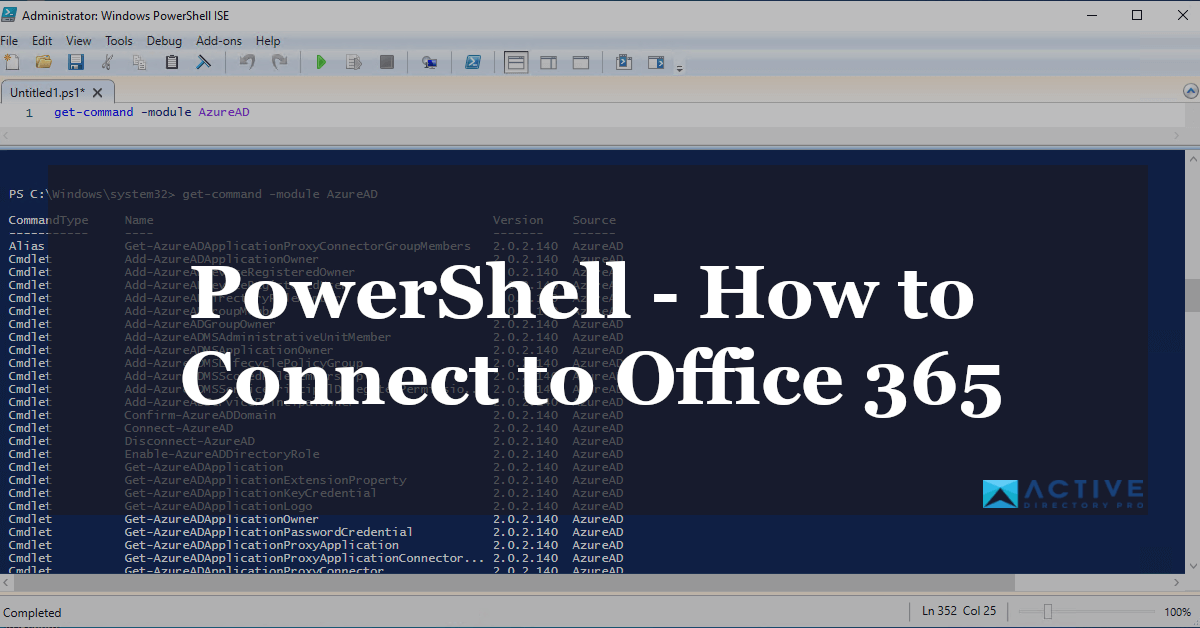
In this example, I want to see all the commands for the AzureAD module. Type the command below.
Get-Command -Module AzureAD
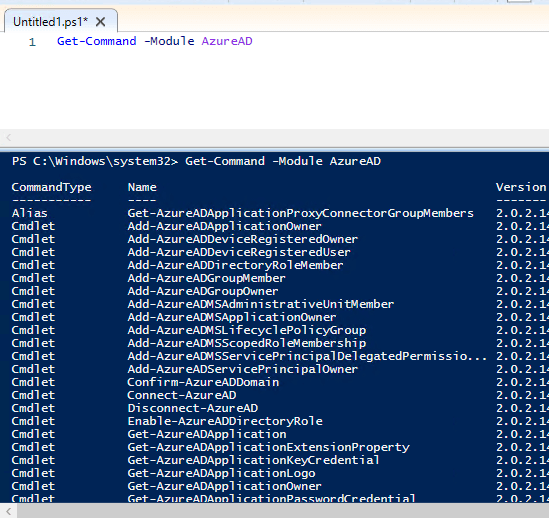
To get a list of commands for the MSOnline module use this command
Get-Command -Module MSOnline
Example Office 365 Powershell commands
Here are a few examples of using PowerShell to manage office 365.
Get all Office 365 Users
Get-MsolUser -All | select-object *
Get all licensed users
Get-MsolUser -All | Where-Object { $_.isLicensed -eq "TRUE" }
Get Azure devices
Get-AzureADDevice
Set a users password
Set-MsolUserPassword-UserPrincipalName “<email address>” -NewPassword “New Password”
Assign a license to a user
Set-MsolUserLicense -UserPrincipalName “user name” -AddLicenses “<licensed name>”
Related: Huge List of PowerShell Commands for Active Directory and Office 365
Summary
In this guide, I showed you the two PowerShell modules that Microsoft requires to connect and manage Office 365. To make it even more confusing the old module is not compatible with PowerShell Core and Version 7 and up. Hopefully, they plan to move all the functionality into the newer module to make this more straightforward. The MSOnline module (old one) has been around for a long time. When you search for commands to manage Office 365 you will find many articles using the older (MSOnline) commands.