In this guide, I will show you how to install Windows 11 virtual machine (VM) on Hyper-V step by step.
Windows 11 has several requirements that you must enable before you can install it on Hyper-V.
Windows 11 VM Hyper-V Requirments
- Generation 2 VM
- UEFI (System Firmware)
- Secure Boot Enabled (Secure Boot can only be enabled with UEFI)
- TPM 2.0 Enabled
- 1 (GHz) or faster CPU with 2 or more cores
- 4GM Memory or more
- 64GB or more of disk space
How to Install Windows 11 VM on Hyper-V
Follow the steps below to create a Windows 11 VM.
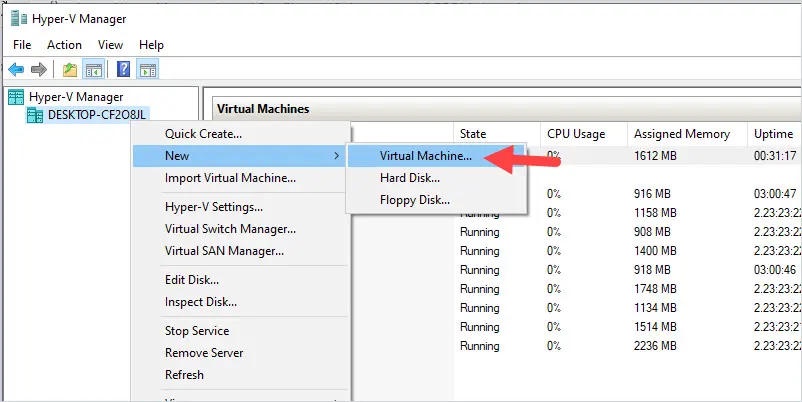
1. Open Hyper-V Manager Console, Right Click, and Select New -> Virtual Machine
2. Click Next
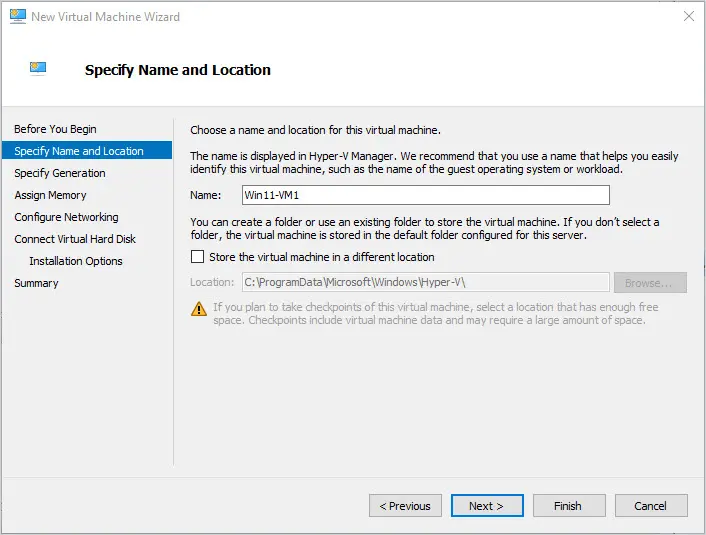
3. Specify Name and Location.
I’m going to name my VM Win11-VM1.
Choose a location to store the VM or leave it unchecked to keep the default location. Click Next
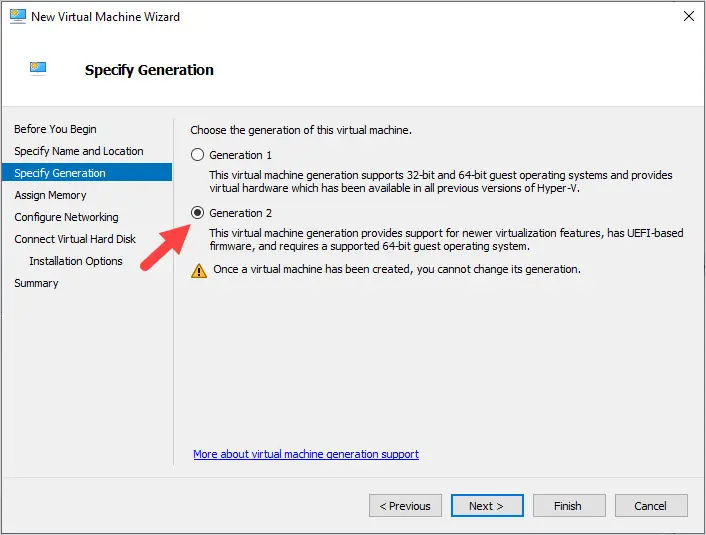
4. Specify Generation.
Select Generation 2 and click Next.
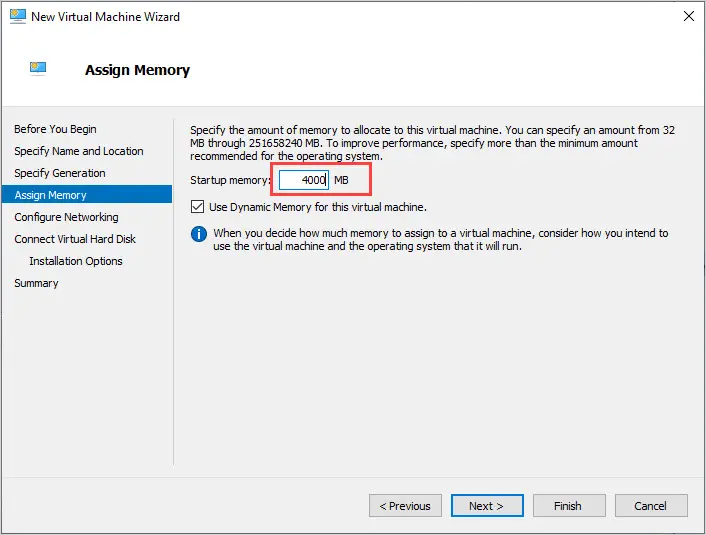
5. Assign Memory
Give the VM at least 4GB of memory and click Next.
6. Configure Networking
Select your network adapter or you can leave it as not connected.
Click Next.

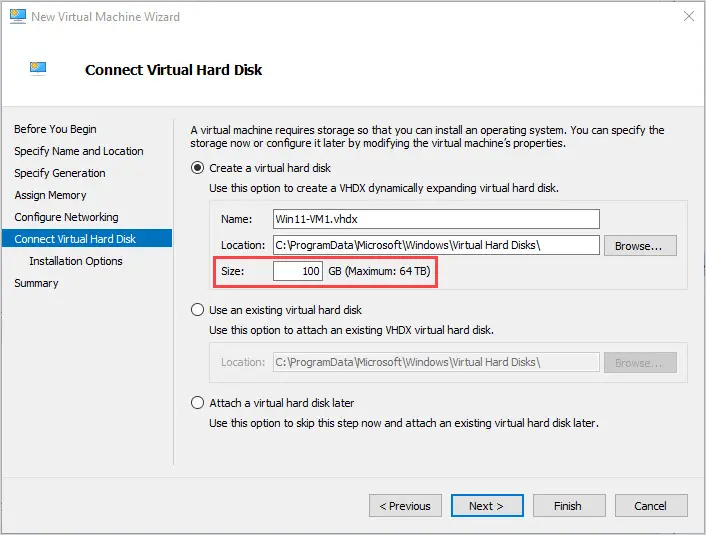
6. Connect Virtual Hard Disk
You can modify the name and location of the virtual disk but I typically leave it at the defaults.
Set disk size to 64GB or greater.
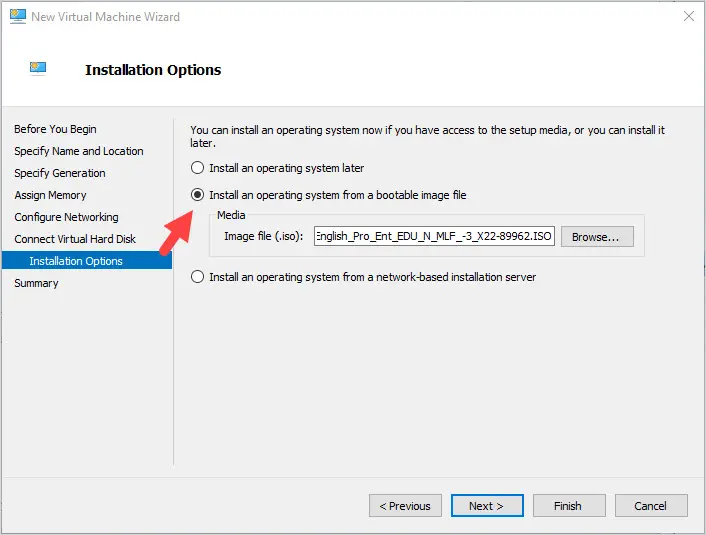
7. Installation Options
Select the Windows 11 ISO and click Next.
On the Summary page click “Finish”.
The VM is created but you now need to ensure Secure Boot and TPM are enabled.
8. Right-click on the VM and click Settings.
Click on Security
Make sure Enabled Secure Boot and Enable Trusted Platform Module are selected. The template should be Microsoft Windows.
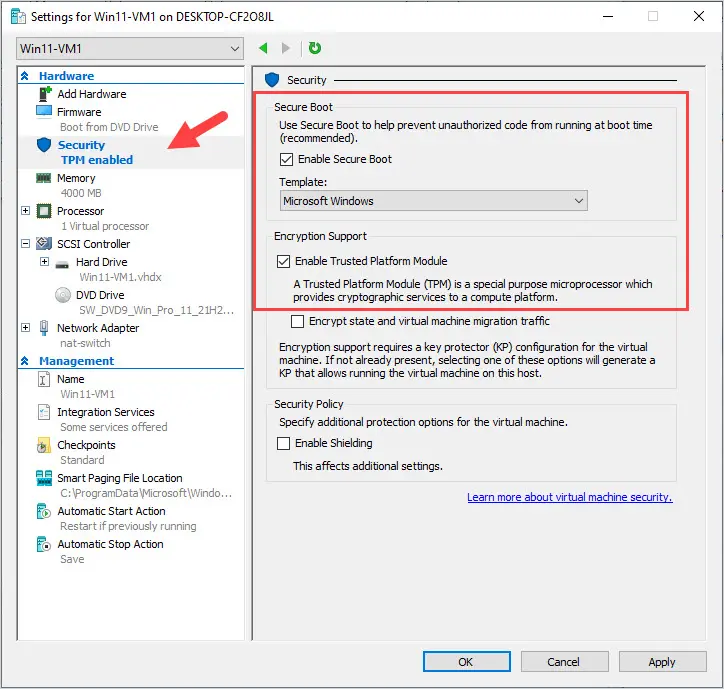
Click Apply.
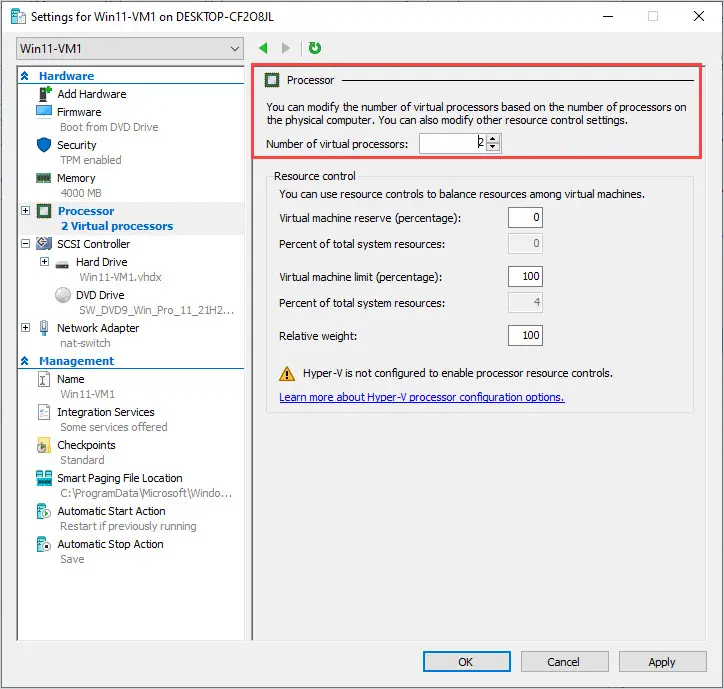
9. Click on Processor
Make sure the VM has at least 2 virtual processors and click OK.
You should now be able to install Windows 11 on the VM.
Right click the VM and click Start.
The VM should boot from the ISO to start the Windows 11 installation.
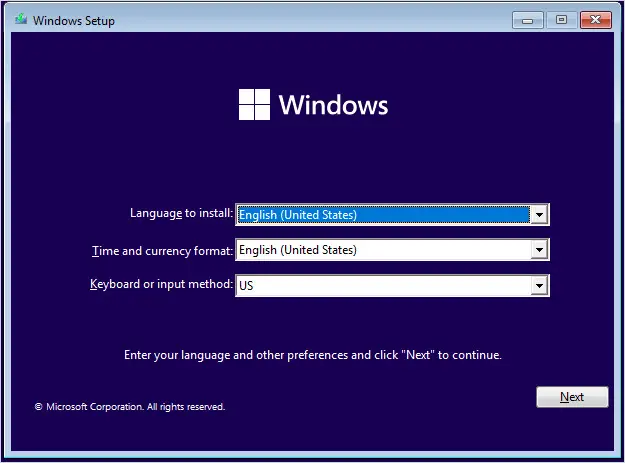
Click Next.
Click Install Now.
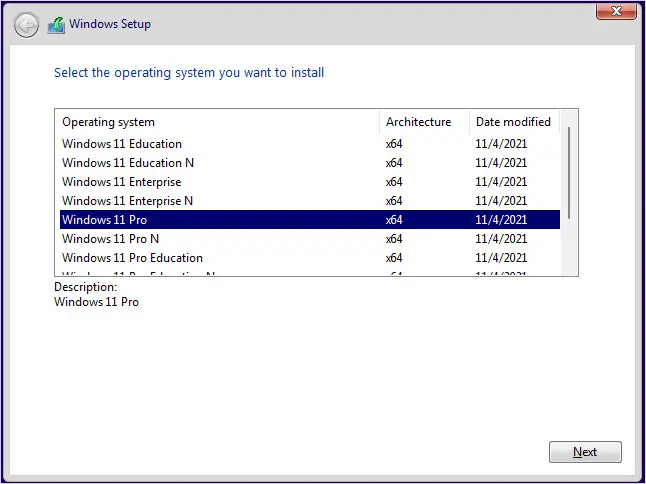
Select the operating system you to want install and click Next.
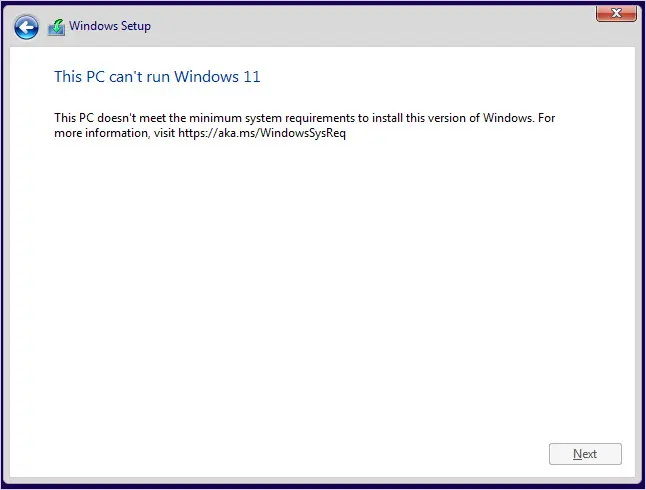
This PC can’t run Windows 11
If you get the screen below you missed a requirement. Go back and verify the VM meets all the Windows 11 requirements.
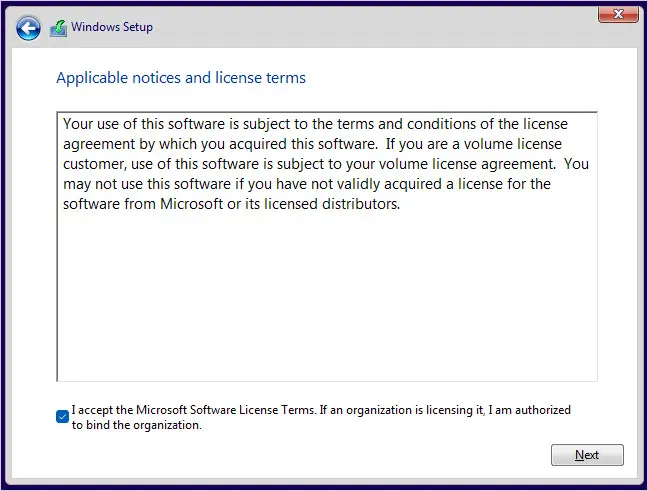
Accept the Microsoft License Terms and click Next.
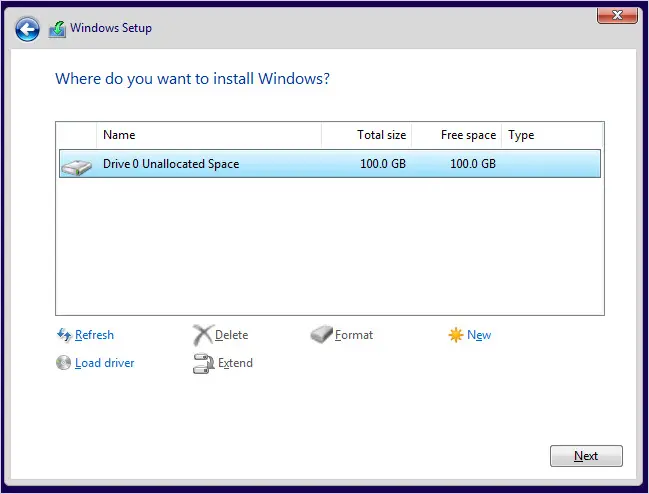
Click on Custom: Install Windows only.
Create a new partition or install it on the Unallocated space. I’m going to install it in the unallocated space. Click “Next”.
The remaining steps are the normal Windows 11 setup steps.

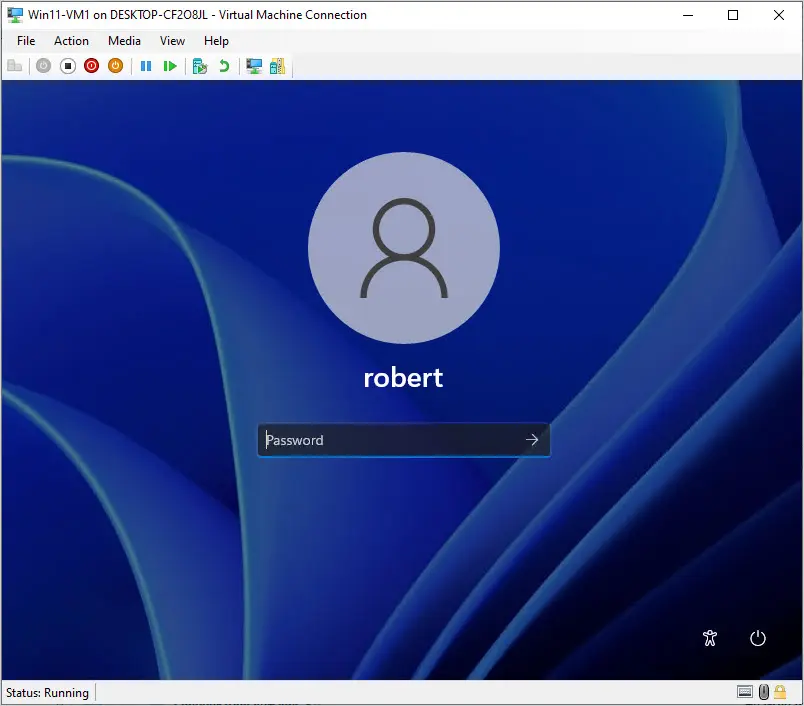
Complete the Windows 11 setup wizard and you will have a Windows 11 VM running on Hyper-V.
I hope you found this guide useful. If you have questions or comments post them below.

Thanks, very helpful guide!
Works like a charm.
Nope,
Did the steps, have the next error :
“Win 11 test could not initialize
The key protector could not be unwrapped”
This error can happen for a number of reasons:
1. The TPM chip is not enabled or is not working properly.
2. The BIOS or UEFI settings are not configured correctly.
3. The Windows 11 installation media is corrupt.
4. There is a hardware problem with the computer.