In this guide, you will learn how to create a Hyper-V switch that uses NAT for network access.
NAT will provide virtual machines access to network resources (internet access) using the host computers network adapter.
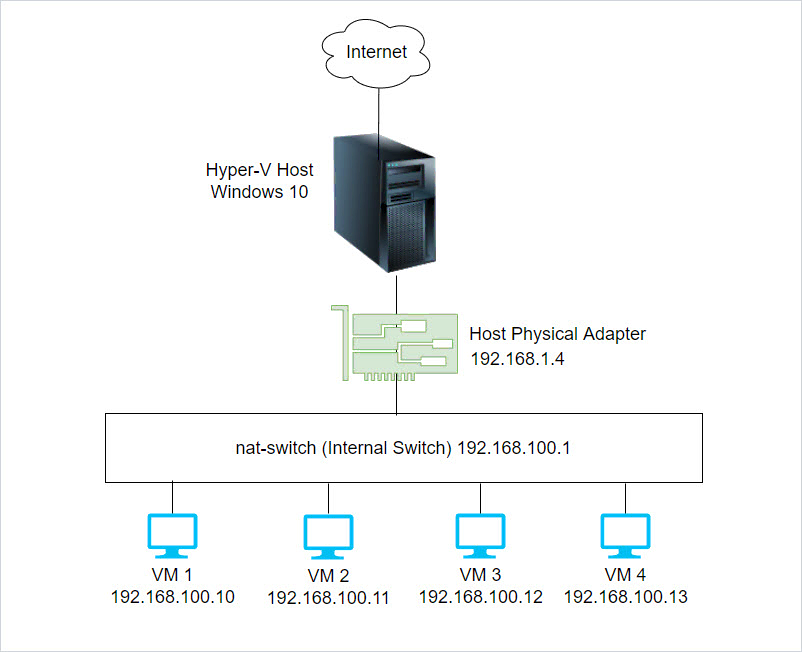
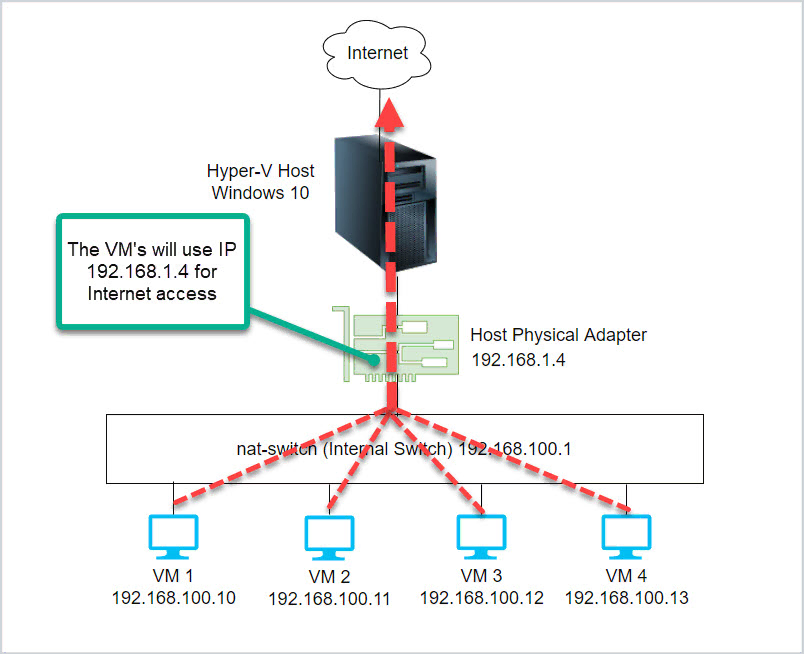
For this guide, I’ll use the below network settings. When the configuration is complete the VMs on the 192.168.100.0/24 network will use the Hyper-V Host IP 192.168.1.4 for accessing the internet.
Step 1: Create an Internal Virtual Switch
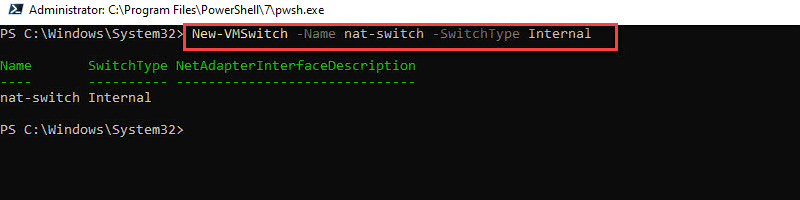
Open PowerShell and run the below command. Change “SWITCHNAME” to whatever you want to name your switch, I’ve called mine “nat-switch”.
New-VMSwitch -Name SWITCHNAME -SwitchType Internal
Step 2: Get the Interface Index Number (ifIndex)
Next, you need to find the index number of the virtual switch created in step 1. Run the below command.
Get-NetAdapter
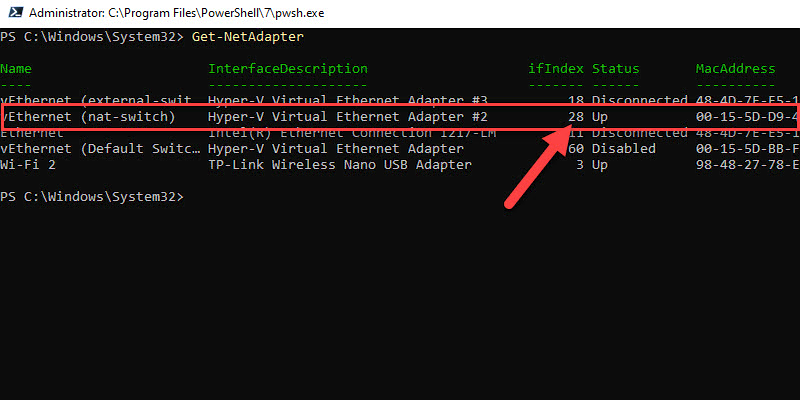
My index number is 28, you will probably have a different number than mine.
Step 3: Configure NAT Gateway
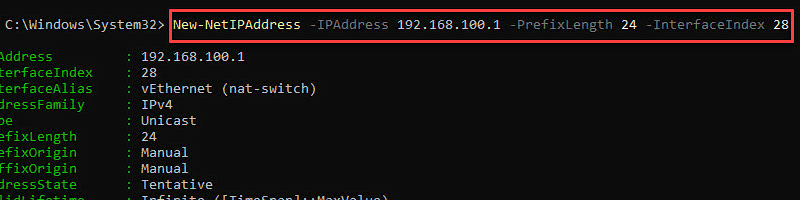
I have my VMs configured on the 192.168.100.0/24 network. I’m going to use the 1st address of this network for the gateway. The gateway will be used n your VMs so they can send traffic outside of their network.
New-NetIPAddress –IPAddress 192.168.100.1 -PrefixLength 24 -InterfaceIndex 28
Step 4: Configure NAT Network
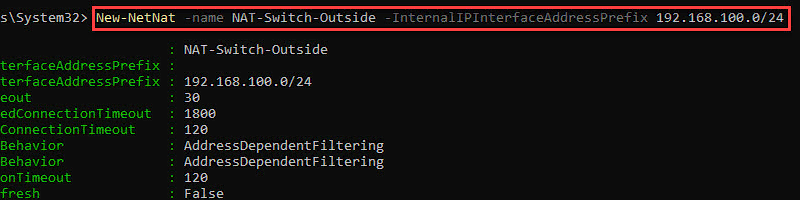
Now configure the network you want to NAT. Again I want to NAT the 192.168.100.0/24 network. You can name anything you like, I named mine “Nat-Switch-Outside”.
New-NetNat -Name Nat-Switch-Outside -InternalIPInterfaceAddressPrefix 192.168.100.0/24
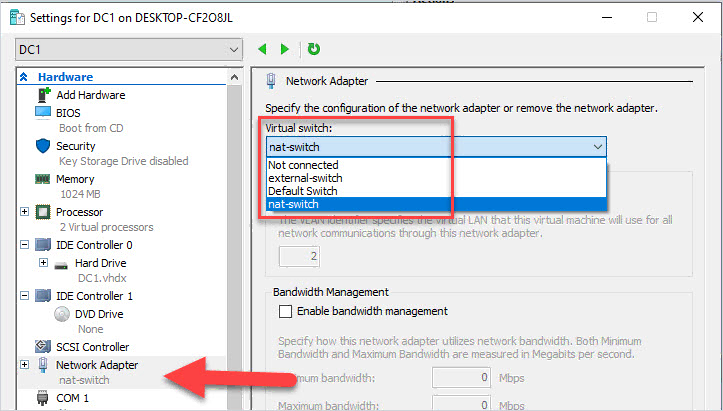
Step 5: Configure VM with New Virtual Switch
In Hyper-v you can now change your VMs to use the new virtual switch.
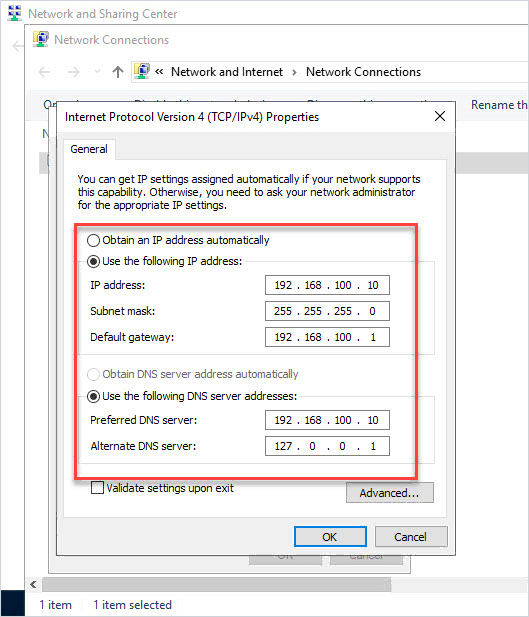
Step 6: VM Network Settings
Now configure your VM with an IP address from the network configured in step 4. In my case, this is the 192.168.100.0/24 network.
I’ll give my VM the IP 192.168.100.10 and the gateway 192.168.100.1 (step 3).
Now your hyper-v VMs will use NAT when accessing a different network. The diagram below is an example of how NAT works. All of the VMs on my 192.168.100.0/24 network will use the Hyper-V host physical Adapter when accessing the internet.
View NAT Settings
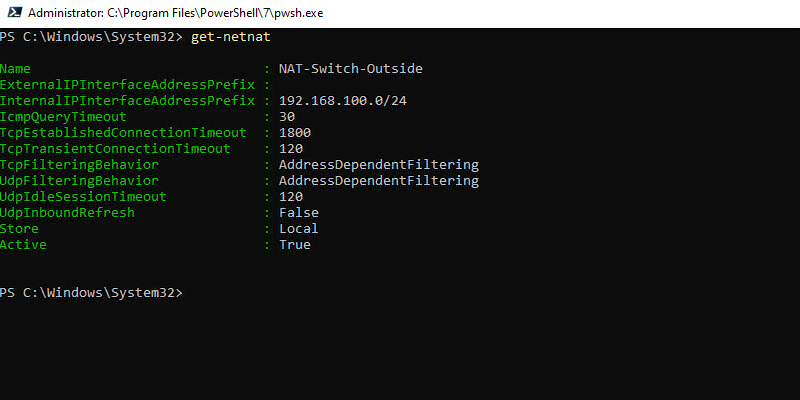
To view existing NAT settings run the below command.
Get-NetNat
View Hyper-V Virtual Switches
Run this command to view your Hyper-V virtual switch.
Get-VMSwitch
Exactly what I was looking for thank you!
Will I be able to remote RDP to any machines behind the NAT?
No, you would have to poke holes in the firewall and or configure port forwarding. I do not recommend doing this.
Hi, This looks great as it may be a solution for us. We are currently want to move three VMs to a hosted server. One VM is a domain server, one is an application server and the third a data server. At present we use Parallels Remote Application server to publish the applications to the end users. Being on our physical network, the connection requests are SSL and the router forwards the connection requests directly to the VM Domain which runs the Parallel Remote Access.
However, when we go the offsite hosted server, the connection will be to the NIC on the host server which has a public IP so we will need to forward to the VM Domain. Of course we want to maintian the current IP addressing of the VMs for consistency and to avoid having to go through the process of changing the Domain IP. How would you go about doing that once you have this setup.
Hello! Good article, I have been long searching for! Thank you!
But… how does the NAT connect to the physical NIC 192.168.1.4? It is not in your setting. And at least on my system the connection from VM-NAT-? does not forward.
…I can ping the physical external NIC (Wi-Fi) from the guest. That’s something. And ping guest from host. But the NAT address (yours 192.168.100.1) does not respond from the guest.
I’ve followed your guide but I’m unable to go out to internet trough VM
On my win10 host I see the nat-switch as “public network” without connection did you know how fix it? Also may I know why you’ve set the VM’s network card dns in that way?
Thank’s
Make sure the internet switch network is different than your physical adapter.
I got it working changing DNS to 8.8.8.8
This is great – thank you Robert.
When we installed Hyper-V, the Windows configuration changed so that the host machine appears to be using the virtual switch for its internet connection. Is that the usual behaviour?
We haven’t set up NAT yet (hence looking at this guide!) and are just looking to ensure that we don’t break anything while we configure NAT.
Thanks,
Iain.
The default switch also uses NAT, it uses a built in DHCP server that assigns IPs to VMs. The issue is you have no control over the DHCP server and cannot set static IPs on your VMs.
would this work on a homelab using a laptop
Yes. I’m using it on a homelab using a dell workstation.