In this guide, I will walk you step-by-step through how to create a Room Resource in office 365 using the Exchange Admin Center and PowerShell.
A Room Resource is a shared room (such as a conference room or training room) used by everyone in an organization. When you create a Room Resource, a mailbox is also created. When you select the Room Resource from the calendar when creating a meeting, an email is sent to the Room Resource mailbox as a meeting invite and adds it to the Room Resource calendar. This reserves the resource for your meeting.
Before you set up Room Resources, you must carefully consider the naming convention. You want your users to be able to easily identify what Room Resource they are reserving. If you have multiple buildings or even one building with multiple floors, you want to be very specific. I can’t tell you how many times users have asked where a conference room is located because there is not enough information in the Room Resource Properties. Room Finder in Outlook addresses this issue in a unique way. As an admin, you want to understand Room Finder before setting up your Room Resources.
Create a Room Resource in Exchange Admin Center
Step 1. Log into Exchange Admin Center
https://admin.exchange.microsoft.com/#/
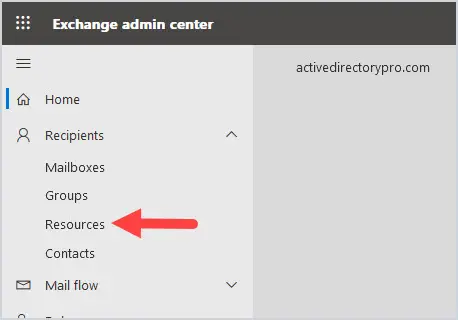
Under recipients click on Resources.
Step 2. Resource Setup
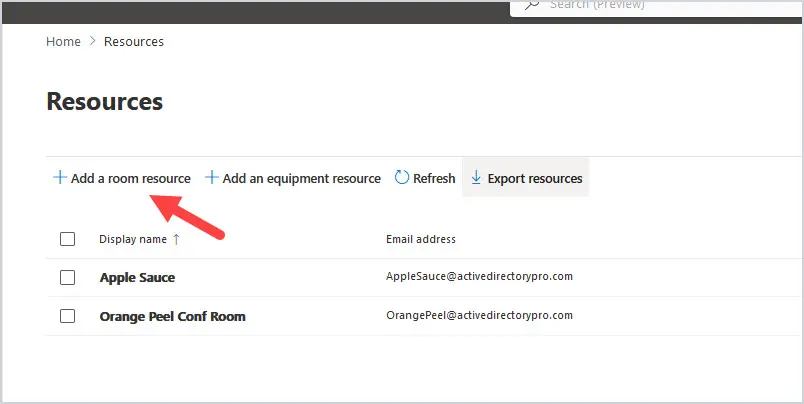
Click on add a room resource.
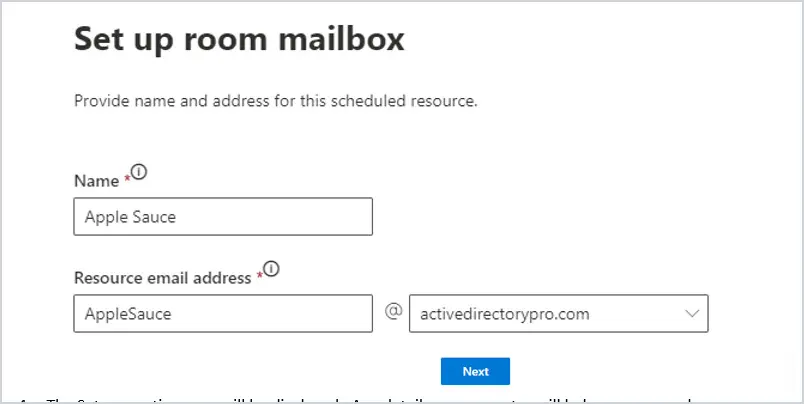
The Set up room mailbox will appear. Enter a Name for your Resource. The name should be detailed to let your users know exactly what resource they are reserving.
NOTE: Adopt a naming convention and stick with it to make the Room Resources easily identifiable for your users.
Enter an email address. This email address should be unique. Try to avoid a long name so it is easier to manage.
If you have multiple domains, choose the domain you want the email address to have.
In this example, I am going to call my Room Resource “Apple Sauce”. I set the email address as “applesauce” and selected my domain activedirectorypro.com. Click Next to continue after you enter all the fields.
Step 3. General Information
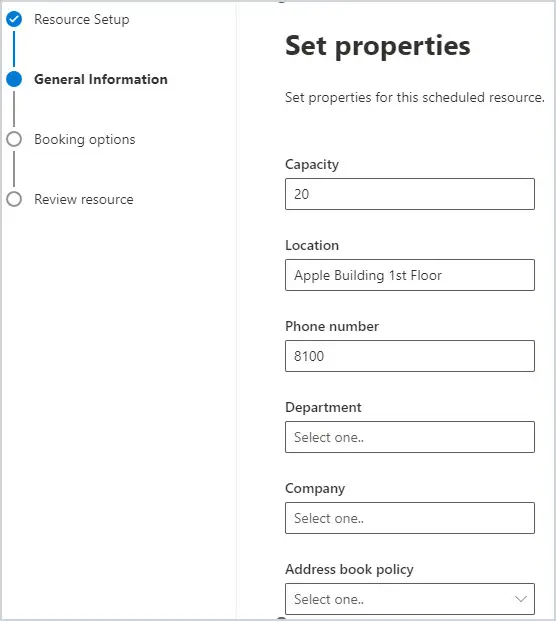
On the general information page, the set properties page will be displayed. Any details you can enter will help your users plan and determine the best room for their meeting.
NOTE: With buildings in the same Room List, it is important to give them all the same properties such as Street, City, State, Location, Country, etc. You should always configure a capacity to help your users plan.
Microsoft also recommends that you configure the properties for Floor and Floor label, but you can only do that in PowerShell. I will go over that further down in the article.
Step 4. Booking Options
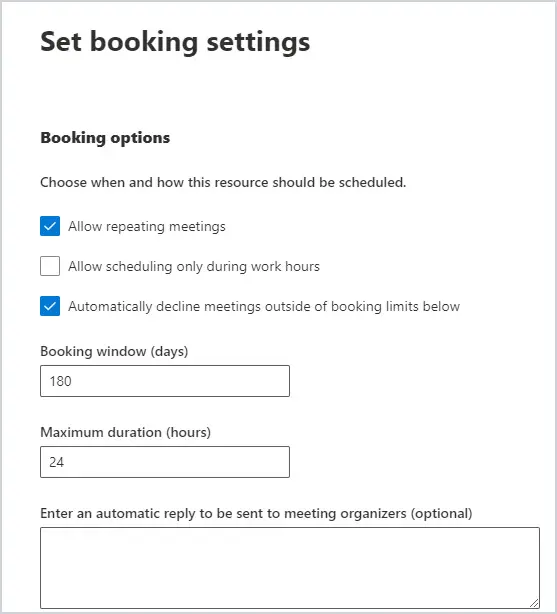
Under Booking options, Allow repeating meetings and Automatically decline meetings outside of booking limits below will be checked by default.
- Allow repeating meetings lets the users book repeating meetings for the resource.
- Automatically decline meetings outside of booking limits below refers to the settings you have for Booking windows (days) and Maximum duration (hours).
- The Booking window (days) setting will be applied if the repeating meeting end date goes beyond the days specified. The default is 180 days so repeating meetings will automatically be declined if they repeat beyond 6 months.
- The Maximum duration (hours) means that the meeting can’t go beyond the hours specified, which is 24 hours by default.
- Enter an automatic reply to be sent to meeting organizers (optional) allows you to put in a custom reply message when organizers book the resource.
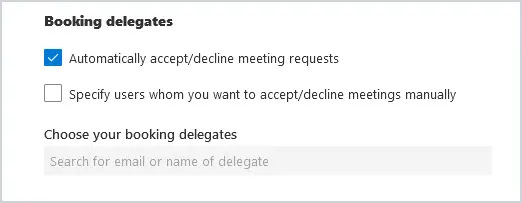
Booking delegates at the bottom of the screen allows meetings to be automatically accepted or declined or you can define specific users who manually accept/decline meetings. The default is Automatically accept/decline meeting requests.
If you want to choose who accepts/declines meeting requests, uncheck Automatically accept/decline meeting requests and check Specify users whom you want to accept/decline meetings manually. Then search for the users in the Choose our booking delegates box.
Once you have completed this page, click Next.
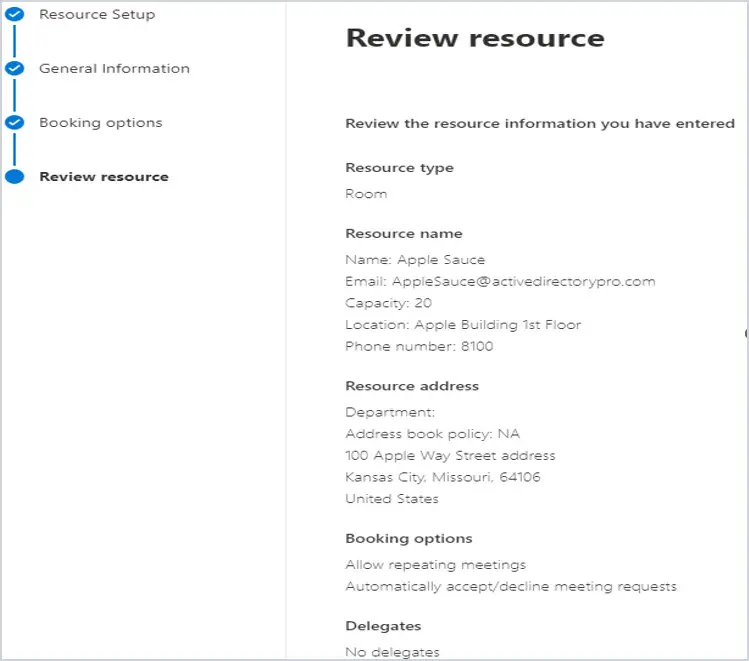
Step 5. Review Resource
The next page is the Review resource. Look over your settings. If you want to change anything, click back at the bottom. Otherwise, click Create.
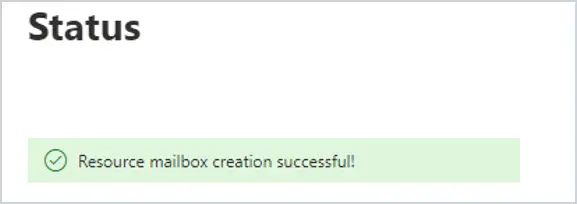
It will take a few minutes for the resource to be created. Once you see the status message below, click Done.
Create a Room Resource using PowerShell
Step 1. Connect to Exchange Online
Use the cmdlet Connect-ExchangeOnline to connect with PowerShell.
You will need the Exchange Online module installed in order to connect with PowerShell. If you need complete steps see the article Connect to Exchange Online with PowerShell.
Step 2. Create a Room Resource using the cmdlet New-Mailbox
In this example, I’m creating a Room Resource called “Orange Peel”. It will create a Room Resource with the Display Name of “Orange Peel” and the email address of “orangepeel@activedirectorypro.com”.
New-Mailbox -Name "Orange Peel" -Room

We can modify the Room Resource properties by using the Set-Place cmdlet.
Microsoft recommends setting the Floor, Floor Label, City, State, Capacity, and Building properties to make sure Room Finder works correctly.
In this example, we are going to set the Building to “Orange Building”, The City to “Kansas City”, the State to “Missouri”, the Capacity to “20”, the floor to “1”, the floor label to “1st Floor”, and the Countryorregion to “United States”.
Set-Place -Identity "Orange Peel" -Building "Orange Building" -City "Kansas City" -State "Missouri" -CountryOrRegion "United States" -Capacity 20 -Floor 1 -FloorLabel "1st Floor"
NOTE: You can’t see the building or floor settings in the Exchange Admin Center GUI.
Change the Room Mailbox Settings with the Set-Mailbox cmdlet
In this example, I change the room capacity to 10 on the Room Resource “Orange Peel”, the Display Name to “Orange Peel Conference Room”, and the Location (Office parameter) to “Orange Building 1st Floor”
NOTE: The office parameter shows up as the Location in the Exchange Admin Center GUI.
Set-Mailbox -Identity "Orange Peel" -DisplayName "Orange Peel Conf Room" -ResourceCapacity 10 -Office “Orange Building 1st Floor”
Set the Booking Options using the cmdlet Set-CalendarProcessing
When a Room Resource is created, accept or decline booking requests automatically is on by default. Also, allow repeat meetings is on by default.
In this example, we are turning off Auto Accept for Room Resource “Orange Peel”, and sending booking requests to “Robert Allen” to approve or decline.
Set-CalendarProcessing -Identity "Orange Peel" -AutomateProcessing None -AllRequestInPolicy $true -AllBookInPolicy $false -ResourceDelegates "Robert Allen"
To turn it back on, use the following command:
Set-CalendarProcessing -Identity "Orange Peel" -AutomateProcessing:AutoAccept
Delegate Full Access Permission to a Room Resource Mailbox using the Add-MailBoxPermission Cmdlet
In this example, we give Robert Allen full access to the Room Resource mailbox “Orange Peel”
Add-MailboxPermission -Identity "Orange Peel" -User "Robert Allen" -AccessRights fullaccess
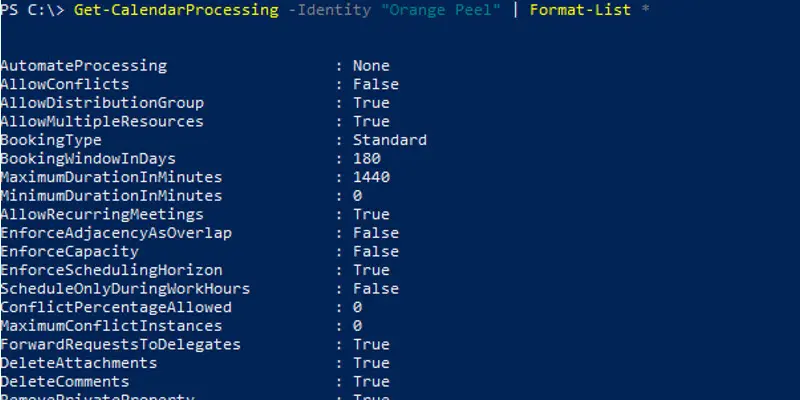
View Calendar Processing Settings on a Room Resource using the cmdlet Get-CalendarProcessing
In this example, all the settings for calendar processing for Room Resource “Orange Peel” are shown.
Get-CalendarProcessing -Identity "Orange Peel" | Format-List *