In this guide, I will walk you through step by step how to delegate Full Access permissions to another user’s mailbox. This guide will work for a regular user mailbox or a shared mailbox.
There are a few reasons why you may want to do this:
- Give assistant access to a manager’s email
- Give access to an employee’s mailbox who may be on vacation or on leave
- An employee has left the company, and someone else needs to monitor the mailbox
- Delegate access to a shared mailbox
When you delegate Full mailbox permissions, it gives that user access to act as the owner of the mailbox meaning they can read, edit, and write to the mailbox folders as well as the calendar.
Method 1: Give Full Mailbox Permissions via Admin portal
Minimum Office 365 Admin Role(s) needed to accomplish this task: Exchange Recipient Administrator
Step 1: Log in to the admin portal at https://admin.microsoft.com and click on Exchange.
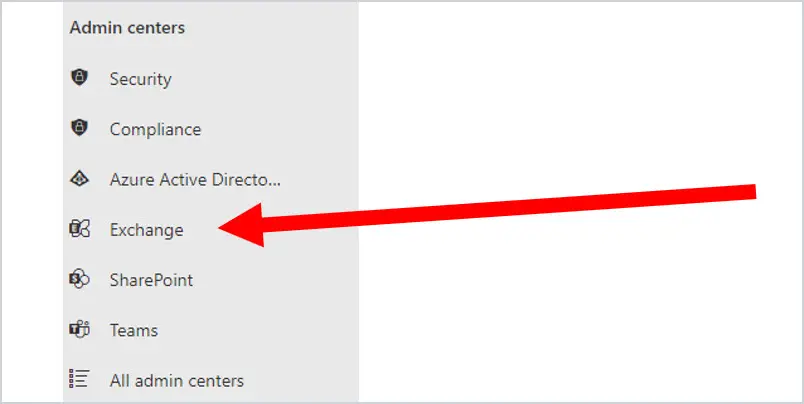
IMPORTANT NOTE: These directions are based on the view from the new Exchange Admin Center, not the Classic Exchange Admin Center. To get the New Exchange admin center, click on the New Exchange admin center on the left-hand side or go to https://admin.exchange.microsoft.com
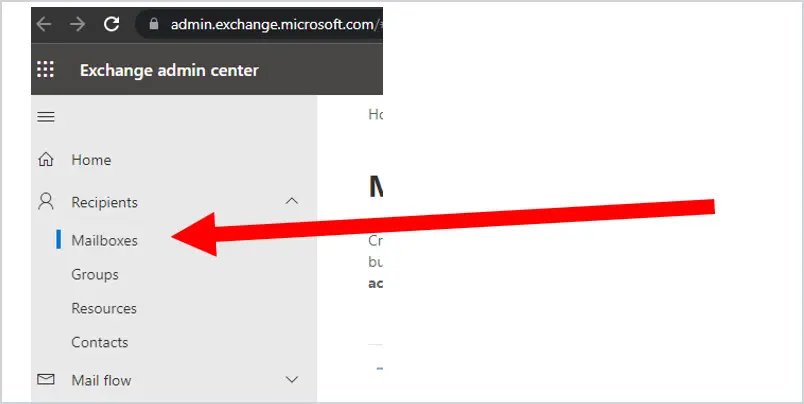
Step 2: Click on Recipients, then Mailboxes.
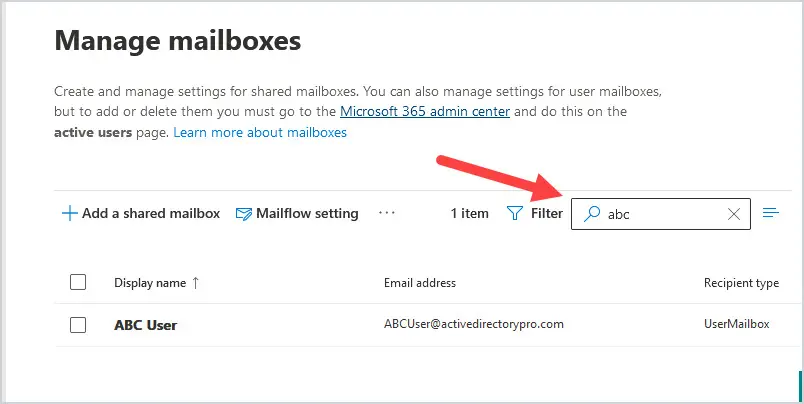
Step 3: Type in the name of the mailbox you are looking for in the Search box. We will use the mailbox ABC User in this example.
Step 4: Click on the mailbox ABC User, then click on Delegation, or click in the box to the left of the mailbox ABC User and then select Mailbox Delegation.
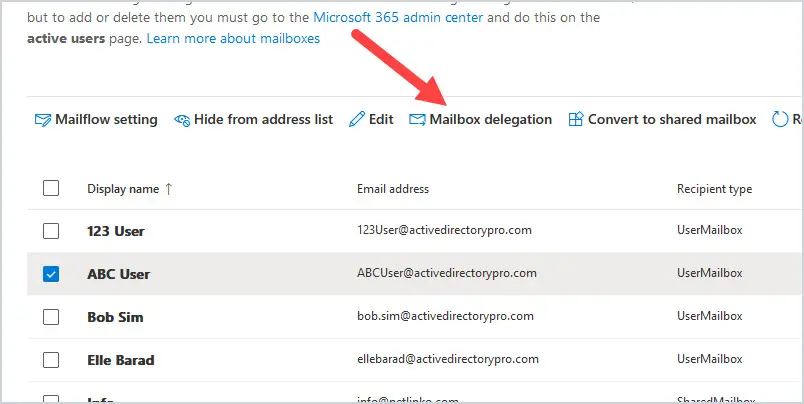
The mailbox settings will display on the right-hand side of the screen.
Step 5: To give permission to another user, click on Edit below Read and manage (Full Access).
TIP: The number to the right of the Read and manage (Full Access) in parentheses (0) is the number of users who currently have Full Access permissions to this mailbox.
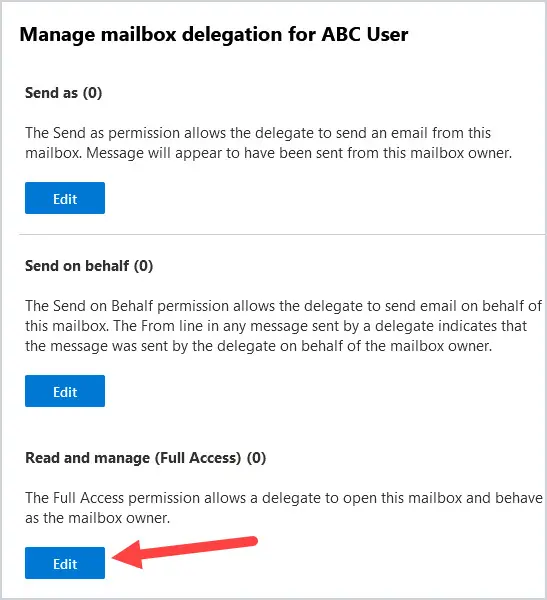
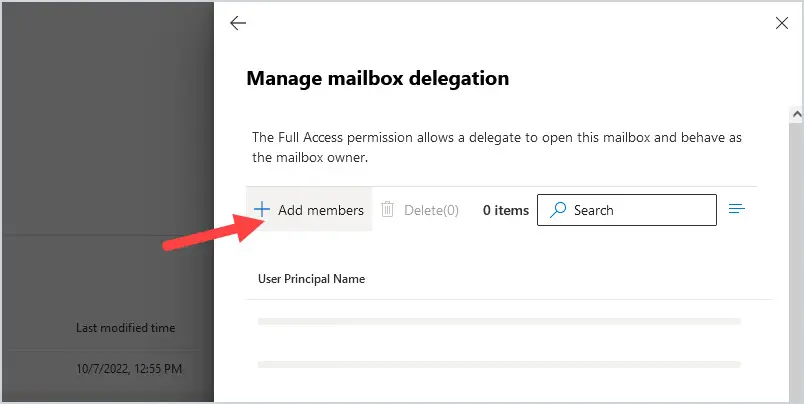
Step 6: The Manage mailbox delegation box will appear. Click on Add Members.
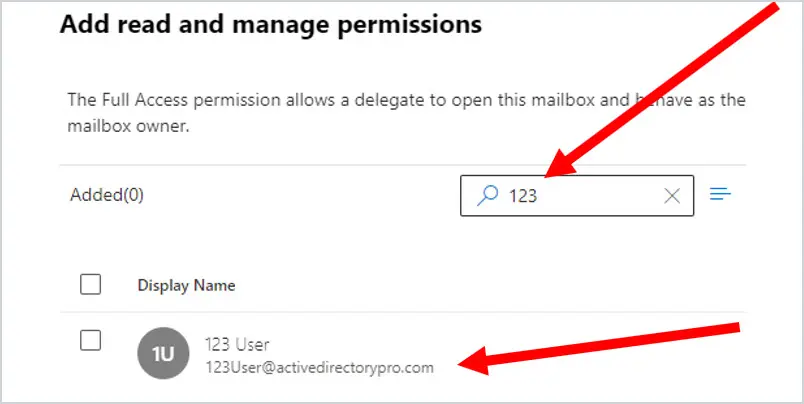
Step 7: To search for the user(s) you want to give delegation permissions to this mailbox, type in the name in the Search box. In this case, we will give the user 123 User Full Access permissions. Click on the user 123 User and then click Save at the bottom of the screen.
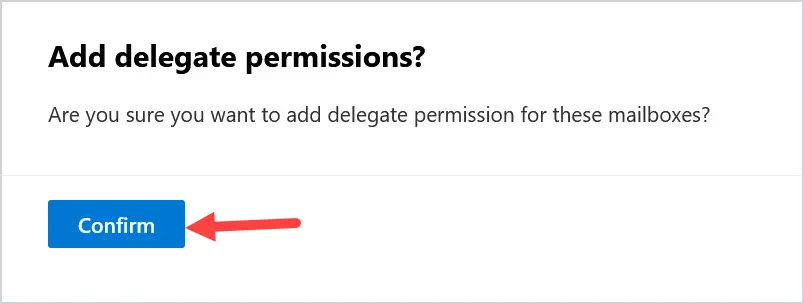
Step 8: After you click Save, you will get prompted if you are sure you want to add delegate permission for this mailbox. Click Confirm at the bottom.
Step 9: After you click on Confirm, another prompt will appear that the Mailbox permissions were added. Click on the X in the upper-right-hand corner to proceed.
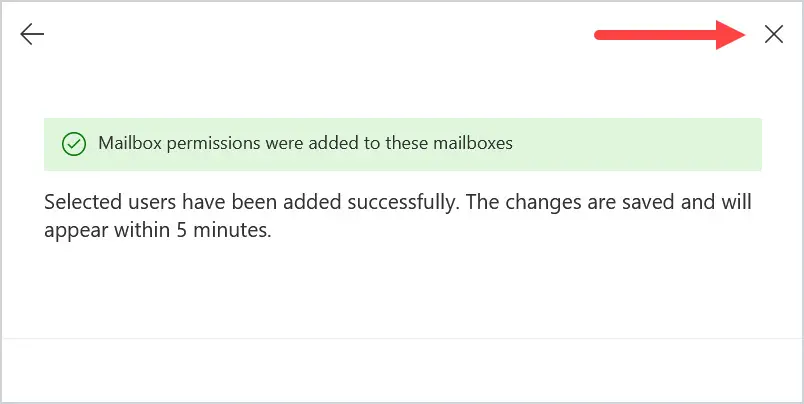
Step 10: Please note that it says the settings will appear in 5 minutes, but that is just the display. It can take an hour for the new permissions to update.
Method 2: Give Full Mailbox Permissions using Exchange Online Module with PowerShell
NOTE: A user delegated Full Access permission has all the permissions as the owner of the mailbox.
Step 1: Connect to Exchange Online.
Refer to the article Connect to exchange online with Powershell if you need steps on how to connect.
Step 2: We will use the Add-MailboxPermission cmdlet to give Full Access permissions. In the example below, we give the user ‘123 User’ Full Access permissions to the mailbox ‘ABC User’
Add-MailboxPermissions -Identity 'ABC User' -User '123 User' -AccessRights FullAccess -InheritanceType All
Step 3: We will use the Get-MailboxPermission cmdlet to view what users have Full Access permissions to a mailbox. In the example below, we check the permissions on the mailbox ‘ABC User’. The results show that the user ‘123 User’ has Full Access to the mailbox ‘ABC User’.
Get-MailboxPermissions -Identity 'ABC User'
