Do you need to export an Office 365 Mailbox to a pst file?
No problem.
In this guide, I’ll show you two options for exporting an Office 365 mailbox to pst.
- Option 1: Export Office 365 Mailbox using Compliance Center
- Option 2: Export Office 365 Mailbox using PowerShell
Requirements
- You need to have the eDiscovery Manager role assigned to export mailboxes (not assigned by default). Steps for adding these rights are at the end of this article.
- Microsoft Edge. Yes, you must use the Edge browser to download the pst file.
Option 1: Export Office 365 Mailbox using Compliance Center
To export a mailbox you first need to create a content search and then download the search results. It’s a lot of steps, and so I have provided screenshots for each one.
You must use the edge browser or you will not be able to complete all the steps.
Step 1. Open Microsoft 365 Compliance Center
https://compliance.microsoft.com
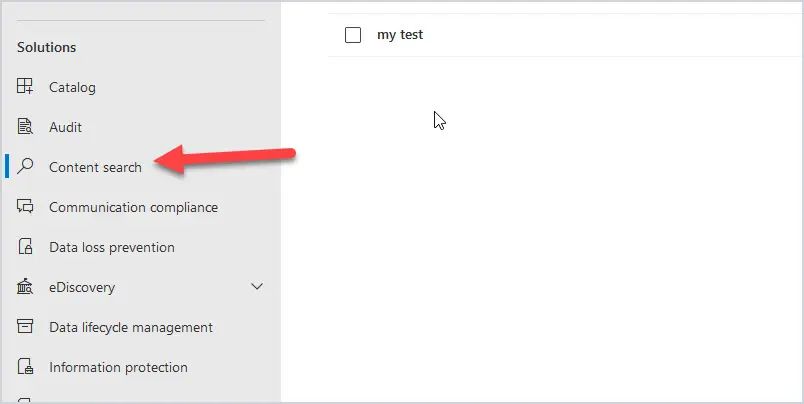
Step 2. Click on “Content search”
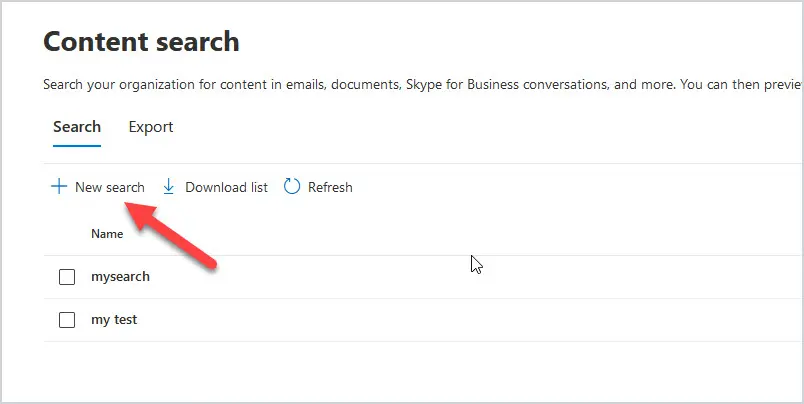
Step 3. Click on “New search”
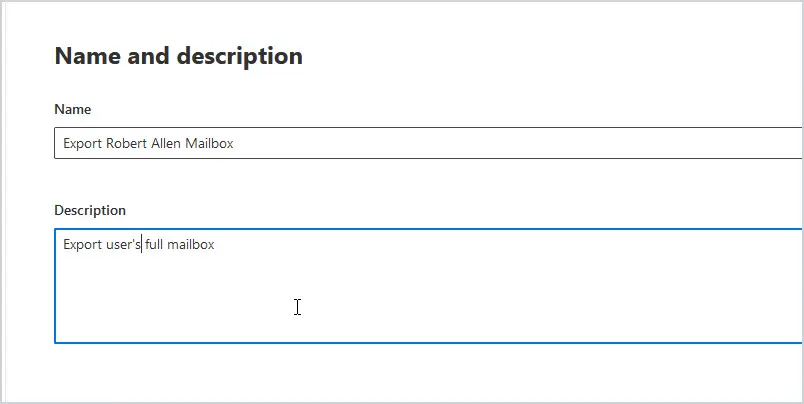
Step 4. Name and description
Provide a name and description for your content search. This will be used to easily identify your search in a later step. Click “Next” when done.
Step 5. Locations (What to export)
Turn Exchange Mailboxes On, then click “Choose users, groups, or teams”.
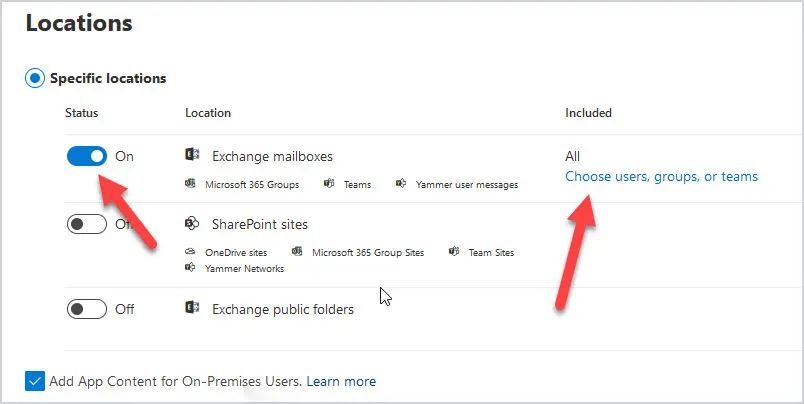
Select or search for the mailbox you want to export. When you have selected the mailbox click on done.
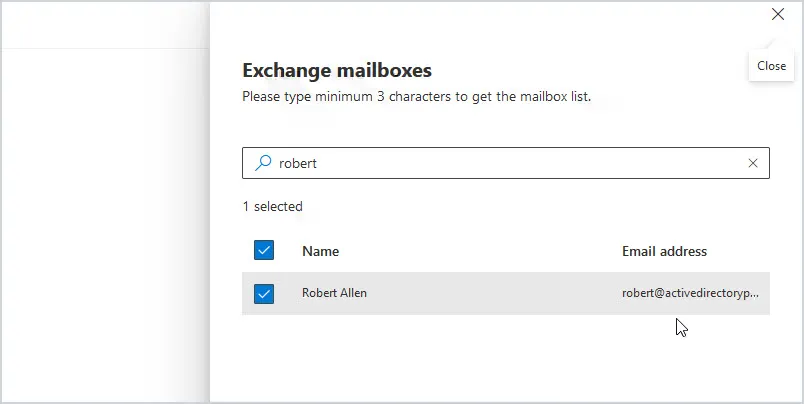
Back at the locations page click on “Next”
Step 6. Define your search conditions
You can leave conditions blank to export the entire mailbox. The conditions section is very powerful and allows you to search for emails based on different criteria.

Click “Next”
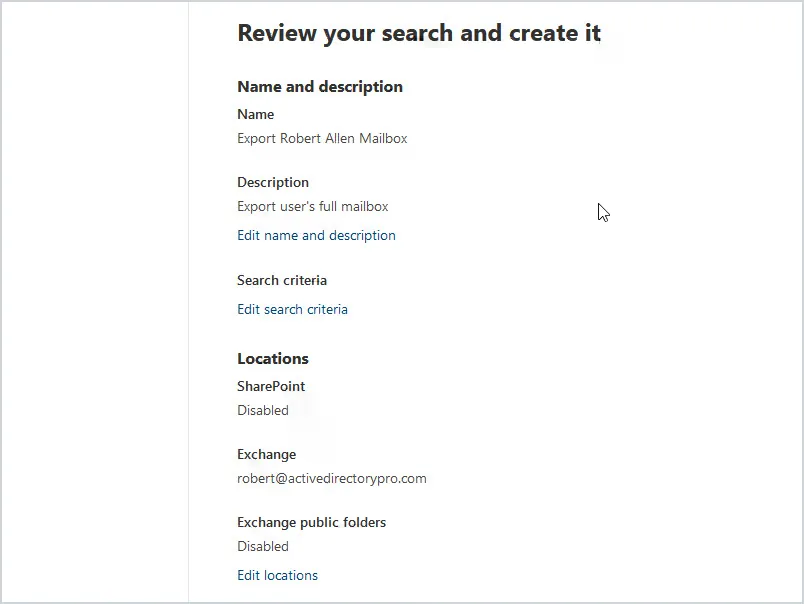
Step 7. Review your search settings
Review your search settings and click the submit button at the bottom.
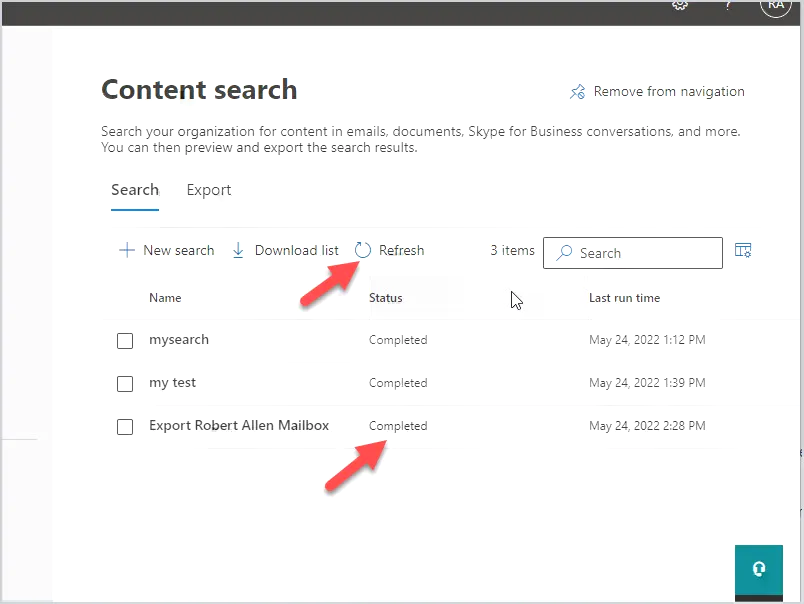
Now you will need to wait for the search to complete before you can export it.
You can click refresh and wait for the status to change to “completed”.
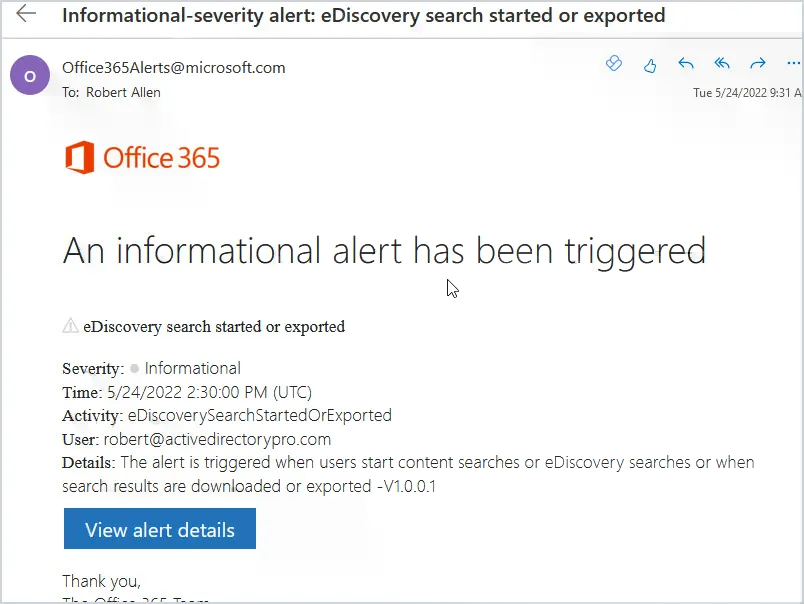
Note: When you run a content search you may get an email alert like the one below.
When the content search is complete you can move to the next step.
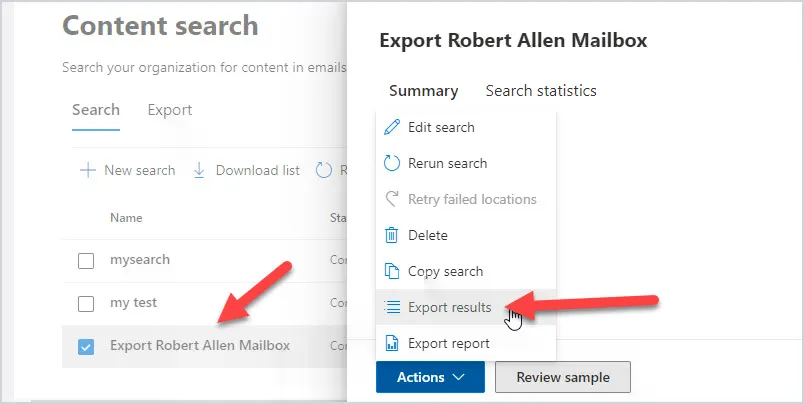
Step 8. Click on your content search
In the 365 compliance center click on “content search” and then the search you created.
Step 9. Click on “Actions”
Step 10. Select “Export Results”
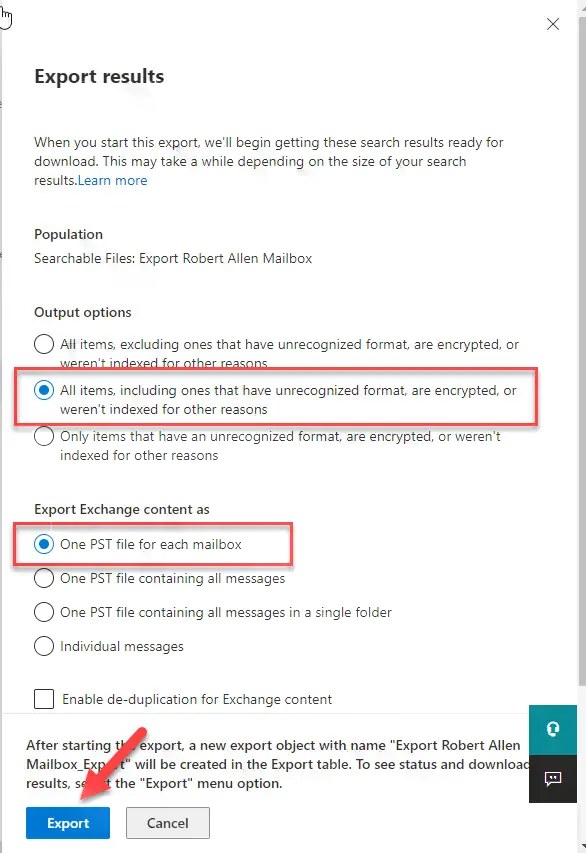
Step 11. Export Options
- Select “All items, including ones that have unrecognized format…”
- Select “One PST file for each mailbox
- Click “Export”
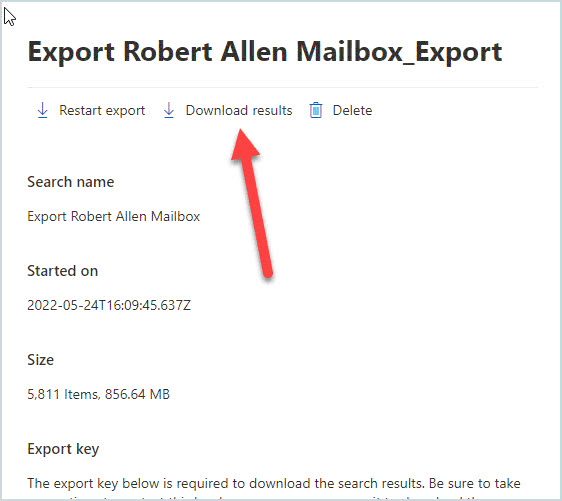
Step 12. In content search click on the Export tab
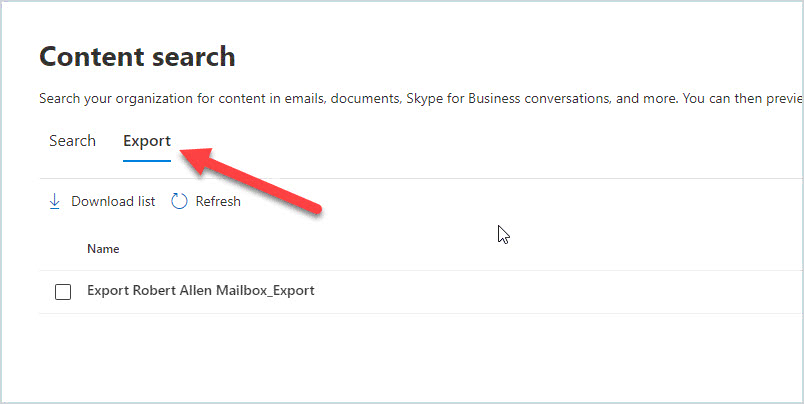
You will need to wait for the export to complete before you can download it. You can click refresh to update the status. Depending on the office 365 mailbox size the download could take several minutes or hours to be completed.
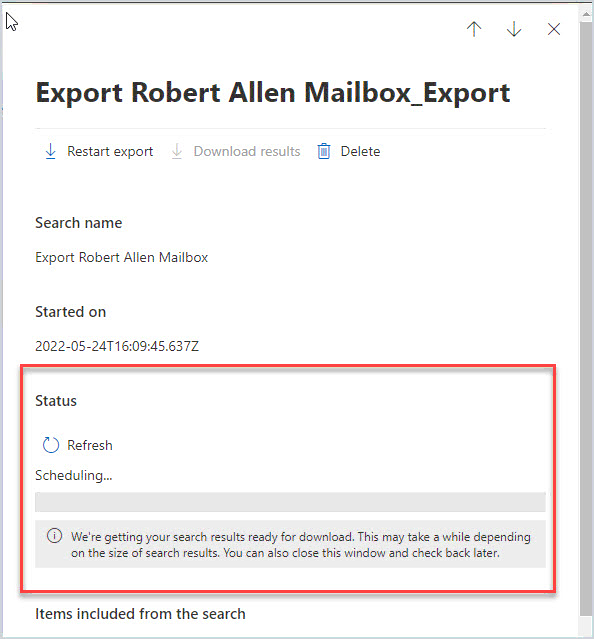
When the status has changed to “completed” click on “Download results”
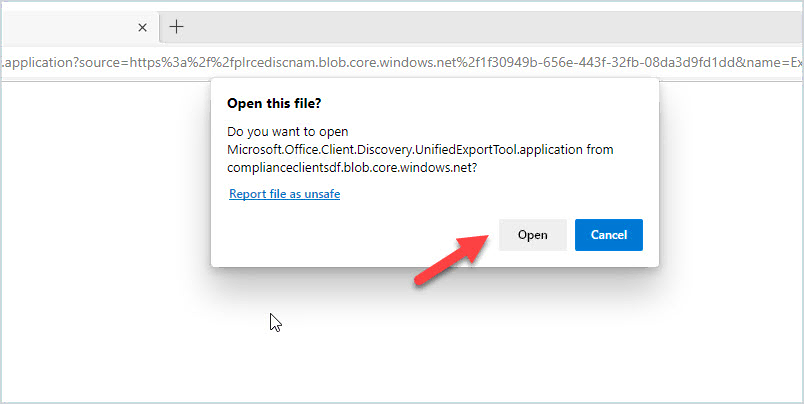
You will be prompted to open a file. This will open the eDiscovery Export Tool that is needed to download the pst.
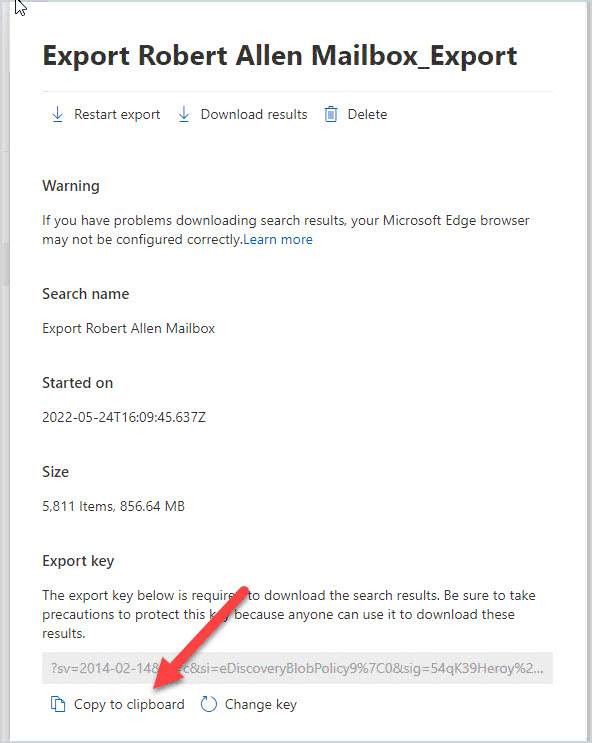
You will then be prompted for the export key and location to download the file.
The export key is on the export page of your download. Copy the key and paste it into the eDiscovery Export Tool.
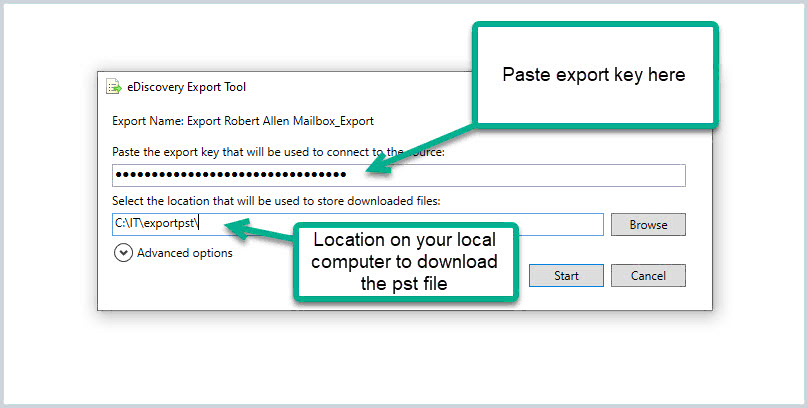
Click “start” and the download will begin.

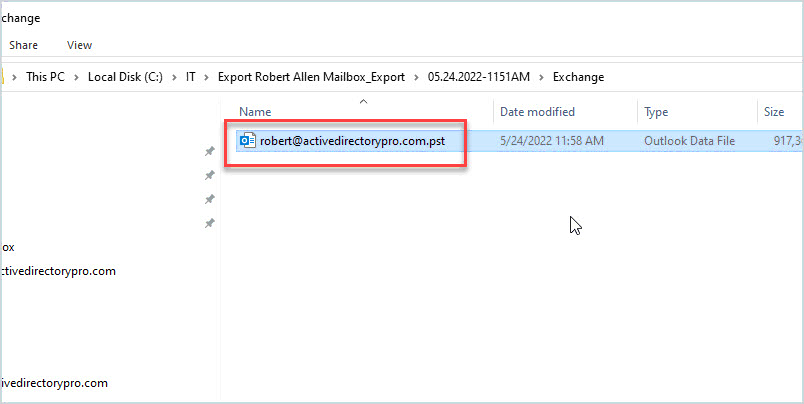
When the download is done, browse to your download folder to access the pst.
That is it for option 1.
Option 2: Export Office 365 Mailbox using PowerShell
Unfortunately, only the content search can be done with PowerShell. To download the pst you will need to use the edge browser. If you find a way to download the pst with PowerShell, please leave a comment below.
Step 1: Connect to Compliance Center with PowerShell
The steps will work with PowerShell Core 7 or the older PowerShell 5.1
Use this command to connect to the compliance center. You will be prompted to authenticate, this supports MFA.
Connect-IPPSSession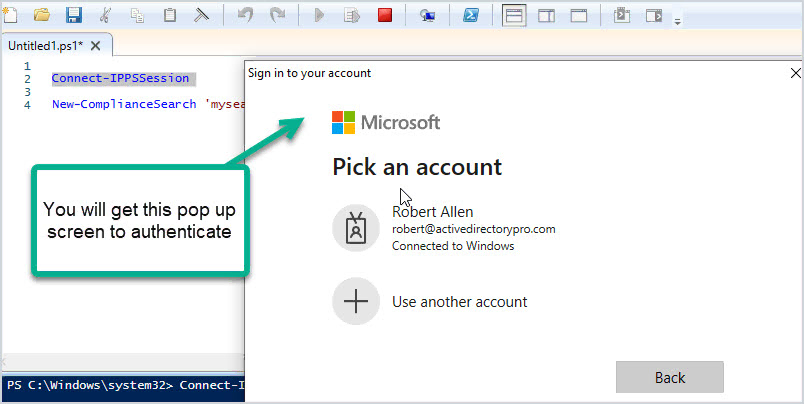
Now run this command to create a content search and start it. Change ‘mysearch’ to name your search and change to the mailbox you want to export.
New-ComplianceSearch 'mysearch' -ExchangeLocation robert@activedirectorypro.com | Start-ComplianceSearch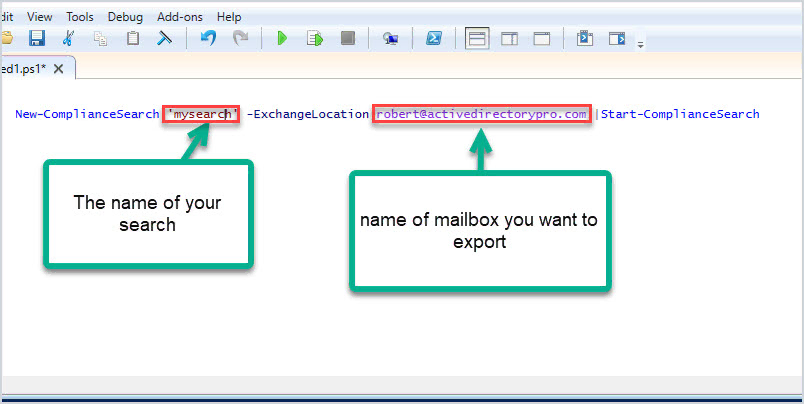
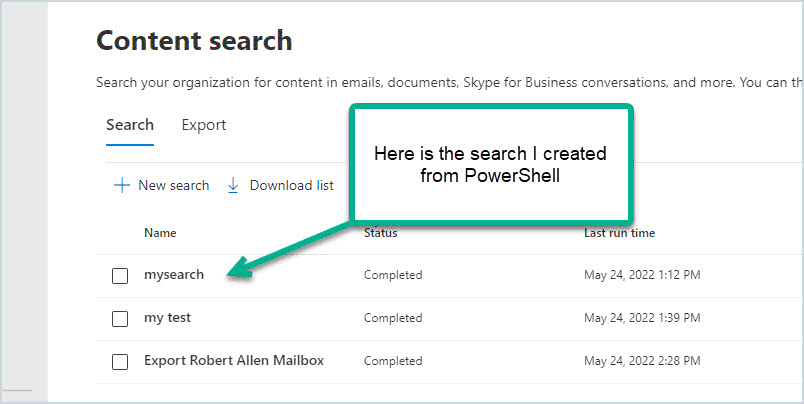
If you go to the MS Compliance center you should see your search.
Now follow the steps from step 2 in the first section to download the pst.
That’s it. I just showed you two methods for exporting an Office 365 mailbox to pst.
How to Check eDiscovery Manager Role
By default, a global administrator does not have all the permissions to export a mailbox to pst.
Here is how you check permissions:
- Log in to the Microsoft 365 Admin Center
- In the left menu go to Compiance (Under Admin centers)
- Click on Permissions
- Click on Roles under “Microsoft Purview Solutions”
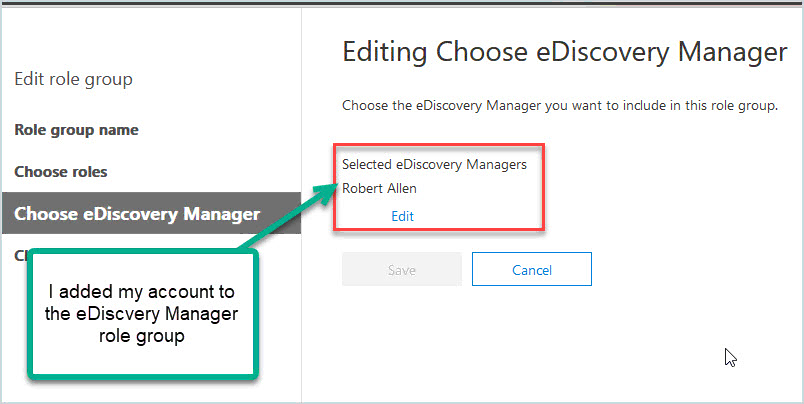
- Select eDiscovery Manager
- Edit the eDiscovery Manager
- Find your account and add it to the list
After adding or removing users to a role group it could take several minutes for the change to take effect. Sometimes you will need to log out of the admin center and log back in.
I just showed you two methods for exporting an office 365 mailbox to pst. It’s a lot of steps and Microsoft has made changes to the process over the years, that is typical Microsoft and I’m sure they will continue to change the process.
Reminder, if you find a way to download the pst please let me know by commenting below.
Resources
- New-ComplianceSearch cmdlet – Full command syntax with examples
- Connect-IPPSSession – PowerShell command used to connect to Office 365 Compliance center
- Office 365 Content Search documentation – Lots of documentation from Microsoft on creating content searches and exporting results.

Amazing! This is so helpful, thanks!
Thank you Robert! These are the best instructions I’ve found & works!
Hii Robert
Can you give steps for assing this Role
To give permission to export a PST see the “How to Check eDiscovery Manager Role” section included in this article.
Appreciate the guide.
Thanks for this great guide Robert !
I used the Option 2 Powershell method, and so far so good, I’m currently waiting for the 25.69 GB mailbox to download with the eDiscovery Tool.
In the Option 2 guide you wrote “Now follow the steps from step 2 in the first section to download the pst. ”
It seems to me you can follow from step 8, as the search is already created with PowerShell (that’s what I’ve done).
Doesn’t work.
Option 1 fails to find the mailbox because only 100 results are displayed on the right side (we have 600+ users)
Option 2 creates the search but when trying to export the results the message comes up saying:
Client Error
Request failed with status code 500
You need to have the eDiscovery Manager role assigned to export mailboxes (not assigned by default).
Thank you. Great article.
I only need to export a folder from the mailbox and it’s sub-folders. Is that possible ?
Is it possible to export all the mailboxes of a group of users at once into individual PST, rather than on a one by one basis?
Yes. In Step 5 select the group or users.