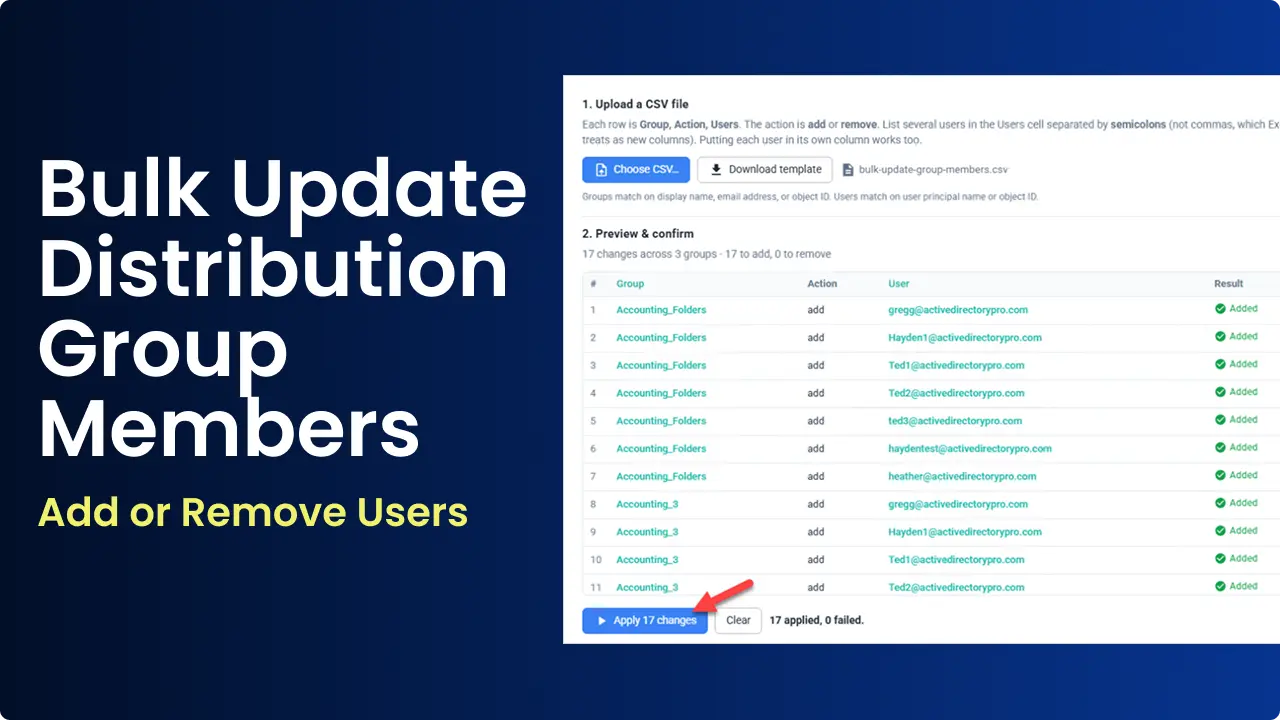
In this guide, you’ll learn how to bulk add users to Microsoft 365 Distribution groups using PowerShell and 365 Pro Toolkit.
Adding users to distribution groups one at a time works fine for a few people, but it gets time consuming when you need to update a lot of users at once. The good news is, there are multiple ways to bulk add or remove users to groups in Microsoft 365, these options will save time and remove the headache of clicking around the admin center.
How to Bulk Update Distribution Groups with 365 Pro Toolkit
The 365 Pro Toolkit makes it easy to perform bulk tasks such as adding and removing members to groups.
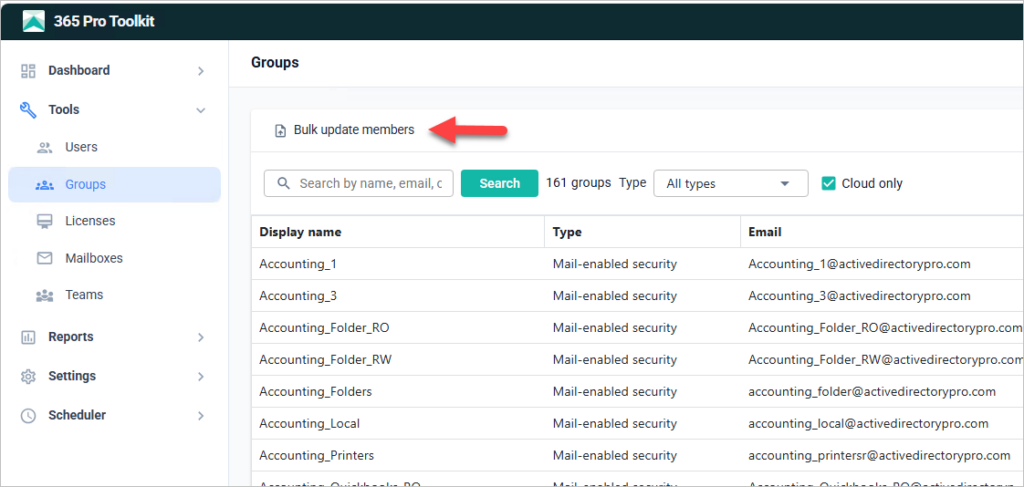
Step 1. Click on Groups > Bulk update members
Step 2. Download the csv template. The toolkit include a csv template just click the download button.
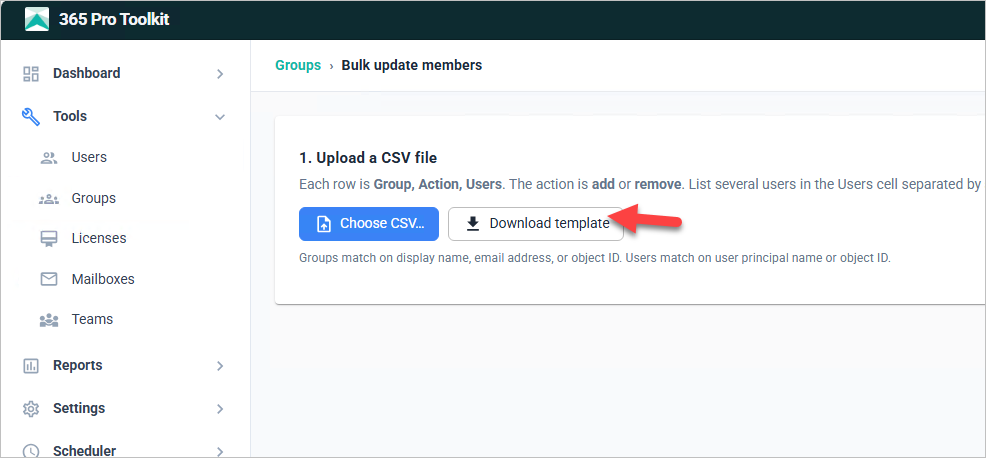
Columns are matched by their header names: a Group column, an Action column (add or remove), and a member column. One member per row is simplest, but you can also list several in a member cell separated by semicolons. Any other columns are ignored, so a Group Members export drops straight in once you add an Action column.
- Group - The group can match on display name, email address, or object ID.
- Action - enter add or remove
- Member - Members match on display name, user principal name, email address, or object ID. One member per row is simplest, but you can also list several in a member cell separated by semicolons
CSV Format 1 - One user per row (the included template format)
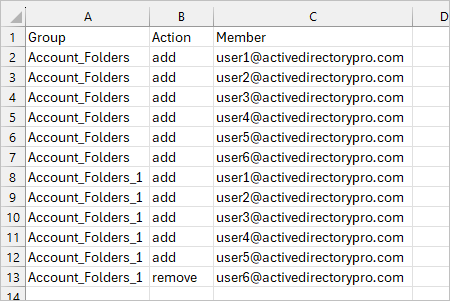
CSV Format 2 - You can also format the csv like this both formats are supported.

Step 3. Click “choose csv” and browse and select your csv file. You will get a preview of the changes based on your csv file.
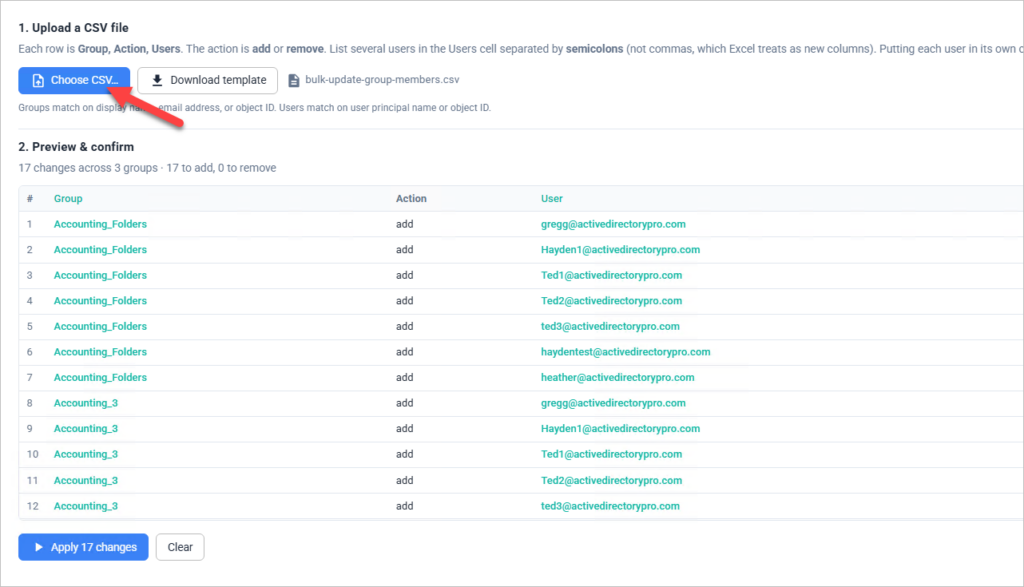
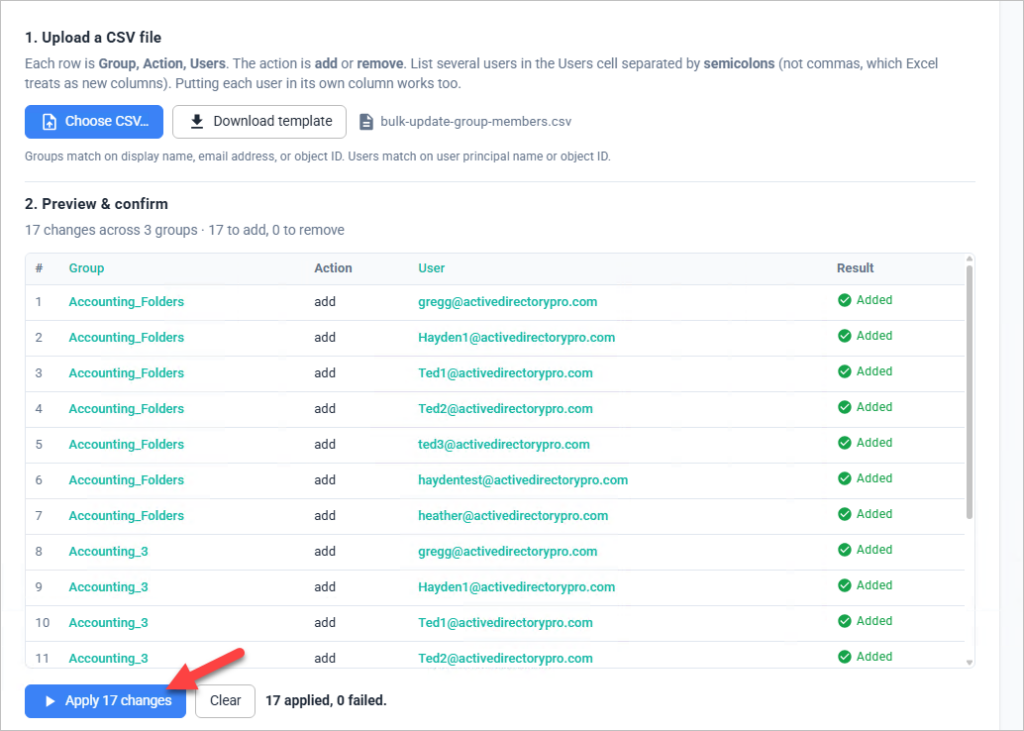
If the preview looks correct click “Apply Changes” to process the csv file.
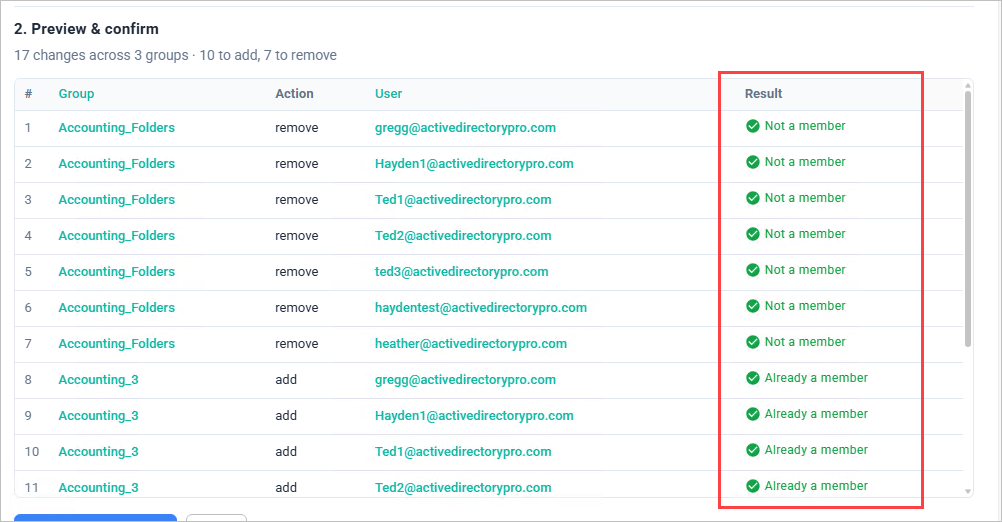
You can see the result for each user in the result column.
To bulk remove users from groups just add remove in the action column.
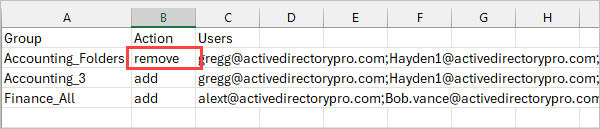
Then run the tool again to remove users, you can add and remove users at the same time.
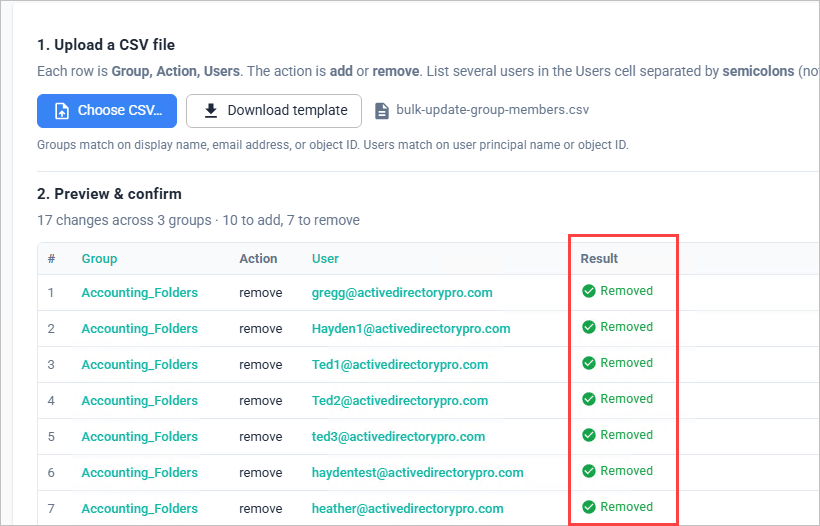
Note: If you try to add a user that is already a member you will get a friendly result of “Already a member”. If you try to remove a member and they are not part of the group you will get “not a member”.
Add Members to Distribution Group with PowerShell
With PowerShell use the Add-DistributionGroupMember cmdlet to bulk add users to Distribution Groups.
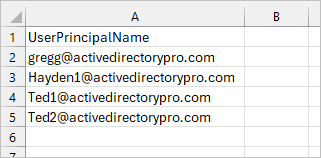
Step 1. Create a CSV file with a UserPrincipalName column and a list of users you want to add to the group.
Step 2. Modify and run the following script. Change the path to your csv file and change the identity to the name of the group you want to update.
$Userslist = Import-Csv "C:\it\temp\update_members.csv"
foreach ($User in $Userslist) {
    try {
        Add-DistributionGroupMember -Identity "Accounting_Folders" -Member $User.UserPrincipalName -BypassSecurityGroupManagerCheck -ErrorAction Stop
        Write-Host "Added: $($User.UserPrincipalName)" -ForegroundColor Green
    }
    catch {
        Write-Host "Failed: $($User.UserPrincipalName) - $($_.Exception.Message)" -ForegroundColor Red
    }
}
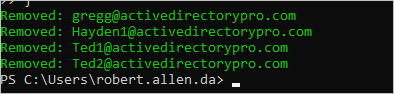
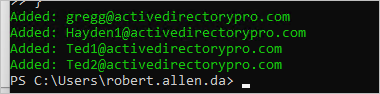
The script will output if the users were added or not. .
Remove Members to Distribution Group with PowerShell
To bulk remove users from a distribution group use the Remove-DistributionGroupMember cmdlet.
The script is almost the same as add members we just need to update the cmdlet.
$Userslist = Import-Csv "C:\it\temp\update_members.csv"
foreach ($User in $Userslist) {
    try {
         Remove-DistributionGroupMember -Identity "Accounting_Folders" -Member $User.UserPrincipalName -BypassSecurityGroupManagerCheck -Confirm:$false -ErrorAction Stop
        Write-Host "Removed: $($User.UserPrincipalName)" -ForegroundColor Green
    }
    catch {
        Write-Host "Failed: $($User.UserPrincipalName) - $($_.Exception.Message)" -ForegroundColor Red
    }
}