In this guide, you will learn how to enable ping requests in Windows client and server operating systems.
I’ll show you the steps for a single computer and how to use group policy to enable ping requests for multiple computers.
By default, the Windows Firewall blocks ping requests. Blocking ping requests adds another layer of security to your network by making systems appear offline or unavailable. This helps to slow down viruses, ransomware, and attackers. For these reasons it is recommended that ICMP ping requests are blocked.
I understand blocking ping requests can cause problems with other systems and in troubleshooting network problems. Many management tools use ICMP requests to check for uptime, system status, and so on. If you need to unblock ping requests try to allow it only where needed.
Allow Ping Requests in Windows 10
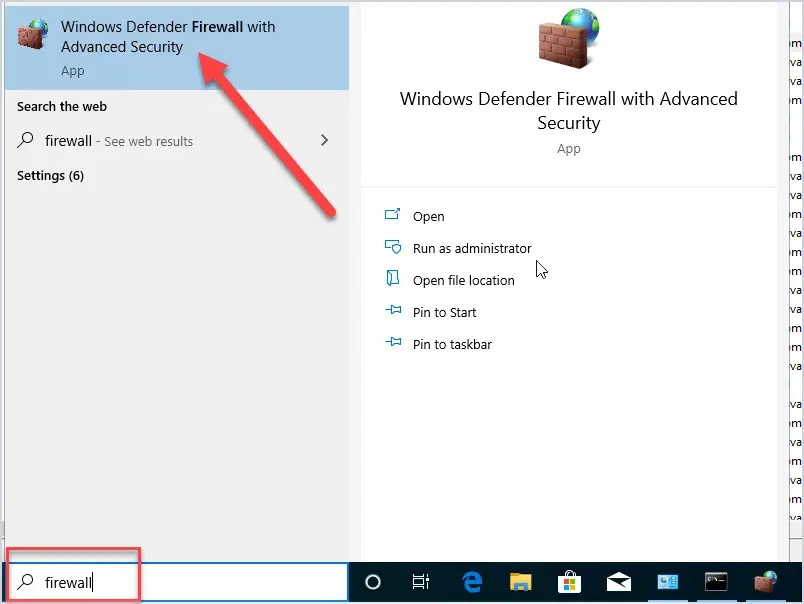
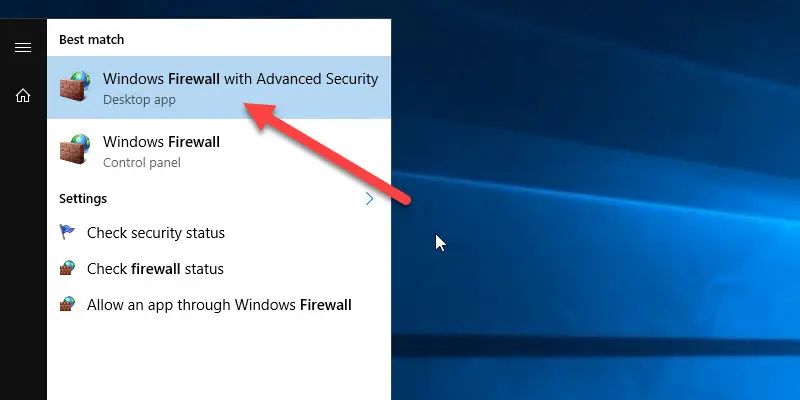
Step 1: Open the Windows Firewall
Click the start button then type firewall and click on “Windows Defender Firewall with Advanced Security”
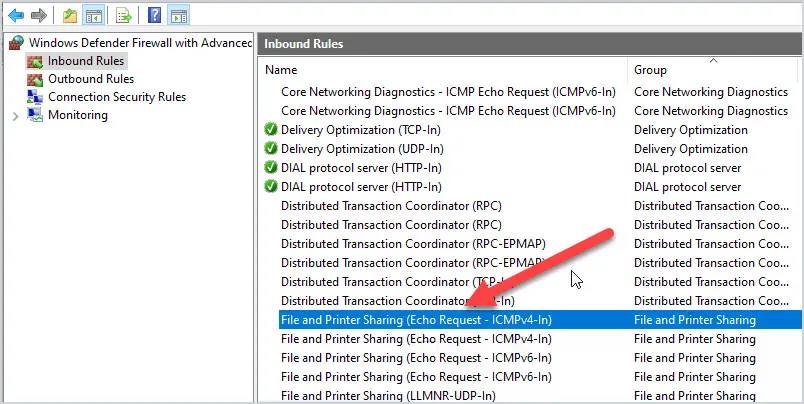
Step 2: Click on Inbound Rules
In the Firewall console click on inbound rules

Step 3: Find File and Printer Sharing (Echo Request – ICMPv4-In) Rule
In the inbound rule list scroll down to find the “File and Printer Sharing (Echo Request
If you look at the Enabled column it should say no and this is why ping requests are being blocked. To allow pings just pick your profile and then click on Enabled. In this example, I will enable pings only for the domain profile.
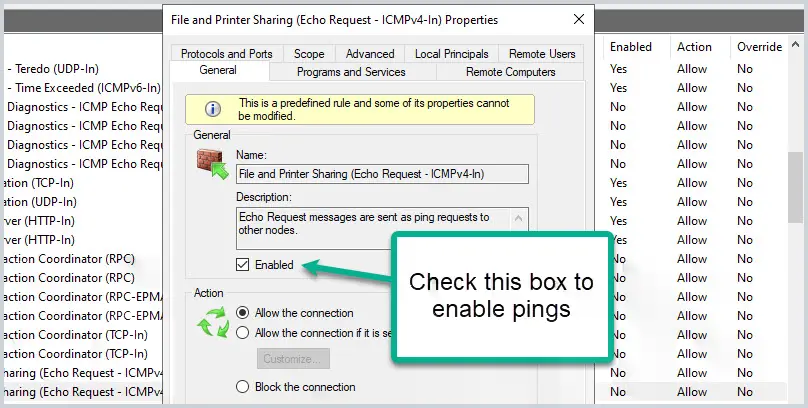
I do not recommend enabling pings on your public profile.
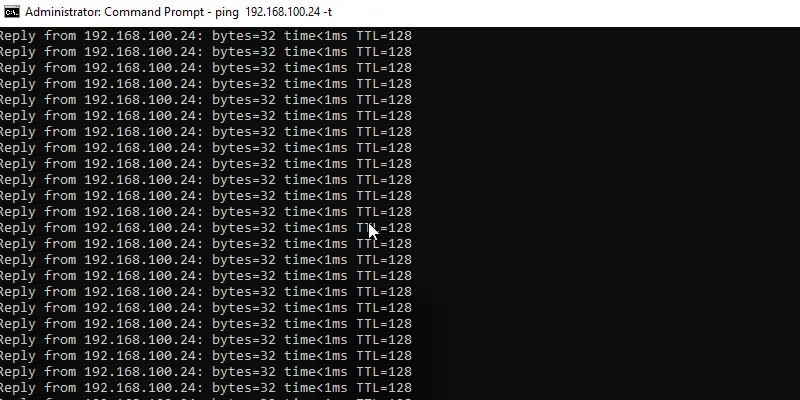
With pings enabled you should now be able to ping this system. I enabled pings on PC2 so I’ll test this from another computer.
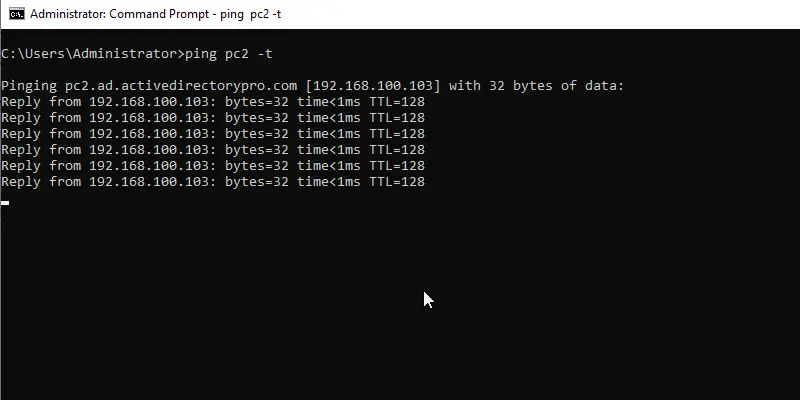
Yes, pings are now working.
If you need to enable ping requests for multiple computers then group policy is a better option, see the next section for example.
Related: 11 Windows Firewall Best Practices
Enable Ping Request Using Group Policy
If you need to enable pings on multiple computers then you should use group policy. This will also prevent someone from disabling it.
These GPO settings will work with Windows 10, Server 2008, and later versions.
Open the group policy management console.
Create and link and new GPO to an OU. In this example, I’m going to enable pings on all computers in my ADPRO Computers OU.
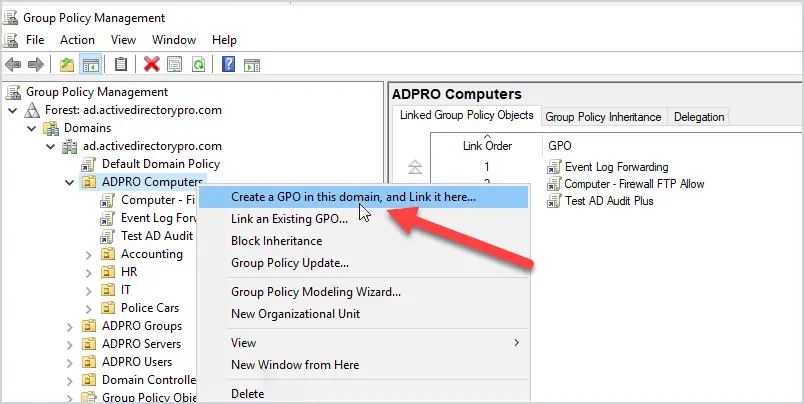
Give the GPO a name, I’ll name mine “Computer – Allow Pings”
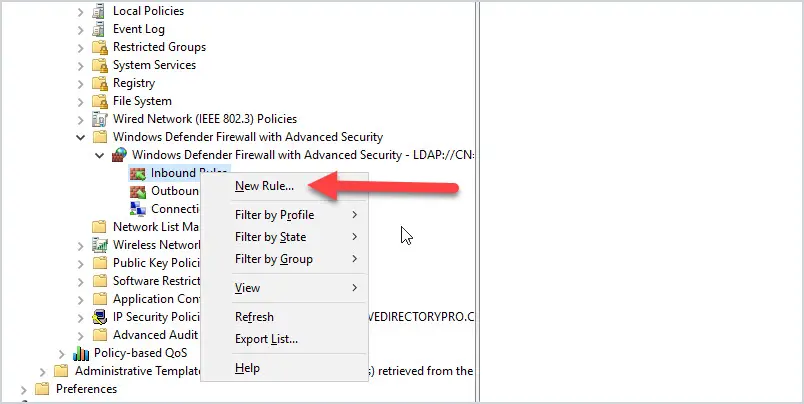
Edit the new GPO and navigate to “Policies -> Windows Settings -> Security Settings -> Windows Defender Firewall with Advanced Security”
Click on inbound rules, right-click and select “New Rule”
Select “Predefined”
In the dropdown select “File and Printer Sharing”
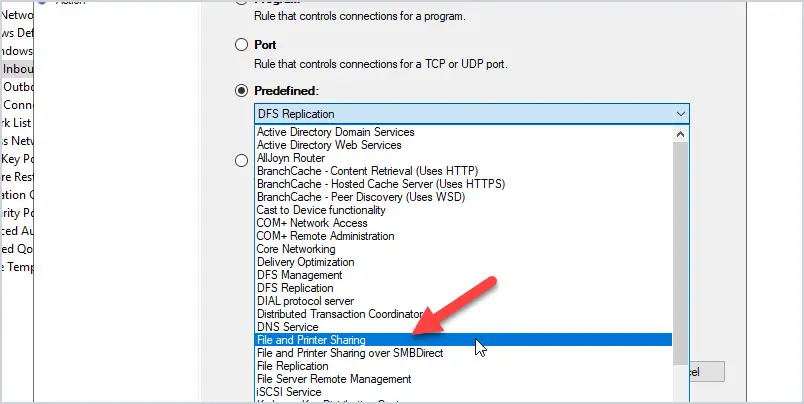
Uncheck all rules except “File and Printer Sharing (Echo Request -ICMPv4-in)
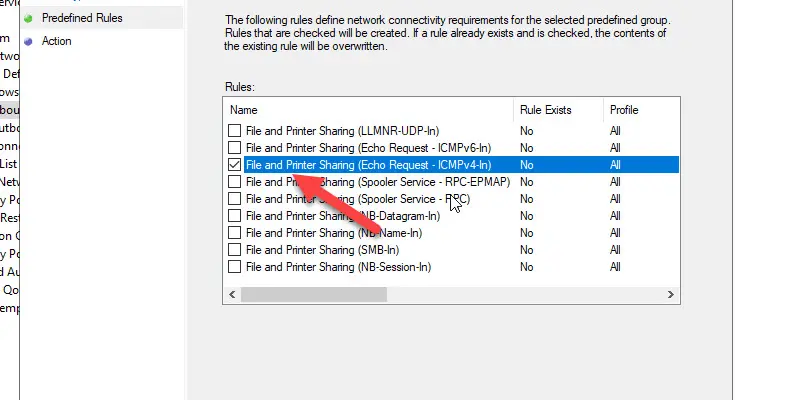
Click Next.
Select “Allow the Connection” and click Finish.
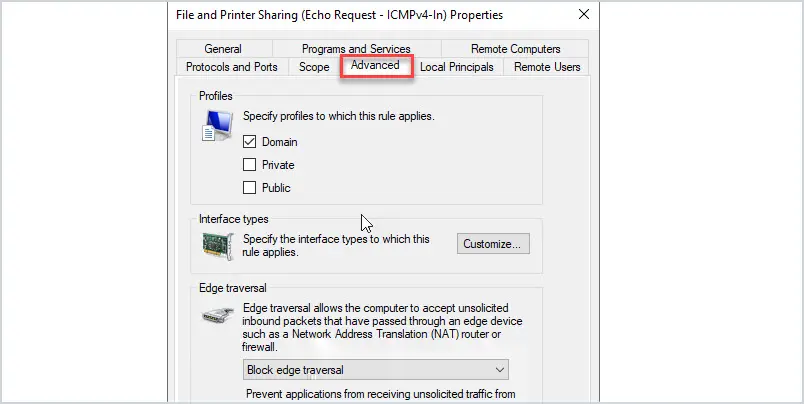
The rule is now created but we need to change the profiles.
Double click the rule and click on the Advanced tab. Unselect any profiles you don’t need. I just need the domain profile enabled so I will unselect “private” and “public” and then click apply.
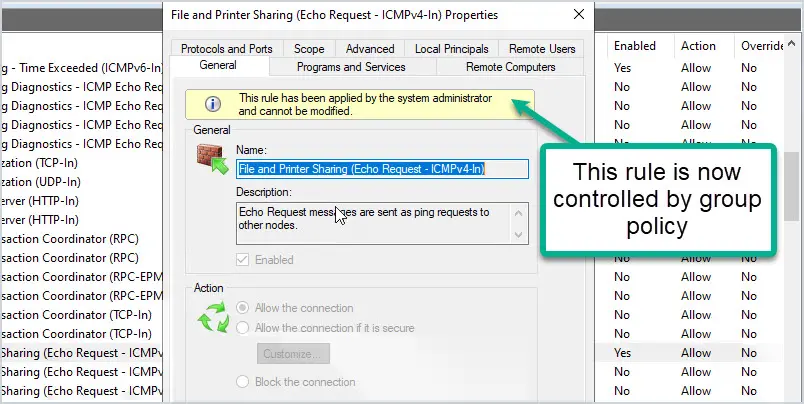
This rule will enable ping requests on any system that the GPO is applied to. It will also prevent changing the rule on the local computer as it is now controlled by group policy. Below is a screenshot of the rule on a local computer. it is locked down and cannot be edited since it is controlled by group policy.
How to Enable Ping Requests in Server 2016
The steps are the same as a Windows 10 computer. The only difference is the firewall is called “Windows Firewall with Advanced Security”
Enable the “File and Printer Sharing (Echo Request – ICMPv4-in) rule and pings will be allowed.
Allow Ping Requests and Limit Scope
For added security, you can use the scope settings to limit which systems can accept and return pings. This is a nice feature as it lets you enable firewall rules with added security.
For example, I need to allow ping requests on my 2016 server but there is no reason Lenny’s computer in finance should have access to ping the server. I can use the scope option to limit which IP addresses can send pings to the server.
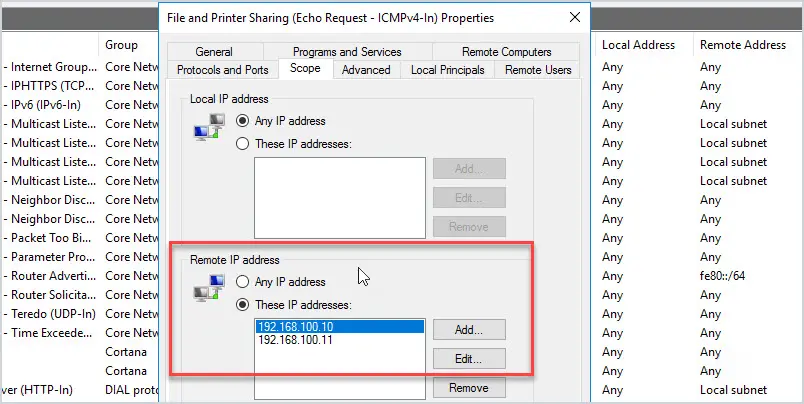
In the picture above, I added the IP addresses of the systems that my 2016 server will accept pings from.
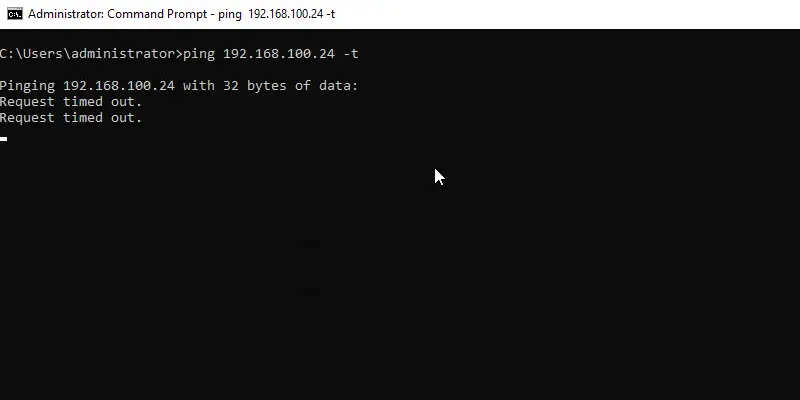
So if I send a ping from my PC2 (192.168.100.103) the ping fails.
Now I’ll send a ping from the server (192.168.100.10)
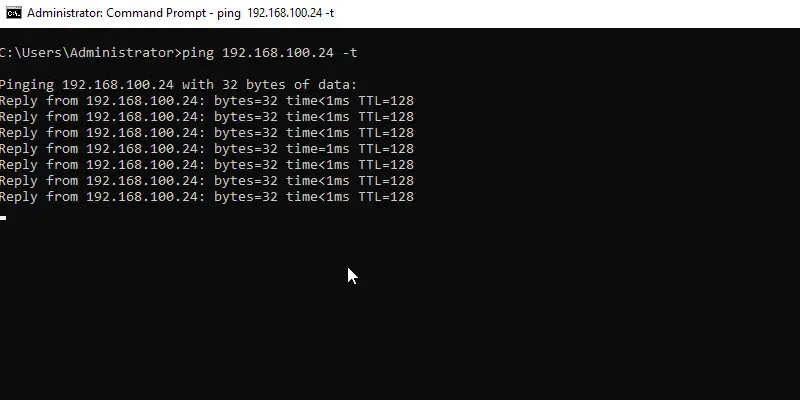
The ping works because this IP is allowed by the firewall scope settings.
This is a great way to add additional security using the Windows Firewall. I use this setting all the time with various rules.
So that is how you enable ping requests in the Windows Firewall. If you liked this guide then check out more of my Active Directory Security tips for Windows domain environments.
If you have questions post them in the comment section below.