
A PowerShell module is a grouping of various functions that operate as a single mini-program. Modules are used to interact with various applications such as Windows, Active Directory, Office365, Azure, and so on.
Each module is stored in a folder where it contains the necessary files for the PowerShell commands.
Although PowerShell comes with several built-in modules there will be times when you need to load additional ones.
In this post, you will learn how to install a PowerShell module using the Gallery and a manual installation.
Method 1: Install PowerShell Module from the PowerShell Gallery
Installing PowerShell modules from the PowerShell Gallery is the easiest way to install modules. The PowerShell Gallery is an online central repository for PowerShell content. Some of these packages are authored by Microsoft, and others are authored by the PowerShell community. Check out the PowerShell Gallery website for more details and to search the available modules.
In this example, I will install the AzureAD module. This module is used for Managing Office365 and azure with Powershell.
Step 1: Open PowerShell
Open PowerShell on your local computer and enter the command below. This command will install the AzureAD module from the PowerShell Gallery.
install-module -Name AzureADDepending on your settings you may get the pop-up below. Click Yes.
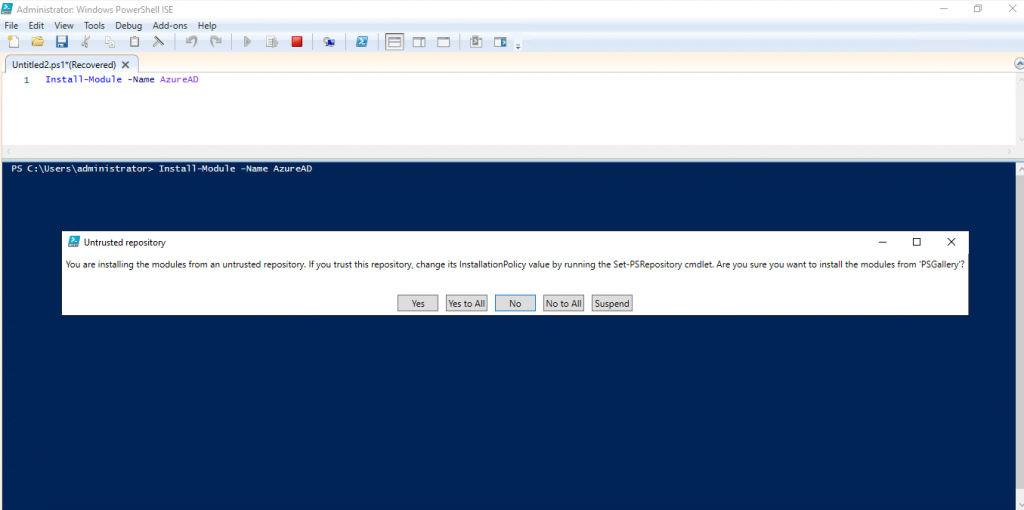
After clicking yes the installation should start.
Step 2: Verify the Module installed
To very the Powershell module installed, run this command:
Get-Module -ListAvailable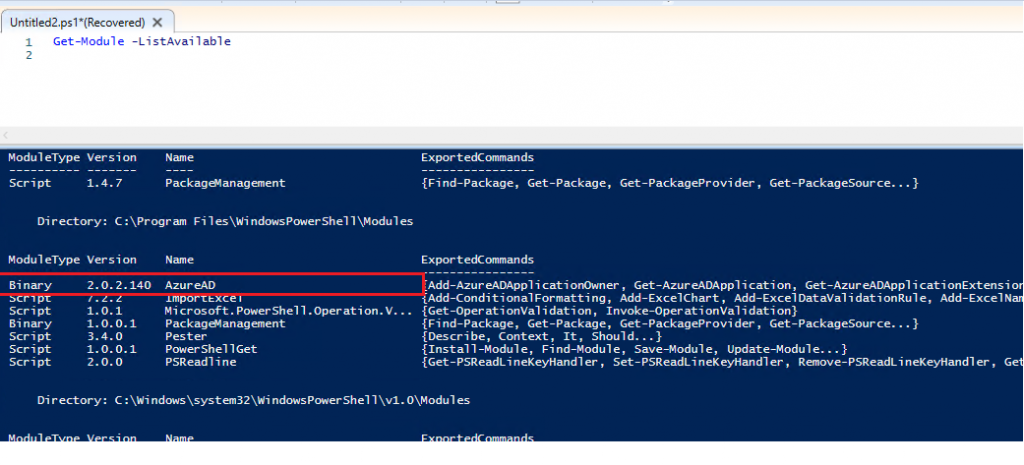
In the screenshot above you can see the AzureAD module is listed. The installation is complete.
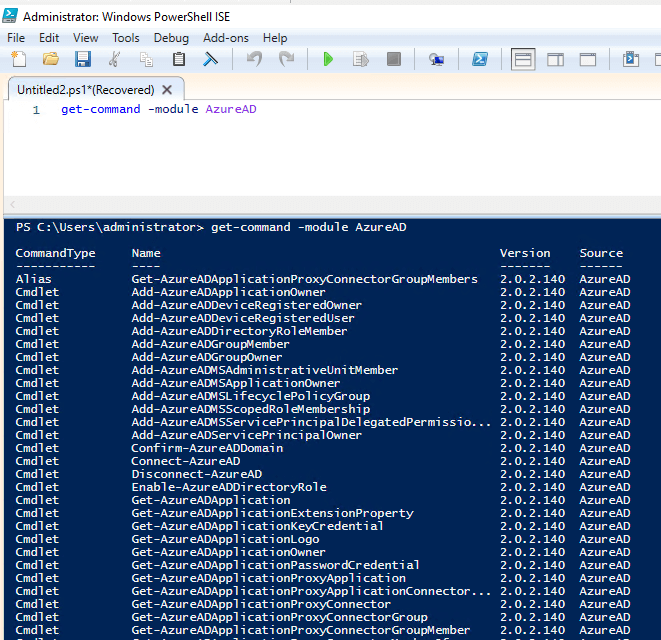
Now let’s see what commands are available in this module.
Get-Command -module AzureADThe above command will list all the available commands available with this module.
Method 2: Manually Install PowerShell Module
If the module is not available in the PowerShell gallery you will need to use this method.
Step 1: Determine the install Path
You want to install new modules in a path that is listed in the PSModulePath environment variable. To see the value of PSModulePath run the following command.
$Env:PSModulePathHere is the result of running that command on my computer. You should see similar results.

There may be several paths listed but there are two main paths you should use, they are:
- C:\Users\userprofile\Documents\WindowsPowerShell\modules
- C:\program files\WindowsPowerShell\Modules\<Module Folder>\<Module Files>
Use the first path if you want the module to be available for a specific user. Use the second path to make the module available for all users.
So, what are the other paths for?
The path below is reserved for modules that ship with Windows. Microsoft recommends not using this location.
$PSHome\Modules (%Windir%\System32\WindowsPowerShell\v1.0\Modules)
You can also add your own paths but unless you have a specific need then just stick with the two I listed.
If you see other paths listed in your environment variable it may be from programs that you have installed. Some programs will install PowerShell commands and automatically add those to the variable.
Now that we know where to put new modules let’s move to step 2.
Step 2: Copy the PowerShell model to Path
So I’ve downloaded a new module and the next step is to copy it into one of the two paths identified in step 1. I’m going to make it available to all users so I’ll copy it here
C:\Program Files\WindowsPowerShell\Modules
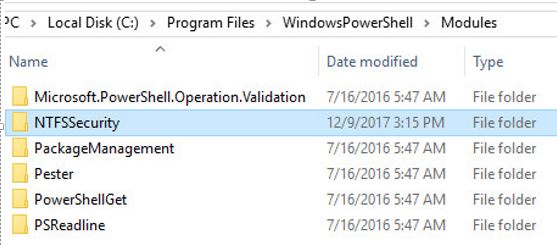
There it is, just copy and paste the module into the path.
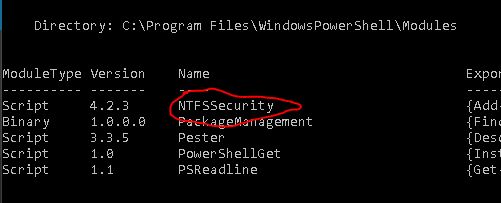
Basically, that is it for installing new modules. Let’s verify the new module is visible to PowerShell, run the following command:
Get-Module -ListAvailableThis command will check the paths that are set in the environment variable for modules.
The screenshot below is what returns when I run this command. I can see that the new module (NTFSSecurity) is now visible to PowerShell.
Now that the new module is installed we still have one final step before we can use the new commands.
Step 3: Import the new PowerShell module
Importing loads the module into active memory so that we can access the module in our session.
To import run the following command
Import-module -name ModuleNameFor the module I’m using in this example it would look like the below.
Import-module NTFSSecurity
That will do it, the new module is now ready to use.
Troubleshooting
You may need to change your computer’s execution policy for modules to install properly. Use this command to check the execution policy.
Get-ExecutionPolicy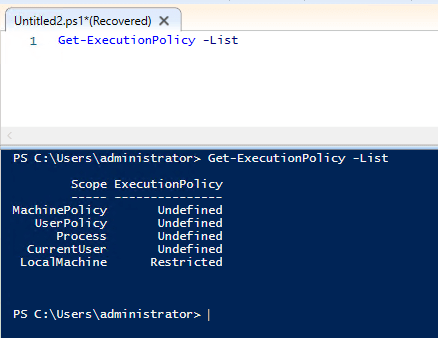
If you need a less restrictive policy you can use the Set-ExecutionPolicy to change it.
I hope you found this tutorial helpful if you have questions or comments please leave them below.

This is a wonderful article and incredibly helpful. Thank you for showing a PowerShell newbie, aka me, how to import my company’s PSModules and start using them locally!
No problem, glad it helped.
# Install All PowerShell Modules :
$Modules = Get-Module -ListAvailable | Select-Object Name -ExpandProperty Name
Foreach ($mod in $Modules) {
Import-module -name $mod
}
# Install all powershell Module in one line
Get-Module -ListAvailable | Import-Module
hi,
I copied the module to the folder and ran the command to see it on powershell but it didnt show up, do you know what the issue might be?
What module did you copy? What OS are you on?
The name of the modules folder and the name of the module have to be the same. For example, if installing to
C:\Program Files\WindowsPowerShell\Modules\MyPowershellModule\
The module file (.psm1 or .psd1) must be named MyPowershellModule.psm1 or MyPowershellModule.psd1.
HTH
After hours of researching, this was the solution for my problem.
Thx a lot.
Glad it worked.