In this article, you will learn how to set logon hours for users in Active Directory.
Logon hours in Active Directory enable administrators to control when users are allowed to log into the network. This is typically used when an organization wants to limit when employees can access company resources.
In this article:
- Set logon hours for a single user
- Set logon hours for multiple users
- Set AD logon hours using Powershell
- Automatically disconnect users after logon time expires
- Get all users logon hours (easy to read report)
Set logon hours for a single user
Follow these steps to set the logon hours in Active Directory for a single user.
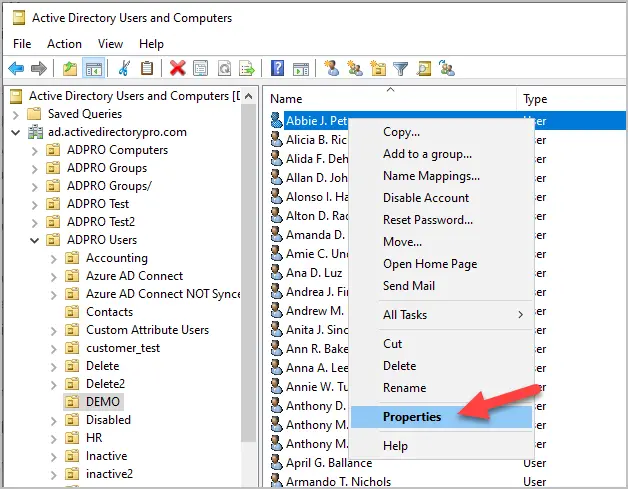
Step 1. In Active Directory Users and Computers (ADUC), browse to the user, right click the account and select properties.
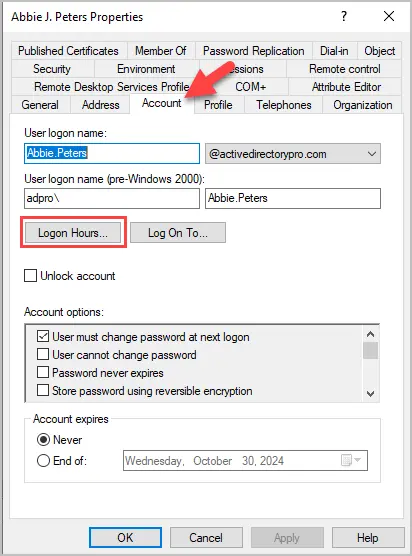
Step 2. Click on the Account tab and then click the “Logon Hours” button.
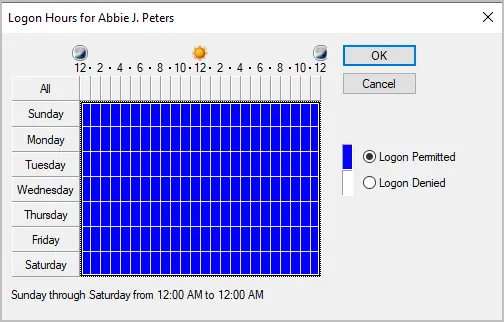
Step 3. By default, accounts are permitted to logon for all hours.
- Blue = Logon permitted
- White = Logon denied
Below is a screenshot of the default logon hours for a user.
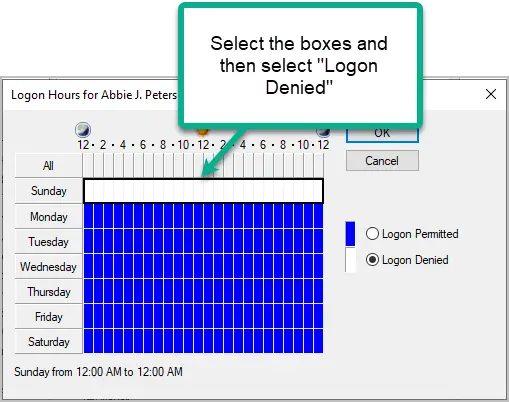
To block a users logon select the day and time and then select “Logon denied”
For example, I will configure the user to only be allowed to logon during the weekdays 8AM to 5PM.
First, I’ll drag and select all the boxes for Sunday and Saturday and select “Logon Denied”.
Next, I’ll limit the logon to 8am to 5pm on weekdays. You can drag the curser over multiple times and days.
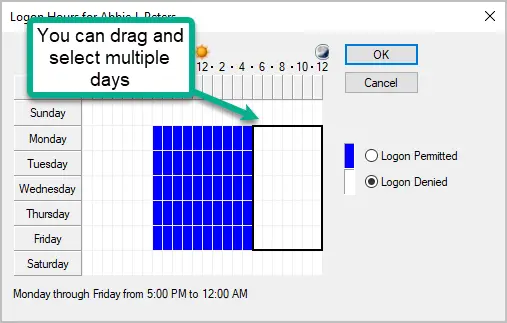
Now the user is limited to logon only during the weekdays from 8am to 5 pm.
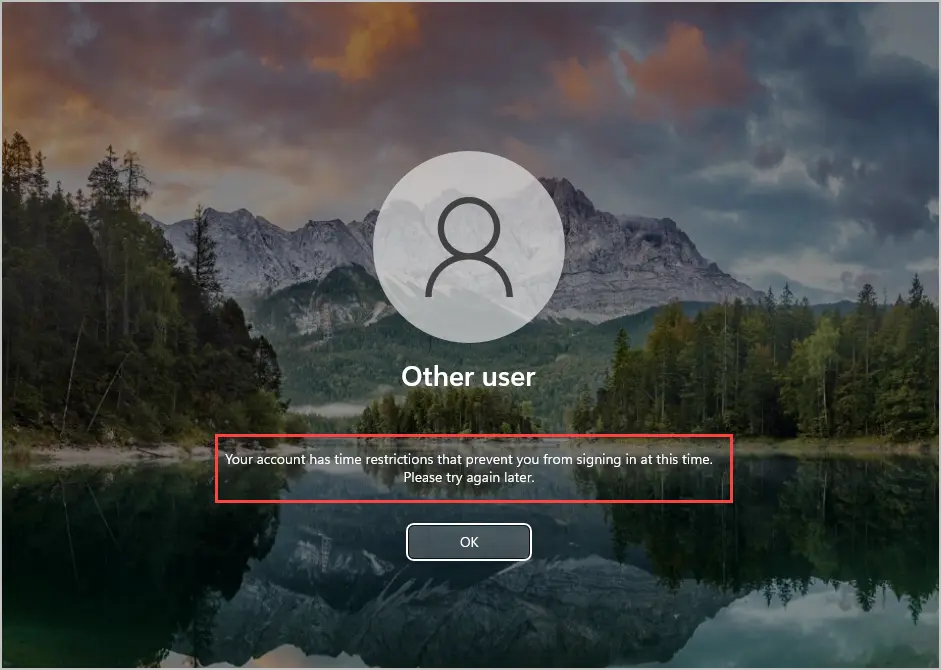
If the user attempts to logon outside of the permitted hours they will get a message that says, “Your account has time restrictions that prevent you from signing in at this time”.
Set logon hours for multiple users
Follow these steps to set the logon hours for multiple users.
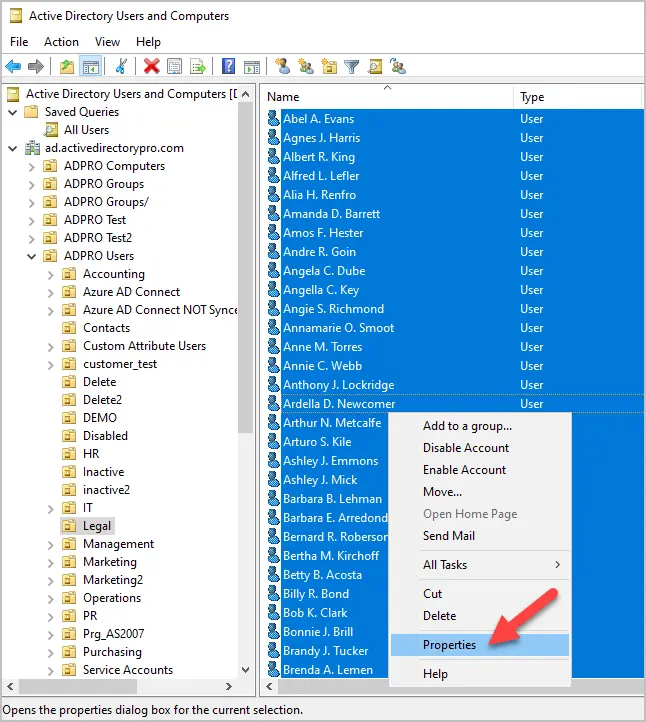
Note: This only works by select multiple accounts in Active Directory users and computers.
Step 1. Browse to the OU, select the accounts, right click and select properties. For example, I’m going to select all my users in the “Legel” OU.
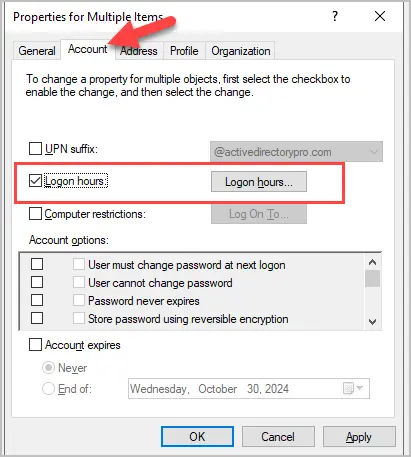
Step 2. Click the “Account” tab, select “Logon hours” and click the “Logon Hours” box.
Set AD Logon Hours using PowerShell
Setting a user’s logon hours with PowerShell is a bit challenging. You need to enter the logon hours into byte format or PowerShell will give errors.
The easy way to do this is to use Active Directory Users and Computer to set the logon hours and then use PowerShell to get the byte value.
Step 1. Set logon hours on a template account using ADUC
Step 2. Get byte value from a template user. In this example, I’ll get the logon hours from user adam.hickey.
get-aduser adam.hickey -property logonhours | select-object -expand logonhours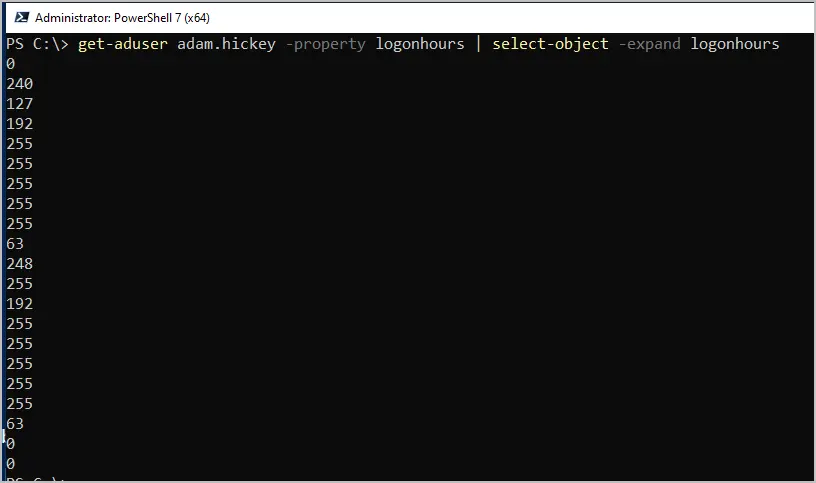
Step 3. Put the logon hours from step 2 into a byte array and use the set-aduser command to set the logon hours for another user. I copied the output from step 2 into chatgpt and asked it to format into a byte array.
$logonHoursArray = [byte[]] (0, 240, 127, 192, 255, 255, 255, 255, 255, 63, 248, 255, 192, 255, 255, 255, 255, 255, 63, 0, 0)
set-aduser Agnes.Dibble -replace @{logonhours = $logonHoursArray}
Now user Anges.Dibble has the same logon hours as my template user adam.hickey. You can use this method to set the logon hours for multiple users or all users in an OU.
Automatically disconnect users after logon time expires
If a user is logged in and the time goes past their allowed logon hours they will still be logged on. This is because they have already authenticated to the network during their allowed time. If you want to automatically disconnect users when their logon hours expire follow these steps.
Step 1. Open the group policy management console.
Step 2. Create a new or modify an existing GPO. You want to apply the GPO to the user accounts that you want to auto disconnect. In this example, I’ll create a new GPO.
Step 3. Edit the GPO and enable the policy Enabled the Microsoft network server: Disconnect clients when logon hours.
Computer Configuration > Policies > Windows Settings > Security Settings > Local Policies > Security Options
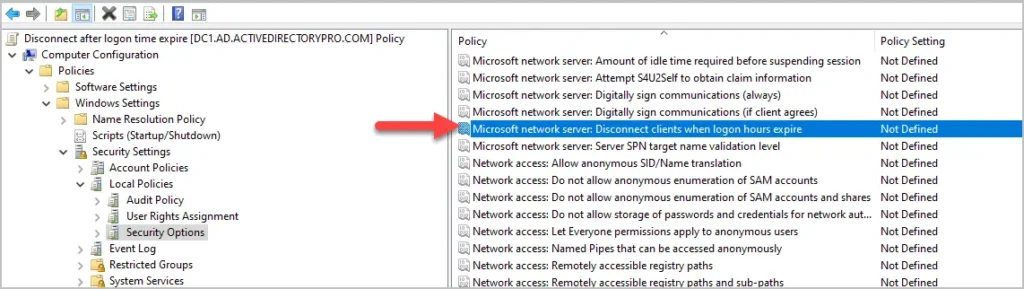

Click OK.
With this GPO enabled users will now be automatically disconnected when their logon hours expire.
Get all users logon hours (easy to read report)
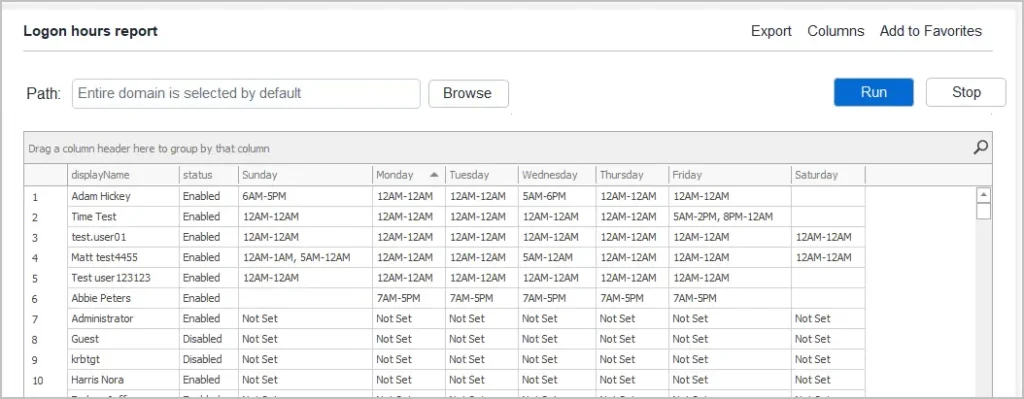
Do you need a report of all user logon hours? Unfortunately, Active Directory users and computers does not provide this report, you can only check the logon hours for individual users. Thankfully, there is a solution.
The Active Directory Reporting Tool includes a logon hours report that makes it easy to get all users logon hours. Below is an example report of all users logon hours.
I hope this article helped you learn how to set logon hours for Active Directory users. To set the logon hours for multiple users, you will need to put them into an OU and then you can select them all and adjust the hours. You may also want to see our article on how to copy user groups from one user to another.
