In this tutorial, you will learn how to use group policy to add shortcuts to all user’s desktops and how to target specific users. For example, add a shortcut just to a group or all users in an OU.
You will also learn how to add shortcuts to the start menu and how to delete shortcuts. It’s easy, check it out.
Table of Contents:
With group policy, you can easily add shortcuts to all users desktops, the start menu, toolbar, and so on. You can also easily target specific computers and users with group policy item level targeting. This most common use is to add a shortcut to all users desktops so let’s jump into an example.
Create Desktop Shortcut for All Users Using GPO
To add a URL shortcut to all users desktop follow these steps. In this example, I’ll create a URL shortcut to my website https://activedirectorpro.com
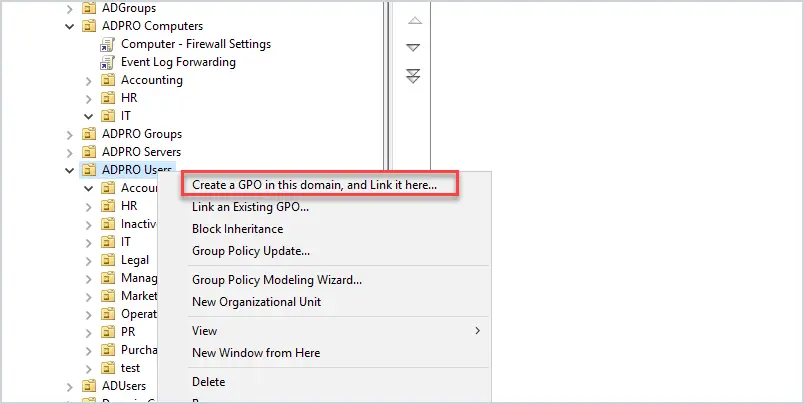
Step 1: Create a new GPO
Open the Group Policy Management Console and add a new GPO. Add a new GPO to the OU that contains the users you want to target. If you want to target everyone in the domain then you could add it to the root.
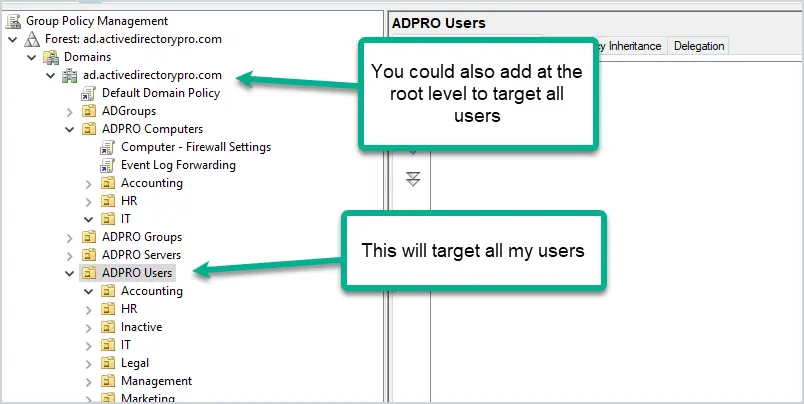
I’m going to create and link a new GPO to my ADPRO Users OU. This OU has all of my users so the GPO will target all Sub Ous.
Give the GPO a name, I’ve called mine “User – Add Shortcut”
Step 2: Edit GPO Settings
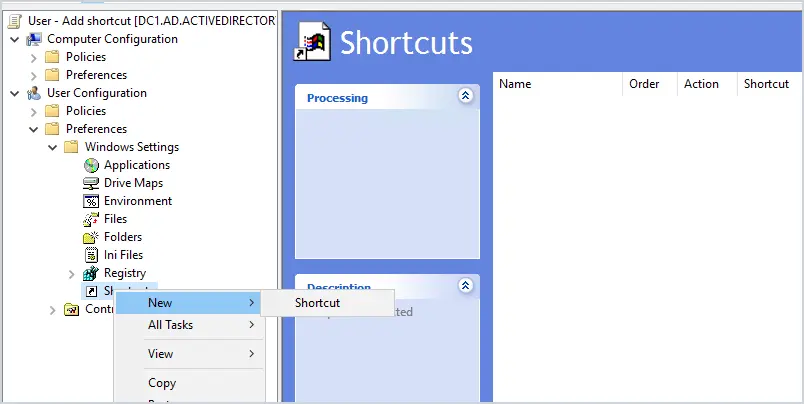
Edit the new GPO and brose to these settings User Configuration > Preferences > Windows Settings and Shortcuts
Right click shortcut select new > Shortcut
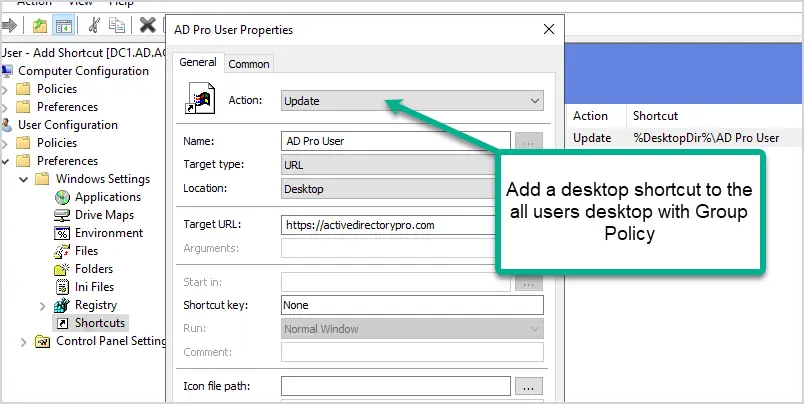
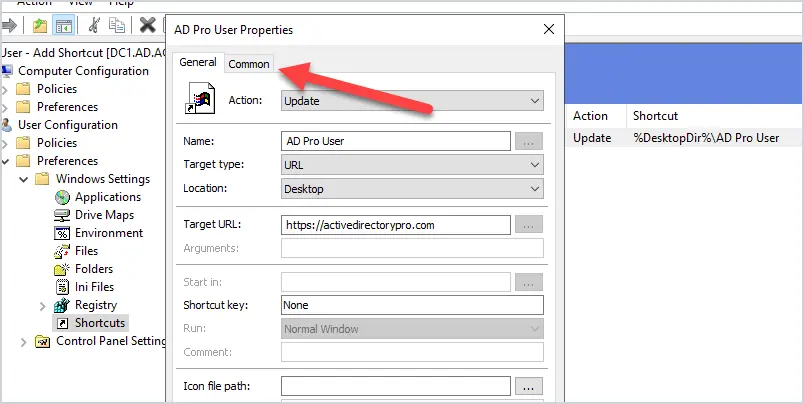
On the New Shortcut Properties screen set the following:
Action: Update
Name: This will be the shortcut name
Target type: URL
Location: All Users Desktop
Icon file path: This is optional. If you have a specific icon you can select it.
When you have added your settings click ok.

That completes the GPO configuration.
Step 3: Reboot or run Gpupdate
GPO will refresh every 90 minutes on the desktops. To force a GPO refresh you can reboot or run the gpupate /force command.
Open the command prompt and type gpupdate /force
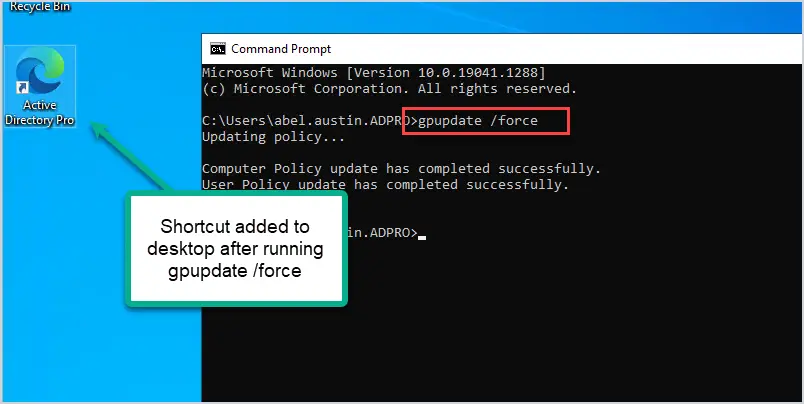
After running the gpupdate command the URL shortcut is added to the all users desktop. Any user that logs into the computer will have this shortcut.
Add a Folder to the Desktop With Group Policy
In this example, I will add a desktop shortcut to a network shared folder. You can create a new GPO or add an additional shortcut to an existing GPO. Here are the settings
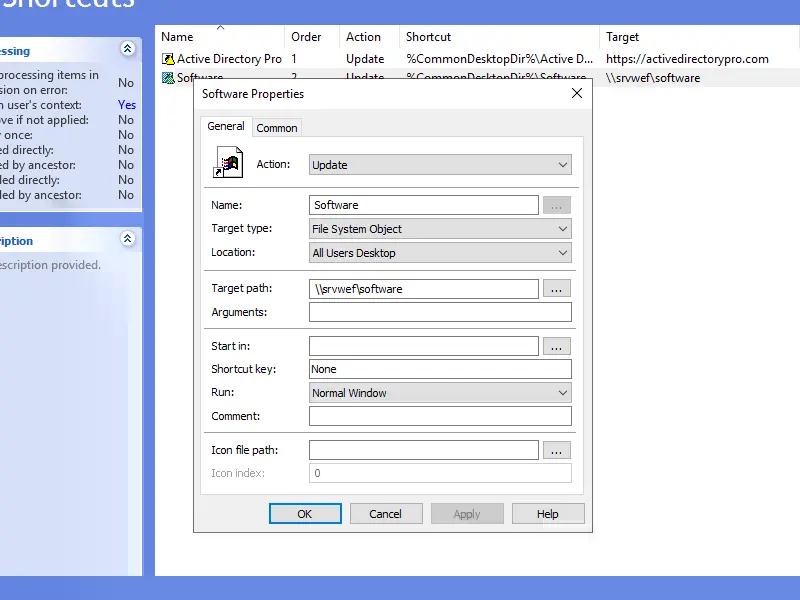
For target type select “File System Object” and in target path enter the UNC path. Run gpupdate command on the computer and the shortcut will appear.
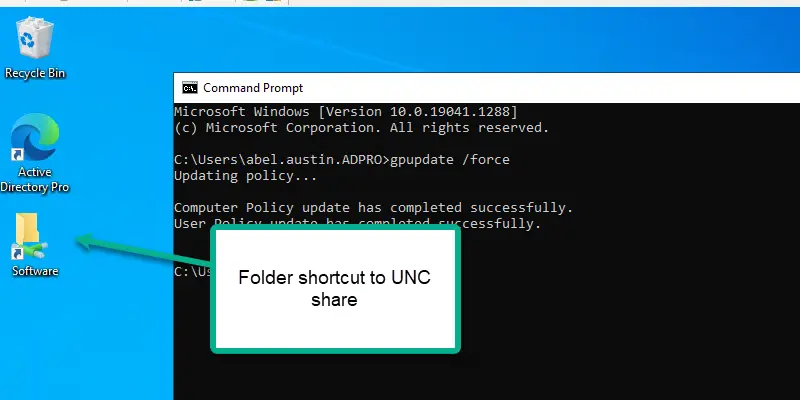
The steps are almost the same as adding a URL shortcut you just change the target type and target path.
GPO Create Shortcut for Specific Users
The first two examples added a shortcut to the all users desktop. Now let’s look at how you can target a specific group of users for adding a shortcut.
Option #1 – Target OU
The first option is to apply the GPO to a specific OU. This will depend on how you have your Active Directory organized. For example, I typically organize users by the department. This way if I want to add a desktop shortcut for just the Marketing department I can apply the GPO to the Marketing OU.
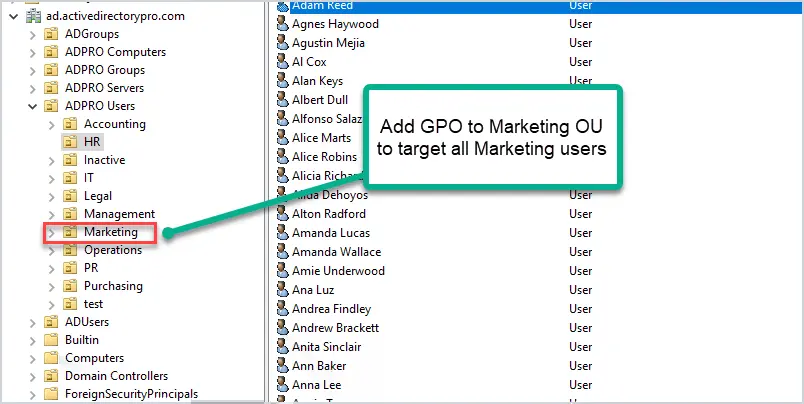
Again, this only works if you have AD organized. If not then check out option 2.
Option #2 – Item Level Targeting
This is a really cool Group Policy feature. In the GPO settings, it is called Item-level targeting and it allows you to apply the GPO to very specific users and computers. For example, you can target users in a security group or computers with a specific IP address or operating system.
I’ll walk through an example and target a security group.
I’m going to link a GPO to add a shortcut to the root of my user’s OU. With item level targeting I can then define a security group that this GPO will only be applied.
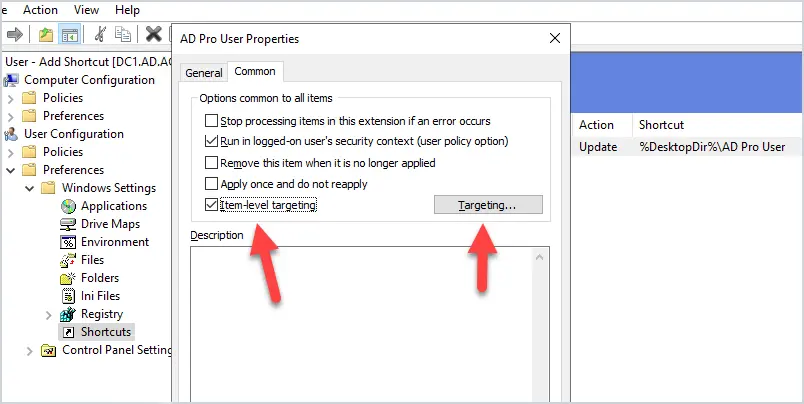
On the GPO shortcut screen click on Common
Then click “Item-level targeting” and click the Targeting button
Now click New item. The list of options will display.
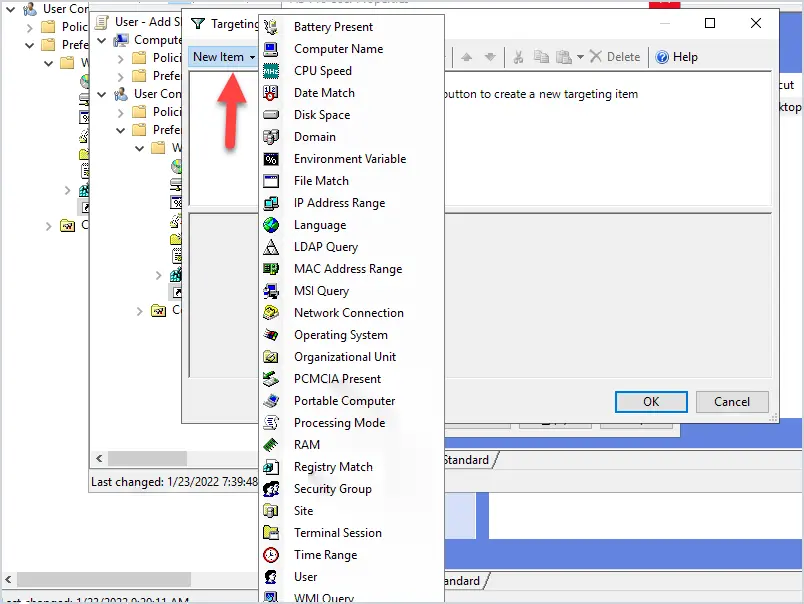
You can see there are a lot of options to choose from. I want to use a Security Group to add the desktop shortcut, so I select “Security Group”
I have a group called “Desktop-Shortcut-Group” I select the group and click OK.
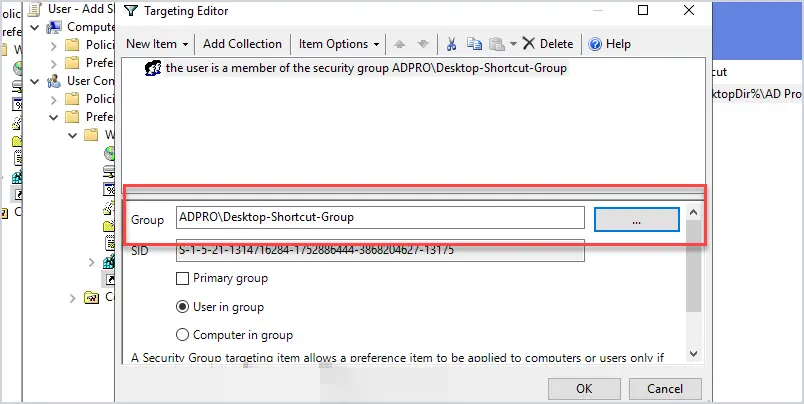
Now only the users in the Desktop-Shortcut-Group will get the shortcut added to the desktop. This makes it super easy to control who gets the GPO.
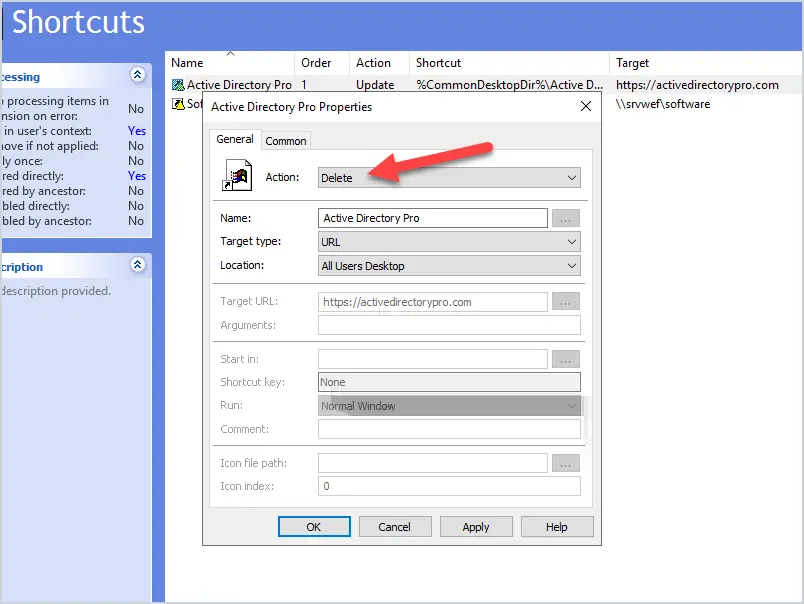
How to Delete a Shortcut Using GPO
Deleting or unlinking a GPO that adds a shortcut does not remove the shortcut. If you delete the GPO the shortcut still exists. You have to change the GPO action to Delete.
What is the difference Between Create and Update?
There are 4 different action types. I’ll give a brief description of each.
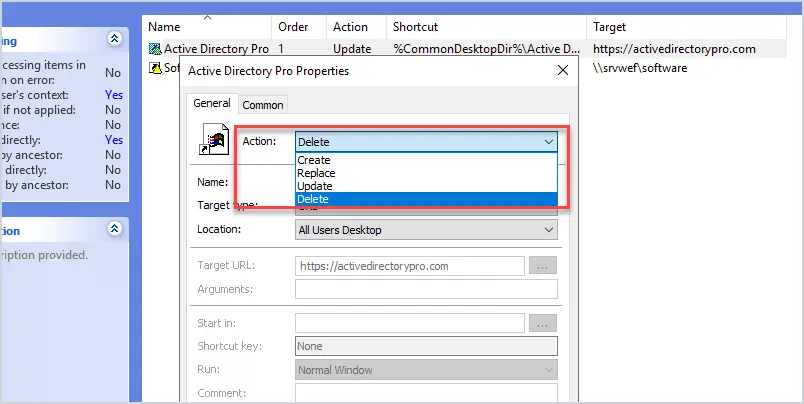
Create: Create a new shortcut for computers or users
Delete: Use this to delete a shortcut for computers or users
Replace: Delete and recreate a shortcut for computers or users. The end result is if the shortcut does not exist it will create it. If the shortcut exists, it will overwrite it.
Update: Modify settings of an existing shortcut for computers or users. I typically use this action for creating shortcuts. If the shortcut does not exist it will create it. If you need to make changes to the shortcut this action will also update its settings.
Summary
Adding desktop shortcuts with group policy is very easy to do. With item level targeting you can get very specific on which users the GPO applies to. Helpdesk likes to use this to add a shortcut to the printer share on all users desktop. This makes it easy for end users to install their own printers.

Why are the shortcuts only showing to regular accounts and not admin accounts?
Is the GPO being applied to the admin accounts? Check it with the gpresult /r command.
I need to install a software, create shortcuts for that software and add windows registry in the same policy. It is possible?
Hello! Is there a way to use Group Policy to create an Edge inprivate shortcut with the URL specified? I know how to create a regular (not inprivate) edge shortcut. I know how to manually create an edge inprivate shortcut, not using GPO. I can’t figure out how to combine the two. Thanks!
Create a normal shortcut. Right-click, go to ‘Shortcut’ tab and under ‘Target’ add the ‘-inprivate’ argument so it looks like the below:
“C:\Program Files (x86)\Microsoft\Edge\Application\msedge.exe” –profile-directory=Default -inprivate
You can choose to modify the name in ‘General’