
In this tutorial, you will learn how to run and view the best practice analyzer results using PowerShell. In addition, I’ll show you how to output the results into a searchable table.
What is the best practices analyzer?
The best practices analyzer is a Microsoft tool that was first available in Windows Server 2008 R2. This tool scans the roles on your server and reports on any best practice violations. These best practices are defined by Microsoft experts, for example, it is best practice to backup Active Directory on a regular basis. The best practices analyzer can scan Active Directory and report if your Active Directory has not been backed up recently.
The Best Practice Analyzer (BPA) tool can be run from the GUI or by using PowerShell. I find the GUI tool is very slow to use and that is why I prefer to run it with PowerShell.
Best Practices Analyzer Benefits
- Find best practices violations on your servers
- Increase security
- Find performance and reliablity issues
- Find configuration issues
Best Practices Analyzer PowerShell Cmdlets
There are three different PowerShell cmdlets that will be used to run and view the BPA results.
Get-BPAmodel
This cmdlet gets and displays a list of BPA tests that can be run on the system. This cmdlet will also display the last time the scan was run.
Invoke-BPAmodel
This cmdlet will start a BPA scan for a specific test (role).
Get-BPAResult
Displays the results of a recent BPA scan.
Now I’ll walk through some examples.
Step 1: List Available Best Practices Analyzer Tests (models)
The first step is to list what best practice analyzer tests are available on your server. This can be done with the following command.
get-bpamodel | select ID, Name, lastscantime
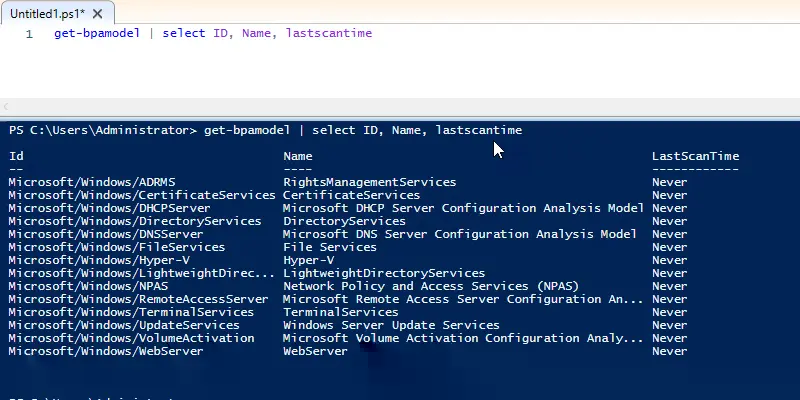
As you can see this cmdlet will list the available BPA tests (Microsoft calls them models) and the last scan time. The list of tests is determined by what roles you have installed on your server.
Step 2: Run BPA Scan
Next, you take the Id from step 1 and use the Invoke-BPAModel command to run a scan. I’m going to run a scan on DirectoryServices which is Active Directory. This is done with the Invoke-BPAModel command + the Id. The Id for Active Directory is “Microsoft/Windows/DirectoryServices” so the complete command is the following:
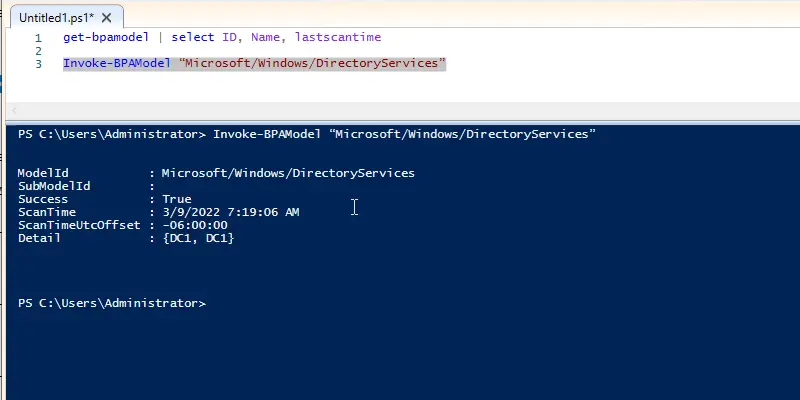
Invoke-BPAModel “Microsoft/Windows/DirectoryServices”
If I wanted to run a BPA scan on DNS the command would be:
Invoke-BPAModel “Microsoft/Windows/DNSServer”
Here is a screenshot of the DirectoryServices scan. This does not display the results, it just displays the status of the scan.
Step 3: View BPA Scan Results
At this point, I have just run a BPA scan on Active Directory and DNS. Now it’s time to view the results of those scans. This is done with the Get-BpaResult command plus the test Id.
Get-BpaResult “Microsoft/Windows/DirectoryServices”
Below is the output of the command.
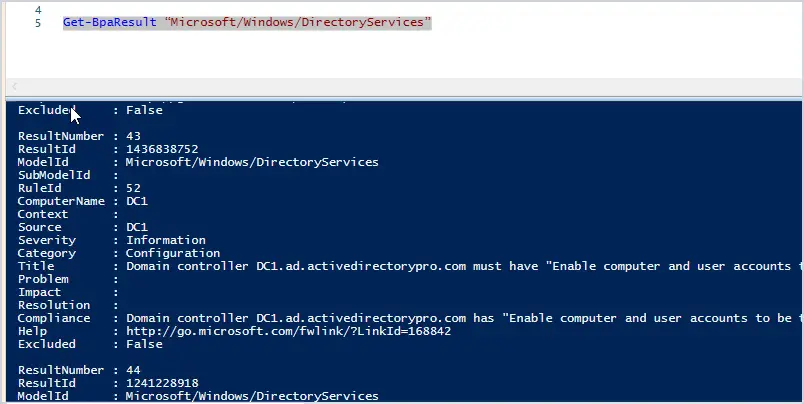
As you can see it’s not in an easy to read format and it can output a lot of data. There are several ways to clean this up and make it easier to read.
First thing is to filter out some of the fields that you don’t want. There are several that I don’t need such as ResultNumber, Excluded, RuleID, SubModelID, and so on. So what you can do is use the format-table command, then list the fields you want to display.
In the example below, I just want to display the Severity, Category, Problem, and Impact.
Get-BpaResult -ModelId Microsoft/Windows/DirectoryServices | format-table Severity,Category,Problem,Impact
Below are the results of the command.
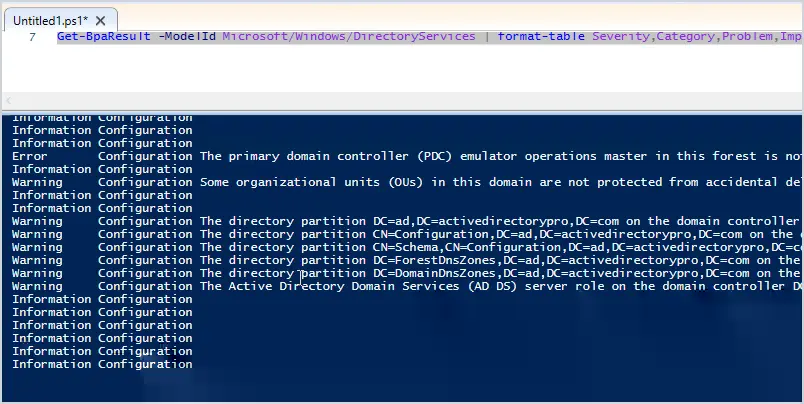
This looks better but there are several rows that are blank. Since I’m just wanting to look for any problems, I can remove the information results from displaying.
This can be done by displaying results where the severity is not equal to “Information”
Get-BpaResult -ModelId Microsoft/Windows/DirectoryServices | where severity -ne Information | format-table Severity,Category,Problem,Impact
Here are the results of the command.
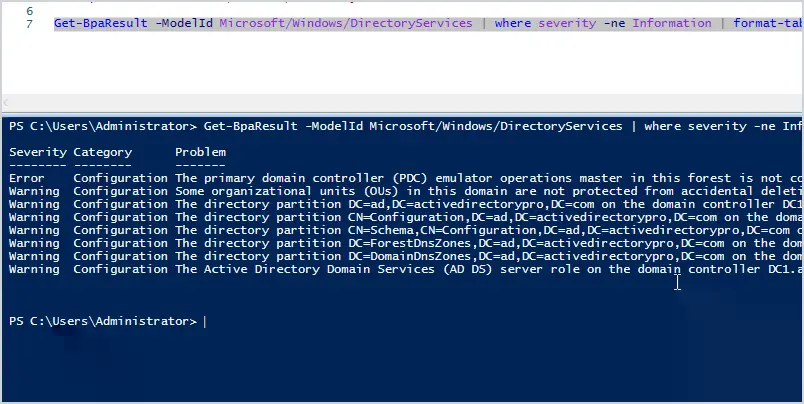
Now I have a much cleaner report that displays only the details that I need.
Display BPA Scan Results in Grid
An easier option for viewing the BPA scan is to output it to a grid. This is done by piping the results to OGV. OGV is short for Out-GridView.
Get-BpaResult -ModelId Microsoft/Windows/DirectoryServices | OGV
Here is what the output looks like.
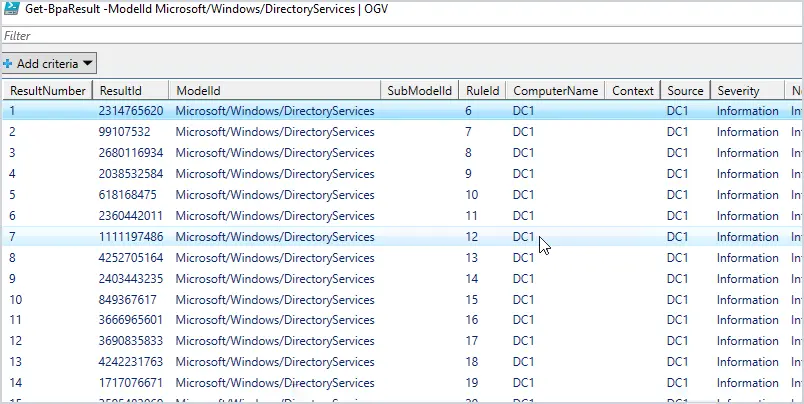
Much easier to read right?
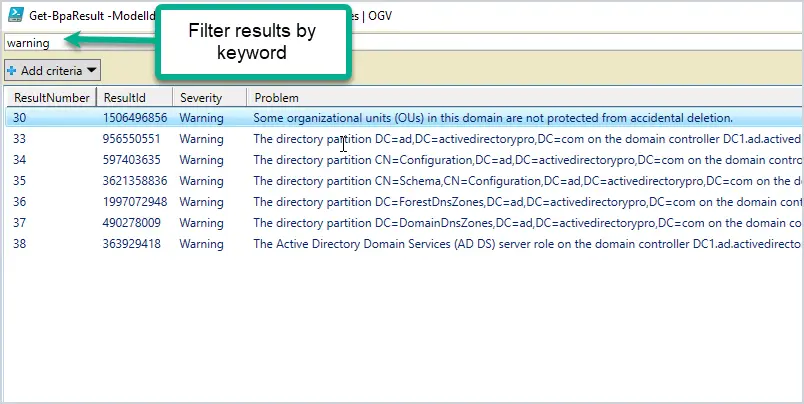
You can also filter the results by typing in the filter. For example, if I typed warning, it would filter the results to display only those that have a warning in them. You can also rearrange the columns.
Export BPA Scan to a file (CSV or HTM)
If you want to save the scan results to a file, then use one of these options.
- Export-CSV
- convertTo-Html
Here is an example of an export to a CSV file.
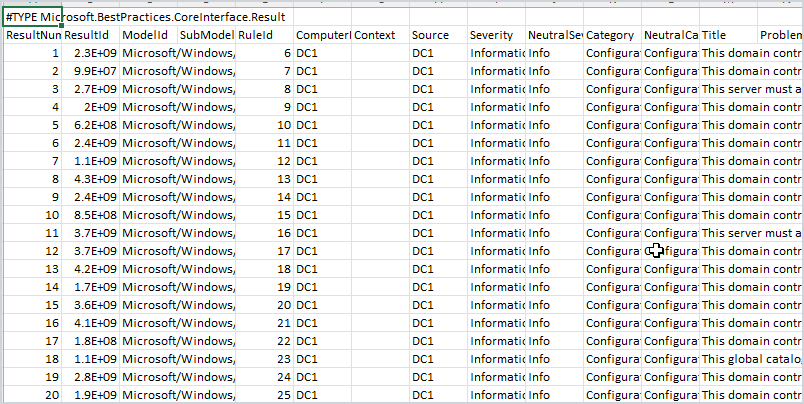
Get-BpaResult -ModelId Microsoft/Windows/DirectoryServices | export-csv c:\it\scan.csv
Here is a screenshot of the results.
Here is an example of exporting the scan results to an html file
Get-BPAResult Microsoft/Windows/DirectoryServices | convertTo-Html | Set-Content C:\BPAResults\DirectoryServices.htm
Summary
The best practice analyzer is a great tool that is built into Microsoft Servers, I don’t think many people know about it or use it. I recommend running it from time to time to see if your servers have any major issues or misconfigurations based on Microsoft’s best practices. Although you can run the scans from the GUI I find the PowerShell scans to be faster and easier to use.