There are times when a file is open on a windows server and you need to view what user or process has it open. These open files can be locked and prevent users from editing, cause errors when upgrading software, hold up a reboot, and so on.
In this article, I will show you how to quickly view open files on Windows servers and workstations.
Both methods use built in Windows tools and work on most Windows versions (I’ve tested this on Server 2012, 2016, 2019, and Windows 10).
Video Tutorial
If you don’t like videos or want more details then continue reading.
Method 1: View Open files using the Computer Management console
This first method is used to view open files on a shared folder. This is the best way to troubleshoot locked files that users have left open. If you need to see what process has a file open then check out method 2.
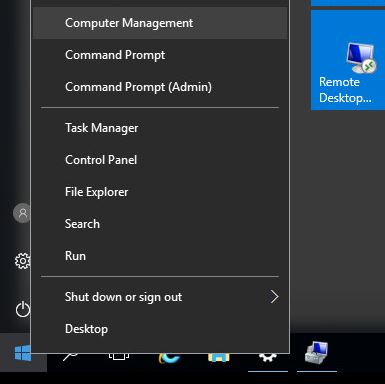
Step 1: Right Click the start menu and select Computer Management
Another way to access computer management is to type in compmgmt.msc into the start menu search box.
You will need to open up this console on the computer or server that has the shared folder. For example, I have a server called file1 with a shared folder named HR. To see the open files on this share I will need to open up the computer management console from the file1 server.
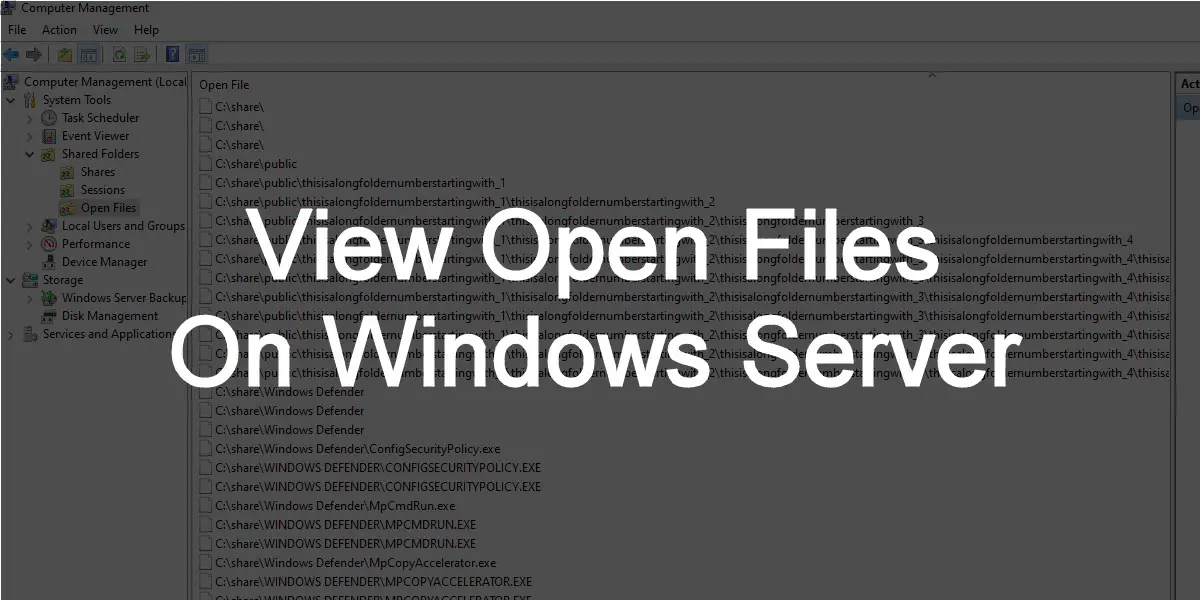
Step 2: Click on Shared Folders, then click on open files
I can now see that the user rallen has the HR folder and the file adpro.txt open.

If I needed to I can right click the file and select “Close Open File”. This is something that needs to be done when a file is locked.
That’s it for method 1.
Method 2: View open files using PowerShell
In this section, I’ll show you how to use the Get-SMBOpenFile cmdlet to view open files on Windows.
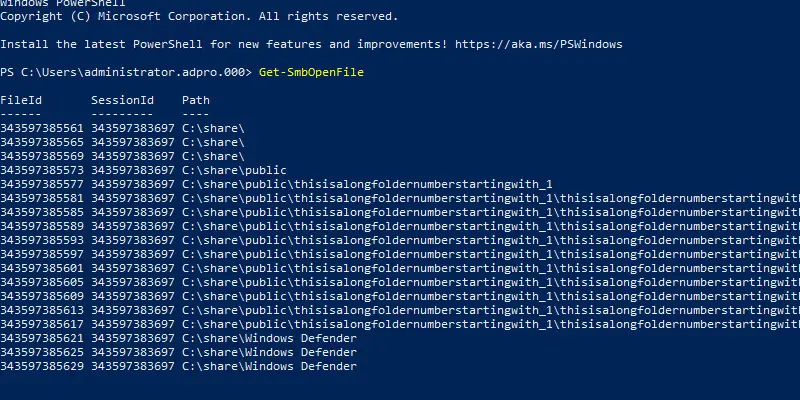
Example 1: Get all open files
get-smbopenfileThe above command will return the FileID, SessionID, and path.
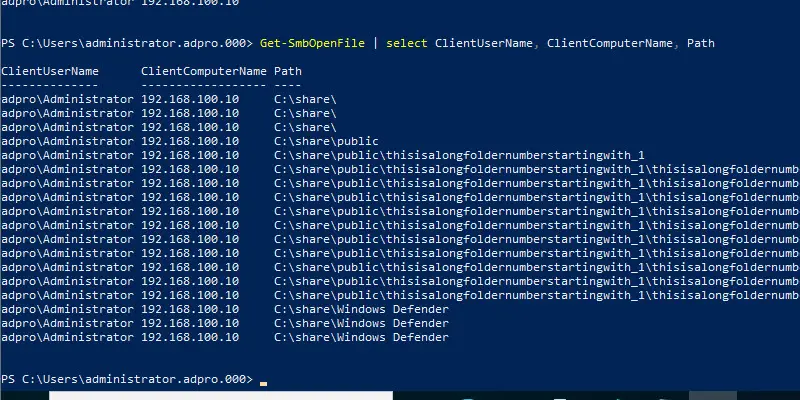
Example 2: Display user and computer
Get-SmbOpenFile | select ClientUserName, ClientComputerNameThe above command displays the user, computer, and file path for the open files.
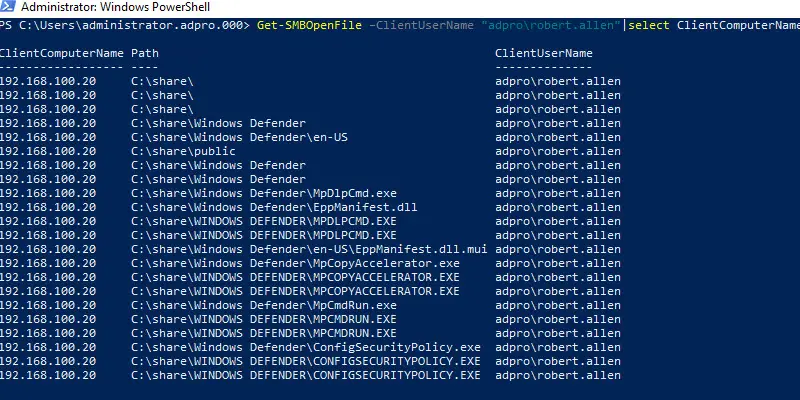
Example 3: Get open files for a specific user
Get-SMBOpenFile –ClientUserName "adpro\robert.allen"|select ClientComputerName,Path,ClientUserNameThe above command will get all open files for the user “robert.allen”
Example 4: Get open files on a specific computer
Get-SMBOpenFile -ClientComputerName 192.168.100.20 | select ClientComputerName, pathIn the above example, I’m getting all open files on the computer with the IP address 192.168.100.20.

Methods 3: View open files using the resource monitor
If you need to see what process has an open file locked then use the resource monitor.
Step 1: Type Resource monitor into the start menu search box
This is the quickest way to access the Resource Monitor.
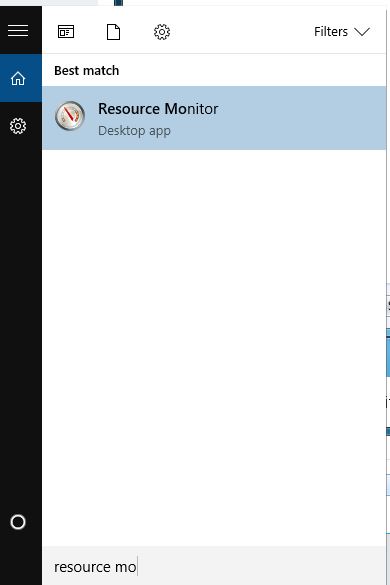
Another option is to open up the task manager, click the performance tab and then click Open Resource Monitor.
Step 2: Click on the disk tab in the resource monitor
Now that I have the resource monitor open I just need to click on the disk tab.
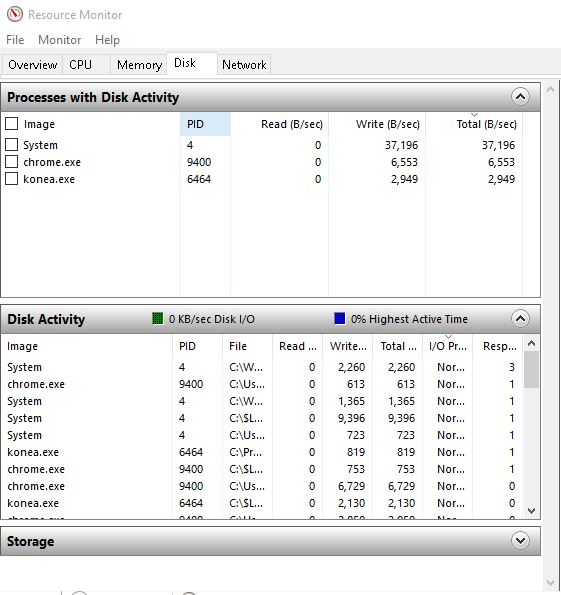
Now I can see all kinds of details about the disk activity such as files open, PID, read and write bytes per second, and more.
You can move the columns around so you can see the full file path.
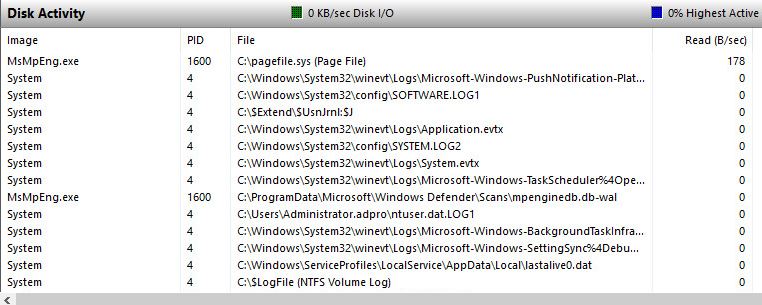
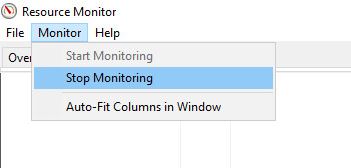
I have a lot of disk activity you go stop the live monitoring so you can view the open file activity.
To stop the live monitoring go to monitor, then select stop monitoring.
If you liked this article, then please subscribe to our YouTube Channel for more Active Directory Tutorials.

That’s not the point Server Software for its price should have enhanced versions of these basic tools.
Powershell is great yes but what’s the point of a UI looking modern yet the underlying tools are still in Windows NT land lol
MS built in tools have always been pretty basic.
I cant believe in 2020 we still have to use an ancient tool in windows to drill into comp management , shares an open files to do this. Surely microsoft would have a extra feature where you just right click on file/folder to see which user is accessing the object.
Netware had this feature out of the box back in 1990’s
Microsoft’s built in tools have always been pretty basic. PowerShell has helped as it allows admins to create their own custom tools
Thanks for the tip. Cheers.