In this article, you will learn how to update Active Directory group attributes using PowerShell. I’ll show you examples of updating a single group and bulk updating multiple groups. As an alternative to PowerShell, I’ll also show examples of updating group attributes using the AD Pro Toolkit.
Table of contents
Update AD Group Attributes using PowerShell
The Set-ADGroup PowerShell cmdlet is used to modify AD group attributes. The Set-ADGroup requires one of the following values to identify the group to update.
- A distinguished name
- A GUID (objectGUID)
- A security identifier (objectSid)
- A SAM account name (sAMAccountName)
You can modify commonly used property values by using the cmdlet parameters. Property values that are not associated with cmdlet parameters can be modified by using the Add, Replace, Clear, and Remove parameters.
Let’s look at some examples.
Example 1. Update description for a group
set-adgroup -identity "Accounting_Folder_RO" -Description "Read only group for accounting shared folder"The above command sets a description for the specific group. I’m using the groups sAMAccountName as the identifier.
Results.

Example 2. Bulk update description for multiple groups
To bulk update group attributes, you will need to create a CSV file.
Step 1. Create a CSV with two columns:
- name
- description
Add the sAMAccountName of each group to the name column and add a description for each group. Here is a CSV example.
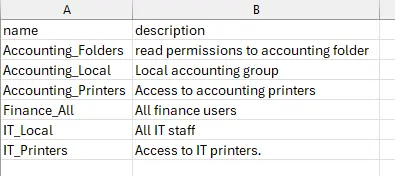
Save you csv file and remember the path as it is needed for step 2.
Step 2. Now I’ll create a simple script to loop through the CSV and update the groups. Change the csv location to the path where you saved your csv file.
$mygroups = Import-csv c:\it\update_groups.csv

#Loop through each row containing user details in the CSV file
foreach ($group in $mygroups) {

        # create a hashtable for splatting the parameters
        $groupProps = @{
            identity     = $group.name
            description  = $group.description
        } #end props

write-host "Updating $group" -ForegroundColor Cyan

         set-adgroup @groupProps

    } #end else
I saved the above script into my c:\it folder and named it set-adgroup1.ps1.
Step 3. Run the script
Open PowerShell and execute the script.

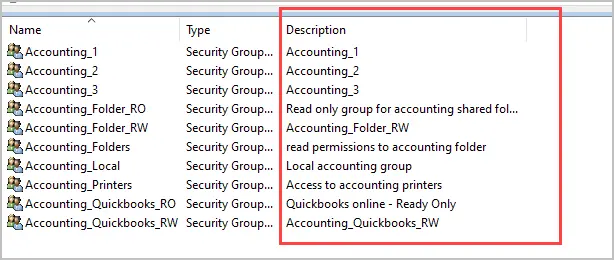
Now if I check AD I’ll see the description has been updated for all the groups in my csv file.
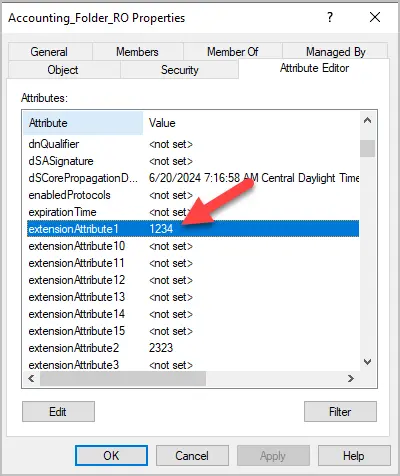
Example 3. Update group extensionAttribute1
set-adgroup -identity "Accounting_Folder_RO" -Add @{extensionAttribute1="1234"}In the above example, I set the extensionAttribute1 to “1234” for the Account_Folder_RO group. There is no parameter for the extenstionAttribute so I’ll need to use the -Add option.
Example 4. Update ExtensionAttribute for Multiple Groups
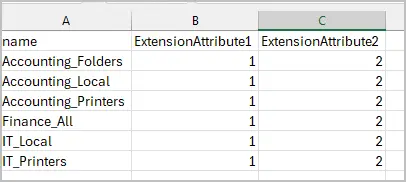
Step 1. Create a csv with the following columns and add values for each ExtensionAttribute.
- name
- ExtensionAttribute1
- ExtensionAttribute2
CSV Example.
Step 2. Create script to loop through the csv file.
# Import the CSV file
$groups = Import-Csv -Path "C:\it\update_groups2.csv"

# Loop through each row in the CSV and update the group
foreach ($group in $groups) {

write-host "Updating $group.name" -ForegroundColor Cyan

    Set-ADGroup -Identity $group.Name -Replace @{
        extensionAttribute1 = $group.ExtensionAttribute1
        extensionAttribute2 = $group.ExtensionAttribute2

    }

}
I saved the above script into my c:\it folder and named it set-adgroup2.ps1.
Step 3. Run the script.
Open PowerShell and execute the script.

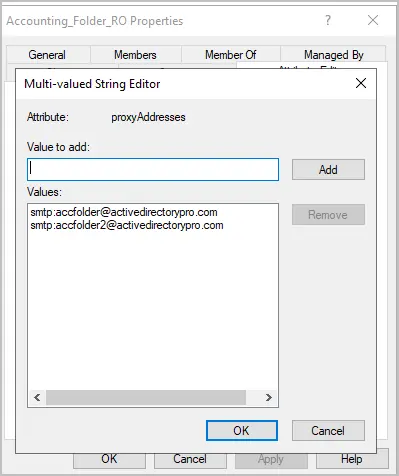
Example 5. Update AD Group ProxyAddresses
set-adgroup -identity "Accounting_Folder_RO" -Add @{proxyaddresses="smtp:accfolder@activedirectorypro.com"}In this example, I add a proxyAddress to the group Accounting_Folder_RO.
Example 6. Update Group ProxyAddresses for Multiple Groups
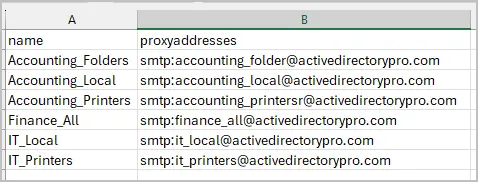
Step 1. Create a csv with the following columns and enter details for the group name and proxyaddresses.
- name
- proxyaddresses
CSV example.
Step 2. Create script
# Import the CSV file
$groups = Import-Csv -Path "C:\it\update_groups3.csv"

# Loop through each row in the CSV and update the group
foreach ($group in $groups) {

write-host "Updating $group.name" -ForegroundColor Cyan

    Set-ADGroup -Identity $group.Name -Replace @{proxyaddresses = $group.proxyaddresses }

}
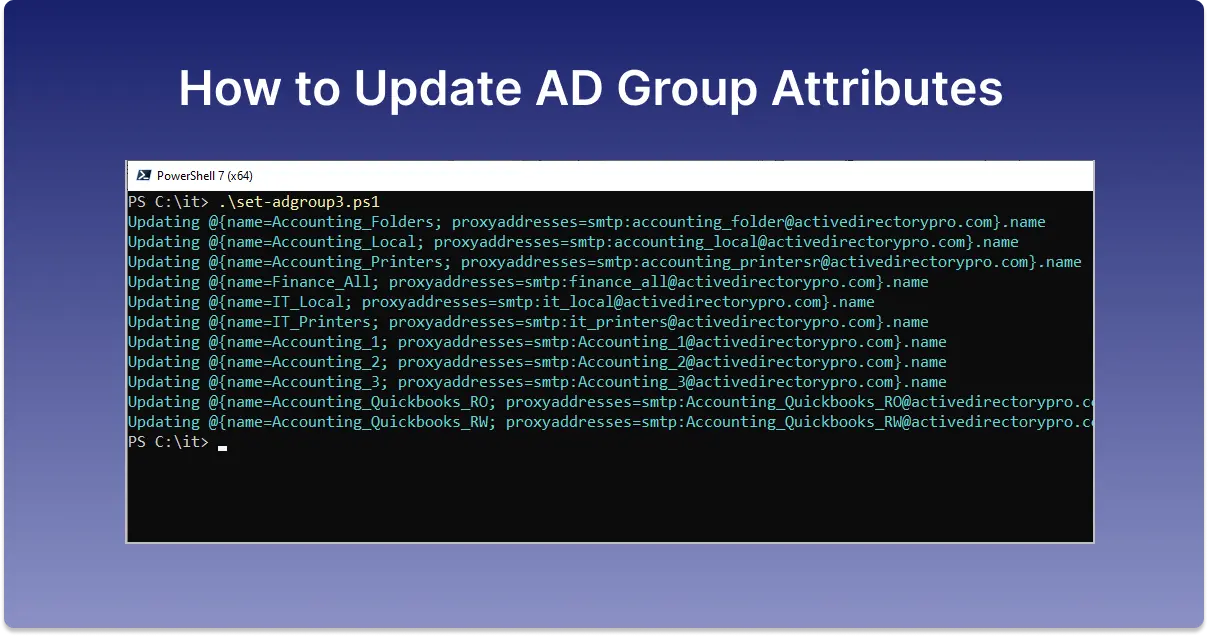
I saved the above script into my c:\it folder and named it set-adgroup3.ps1.
Step 3. Run script
Open PowerShell and execute the script.

You can use the get-adgroup cmdlet to verify the group properties have been updated.
get-adgroup -identity Accounting_Folders -properties proxyAddresses
Hopefully the above 6 examples helped you learn how to update group attributes using PowerShell. In the next section, I’ll walk through updating group attributes using a windows application called AD Pro Toolkit.
Update AD Group Attributes using AD Pro Toolkit
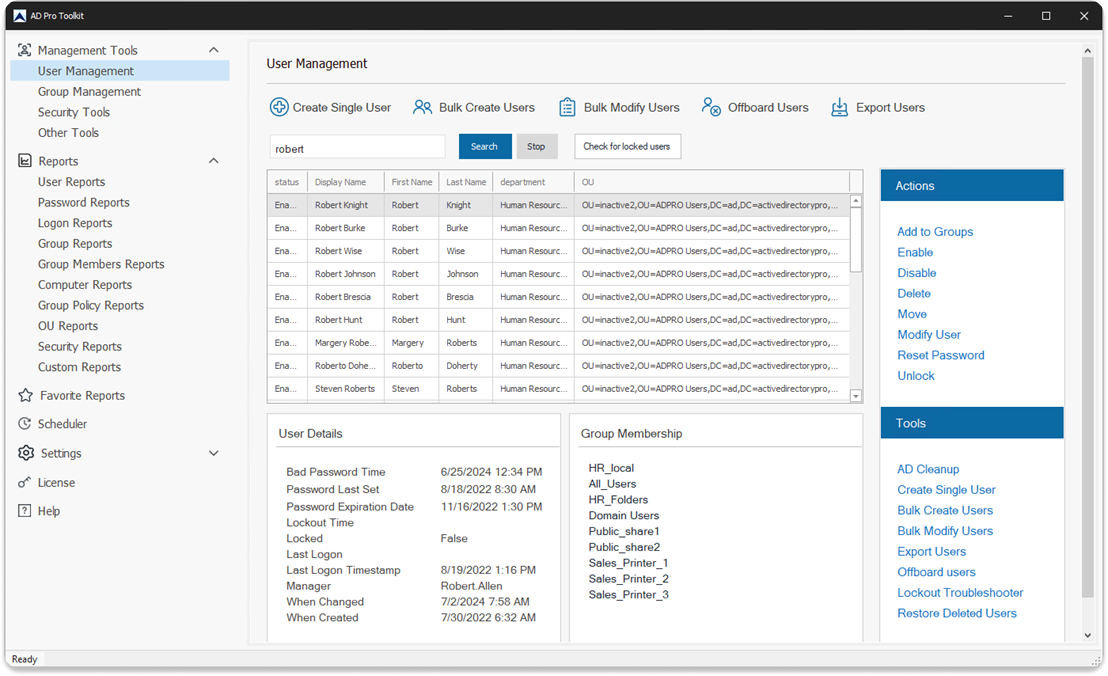
The AD Pro Toolkit includes multiple Active Directory Tools that makes it very easy to bulk update AD user and groups. With the toolkit you can update multiple group and user attributes.
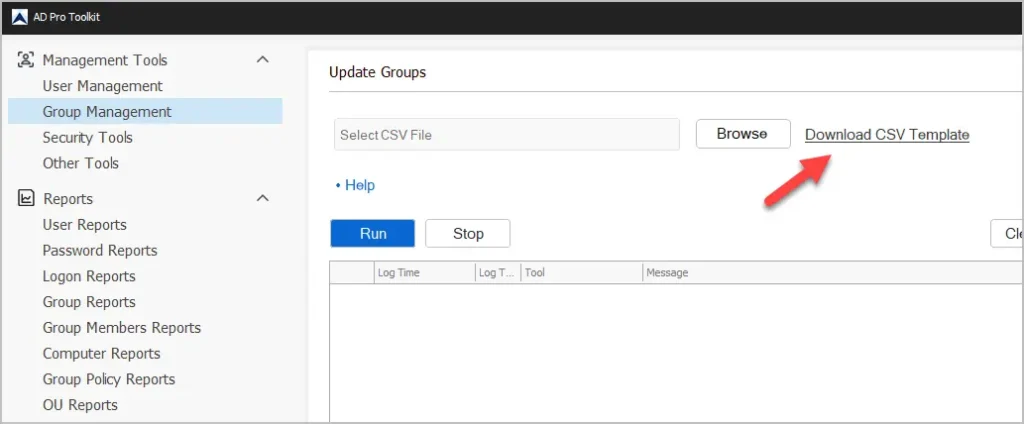
Step 1. Download CSV Template
Click on “Group Management”, “Update Groups” and then click “Download CSV Template”.
Step 2. Fill out the CSV Template
In this example, I’ll update multiple groups and group attributes at the same time. The template has a default list of attributes, you can add additional attributes to the csv.
- sAMAccountName
- extensionAttribute1 and 2
- description
- managedBy = is the distinguishedName of the account.
- proxyAddresses

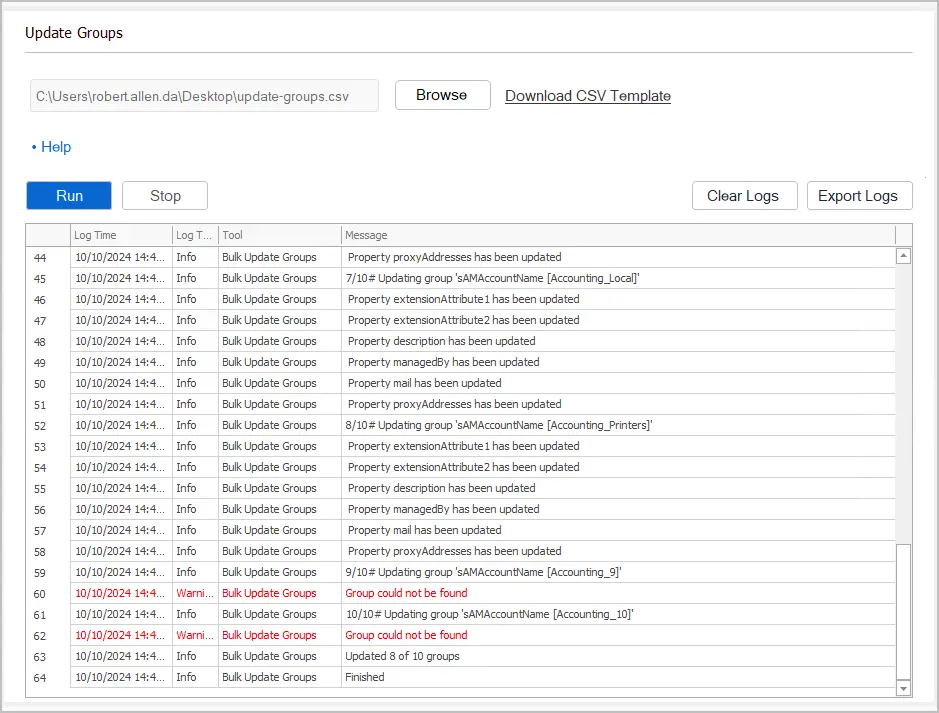
Step 3. Run Update Groups tool
Select your csv file and click run.
The logs will be displayed on the screen. Any errors will show up in red.
Step 4. Verify Group Attributes
Now I’ll use the group reports to verify everything updated.

With the toolkit you don’t need to modify code or take extra steps when you need to update different group properties. The only thing you need to do is update the csv file, it’s that easy. Download AD Pro Toolkit and see how easy it is to update group properties.
I hope you found this article helpful. If you have any questions, post in the comments below.
Related Articles
- Get-ADUser – Update AD User Accounts
- Get-ADComputer – Get AD Computer accounts
- Get-ADGroup – Get AD Group objects
- Bulk Update AD User Attributes

