In this guide, I’ll show you how to get NTFS permissions on folders and subfolders. I’ll also show you how to export the NTFS permissions to a CSV file.
In this article:
Get NTFS Folder Permissions using PowerShell
To get NTFS folder permissions with PowerShell, the get-acl cmdlet is used. The one drawback to this command is that it doesn’t get subfolder (recursive) permissions. To get around this, you can use the get-childitem command and pipe it to the get-acl command. See examples below.
Example 1: Get NTFS Permissions on the Root Directory
For this example, I’ll get the NTFS permissions for my shared folder “\\srv-vm1\share”.
get-acl \\srv-vm1\share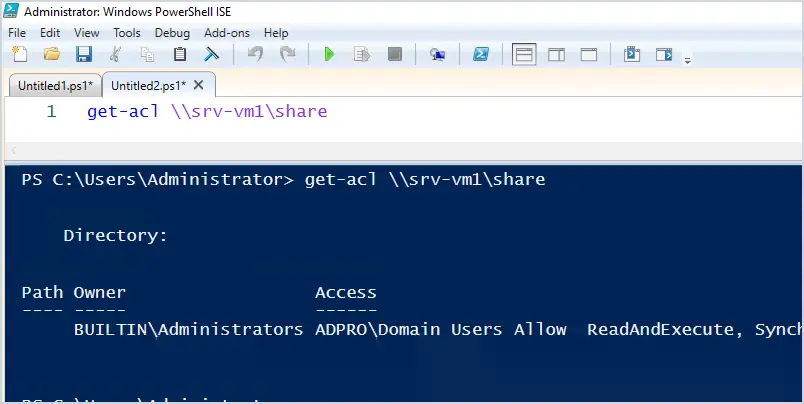
The output doesn’t look so great, it’s missing a lot of valuable information. To see more details, you can pipe the results to format-list.
get-acl \\srv-vm1\share | format-list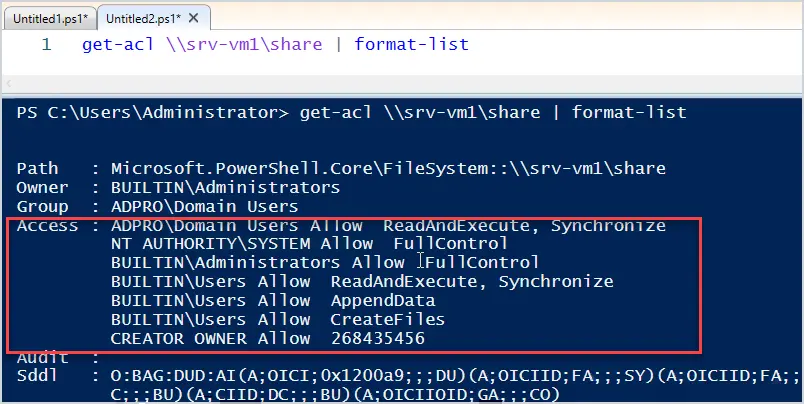
That looks much better. I can now see the full permissions on this folder.
Example 2: Get NTFS Permissions on folder and Subfolders
To get subfolder permissions, you will need to use the get-childitem command to first get all of the folders. Then it is sent to the get-acl command to get the permissions. Below is an example.
Get-ChildItem -Directory -Path "\\srv-vm1\share" -Recurse -Force | get-acl | format-list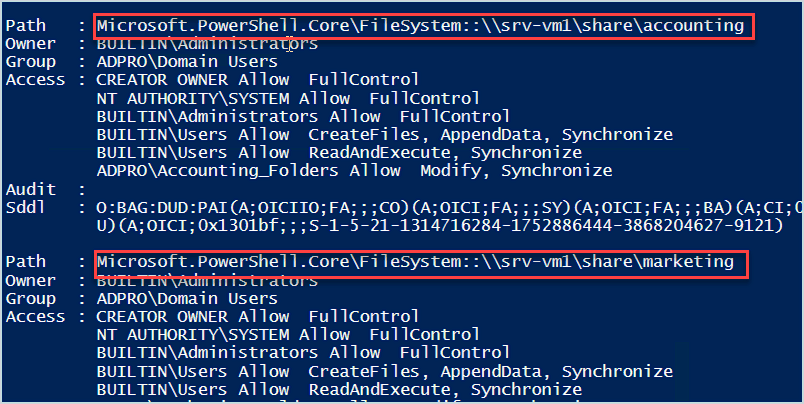
You can see it is going through each subfolder in the root of my share folder and getting the permissions for each one.
You can now export this report to a CSV or text file. The below command will export to a text file.
Get-ChildItem -Directory -Path "\\srv-vm1\share" -Recurse -Force | get-acl | format-list | out-file c:\it\ntfs-report.txtOption 2: Easily Get NTFS Permissions with AD Pro Toolkit
The AD Pro Toolkit includes an easy-to-use NTFS Permissions Report Tool. This tool will get the NTFS permissions from a share or local folder and display the results in a grid format. You can then filter, sort and export the list of permissions.
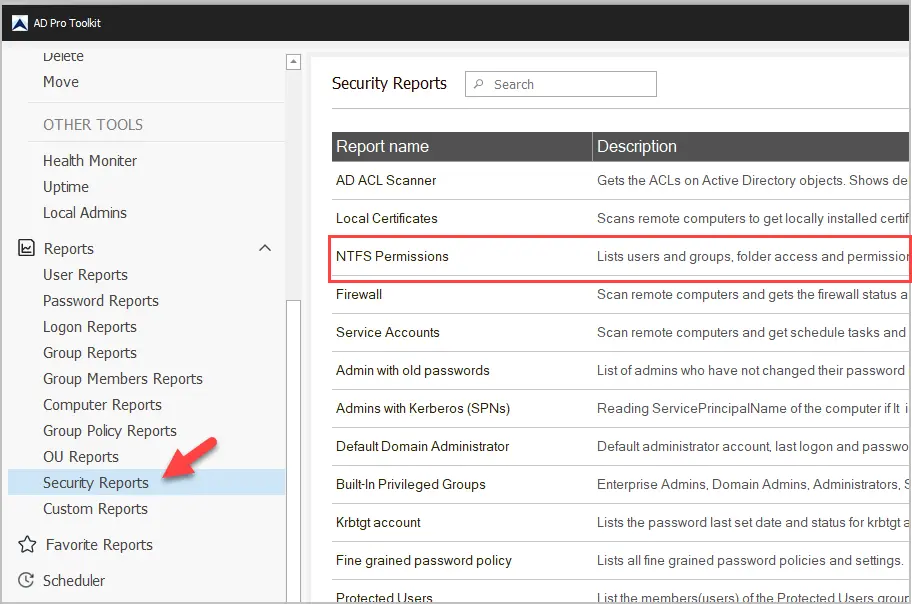
Step 1: Open NTFS Permissions Tool
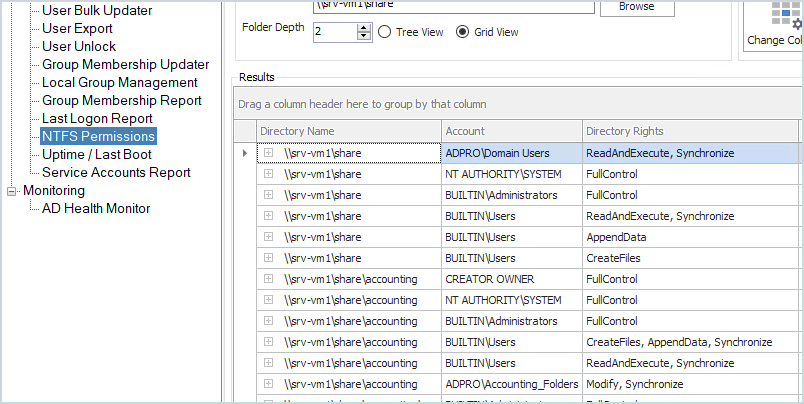
Click on Security Reports and then NTFS Permissions.
Step 2. Enter Folder Path
Enter or browse to the folder where you are wanting to get NTFS permissions. You can select the folder depth which means how many subfolders deep you want to get permissions. You can also select to display the results in a tree view or grid view.
Next, click the run button at the top to run the NTFS permissions report.
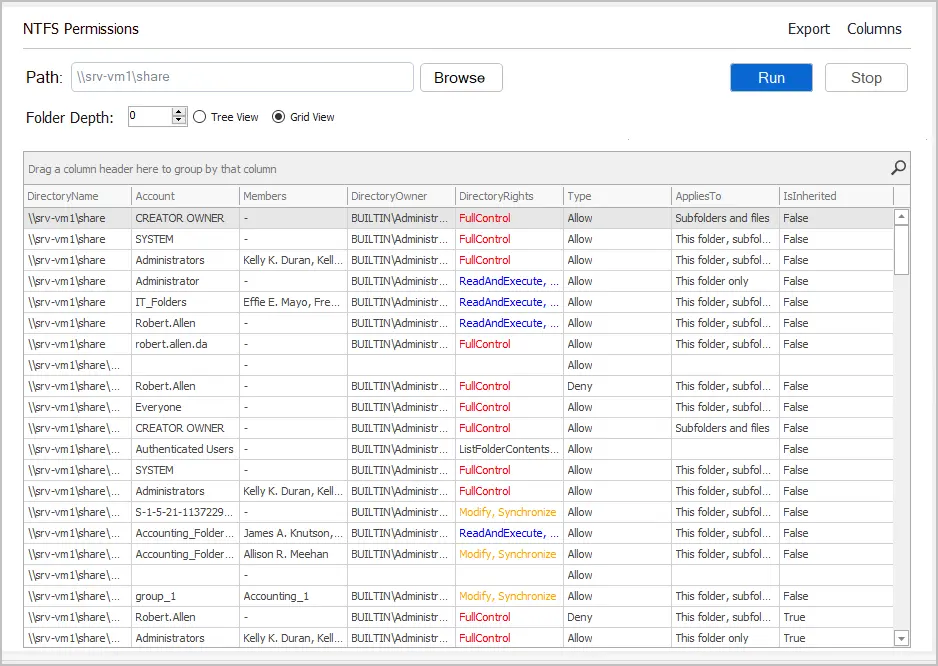
Now I’ve got a list of NTFS permissions for the root folder, and two subfolders deep. The report includes the path, the account, directory owner, permissions, applies to, and inheritance.
Very fast and easy to use.
Step 3: Export NTFS Permissions to CSV
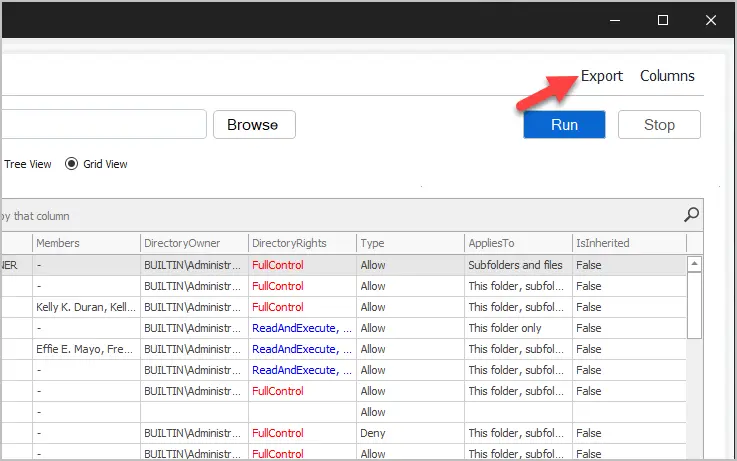
To export the list, select the export button and select “Export All Rows”
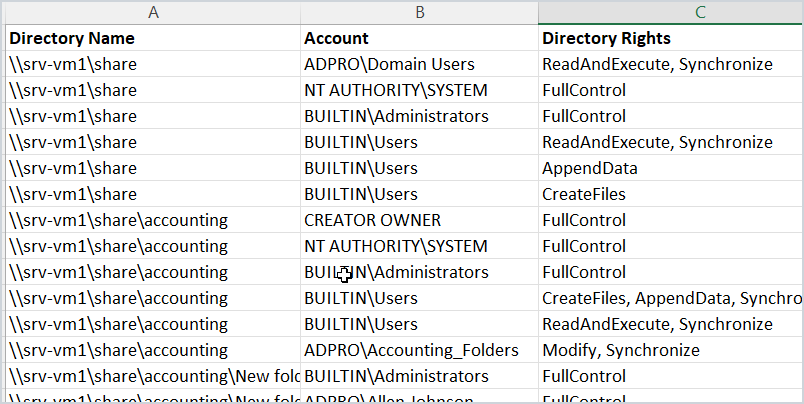
Here is an example export.
As you can see the GUI NTFS permissions reporting tool makes it very easy to get folder permissions and export them to CSV.
Key Features
- Select folder depth
- Easily export the report to CSV
- Browse results in tree or column grid
- Filter and sort on any column
- Add/Remove and rearrange the columns
Summary
In this guide, I showed you two options to list NTFS permissions and export the report to CSV.
The GUI NTFS tool is very easy to use and is a great alternative for those that don’t want to deal with PowerShell Scripts. With PowerShell, it’s a little harder to get NTFS permissions as by default it only shows root folder permissions.
Either option will work for creating NTFS permission reports.
Resources
- Get-Acl – Microsoft command documentation. This command was used to get a security descriptor from resources (folders in this guide).
- Get-Childitem – Microsoft command documentation. This is the command used to get subfolders.
- NTFS Permissions Reporting Tool – This is the GUI tool used in option 1.

Can the exported permissions data be used to apply to “reset” screwed up permissions later? Does it scale to millions of files?
Hi Robert, this Get-ChildItem -Directory -Path “\\srv-vm1\share” -Recurse -Force | get-acl | format-list works very well! i have a question. How can i go one level down? I would like to check every subfolder \\srv-vm1\share\folder automatically. is this possible? Thank you!
In later version off powershell there is a -depth “Value”.
So Get-Childitem “C:\” -Depth “1” will give you all items in C:\ and all folder content 1 layer deep. The means it will not list Content in C:\windows\System32; but it will in the C:\windows folder
kind regards
Dieter
Great article! Very helpful. I did have a quick question: If I only want the Path and Access information sections, is there a way to limit what is printed on screen/in file?
Yes. For the GUI tool click on the columns button and add/remove the columns you need. For PowerShell use the select command to limit the results. get-acl \\srv-vm1\share | select Path, Access
Incredible info and great tool, thanks!
Free tool is limited to 10 lines. Don’t be lazy and use Powershell – works well, more fun and you learn something.
PowerShell is an option.
Completely useful! I got one directory that is bringing me an exported CSV file with 165441 rows. Imagine doing one directory at the time.
Thank you Robert!