This is a detailed guide on how to install Active Directory Domain Services (AD DS).
The steps in this guide walk through how to install and configure the first domain controller in the forest.
I’ll be using a Windows 2025 server, but these same steps will work with 2012 and later server OS.
Table of contents
Prerequisites
Before you install the AD DS role make sure you have the following:
- Windows Server: You need a server with Windows Server OS (2012, 2016, 2019, or later).
- Static IP: Assign a static IP address to your windows server.
- Hostname:
- Make sure you have the hostname of the server set to what you want. Changing hostnames on a domain controller can cause temporary outage.
Install AD DS using Server Manager
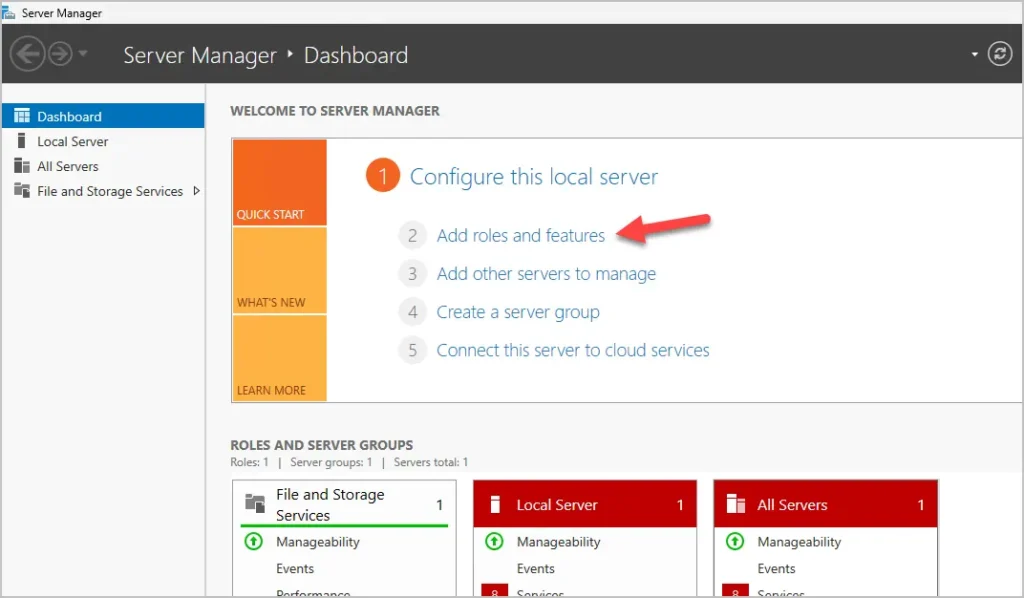
Step 1. Open Server Manager
Step 2. Click Add roles and features
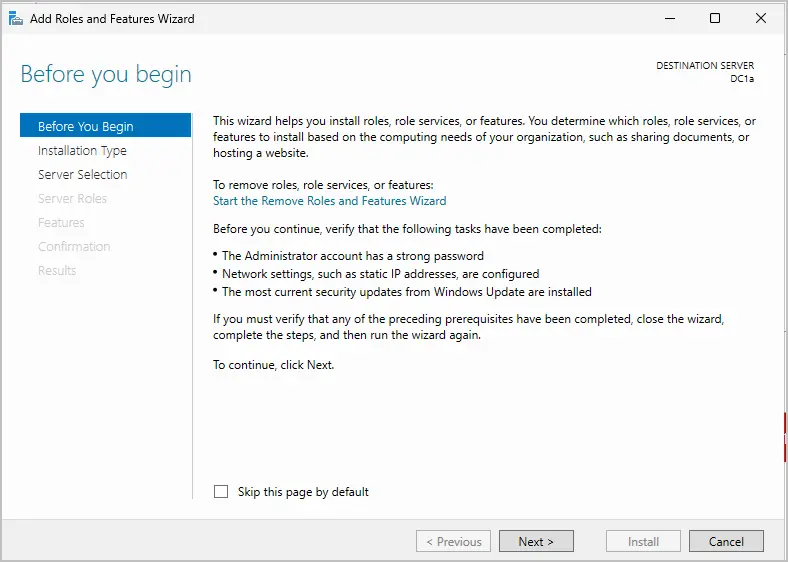
Step 3. The Add Roles and Features wizard will open. Click Next.
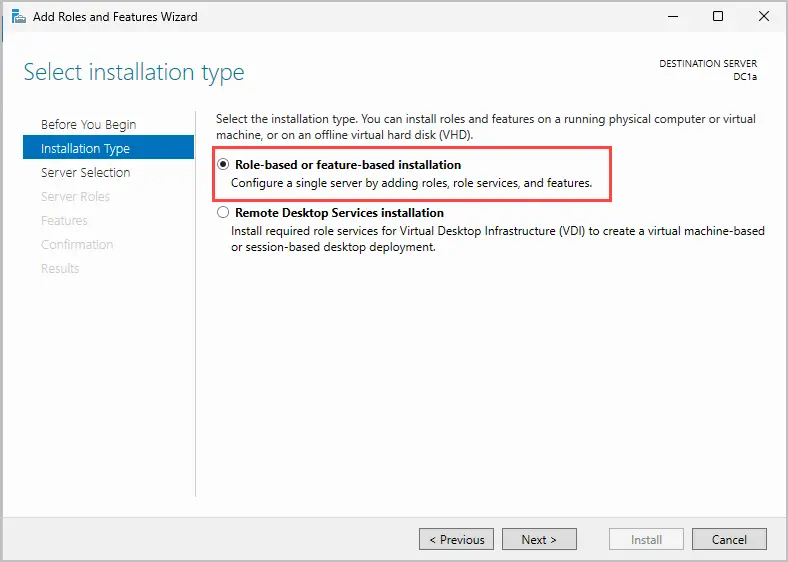
Step 4. Select “Role-based or featured-based installation”. Click Next.
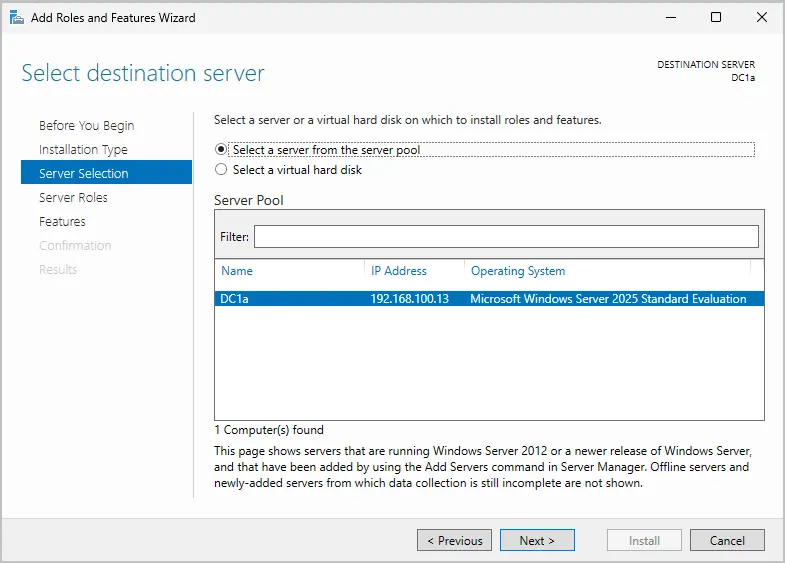
Step 5. Select your server from the pool and click Next.
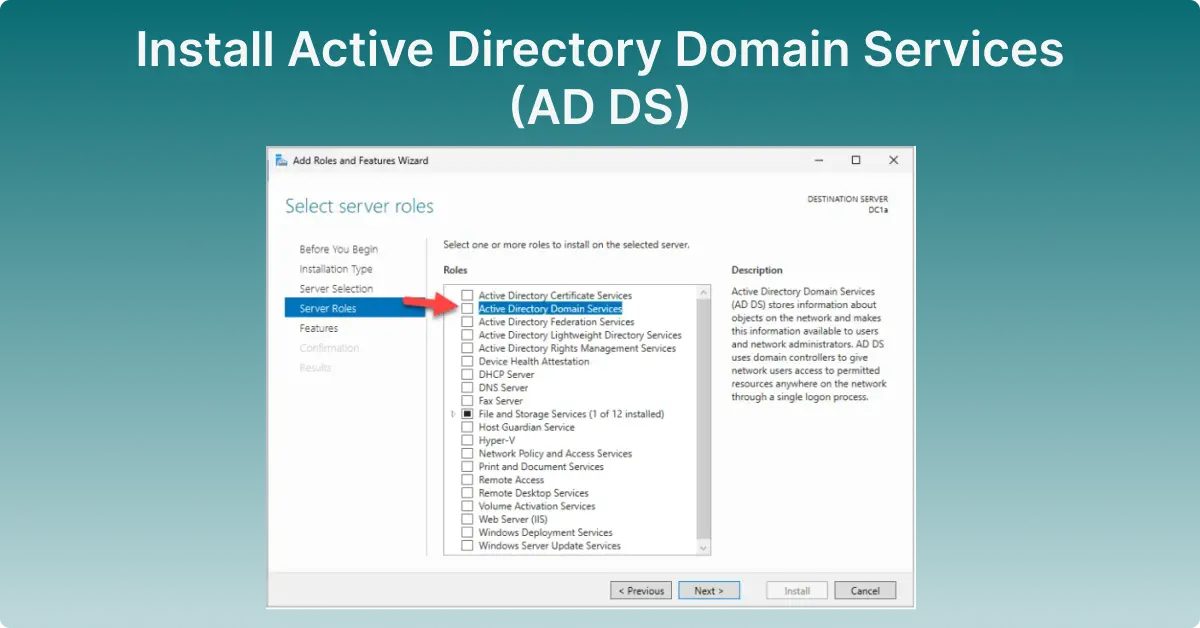
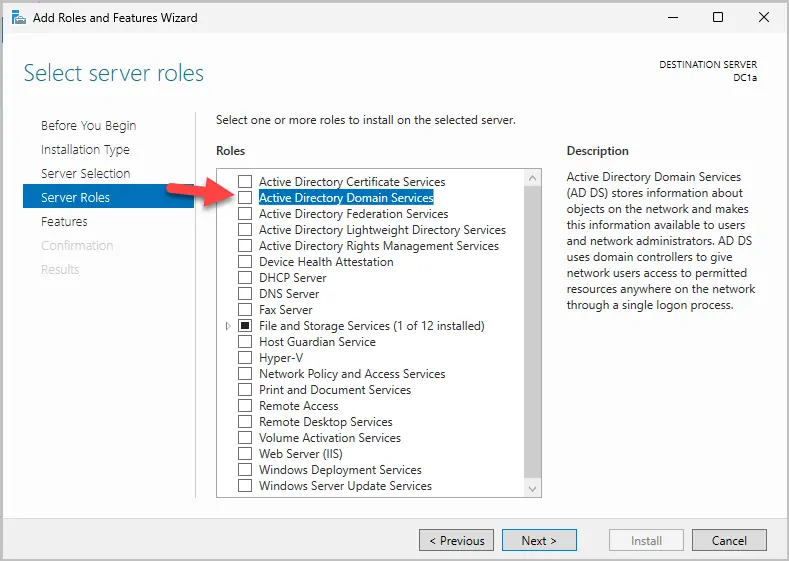
Step 6. Select “Active Directory Domain Services” from the list of roles.
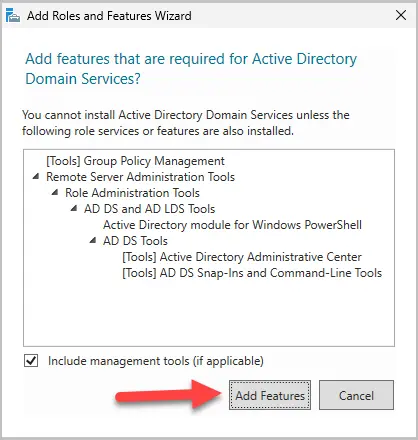
When you click the checkbox, you will get a popup. Click “Add Features”.
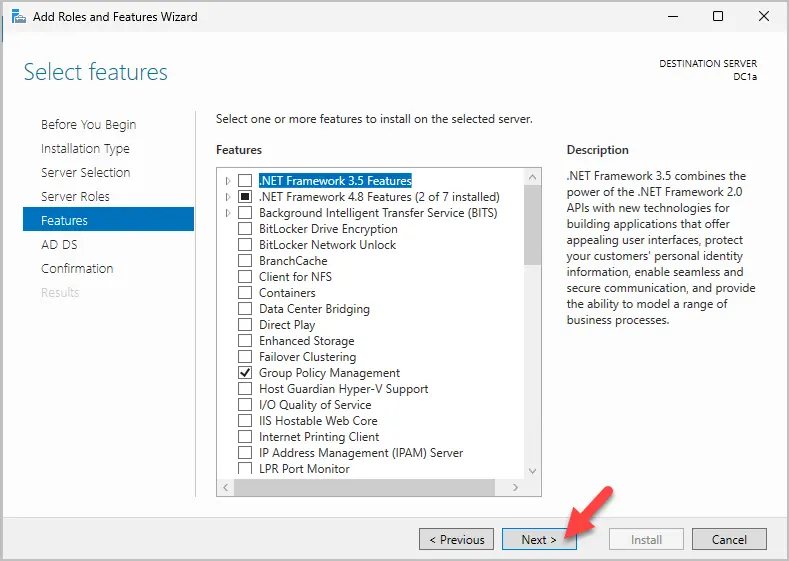
Step 7. On the select features screen just click Next. You do not need to add any additional features.
Step 8. On the Active Directory Domain Services overview page, click next.
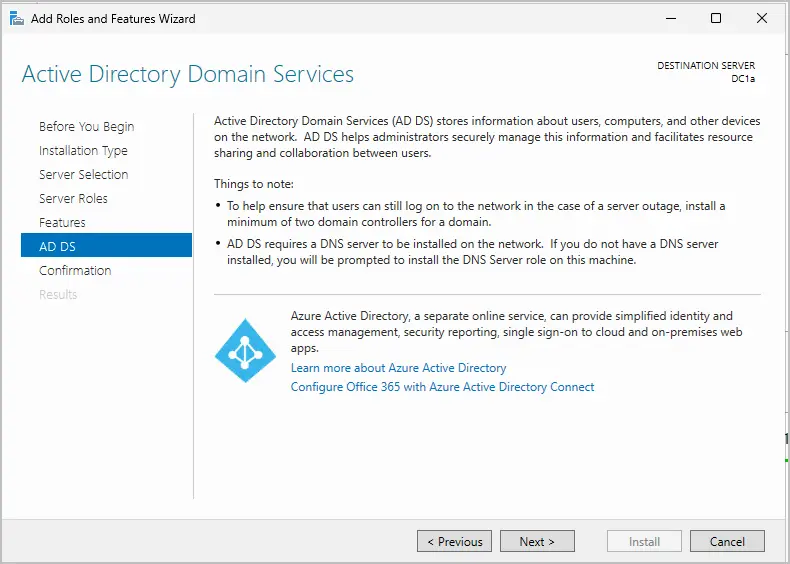
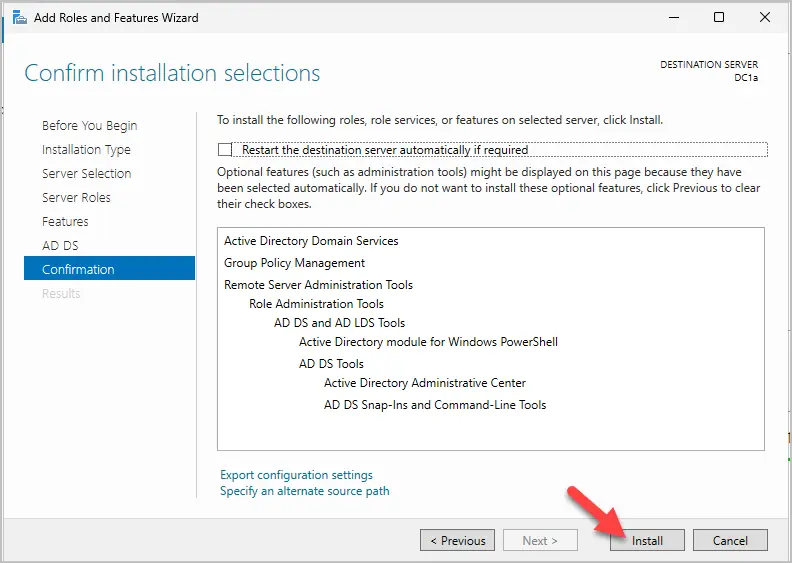
Step 9. On the Confirm installation page, click install.
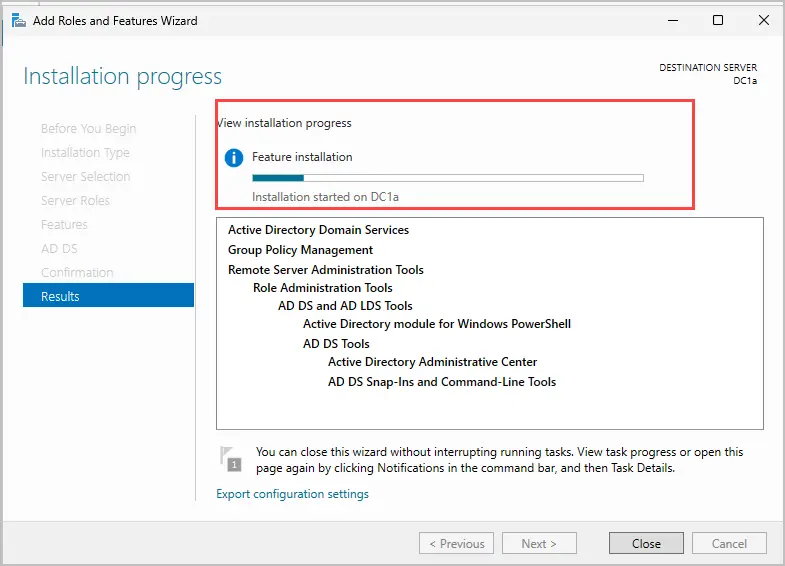
The install progress begins.
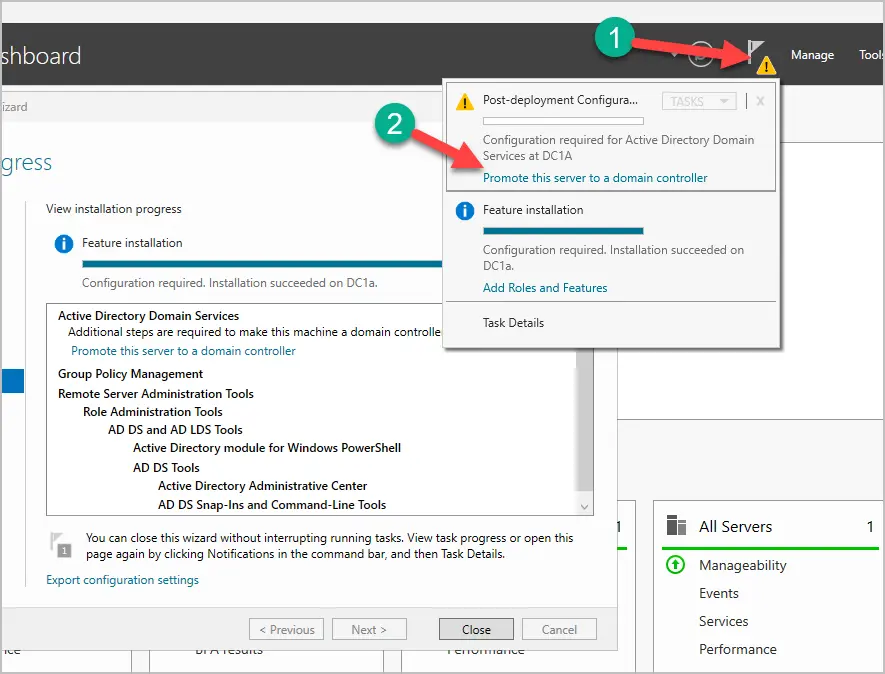
Step 10. When AD DS role has completed the installation, the next step is to promote the server to a domain controller.
- Click the yellow symbol in the top right.
- Click “Promote this server to a domain controller.
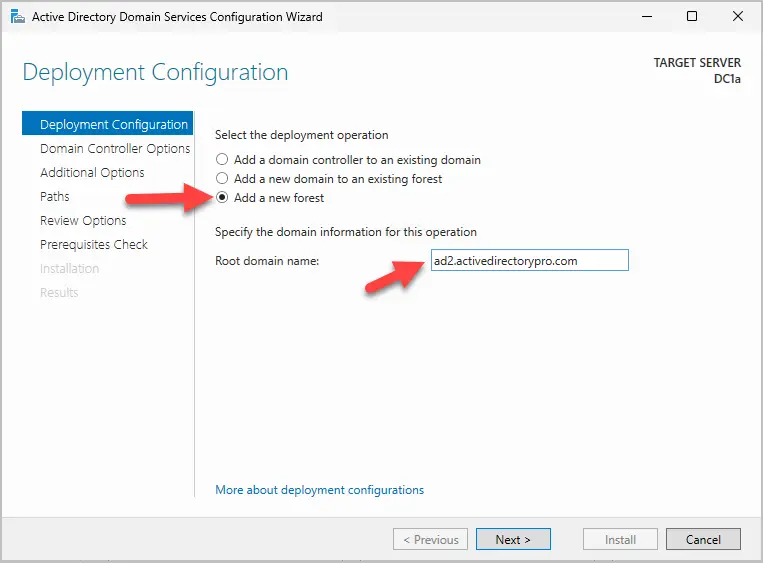
Step 11. Select “Add a new forest”. Enter your root domain name and click next.
Tips for Choosing the Root Domain Name:
- Use a Sub-Domain:
- If you have a public domain, you should use a sub-domain for your AD root domain.
- Example, my primary domain is activedirectorypro.com, I’ll use ad.activedirectory.com for my ad root domain.
- If you do not have a public domain, you can use whatever you want. .local or .internal is common.
- If you have a public domain, you should use a sub-domain for your AD root domain.
- Length:
- The maximum length for an AD root domain name is 64 characters. Aim for something much shorter for practical reasons, ideally under 20 characters.
- Compatibility and Best Practices:
- Use only lowercase letters, numbers, and hyphens in the DNS name to ensure compatibility across different systems. Avoid underscores as they are not supported in DNS names per RFC standards.
- Keep it simple and avoid overly complex names that might lead to confusion or typing errors.
- Consider Single vs. Multi-Forest Designs:
- If you plan for a multi-forest environment, your root domain name choice might influence how you structure these forests. Again, sub-domains can help in planning a multi-forest design. Examples, west.activedirectory.com, east.activedirectory.com, south.activedirectory.com, are some options for multi forest designs.
- NetBIOS Name (Step 14)
- Keep in mind that Windows uses the first 15 characters of the domain name for NetBIOS names
For more details on the root domain name refer to the articles below.
- Deployment and operation of Active Directory domains that are configured by using single-label DNS names
- Selecting the forest root domain
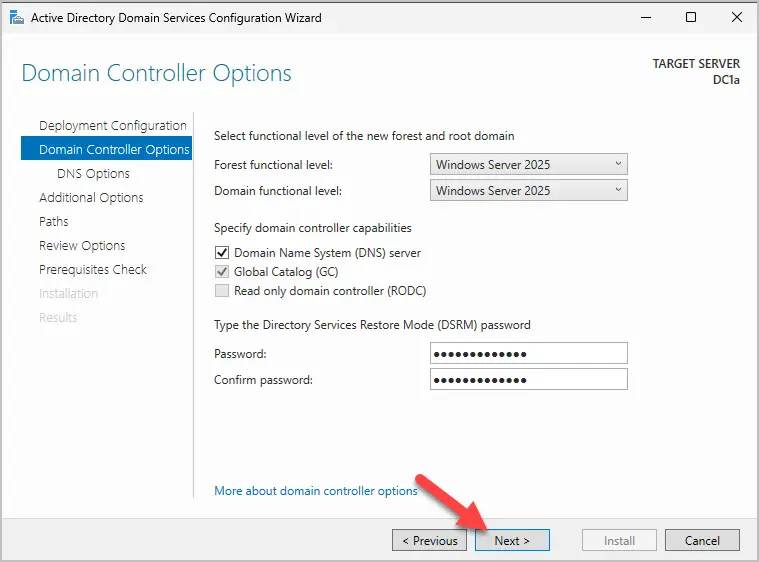
Step 12. On the “Domain Controller Options” page, enter the DSRM password and click Next.
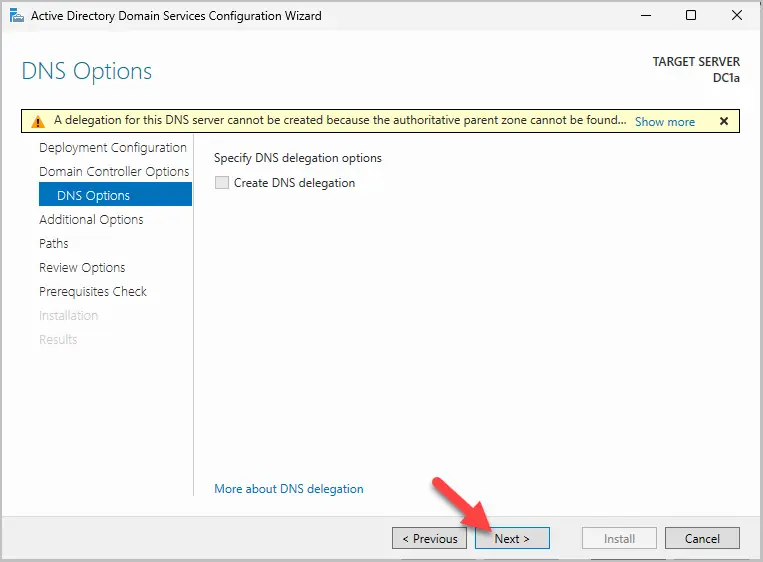
Step 13. On the DNS Options page, click Next.
Note. The DNS delegation warning is typical, and you can ignore this message.
Error Meaning: The error suggests that the DNS server promoting to a domain controller cannot find or connect to the DNS server hosting the parent zone. This might occur because:
- The parent zone is not hosted on a local domain controller but instead by an external provider or another DNS server not directly accessible. This is the most common reason for this warning.
- The DNS server you’re promoting does not have the correct DNS settings to locate the authoritative server for the parent zone.
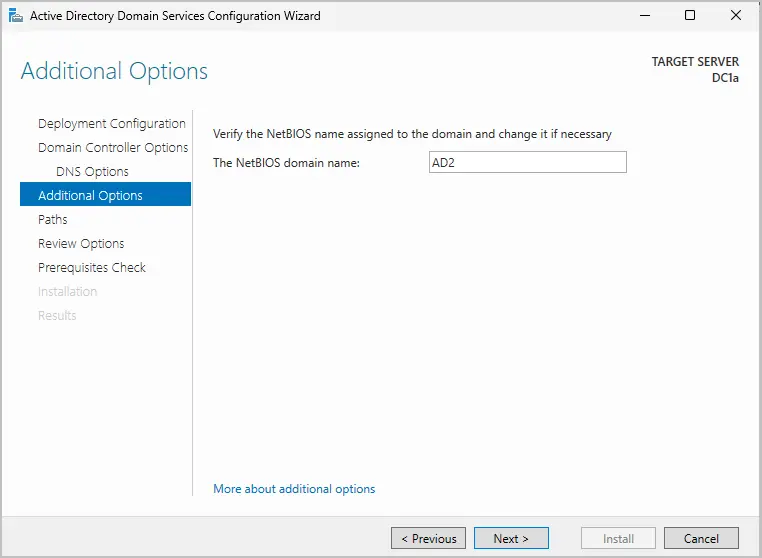
Step 14. Enter a NetBIOS domain name and click Next.
- Name Suggestion: The wizard often suggests a NetBIOS name based on the DNS name of the domain you’re creating or joining. For example, I entered ad2.activedirectorypro.com for the DNS domain name, and the wizard suggested AD2 for the NetBIOS domain name.
- Manual Selection: You can manually type in a different NetBIOS name if the suggested one doesn’t fit your needs or if you want something specific. Remember, it must be unique within your network environment to avoid conflicts.
- Character Limit: The NetBIOS name is limited to 15 characters.
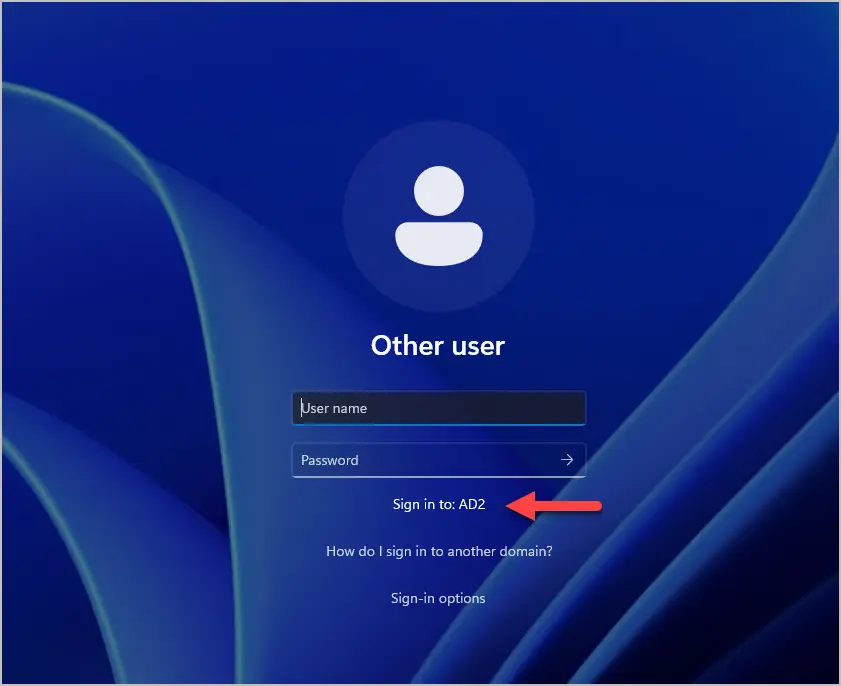
- What is it for: This name is used in scenarios involving legacy systems or older network protocols where NetBIOS is still relevant. It’s particularly important for network browsing in environments where NetBIOS over TCP/IP is enabled or for applications that rely on NetBIOS for domain name resolution. Even though its considered legacy it’s still used by default as the sign in to on Windows computer.
- Changing NetBIOS: Once set, changing the NetBIOS name of a domain is not recommended. It requires significant reconfiguration, so it’s generally set once and never changed.
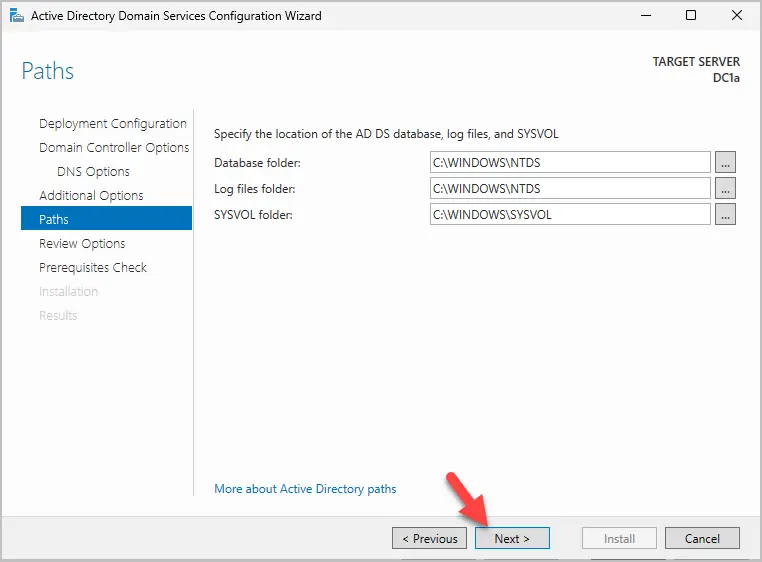
Step 15. On the paths page, click next.
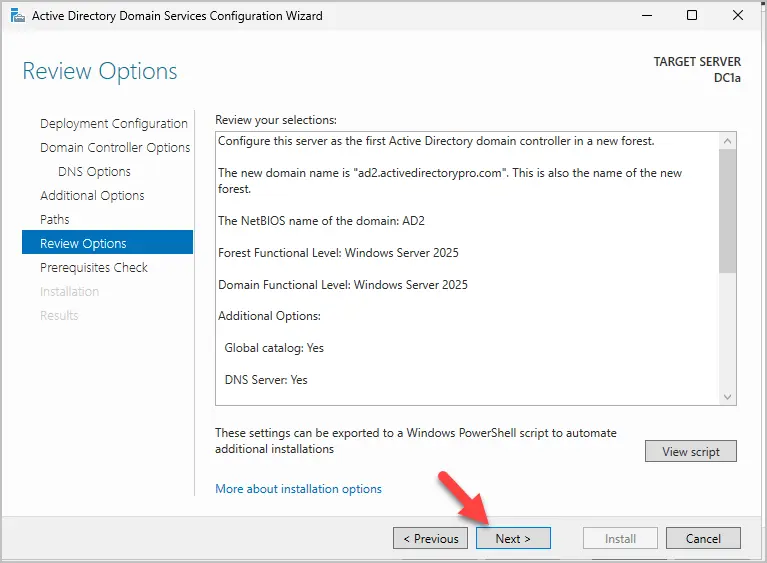
Step 16. On the Review Options page, click next.
Step 17. On the Prerequisites check page, click “Install” to complete the install.
Note: You will have a warning about the DNS delegation, this is normal.
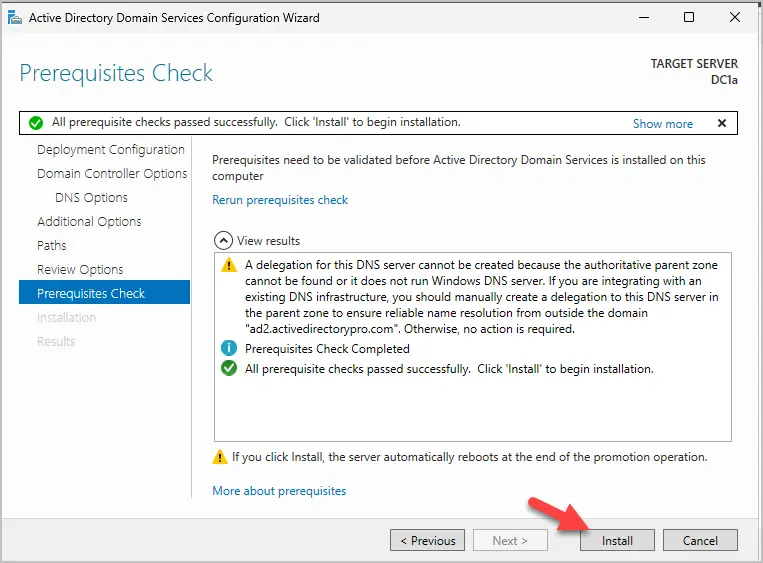
The install will begin, and the server will reboot when it is completed.
After the reboot you can now sign in to your domain.
Install AD DS using PowerShell
Installing Active Directory Domain Services with PowerShell is much faster than server manager. It saves you the time of clicking through multiple pages.
Step 1. Install AD PowerShell module
Install-WindowsFeature -Name AD-Domain-Services -IncludeManagementTools
Step 2. Run the below script.
Modify the script as needed.
- You will need to change the DomainName and DomainNetbiosName.
- Depending on your OS you might need to change the DomainMode.
- Refer to the Install-ADDSForest documentation for a complete list of command line options.
#
# Windows PowerShell script for AD DS Deployment
#

Import-Module ADDSDeployment
Install-ADDSForest `
-CreateDnsDelegation:$false `
-DatabasePath "C:\WINDOWS\NTDS" `
-DomainMode "Win2025" `
-DomainName "ad2.activedirectorypro.com" `
-DomainNetbiosName "AD2" `
-ForestMode "Win2025" `
-InstallDns:$true `
-LogPath "C:\WINDOWS\NTDS" `
-NoRebootOnCompletion:$false `
-SysvolPath "C:\WINDOWS\SYSVOL" `
-Force:$true
You will be prompted for the safe mode password.
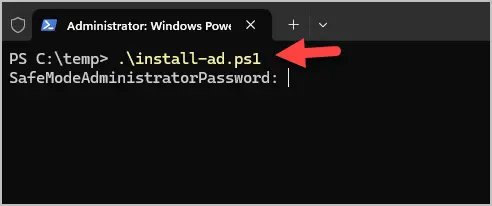
Then the install process will begin.
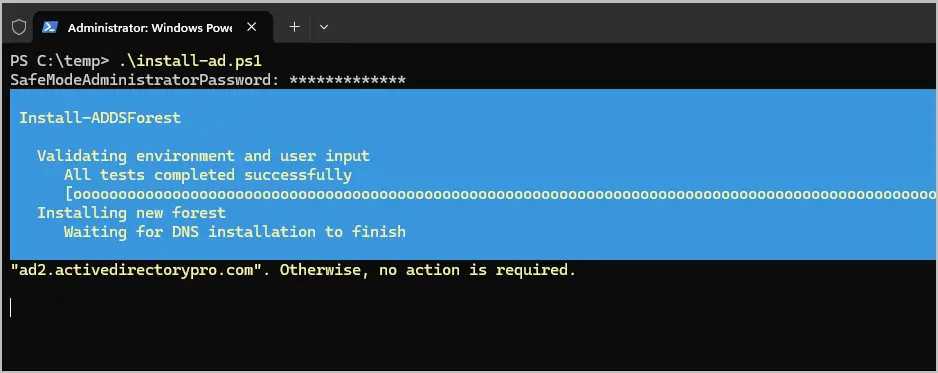
When the install is complete the server will reboot. Thats all the steps for installing AD DS with PowerShell.
Conclusion
Installing Active Directory Domain Services (AD DS) involves several steps when using the server manager. If you want a more streamline approached than consider using PowerShell with the script I provided.
If you found this article helpful, then check out our Active Directory Management Best practices guide.

