Create and Schedule Active Directory Reports
The AD Pro Toolkit includes over 200 pre-defined Active Directory Reports. Reports can be customized, exported and run on an automated schedule.
Table of Contents
How to Create and Export Active Directory Reports
To run a report follow these steps.
Step 1: From the menu select “Reports” and the select a report category.
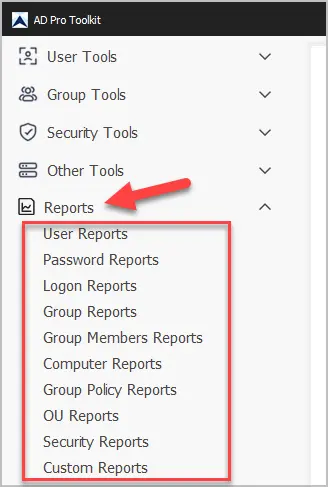
Step 2: Select a report from the list
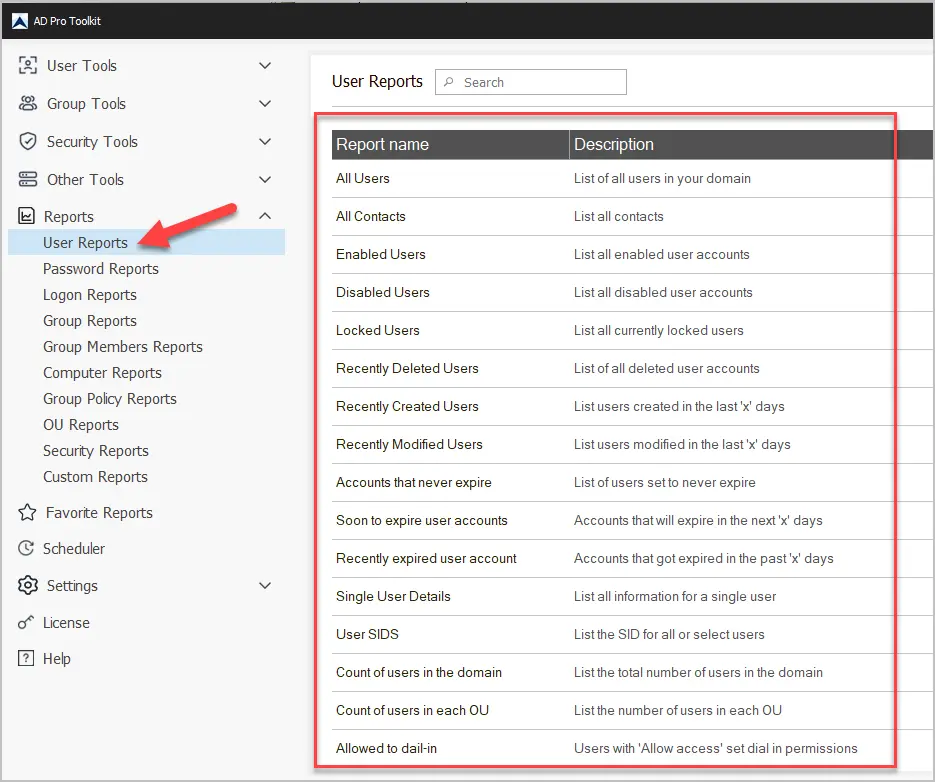
When you click a category from the menu you will get a list of reports to choose from. For example, I clicked on “User Reports” and I get a list of user reports. Select a report from the list.
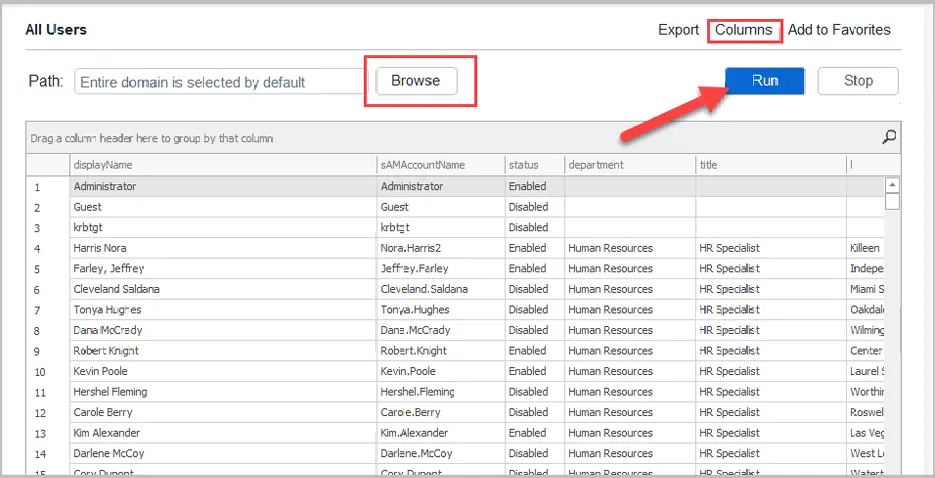
Step 3. Run the selected report
- By default, the reports will run for the entire domain. Click browse if you want to report on an OU or group.
- To add or remove columns click the “columns” button.
Click “Run” to generate the report.
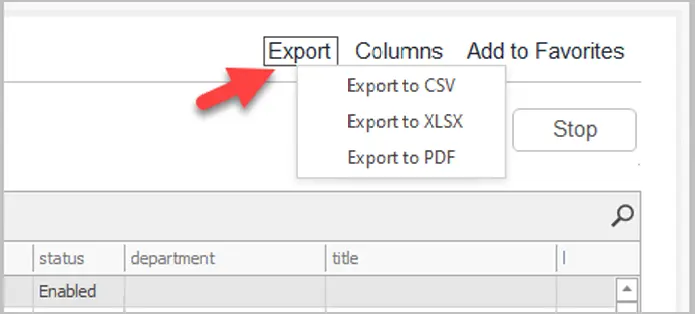
Step 4. Export report
To export a report, click the export button and choose your format.
Create Custom Reports
If you don’t see the report you need you can create custom reports with the report builder.
Click on Custom Reports.
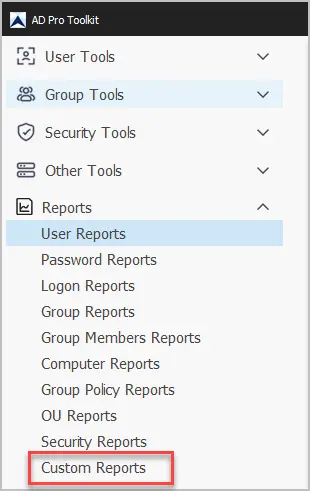
Choose a report category.
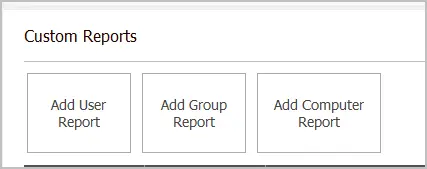
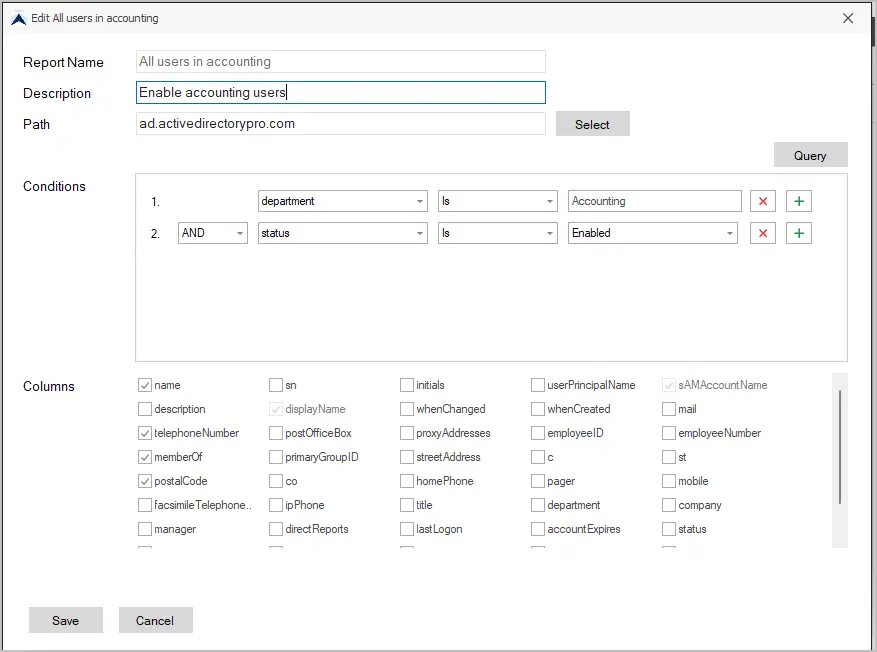
Complete the form to create your own custom report. You can add multiple conditions if needed.
In the example below, I created a report that gets all enabled users from a specific department.
Schedule Reports
Note: If you want email reports you will first need to click “Email Settings” and add your email server.
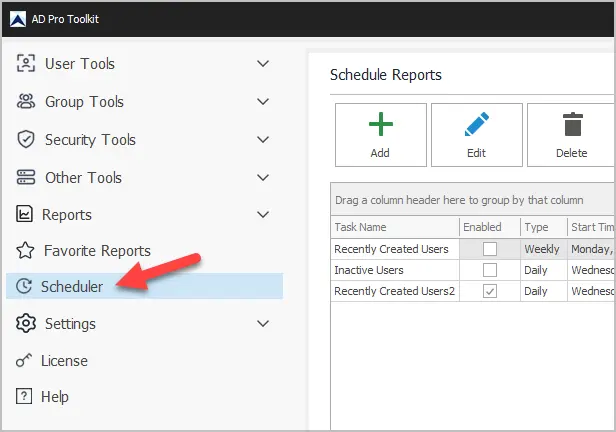
To schedule automated emails, click on “Scheduler” Then click “Add”.
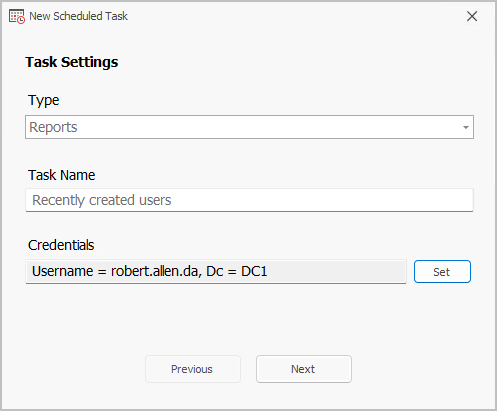
On the new scheduled task screen:
- Choose “Reports” for task type
- Give the task a name
- Set credentials
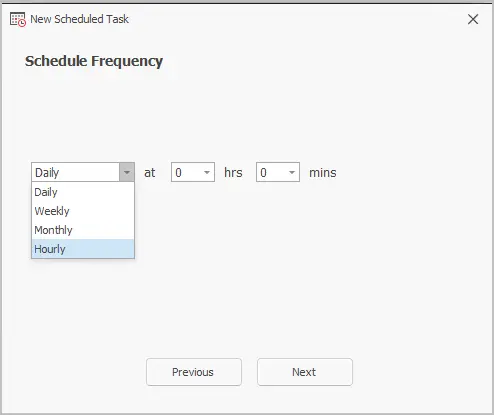
Set the schedule frequency. This is how often do you want the scheduled task to run.
Next, select the report category and the report.
Enter in the email address to receive the report and email subject.
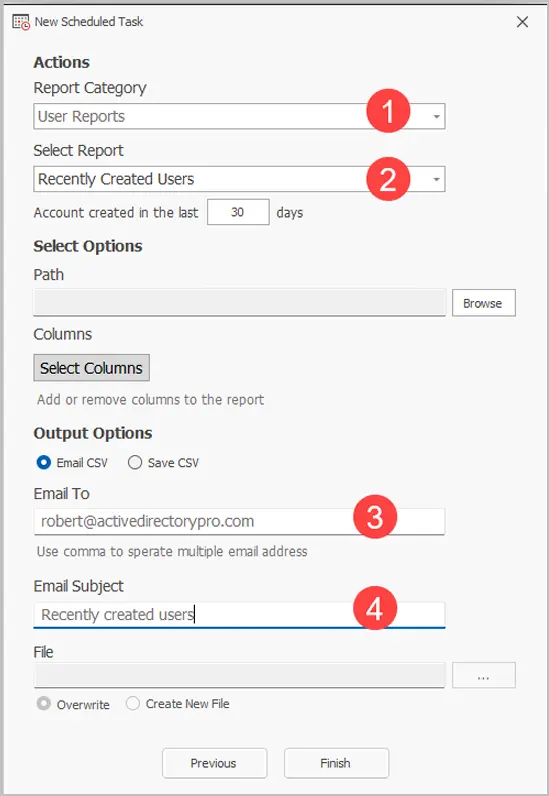
Click “Finish”.
You can view the details of the scheduled report on the scheduler page.

