Change User Logon Name in Active Directory
In this guide, I’ll show you how to change a users sAMAccountName and UPN using the AD Pro Toolkit. The toolkit makes it easy to update these settings for multiple users.
Step 1. Create a CSV Template of user accounts
The first step is to export the accounts you want to update to a CSV file.
1. Click on User Management -> Export Users
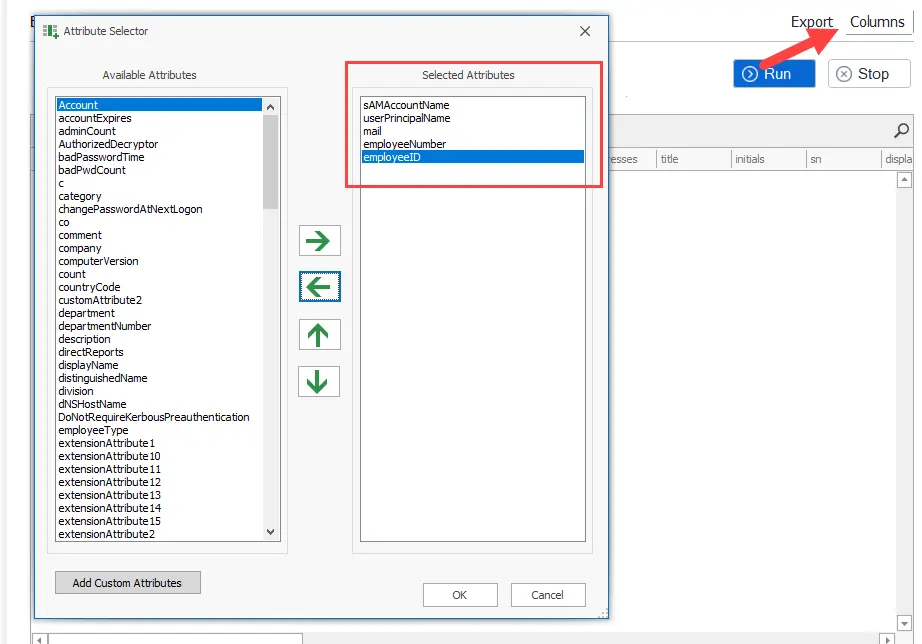
2. Click on columns and include the following:
- sAMAccountName
- userPrincipalName
- employeeNumber
- employeeID

3. Click run and then Export > Export to CSV. This will generate and download the csv file.
Step 2. Change sAMAccountName or UPN in the template
1. Open the CSV template and make the changes to the sAMAccountName or UPN for each user that you want to update. If you are not updated both attributes then you can remove one of them from the template.
For example, I’m changing a users sAMAccountName from tom.smith to tom.smith2 and the UPN from tom.smith@activedirectorypro to tom.smith2.activedirectorypro.com.

2. Next, you need to set one of the columns as the ID column, this is used so the tool knows how to identify the account. If you are updated both the sAMAccountName and userPrinciplaName then you will need to use the mail, employeeNumber or employeeID. In this example, I’ll use the mail column so I would just change mail to ID in column C.

Step 3. Run the User Update Tool
1. Open the Bulk User Modification tool.
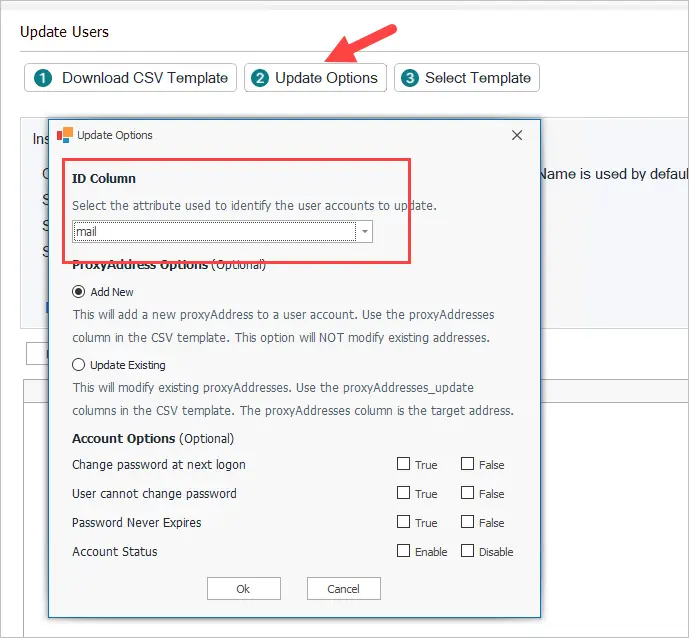
2. Click on Update Options and change the ID column to whatever column you set this to in the CSV. I’ll choose mail because that is what I set in my template. Click OK.

3. Click the “Select Template” button and select your template
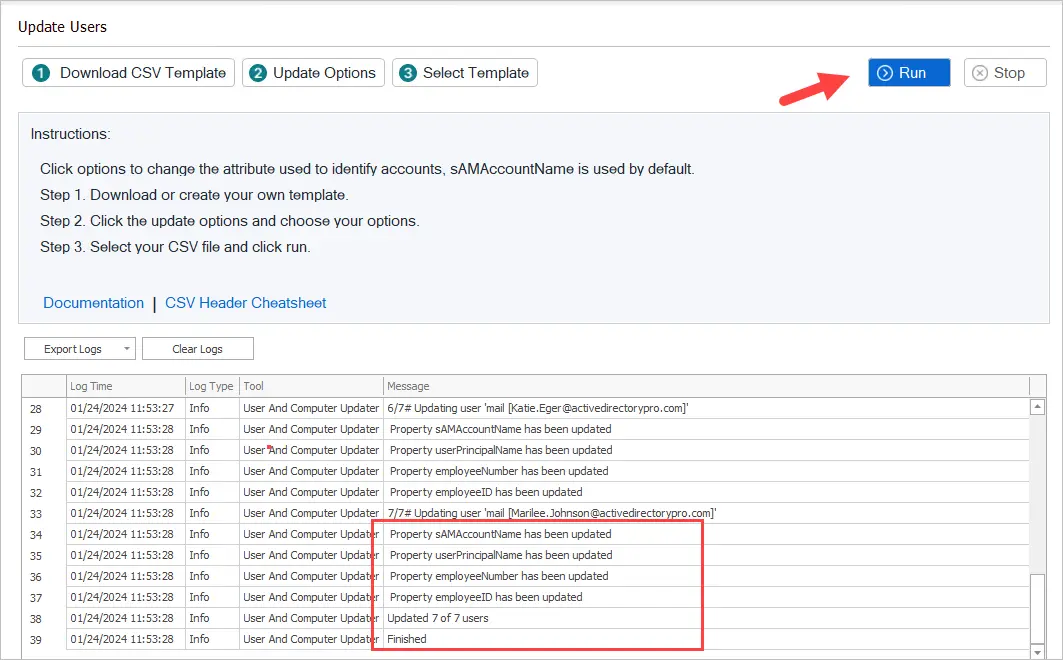
4. Click Run to start the update.
The tool will now use your csv template to update the sAMAccountName and UPN username.

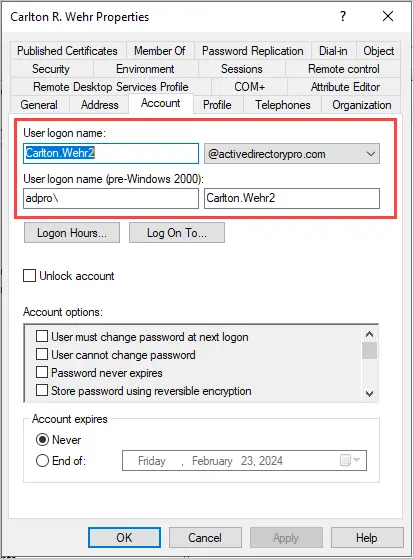
I’ll open an account in Active Directory to verify the update worked.
You can see in the screenshot below the user logon name and user logon name (pre-windows 2000) have both been updated.

Success! I can see this users username has been changed.