Automatically Disable Inactive Users in Active Directory
In this guide, you will learn how to disable inactive users in Active Directory using the AD Pro Toolkit.
You can auto disable inactive users and computers by an inactive time frame such as 90 days. In addition, you can set multiple actions on the inactive accounts such as disable, move, description and report only.
How to Automatically Disable Inactive Users in Active Directory
- Open the AD Pro Toolkit
- In the left menu click on “Scheduler”
- Select “Inactive Accounts” from the dropdown
- Click “Add” on the schedule page
- Enter a task name and set the credentials. Click “Next”
- Set a schedule frequency, daily, weekly or monthly
- Set the conditions (Path is required)
- Select one or more actions
- Choose output options (email or save to csv)
- Click Save
Below is a screenshot of the scheduled task. This task is configured to find accounts that have been inactive for at least 90 days. The task will then disable the account, move them to an OU called Disabled, set a description and email the results.
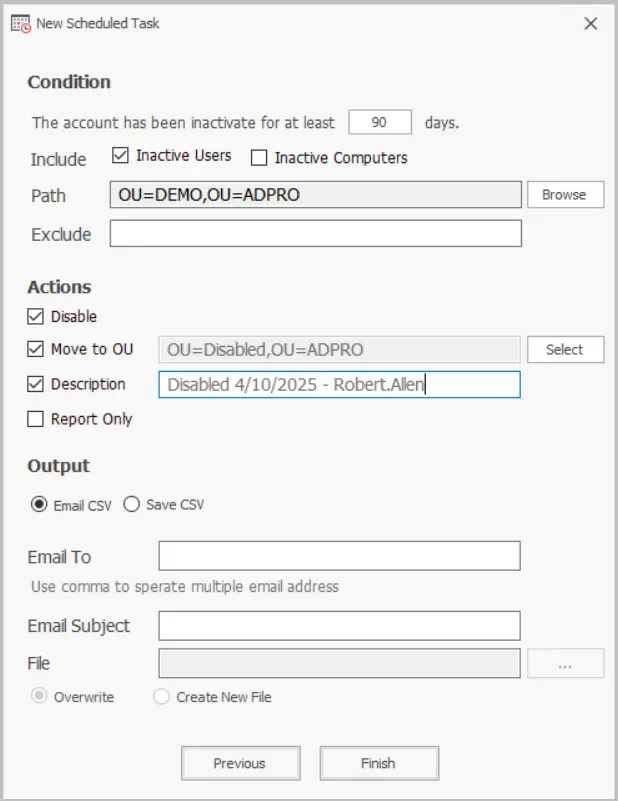
Conditions
The condition section lets you define details for identifying inactive accounts.
- Inactivity time: The account is inactive for at least x days. Default is 90 days, you can
change this to any time you need. This uses the lastLogonTimestamp to identify stale
accounts. - Include: Choose to find inactive users, computers or both.
- Path: Select an OU or choose the entire domain
- Exclusions: Add accounts to exclude from being automatically disabled. Use the accounts
samaccountname, separate accounts with a comma.
Actions
This section you configure what actions to run on the inactive accounts.
- Disable: Check this box to auto disable accounts
- Move to OU: Enables moving accounts to another OU
- Description: Adds a description to the account
- Report only: Report only mode sends an email with the identified accounts, but no actions
are run.