In this guide, I will show you how to add users to a group using PowerShell and the AD Pro Toolkit. Both options make it easy to add users to a single or multiple groups in Active Directory.
In this article:
- PowerShell Add Users to AD Group
- Add User to Groups with AD Pro Toolkit
- PowerShell Add multiple Users to a group
- Add User to Multiple groups from CSV file
- Bulk Add Users to groups with AD Pro Toolkit
PowerShell Add User to AD Group
In this example, I’ll use the Add-ADGroupMember cmdlet to add a single user to a group.
You can use one of the following to identify the group and the user:
- distinguished name
- objectGUID
- objectSid
- SAMAccountName
In the below example, I’m going to add a user to the group “IT_Local”, I will use the groups SAMAccountName.
Step 1. Open PowerShell as Administrator
Step 2. Copy and paste the command below
In this example, user Beth.Bain will be added to group IT_Local.
Add-ADGroupMember -Identity IT_Local -Members Beth.BainIf the command works it won’t return any info.

You can verify the user was added to the group with this command.
Get-ADGroupMember -Identity "IT_Local" | select name | sort name
Easily Add Users to Groups with the AD Pro Toolkit
With the AD Pro Toolkit, you can easily add or remove users to a group.
Step 1. Search and select the account
Step 2. Click “Add to groups” from the Actions menu
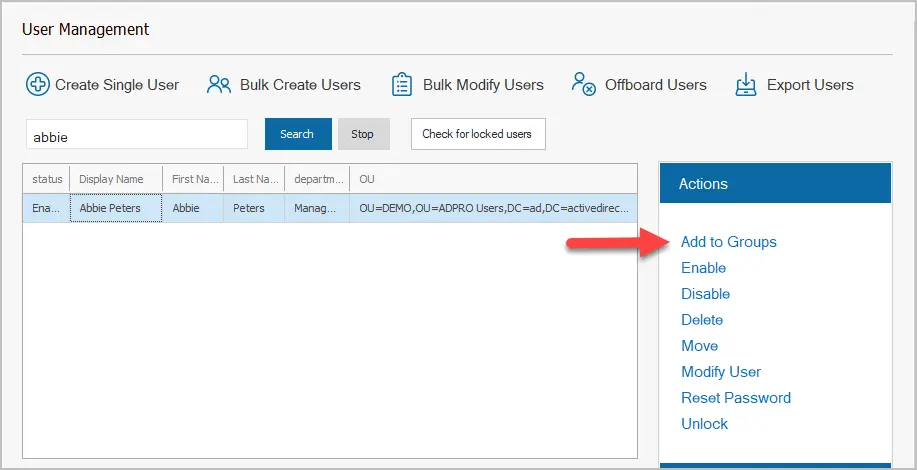
Step 3. Add or remove user to groups.
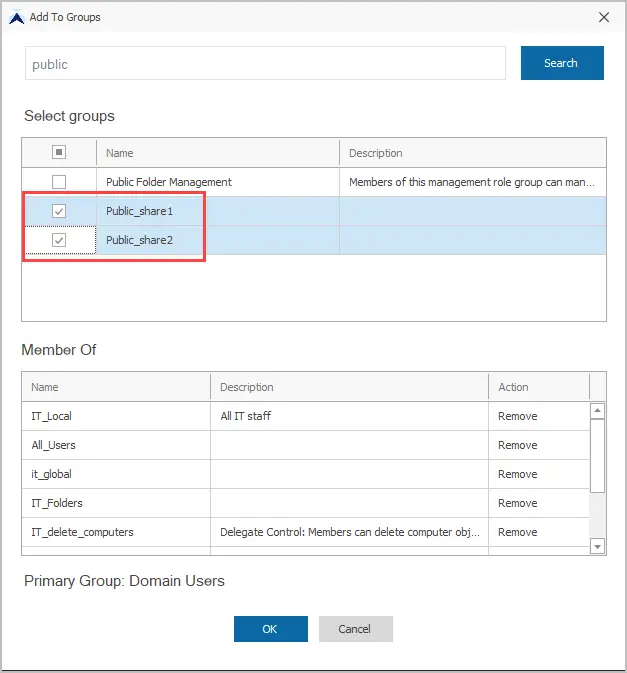
To add the user to a new group search for the groups and select the box for each group you want to add the user to. In the example below, I’m adding a user to the “Public_share1” and “Public_share2” groups.
To remove a user from a group just click remove on any group.
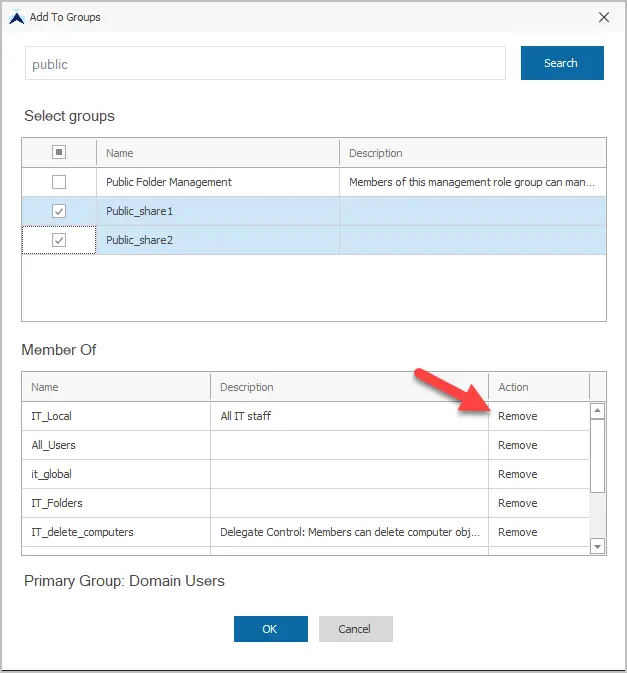
The toolkit makes it very easy to add and remove users to multiple groups at once.
Download AD Pro Toolkit and see how easy it is to add or remove users to groups.
PowerShell Add Multiple Users to an AD Group
To add multiple users to a group you would just separate them with a comma after the -Members parameter. In the below example, I’m adding 3 users to the “IT_Local” group.
Add-ADGroupMember -Identity IT_Local -Members Beth.Bain, abbie.peters, ana.luzAdd User to Multiple AD Groups from CSV file
If you need to add users to multiple groups, then it is best to use a CSV file and a PowerShell script.
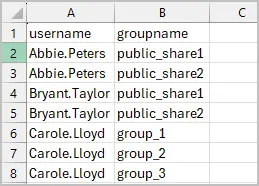
Step 1. Create a CSV with two columns.
- username
- groupname
Example.
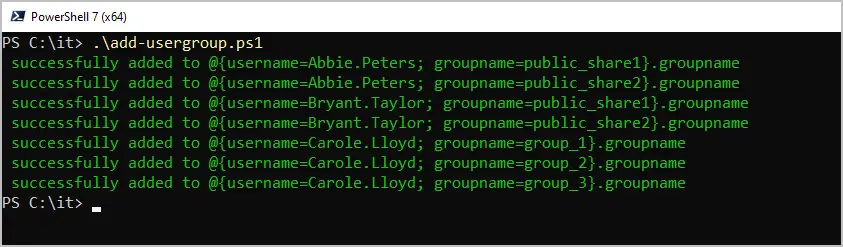
Step 2. Run Script
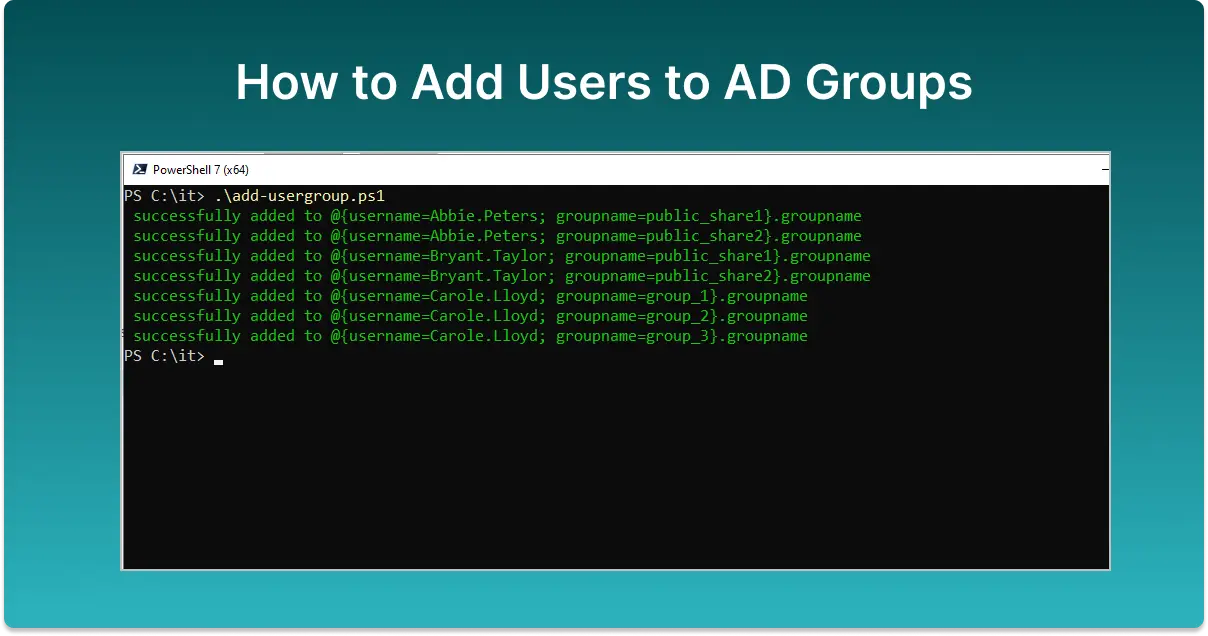
The simple script below will loop through the CSV file and add each user in column A to the group in column B. Change the path to the location of your csv file.
# Import CSV file
$users = Import-Csv -Path "C:\it\add_usergroups.csv"

# Loop through each user in the CSV
foreach ($user in $users) {

        Add-ADGroupMember -Identity $user.groupname -Members $user.username
        Write-Host "$username successfully added to $groupname" -ForegroundColor Green

}
Bulk Add Users to AD Groups with the AD Pro Toolkit
With the AD Pro Toolkit, you can easily bulk add or remove users to groups.
Let’s walk through an example.
I’m going to add 300+ users to the “HR_Local” security group.
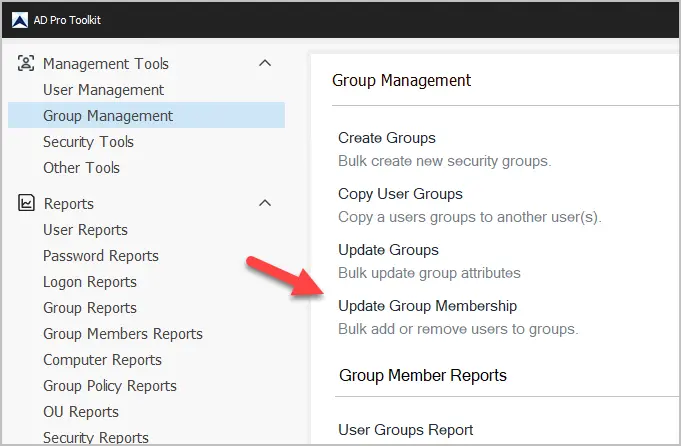
Step 1. Open the “Update Group Membership” Tool
Click here to download a free trial
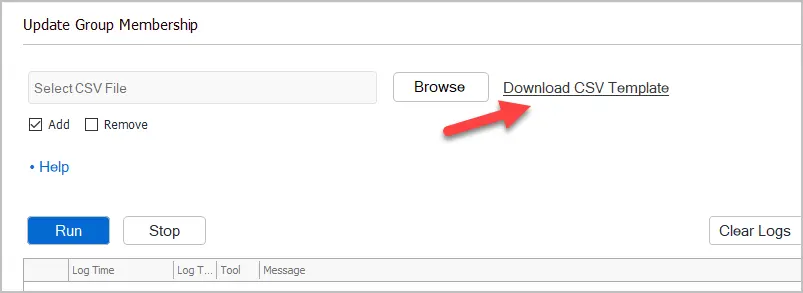
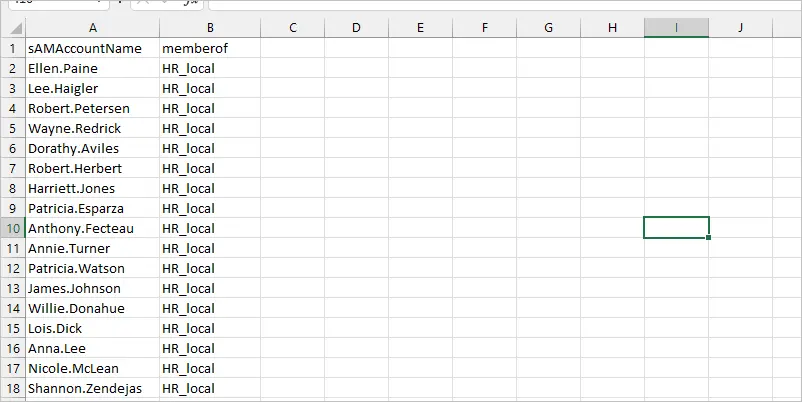
Step 2. Setup the CSV File
Click on “Download CSV Template” and save the template. You can save it anywhere you like.
Now just fill out the CSV file.
sAMAccountName = logon name of the users you want to add to a group.
memberof = the group name you want the user to be a member of.
Step 3. Select Your CSV File and click Run
Make sure “Add” is checked.
Click “Select CSV File” and select your template.
Click Run.
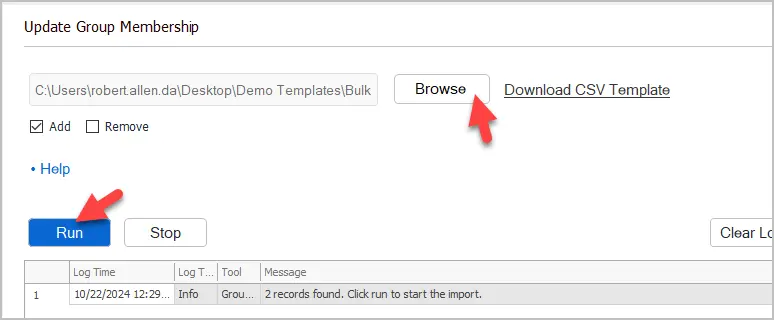
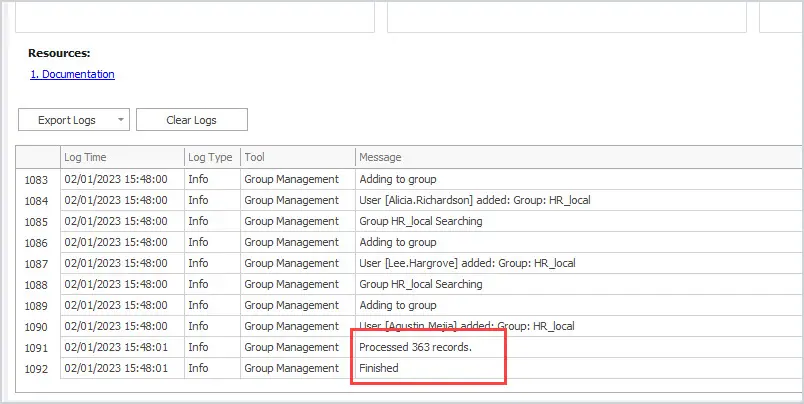
The tool will display the results, and you can watch the progress in the log window. If there are any errors, they will display in red.
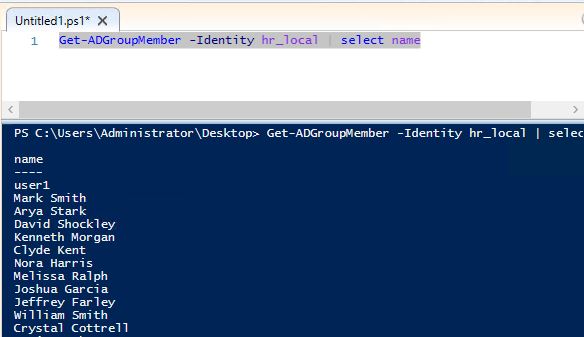
Let’s verify the users were added by using the Get-ADGroupMember PowerShell cmdlet.
Get-ADGroupMember -Identity hr_local | select name
You can also verify with the Group Membership report tool. Select Group Report from the list, select your group, and click run. The tool will display all the members of the group.

This tool is included in the AD Pro Toolkit.
Bulk Remove Users from a Group
To remove users from multiple groups follow these steps.
- Enter the group and user info into the template, same steps as adding users.
- In the Update Group Membership tool select “Remove”
- Select your CSV file and click run.

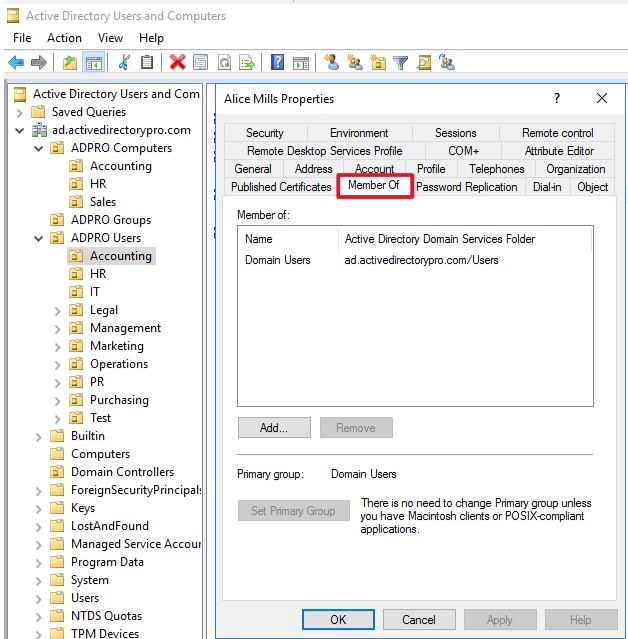
Add User to a Group Using Active Directory Users and Computers (ADUC)
In this example, I will use the Active Directory Users and Computers GUI console to add a user to a security group.
For this example, I will add user Alice Mills to the Accounting_folders security group.
Open ADUC, open the user account and click on the “member of” tab.
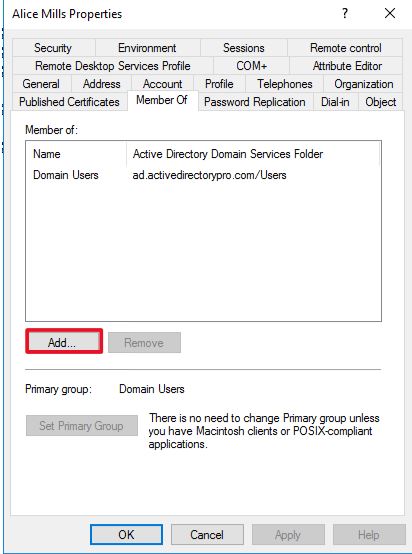
Next, click on the add button.
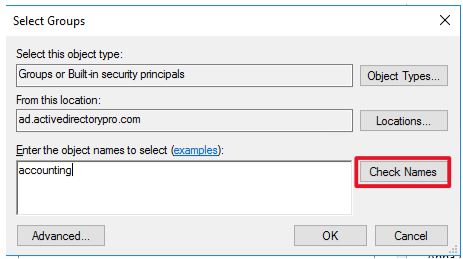
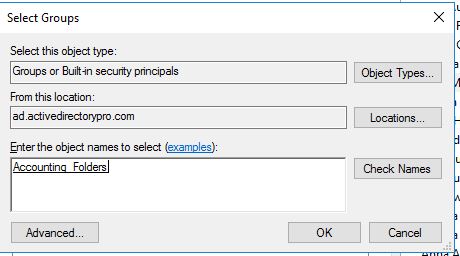
You can type the full group name out or if you don’t remember it just type a partial name and click check names. I typed accounting and when I click check names it gave me a list of all the matching groups.
It found three groups that have accounting in the name, I selected the one I wanted and clicked ok.
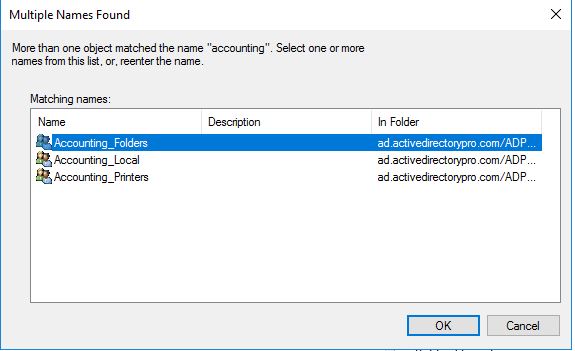
Click ok again.
Click ok and you are done.
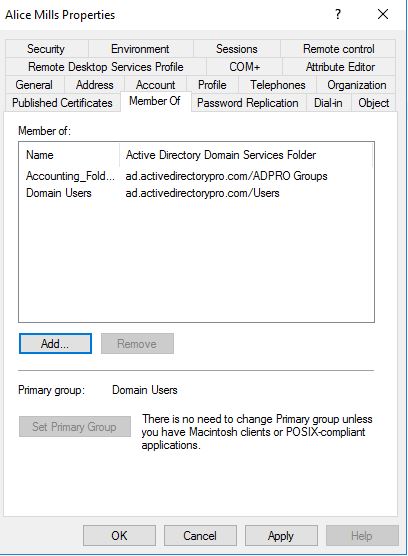
You can confirm this by seeing the group listed in the members of tab for the user account.
In this article, I showed you several options for adding users to Active Directory groups. If you have a comment or question, please post it below.