Active Directory Bulk
User Creation Tool

Bulk import Active Directory users from CSV with
this easy-to-use tool.

  • Save Hours of Time
  • Bulk Import users
  • Includes CSV template
YouTube video

Key Features

Here are the advantages of using the AD User Creation Tool.

Save Hours of Time

Easily mass import user accounts directly in Active Directory to avoid hours of manual work.

Bulk Update Accounts

Do you need to bulk update user accounts? No problem the bulk importer can also modify existing user accounts.

Powerful Integrations

Integrates with other AD Pro tools to streamline your Active Directory management.

Migrate Users

Easily export users from one domain and import them into a new domain or server

No Scripting Required

No scripting is required to create mass users. The GUI tool is fast and easy to use.

Add Users to Groups

Add users to single or multiple AD groups during the import process to stay on top of access permissions.

Simple Automation

Bulk import accounts in two clicks (seriously) to make repetitive manual work a thing of the past.

Includes CSV Template

The CSV template includes 30 of the most common user account fields. You can add more if needed.

“Amazing Software! We utilize the bulk import tool for importing and updating new students. It saved hours of manual updating and was very easy to use. ”

Anthony Gannon – Systems Administrator

Administrator Guide
Bulk User Creation Tool

Description

The bulk user import tool is an easy and fast way to bulk create Active Directory User accounts. The tool comes with a CSV template that you fill out and use to import accounts.

Table of Contents:

Read First

  1. It is recommended to first run a small import to ensure the accounts are being created as expected.
  2. The CSV template includes 33 user attributes. This covers the most common attributes for creating new accounts. Additional attributes can be added to the template.
  3. You DO NOT need to add the name attribute to the CSV. This gets automatically created based on the first and last name.
  4. CSV Template – Refer to the provided CSV template for an example of how to setup the CSV file.

Step 1: Download CSV Template

You will be prompted to save the CSV file. You can save it anywhere you want.

Step 2: Fill out the CSV template

The provided template includes an example user as a reference on how to fill out the CSV template.

If you need help with understanding the CSV columns and Active Directory attributes then jump to the next section.

Step 3: Select Import Options

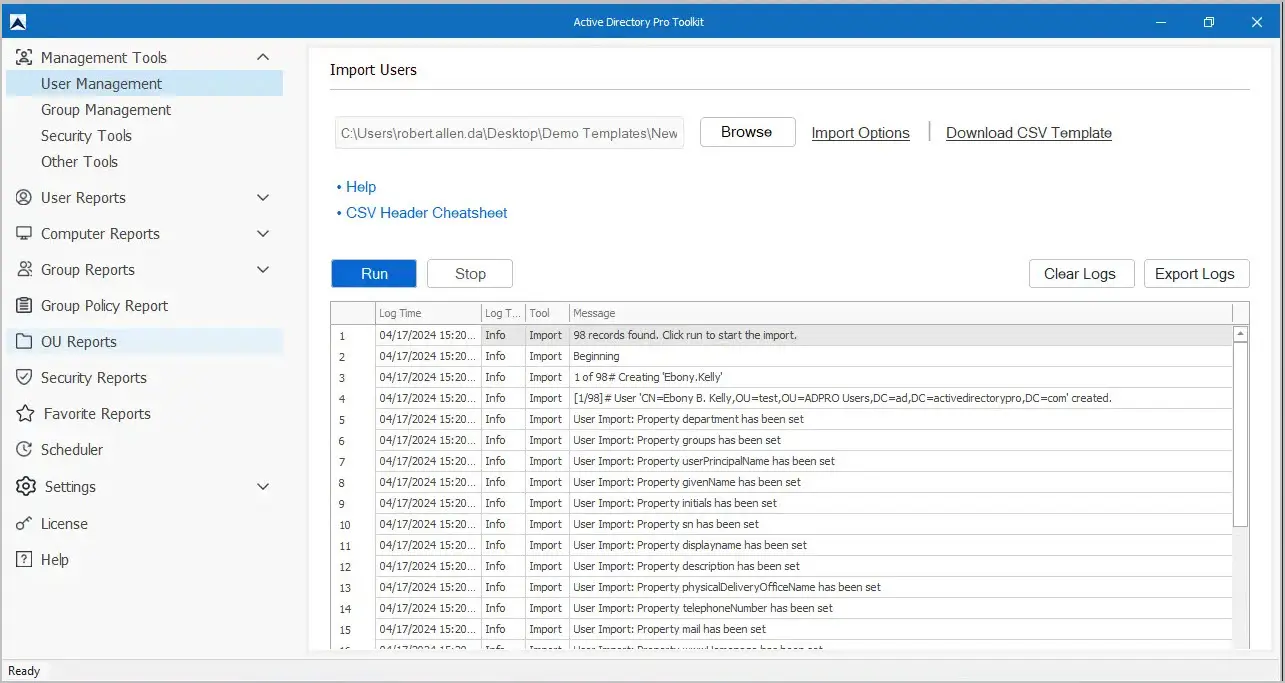
Select your import options in box 2.

  1. Enable users
  2. Force Password Change
  3. Name: LastName, FirstName – By default the name format is FirstName, LastName, if you want to reverse this select this box.

Next, select your CSV template and click run.

When the import process is completed, review the logs for any errors. Errors will be in red and will tell you why the error occurred. In this example, you can see it could not add the user to the group because the group does not exist.

CSV Template Setup

The provided CSV template included 33 user attributes you can use. You can add or remove attributes as needed. Active Directory uses LDAP attribute names to store most account information. This means the user fields you see in Active Directory Users and Computers do not always match with the LDAP attribute name. To create accounts the LDAP field names must be used.

Below is a reference table that shows the LDAP name (CSV Template column) and what it maps to in Active Directory.

For example, the first name in Active Directory = giveName. The office field in Active Directory = physicalDeliveryOfficeName.

If you look at the provided CSV template the example has Test for the giveName (First name) and Nixa Office as the physicalDeliveryOfficeName (Office).

Here is a visual to help illustrate this.

If you need more visual reference refer to the LDAP Field Mappings guide.

Adding additional user fields to the CSV

You can add additional user attributes to the CSV file, you just need to know the LDAP name. You can find the LDAP name by opening the attribute editor in Active Directory Users and Computers. You could also use PowerShell to list all user account properties.

To see the attribute editor you first need to enable the advanced features in Active Directory Users and Computer

Click view from the top menu then select advanced features.

Now when you open an account you will see the attribute editor tab.

The attribute editor screen will show you all the user LDAP properties.

Now just find the attribute name and add it to the CSV. For example, I want to add information to the other Home telephone section for users.

In the attribute editor, I see the name is “otherHomePhone”. I will add this to the CSV.

All done. That is how you add additional attributes to the CSV file to import with new accounts.

Additional Tools

The AD Pro Toolkit includes 13 Active Directory management tools and over 200 built-in reports.

Support

If you run into any issues or need to ask a question you can contact us via our contact page.

You can also send us any additional features you would like to see added.

Try The Bulk User Creation Tool For FREE

Join thousands of IT professionals using the Bulk User Creation Tool to automate the process of account management and enjoy greater freedom over your time.